- Company Articles
- Products and Technology
- Installation And Maintenance
- How to replace a Worn Swivel Stem Caster Wheel with Brake: Step-by-Step

How to replace a Worn Swivel Stem Caster Wheel with Brake: Step-by-Step
Related Product
Swivel Stem Caster Wheel with Brake
360 Degree Swivel Stem Caster with brake. Threaded-post mount design, castors diameter 3 inch.Each swivel caster wheels loading 70KGS. Heavy enough and widely suit for carts, chairs, cabinet, flow rack, workbench, turnover rolley.
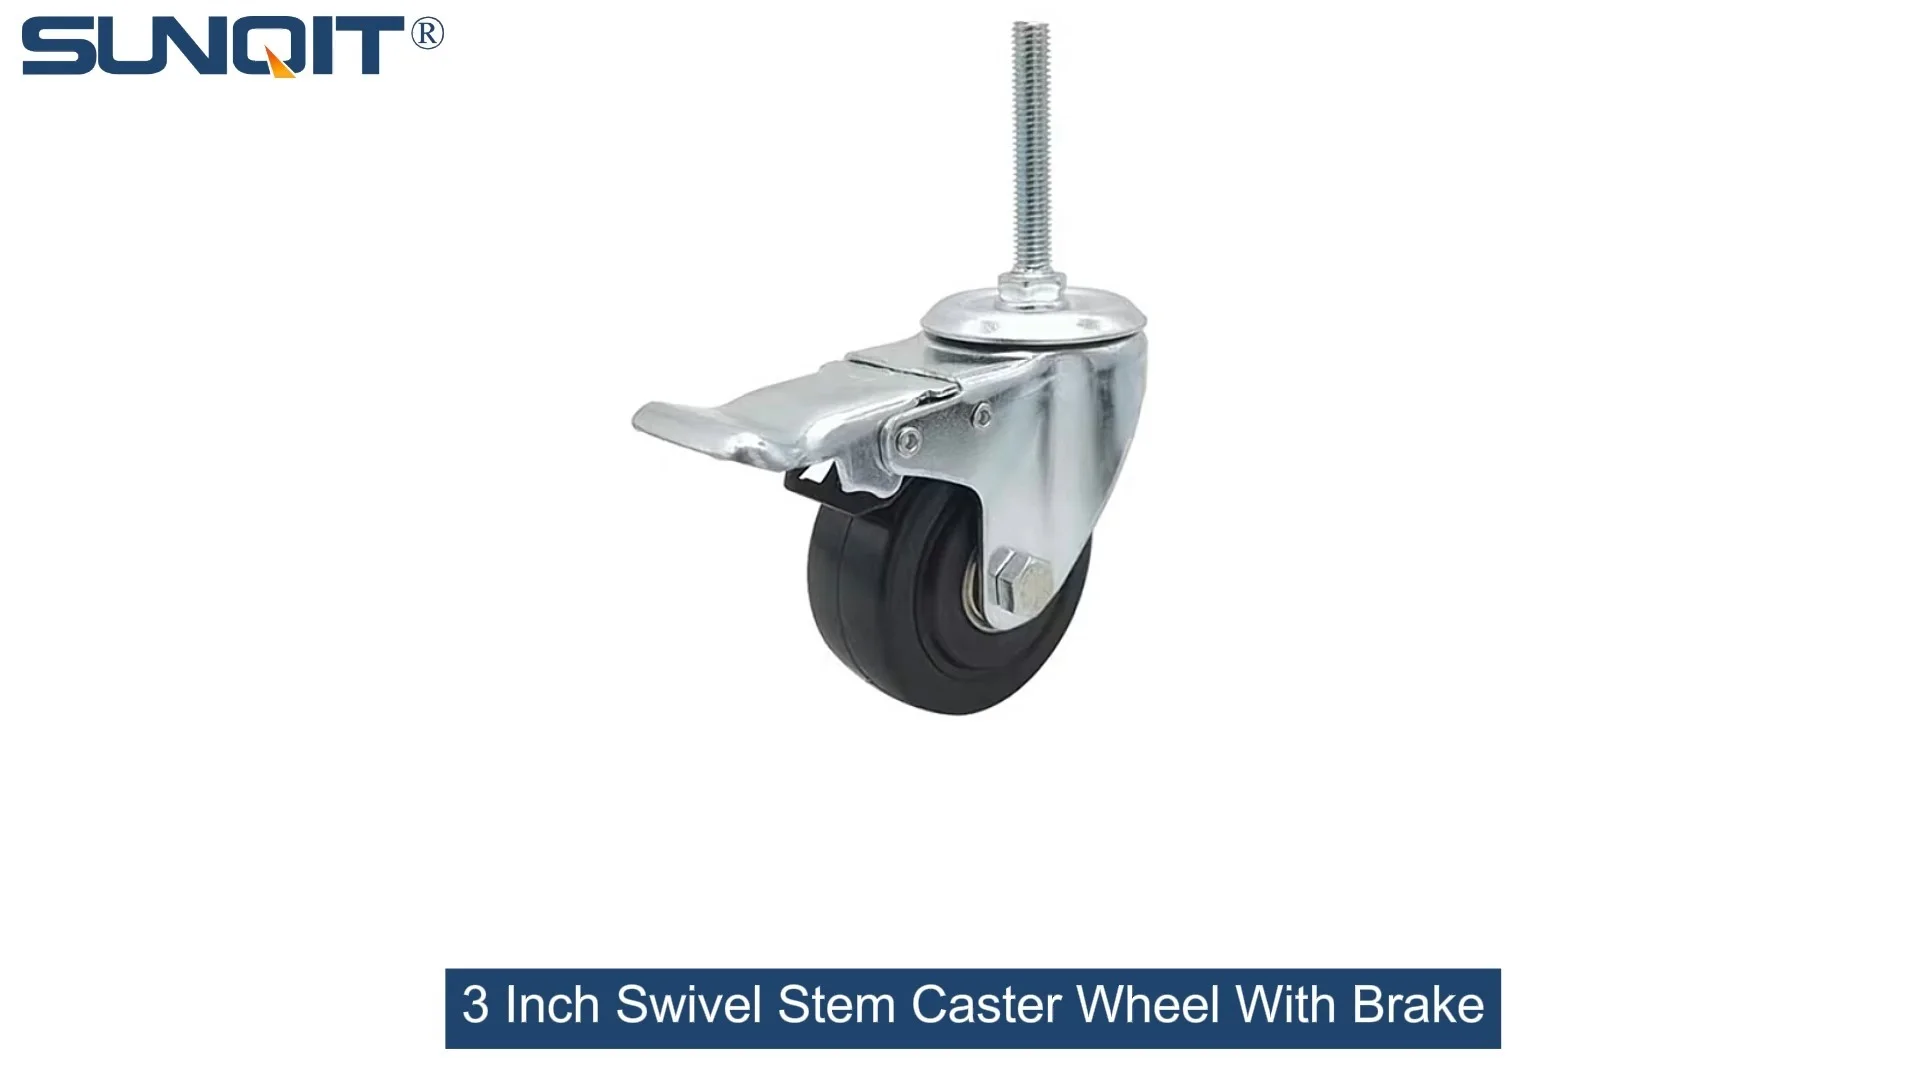
Ever been halfway through pushing a workbench across the shop floor when it suddenly feels like dragging a boulder? Or noticed that the swivel stem caster wheel with brake on your turnover trolley is making a high-pitched squeal every time you pivot? If so, you're not alone. Worn caster wheels are one of the most common (and frustrating) issues in workshops, warehouses, and factories. But here's the good news: replacing a caster wheel is a simple DIY task that takes less than 30 minutes, requires basic tools, and saves you from bigger headaches down the line—like damaged floors, strained muscles, or even equipment breakdowns.
In this guide, we'll walk you through everything you need to know to replace that stubborn swivel stem caster wheel with brake. We'll start with why it matters, what tools you'll need, and then dive into a step-by-step process that even if you're new to DIY, you'll feel confident tackling. Plus, we'll share pro tips to keep your new caster (and all your caster accessories) working smoothly for years. Let's get started.
Why Bother Replacing a Worn Caster Wheel?
You might be thinking, "It's just a wheel—can't I ignore it a little longer?" Maybe, but here's why that's a risky move. First, safety. A wobbly or seized caster wheel makes equipment harder to control. Imagine pushing a loaded material rack around a corner with a stuck caster—it could tip, spilling materials or even injuring someone. Second, efficiency. A squeaky, dragging wheel slows you down. Over a day, that adds up to wasted time. Third, cost. A $20 caster wheel replacement now prevents $200 in floor repairs (scratched concrete or dented tiles) or a $500 stem replacement if the old one bends under strain.
And let's not forget the little things: a smooth-rolling caster makes your workspace feel more professional, reduces noise (goodbye, that annoying squeak!), and even boosts morale. Trust me—I've seen shops where replacing a few worn casters turned a frustrating, clunky workflow into a seamless one. Your future self (and your team) will thank you.
Signs Your Caster Wheel Needs Replacing
Not sure if it's time? Here are the most common red flags. Keep an eye out for these, and you'll catch issues early:
| Sign | What It Means |
|---|---|
| Squeaking, grinding, or clicking noises | Worn bearings, lack of lubrication, or debris stuck in the wheel |
| Wheel wobbles or leans to one side | Bent stem, cracked wheel hub, or loose mounting |
| Brake doesn't hold (equipment rolls when locked) | Worn brake pads, misaligned brake lever, or stretched spring |
| Flat spots or cracks on the wheel | Prolonged pressure on a locked wheel, or low-quality wheel material |
| Swivel mechanism sticks (won't turn smoothly) | Rust, dirt buildup, or damaged swivel bearings |
If you're seeing any of these, it's time to replace that caster. Let's gather your tools.

Tools You'll Need (Most You Probably Already Have)
No need to rush to the hardware store—chances are, you have most of these tools in your toolbox. Here's the list:
- New swivel stem caster wheel with brake: Make sure it matches the old one! Check the stem diameter (most common is 1/2 inch or 5/8 inch), wheel size (2-3 inches is standard for workbenches and trolleys), and load capacity (if your trolley carries 200 lbs, get a caster rated for at least 250 lbs to be safe).
- Adjustable wrench or socket set: To loosen the nut holding the caster stem in place.
- Screwdriver (flathead or Phillips): If the caster is mounted with screws (less common for stem-type, but good to have).
- Pliers: Helpful if the stem is stuck or the nut is rusted.
- Wire brush: To clean rust or dirt from the mounting area.
- Penetrating oil (like WD-40): For stuck, rusted nuts or stems.
- Caster accessories (if included): Some new casters come with washers, lock washers, or extra nuts—keep these handy; they help secure the caster and reduce vibration.
- Gloves: To protect your hands from sharp edges or rust.
- Block of wood or jack (optional): To elevate the equipment slightly if needed (great for heavy workbenches).
Pro tip: Lay out your tools on a clean workbench before starting. It saves time and keeps you from hunting for a wrench mid-project.

Safety First: Prep Before You Start
Before you dive in, let's make sure you stay safe. Caster replacement is low-risk, but a few simple steps prevent accidents:
- Lock or secure the equipment: If the equipment has other working casters, lock their brakes to keep it from rolling. For example, if you're replacing a caster on a workbench, lock the three good brakes so it stays put.
- Disconnect power (if needed): If the equipment is electrical (like a mobile workbench with a power strip), unplug it to avoid shocks.
- Clear the area: Move other tools, materials, or debris out of the way. You need space to work, especially if you're elevating the equipment.
- Wear gloves: Rusty stems or sharp edges on old casters can cut—leather or nitrile gloves add protection.
- Use a block for elevation: If the caster is on the bottom of a low trolley, slide a block of wood under the frame to lift the old wheel off the ground. This makes it easier to remove and install the new one.
Got everything? Great—let's replace that caster!

Step-by-Step: Replacing Your Swivel Stem Caster Wheel with Brake
We'll break this into 8 simple steps. Take your time, and don't rush—remember, this is supposed to be easy!
- Identify the problem caster (and confirm the type). First, double-check which caster is causing trouble. Spin each wheel by hand—if one doesn't spin freely, or the swivel feels stiff, that's your culprit. Next, confirm it's a "swivel stem caster wheel with brake." Stem casters have a long metal rod (the stem) that screws or presses into a socket on the equipment frame. The brake is usually a lever on the side that, when pressed, locks the wheel in place. If your caster has a flat metal plate with screws (instead of a stem), this guide still works—just swap the wrench for a screwdriver to remove the plate screws.
- Secure the equipment. Let's say you're working on a turnover trolley. Lock all other casters (if they have brakes) so it doesn't roll. If it's a workbench, ask a friend to steady it, or slide a block under the frame near the bad caster to lift that corner 1-2 inches off the ground. You want the old caster wheel to be off the floor so it's easy to remove.
- Remove the old caster. Look under the equipment frame—you'll see the caster stem sticking through a hole, with a nut (called a "lock nut") against the frame. This nut holds the caster in place. Grab your adjustable wrench, fit it onto the nut, and turn counterclockwise to loosen. If the nut is rusted, spray it with penetrating oil, wait 5-10 minutes, and try again. If the stem spins when you turn the nut, use pliers to grip the top of the stem (where the wheel swivels) to hold it steady. Once the nut is loose, unscrew it by hand and set it aside (you might need it later if the new caster doesn't come with one). Then, pull the old caster stem out of the socket. It might be tight—wiggle it gently side to side to loosen it.
- Clean the mounting area. Now that the old caster is out, take a look at the socket (the hole in the frame where the stem goes) and the surrounding area. Chances are, there's dirt, rust, or old grease buildup. Use your wire brush to scrub the socket—this ensures the new stem fits snugly. Wipe the area with a damp cloth to remove dust. Check for cracks or damage to the frame—if the socket is bent or cracked, you might need to reinforce it with a metal plate (but that's rare; most frames hold up fine).
- Inspect the new caster (and caster accessories). Unbox your new swivel stem caster wheel with brake. Check that the stem length matches the old one—if it's too short, the caster will sit loose; too long, and the nut won't tighten. Spin the wheel by hand to make sure it rolls smoothly, and flip the brake lever to ensure it locks and releases easily. If the caster came with caster accessories like washers, figure out where they go. Most washers go between the frame and the lock nut to reduce friction and prevent the nut from loosening over time.
- Install the new caster. Align the stem of the new caster with the socket in the frame. Push it in firmly—you might need to twist it slightly to get it started. Make sure the brake lever is facing outward (so you can reach it easily when the equipment is on the ground). Once the stem is fully seated, thread the lock nut onto the stem by hand. This is crucial: hand-threading first prevents "cross-threading" (stripping the threads), which would ruin the stem. Once the nut is tight by hand, grab your wrench and tighten it clockwise—snug, but not so tight you strip the threads. A good rule: tighten until it stops, then give it a 1/4 turn more. If you have washers (from caster accessories), place them between the nut and the frame before tightening.
- Test the new caster. Now, lower the equipment (remove the block if you used one) and unlock any brakes. Give the caster a spin—it should rotate 360 degrees smoothly, no wobbling. Push the equipment back and forth a few feet—no dragging, no noise. Then, test the brake: press the lever down and try to move the equipment. It should stay put. If it rolls, the brake might need adjustment (some models have a small screw on the brake lever to tighten the pad—check the caster's manual). If the caster wobbles, double-check that the stem is fully seated and the nut is tight.
- Clean up and check the rest. Toss the old caster (or keep it for spare parts if the bearings are still good), put away your tools, and give the area a quick sweep. While you're at it, take 2 minutes to check the other casters on the equipment. If one is worn, others might be close behind—better to replace them now than repeat the process next month.
Troubleshooting: Common Issues (and Fixes)
Even with the best prep, things can go sideways. Here's how to fix the most common problems:
- New caster is loose: If it wobbles after tightening, the stem might be too short. Add a washer (from caster accessories) between the frame and the nut to take up space. If the stem is too long, use a hacksaw to trim it (measure twice, cut once!).
- Stem spins when tightening the nut: Grip the top of the caster (where the wheel swivels) with pliers to hold it steady while you tighten the nut below.
- Brake doesn't lock: Check if the brake pad is aligned with the wheel. If it's off-center, loosen the nut slightly, adjust the caster position, then retighten. If the pad is worn (unlikely on a new caster), contact the supplier for a replacement pad.
- Wheel squeaks (new caster): New casters sometimes have dry bearings. A drop of silicone lubricant (avoid oil-based, which attracts dirt) on the wheel axle should quiet it down.
Pro Tips to Extend Your Caster's Life
Now that your new swivel stem caster wheel with brake is installed, let's keep it rolling smoothly for years. Here's how:
- Clean regularly: Once a week, use a brush to sweep debris (sawdust, metal shavings, dirt) off the wheels and swivel mechanism. In dusty environments (like woodshops), do this daily—debris grinds into bearings and causes wear.
- Lubricate smartly: Every 3 months, apply a silicone-based lubricant to the swivel joint (the part that lets the caster spin) and the wheel bearings. Avoid oil-based lubricants—they attract dust and can stain floors. A quick spray or a drop from an oiler bottle works wonders.
- Don't overload: Check the caster's load rating (usually stamped on the wheel or stem). If you're pushing a workbench with 300 lbs of tools, use casters rated for 400 lbs (overloading is the #1 cause of premature wear).
- Adjust brakes: If the brake starts to slip, tighten the adjustment screw (if your model has one) or replace the brake pad (cheap and easy to find online).
- Inspect monthly: Spend 2 minutes each month checking all casters for wear, loose nuts, or debris. Catching issues early is key.
Conclusion: You've Got This!
Replacing a swivel stem caster wheel with brake might seem intimidating at first, but as you've seen, it's all about preparation and patience. With basic tools, a little time, and this guide, you can tackle it confidently. And remember: this skill isn't just for caster wheels. Once you're comfortable with this, you'll find other small repairs (like replacing caster accessories or adjusting brakes) feel easier too.
So go ahead—grab that wrench, order your new caster, and give your equipment the upgrade it deserves. Your workspace will be quieter, safer, and more efficient. And the next time someone asks, "How'd you fix that caster so fast?" you can smile and say, "Oh, it was easy—I followed this guide."
Happy rolling!