- Company Articles
- Products and Technology
- Installation And Maintenance
- How to replace Anti-Slip Adjustable Leveling Feet on Material Rack B

How to replace Anti-Slip Adjustable Leveling Feet on Material Rack B
Related Product
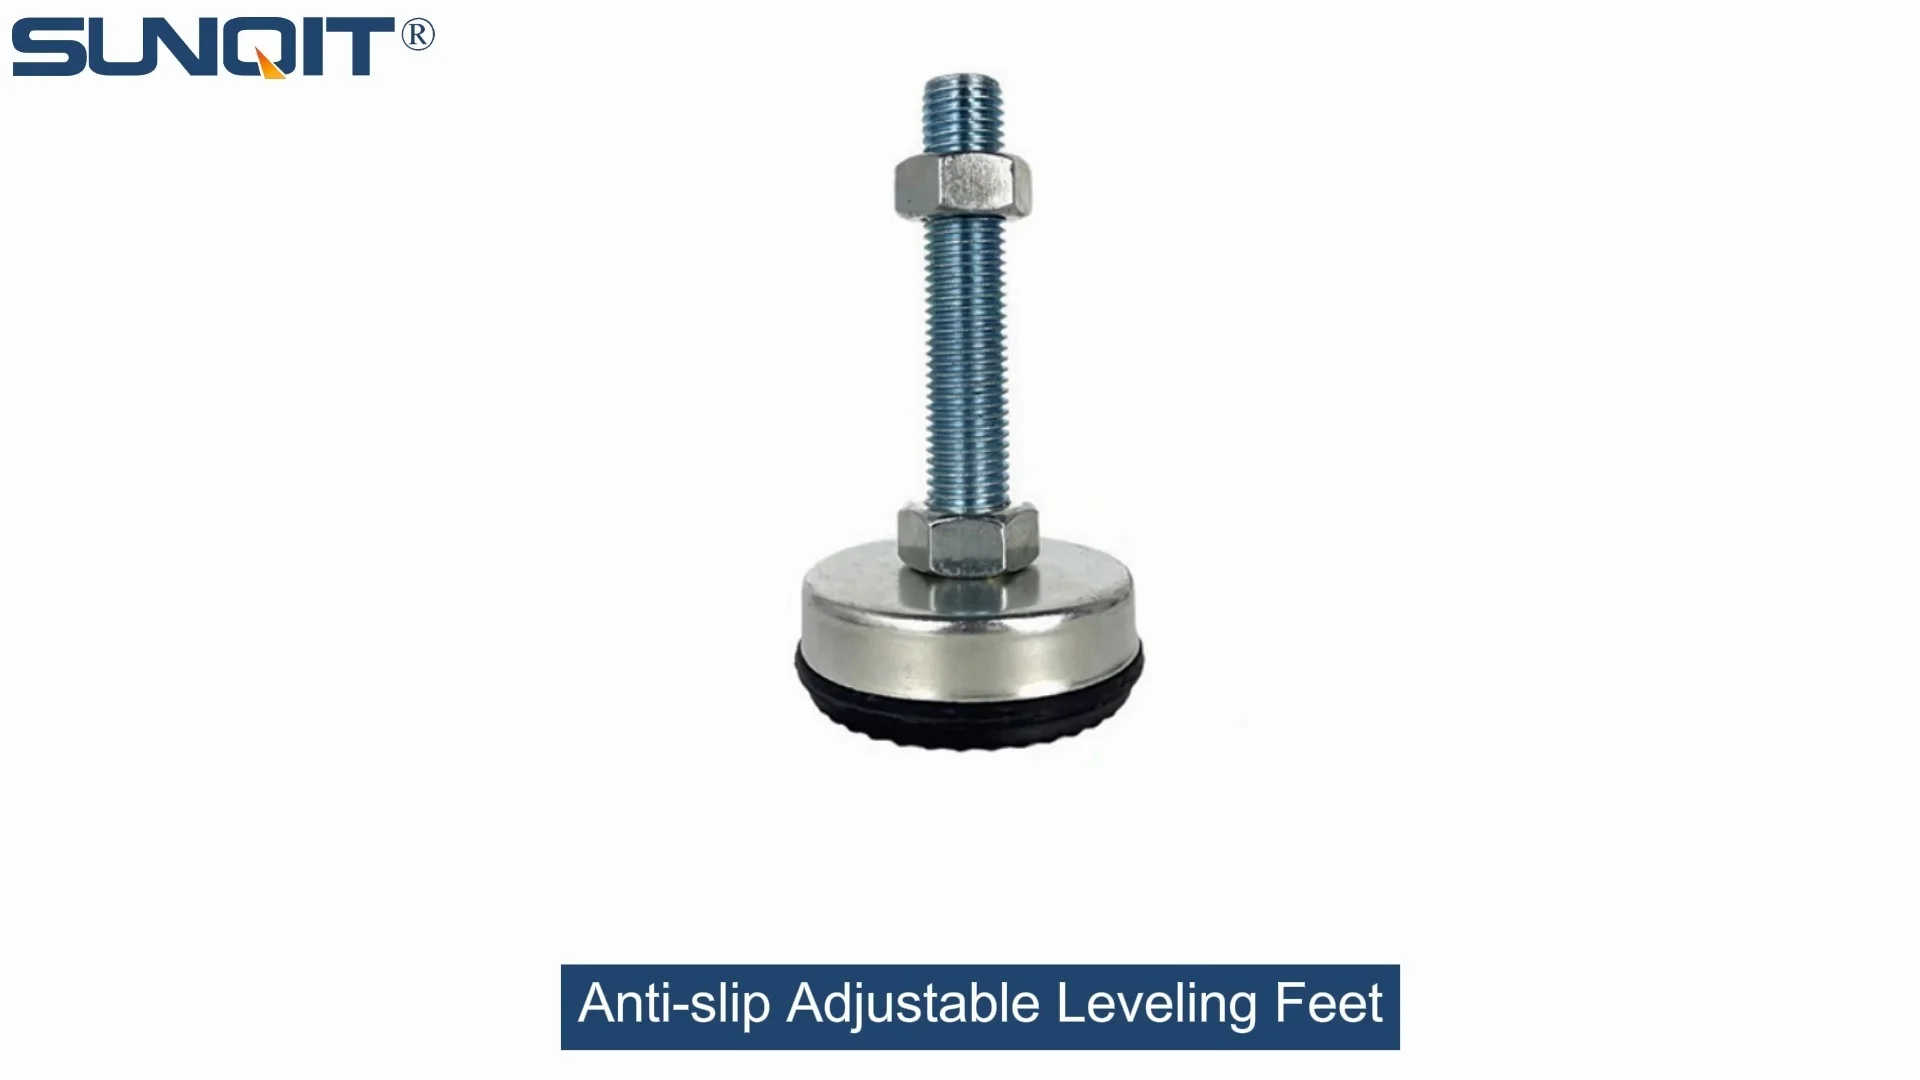
Anti-slip Adjustable Leveling Feet
Anti-slip Adjustable Leveling Feet are designed to keep machines level when placed on uneven or sloped ground, the rubber base will prevent product slip during work.
It's 8:15 AM on a Monday, and your production line is already humming. Operators are grabbing bins from the Material Rack B (3 row and 3 floor) near the assembly station, ready to start the day's orders. But as Maria reaches for a bin of circuit boards on the middle shelf, she pauses. The rack wobbles—just a little, but enough to make her hesitate. "Is this thing safe?" she mutters, eyeing the gap between the floor and one of the rack's feet. You walk over, give the rack a gentle push, and sure enough, it rocks like a seesaw. A quick kneel reveals the problem: one anti-slip adjustable leveling foot is cracked clean through, another is missing its rubber pad, and the third is so loose it spins with a light touch.
We've all been there. A wobbly rack might seem like a minor annoyance, but in a lean system—where efficiency and safety are the backbone of daily operations—those small issues add up. An unstable rack slows down workflow as workers avoid spills, risks damaging expensive materials, and creates a safety hazard that could lead to slips, trips, or worse. The good news? Replacing anti-slip adjustable leveling feet on your Material Rack B is a simple fix that takes less than an hour, even if you're not a seasoned maintenance pro. In this guide, we'll walk through the entire process—from gathering tools to testing stability—so you can get that rack back to solid, reliable form.
Why Anti-Slip Adjustable Leveling Feet Matter (More Than You Think)
Before we dive into the "how," let's talk about the "why." Anti-slip adjustable leveling feet might look like metal and rubber bits, but they play three critical roles in keeping your Material Rack B (and your entire operation) running smoothly:
- Stability First: Material Rack B (3 row and 3 floor) is designed to hold up to 300 lbs per shelf (check your manual for exact specs), which means when it's fully loaded, uneven feet can turn it into a tipping hazard. Leveling feet distribute that weight evenly across the floor, preventing wobbles even when shelves are loaded to capacity.
- Protect Your Floors: Without proper leveling, the rack's metal legs can scratch or dent concrete floors, especially in high-traffic areas. The rubber pads on anti-slip feet act as a buffer, keeping floors intact and reducing noise as bins are loaded and unloaded.
- Adapt to Imperfections: No warehouse floor is perfectly flat. Over time, concrete shifts, tiles crack, and wear creates small dips and bumps. Adjustable feet let you tweak each leg's height by fractions of an inch, ensuring the rack stays level even on uneven surfaces.
Think of it this way: in a lean system, every component has a purpose. The Material Rack B organizes materials for quick access, cutting down on wasted movement. The anti-slip adjustable leveling feet ensure that organization doesn't come with trade-offs in safety or efficiency. Ignoring them isn't just lazy—it's a disservice to the lean principles your team works hard to uphold.
Pro Tip: If you're not sure when your rack's feet were last replaced, take 5 minutes today to inspect all Material Rack B units in your facility. Look for cracks in the metal housing, missing rubber pads, or feet that spin freely when touched. Catching issues early beats cleaning up a spilled shelf of parts later!
Gathering Your Tools: What You'll Need (And Why)
Replacing leveling feet isn't a high-tech job, but having the right tools on hand will make the process faster and frustration-free. Here's your checklist—grab these before you start, and you won't find yourself halfway through, hunting for a wrench:
| Tool Name | Purpose | Pro Tips |
|---|---|---|
| Adjustable Wrench (10-12 inch) | Loosening old feet and tightening new ones | A 12-inch wrench gives better leverage for stuck feet. Avoid using pliers—they can slip and damage the foot's metal housing. |
| New Anti-Slip Adjustable Leveling Feet | Replacement parts (duh!) | Order the exact model for Material Rack B—check your supplier's specs. Generic feet might not fit the rack's leg threads or support the weight. |
| 4-foot Level | Ensuring the rack is level after replacement | A bubble level works, but a digital level (with a backlit display) is easier to read in dimly lit warehouses. |
| Penetrating Oil (e.g., PB Blaster or WD-40) | Loosening rusted or stuck feet | Spray 5-10 minutes before trying to remove old feet—let the oil seep into threads to break up rust. |
| Lint-Free Cloth | Cleaning dirt and debris from rack legs | Use a damp cloth to wipe away grime—this ensures new feet thread on smoothly. |
| Work Gloves | Protecting hands from sharp edges or rust | Choose nitrile gloves—they're puncture-resistant and won't slip on metal parts. |
| Flashlight | Inspecting hard-to-see threads or damage | A headlamp frees up your hands—super helpful when crawling under the rack! |
Pro move: Lay out your tools on a clean workbench nearby (a simple aluminum profile workbench works great) so everything is within arm's reach. No need to waste time running back and forth to the toolbox.

Step 1: Prep the Rack (Safety First!)
Before you touch a single leveling foot, you need to prep the rack. This isn't just about convenience—it's about keeping you and your materials safe. Here's how to do it right:
Empty the Rack (Top to Bottom)
Start by clearing all materials from the Material Rack B. Grab a nearby turnover trolley (or a flat dolly) and load bins onto it— starting with the top shelf . Why top to bottom? If you empty the bottom shelves first, the rack's center of gravity shifts upward, making it more likely to tip forward when you remove the top bins. Trust me, I learned this the hard way in my first warehouse job: emptied the bottom shelf, then went for the top, and the whole rack lurched forward. Bins crashed, parts scattered, and my supervisor gave me a look that could melt steel. Save yourself the headache (and the cleanup): top shelf first, then middle, then bottom.
Once the rack is empty, give it a quick wipe-down. Dust and debris can hide cracks in the frame or legs—issues that might have contributed to the leveling feet failing in the first place. If you spot a bent leg or a cracked shelf bracket, note it down—you'll want to address that later (but for now, focus on the feet).
Secure the Area
Even an empty rack can be heavy, so clear a 3-foot radius around the rack to avoid tripping hazards. If the rack is near a walkway or production area, put up a "Caution: Maintenance in Progress" sign. You don't want someone accidentally bumping into you while you're kneeling under the rack.
Safety Note: If your Material Rack B is extra tall (over 6 feet) or was loaded with very heavy materials, have a coworker spot you while you work. An extra set of hands can steady the rack if it shifts unexpectedly.

Step 2: Remove the Old Leveling Feet (The Tricky Part)
Now comes the fun part: getting those old, stubborn feet off the rack. Depending on how long they've been in place, this can be a breeze—or a battle with rust and grime. Let's break it down:
Inspect the Feet (And Know Your Enemy)
Kneel down and take a close look at each foot. Are they threaded directly into the rack leg, or do they have a separate mounting plate? Most Material Rack B models use threaded feet—meaning the foot screws into a metal insert welded to the rack's leg. If the foot is cracked (like the one in our earlier example), the metal housing might be split, making it easier to loosen. If it's just loose or missing a pad, you'll need to grip the hexagonal base of the foot to unscrew it.
Loosen the Feet (Patience > Force)
Slip on your gloves, grab the adjustable wrench, and position it on the hexagonal base of the first foot. Make sure the wrench is tight around the base—you don't want it slipping and scratching the rack leg. Turn counterclockwise to loosen. If it spins freely, great—you're done with that one. If it's stuck:
- Spray with Penetrating Oil: Douse the base of the foot (where it meets the rack leg) with penetrating oil. Let it sit for 5-10 minutes—the longer, the better. The oil seeps into the threads, breaking up rust and grime.
- Tap the Wrench Gently: Put the wrench back on the foot, then tap the end of the wrench with a rubber mallet (or a regular hammer, if you're careful). The vibration helps loosen the threads without damaging the foot or rack.
- Use Heat (As a Last Resort): If all else fails, a hair dryer or heat gun on low can warm the metal, expanding it slightly to loosen rust. Caution: Don't overheat—you don't want to melt nearby plastic parts or burn yourself.
Once the foot is loose, unscrew it the rest of the way by hand. Repeat this process for all three feet (or however many your rack has—Material Rack B typically has four, but some models use three for stability). Set the old feet aside—you can recycle the metal later, but check if any rubber pads are still intact (they might come in handy as spares for other racks).
Clean the Threads (Don't Skip This!)
With the old feet removed, you'll see the threaded insert in the rack leg. Chances are, it's covered in dirt, rust, or bits of old thread sealant. Take your lint-free cloth and wipe away as much grime as possible. If there's stubborn rust, use a small wire brush (the kind with soft brass bristles) to gently scrub the threads—you don't want to damage them, as that could make screwing in the new feet impossible.
Pro tip: Blow into the threaded hole (or use compressed air, if available) to clear out any leftover dust. A clean thread means a tight, secure fit for the new foot.

Step 3: Install the New Anti-Slip Adjustable Leveling Feet
Now that the old feet are gone and the threads are clean, it's time to install the new ones. This part is straightforward, but attention to detail here will ensure your rack stays stable for months (or years) to come.
Thread the New Feet (By Hand First)
Take one new anti-slip adjustable leveling foot and align the threads with the insert in the rack leg. Start screwing it in by hand—this is crucial. If you cross-thread the foot (meaning the threads don't line up), you'll strip the insert, and you'll need to replace the entire rack leg (a much bigger job). Screw in the foot until it's hand-tight—you should feel resistance, but it shouldn't require force.
Repeat this for all feet. At this point, all feet should be screwed in by hand, sticking out of the rack legs by about 1-2 inches (you'll adjust the height next).
Adjust Height with a Level (Get It Right the First Time)
Now, grab your 4-foot level. Place it horizontally across the top shelf of the Material Rack B, near the front edge. Check the bubble—if it's leaning to the left, that means the right side is too low (or the left is too high). To fix it, adjust the feet on the right side: use the adjustable wrench to turn the foot clockwise (tightening it, which raises the rack) or counterclockwise (loosening it, which lowers the rack). Move the level to the back edge of the top shelf and repeat—you want the rack level front to back, too.
Next, place the level vertically along the side of the rack (from top to bottom). This checks for side-to-side lean. Adjust the front or back feet as needed until the bubble is centered. It might take a few rounds of tweaking—front to back, side to side—but patience pays off. A level rack is a stable rack.
Pro Hack: If your floor is really uneven (we're talking "dip in the concrete" uneven), you might need to extend one foot more than the others. That's okay! The goal is stability, not perfectly equal foot height. As long as the level reads even and the rack doesn't wobble, you're good.
Tighten the Feet (Snug, Not Superman Tight)
Once the rack is level, grab your adjustable wrench and give each foot a final tighten. Turn clockwise until you feel resistance, then give it a quarter-turn more—just enough to lock it in place. Don't over-tighten! Stripping the threads or cracking the new foot's housing is a common mistake here. You want the foot secure, but not so tight that you can't adjust it later if needed.
Step 4: Test Stability (The Moment of Truth)
You've installed the new feet, adjusted the height, and tightened everything down. Now it's time to see if your handiwork paid off. Here's how to test:
The "Push Test"
Stand at the front of the rack and push gently but firmly with both hands (like you're trying to move it across the floor). It should stay solid—no wobbling, no creaking, no feet shifting. Do the same from the back, left, and right sides. If it moves, check which foot is slipping: maybe it's not tight enough, or the rubber pad is dirty. Wipe the pad with a damp cloth (grease or dust can reduce grip) and retighten.
The "Load Test"
Now, reload the rack—again, top to bottom—to mimic real-world conditions. Start with lighter bins on the top shelf, then add heavier ones to the bottom (remember: bottom-heavy is more stable). Once it's fully loaded, repeat the push test. A rack that feels solid empty might wobble under weight, so this step is non-negotiable. If it still wobbles, double-check the level—adding weight can sometimes shift the rack's balance.
Maria, the operator from earlier, walks over as you finish. "Is it safe now?" she asks, eyeing the rack. You nod, and she gives it a playful nudge. "Wow, that's solid," she says, grabbing her bin of circuit boards with confidence. "Thanks—now I won't have to hold my breath every time I grab something." Mission accomplished.
Troubleshooting: When Things Don't Go Smoothly
Even with careful prep, you might hit a snag. Here are the most common issues and how to fix them:
- New Foot Won't Screw In: If the foot binds up when hand-tightening, you might have cross-threaded it. Back it out, realign the threads, and try again. If it still won't go, check the rack leg's threads for damage—if they're stripped, you'll need to tap new threads (use a thread tap kit) or replace the leg insert (contact your supplier for parts).
- Rack Still Wobbles After Adjustment: If the level says it's even but the rack wobbles, the floor might have a "soft spot" (e.g., a cracked tile or sunken concrete). Try placing a thin metal shim under the foot (you can buy pre-cut shims at hardware stores) to fill the gap.
- Rubber Pad Falls Off: Some cheaper leveling feet have loose rubber pads—if yours fall off, use a drop of super glue (like Loctite) to secure them. Just don't get glue on the threads!
Maintaining Your New Feet (Keep the Rack Stable for the Long Haul)
Replacing leveling feet is a win, but to keep your Material Rack B stable for months (or years) to come, a little maintenance goes a long way. Here's how to make those new feet last:
- Monthly Check-Ups: Add a "leveling feet inspection" to your team's monthly 5S audit checklist. Have operators report any wobbles or loose feet immediately.
- Clean Pads Regularly: Wipe the rubber pads with a damp cloth every month to remove oil, dust, or debris that can reduce grip.
- Tighten Quarterly: Even the best feet loosen over time with vibration from daily use. Every 3 months, grab your wrench and give each foot a quarter-turn tighten—just to keep them secure.
- replace Pads Proactively: If a rubber pad starts to crack or wear thin, replace it before it falls off. Many suppliers sell replacement pads separately, so you don't need to buy a whole new foot.
Remember: in a lean system, preventive maintenance is always cheaper than reactive fixes. Spending 5 minutes a month checking leveling feet saves you hours of cleanup and downtime later.
Wrapping Up: Small Fix, Big Impact
You started the day with a wobbly rack and a worried operator. Now, you've got a stable Material Rack B (3 row and 3 floor) that's ready to handle the day's workload—safely, efficiently, and without a single wobble. It might seem like a small task, but that's the beauty of lean systems: focusing on the little things (like leveling feet) creates a foundation for big results.
As you walk back to your desk, you pass Maria again. She's loading bins onto the rack without hesitation, and the production line is moving faster than it did this morning. "Hey, thanks for fixing that rack," she calls out. "It's like night and day." You smile—because you know: a stable rack isn't just about bolts and rubber pads. It's about building a workspace where your team feels confident, your materials stay safe, and your lean system runs like the well-oiled machine it was meant to be.
Now go grab a coffee—you've earned it. And next time you see a wobbly rack? You'll know exactly what to do.