- Company Articles
- Products and Technology
- Product knowledge
- How to Calculate the Right Quantity of One Way Rotatory Straight Lean Pipe Joint Chrome for Your Project

How to Calculate the Right Quantity of One Way Rotatory Straight Lean Pipe Joint Chrome for Your Project
Related Product
One Way Rotatory Straight Lean Pipe Joint Chrome
Two way lean pipe joint for 2 pcs 28MM lean pipe connection in straight angle with rotatory fucntion, which used widely in workbench, flow rack, hand trolley frame connection.
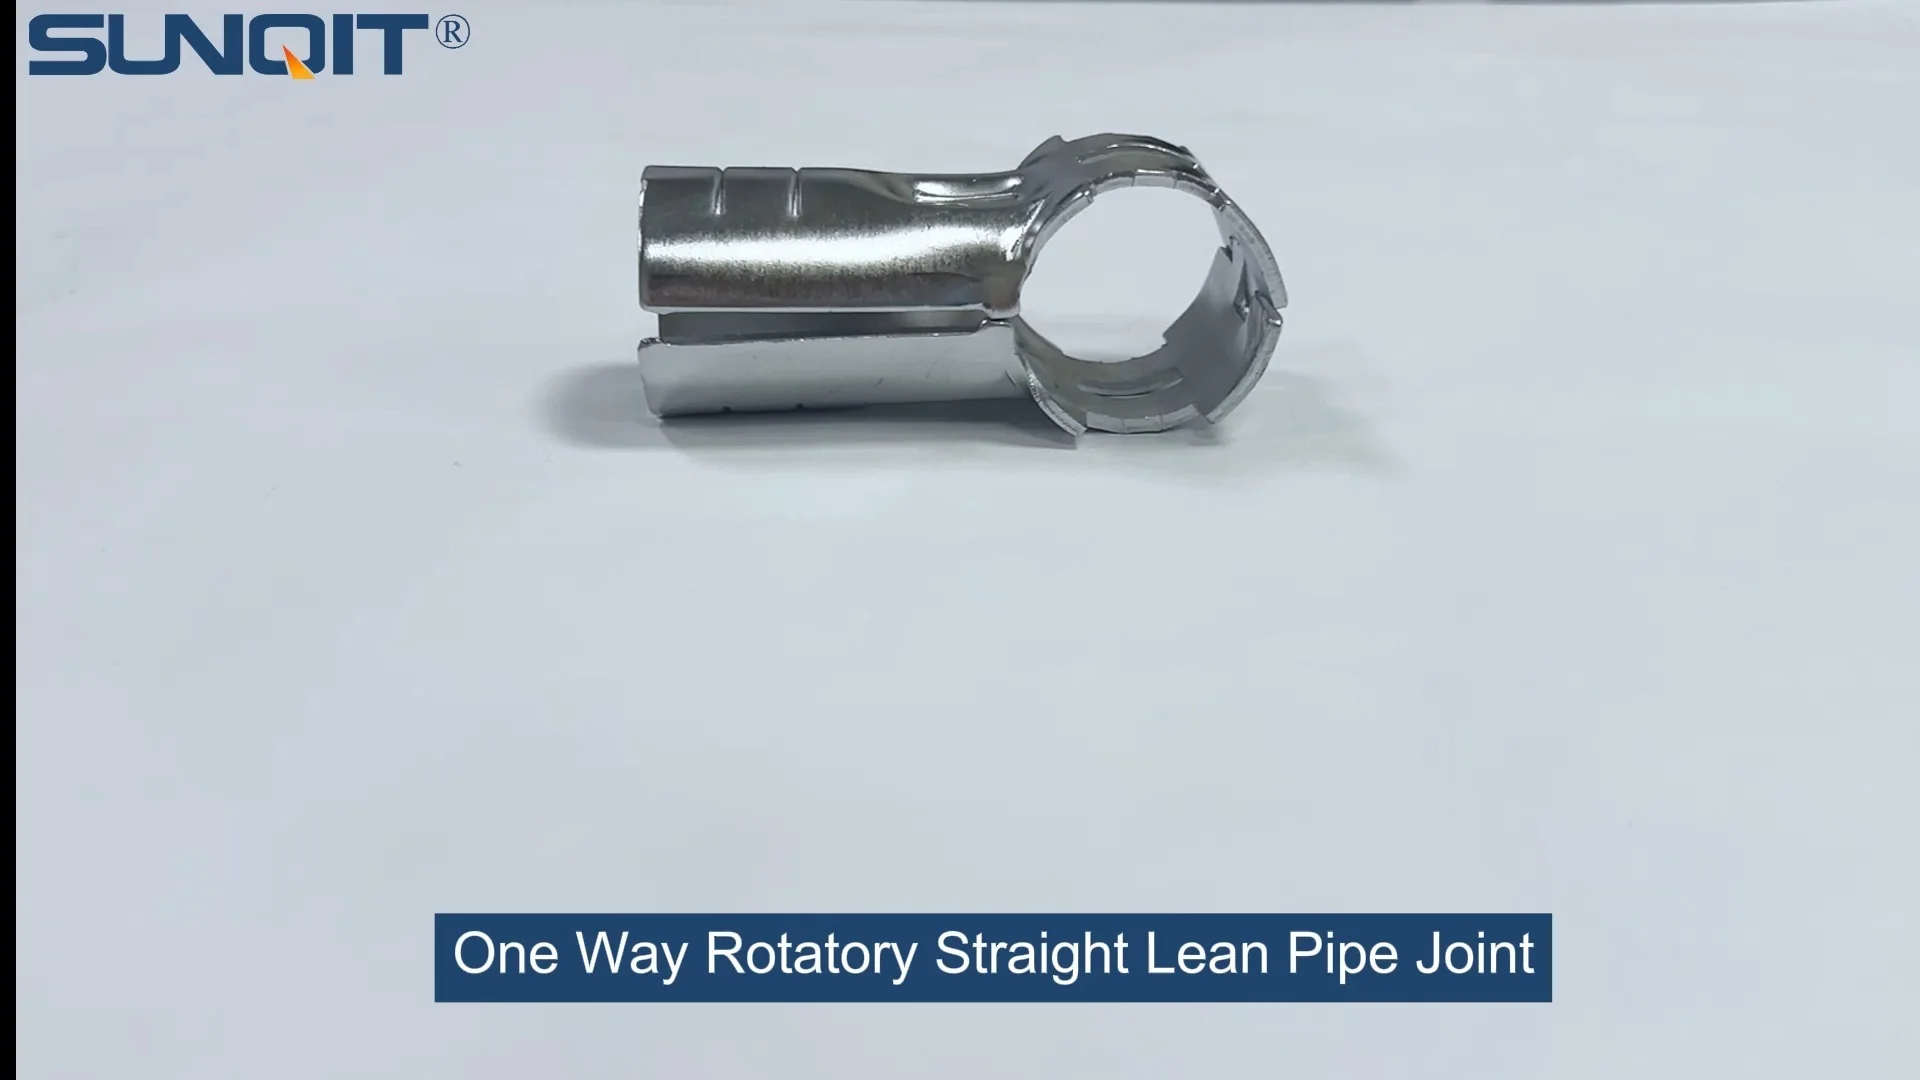
There's a quiet frustration that comes with mid-project delays—especially when it's avoidable. Picture this: you're three hours into assembling a custom workbench for your workshop. The lean pipes are cut to size, the tools are laid out, and you're on a roll… until you reach for the last one way rotatory straight lean pipe joint chrome and realize you're short by two. Suddenly, the momentum stalls. You either scramble to pause the project and order more (losing days to shipping) or cobble together a temporary fix with the wrong joint, compromising stability. On the flip side, overbuying joints means tying up budget in parts that gather dust in a corner, never to be used. Either way, the root cause is the same: miscalculating how many joints you actually need.
For anyone working with lean systems—whether you're setting up a production line, a warehouse flow rack, or a simple workshop workbench—the one way rotatory straight lean pipe joint chrome is a small but mighty component. Its ability to rotate in one direction adds flexibility, making it ideal for structures that need occasional adjustment, like workbenches with movable shelves or flow racks that adapt to changing inventory sizes. But to leverage that flexibility without headaches, you need to nail the quantity calculation from the start. In this guide, we'll walk through the step-by-step process to figure out exactly how many of these joints your project requires, so you can shop confidently, build smoothly, and avoid those mid-project panic moments.
Step 1: Define Your Project Scope and Design—Start with the "What" and "Why"
Before you even think about counting joints, you need to get crystal clear on what you're building and why. Is this a fixed workbench for a small electronics assembly station? A flow rack to speed up order picking in a warehouse? Or a turnover trolley that needs to navigate tight aisles? The answers will shape every part of your calculation, from the types of lean pipe you use to the number of joints required.
Let's say you're building a workbench—specifically, a single-deck workbench without casters (we'll call it "Workbench E" for reference, borrowing from common naming conventions in lean system setups). Your goal is to create a sturdy surface for assembling small parts, with a lower shelf for storing tools. First, sketch your design. You don't need to be an artist—even a rough diagram on graph paper or a quick digital sketch in a tool like Canva will do. Note the dimensions: height, width, depth, and where you want shelves or additional supports.
For Workbench E, let's assume standard dimensions: 120cm wide (length), 60cm deep (width), and 85cm high (standard elbow height for comfortable working). You want a lower shelf 40cm from the ground, and you'll use aluminum profile for the top surface to add durability (aluminum profile is a popular choice here, as it's lightweight yet strong, and easy to clean). Now, list out the main components: vertical legs, horizontal rails (front, back, sides), shelf supports, and the top surface frame.
Pro tip: If you're unsure about dimensions, measure existing structures you like. For example, if you have a colleague with a workbench that feels "just right," take its measurements as a baseline. This saves you from guessing and ensures your final build is practical.
Step 2: Break Down the Structure into Lean Pipe Components—Every Pipe Tells a Story
Now that you have a design, it's time to dissect it into individual lean pipe segments. Lean pipe (also called "lean tube") is the backbone of these structures—typically made of steel with a plastic coating, though aluminum lean pipe is gaining traction for its corrosion resistance. For our workbench, we'll use standard 28mm diameter lean pipe (the most common size), which pairs well with the one way rotatory straight lean pipe joint chrome.
Let's list the pipe segments for Workbench E:
- Vertical Legs: These support the entire structure. For a stable workbench, you'll need 4 vertical legs (one at each corner). Height: 85cm (from floor to top rail). But wait—if the top surface is an aluminum profile frame, the vertical legs will connect to the horizontal rails, which then support the profile. So the legs are 85cm tall.
- Horizontal Rails (Top Frame): These connect the vertical legs at the top. You'll have 2 front/back rails (length: 120cm) and 2 side rails (length: 60cm). Together, they form a rectangle that sits atop the vertical legs.
- Horizontal Rails (Lower Shelf Frame): The lower shelf needs its own frame. This will be a smaller rectangle, attached to the vertical legs 40cm from the ground. So another 2 front/back rails (120cm) and 2 side rails (60cm).
- Shelf Supports: To reinforce the lower shelf, you might add crossbars between the side rails. Let's say 2 crossbars (60cm each) running front to back, spaced evenly. This prevents the shelf from sagging under weight.
Now, here's the key: every time two pipes meet, you need a joint. A vertical leg connecting to a horizontal rail? That's a joint. A horizontal rail connecting to a side rail? Another joint. Even the crossbars on the shelf will connect to the side rails with joints. The type of joint depends on the angle and movement needed—fixed joints for 90° angles that won't move, and rotatory joints for connections that might need adjustment.
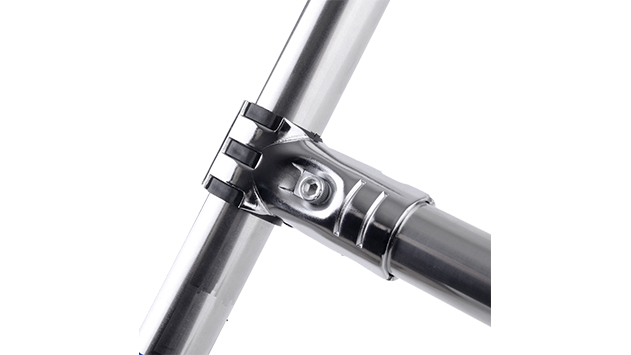
In our Workbench E example, most connections will use fixed joints (like 90° fixed lean pipe joints) for stability. But let's say you want the lower shelf to be adjustable—maybe you'll need to raise it later to fit taller toolboxes. That's where the one way rotatory straight lean pipe joint chrome comes in. By using these rotatory joints at the shelf's connection points, you can loosen the joint, rotate the shelf to the desired height, and retighten—no need to disassemble the entire structure.
Step 3: Understand the Role of One Way Rotatory Straight Lean Pipe Joints—Why This Joint Stands Out
Before diving into calculations, let's make sure we're clear on what makes the one way rotatory straight lean pipe joint chrome unique. Unlike fixed joints (which lock pipes in place at a set angle, like 45° or 90°), this joint allows rotation around its axis in one direction. Think of it like a door hinge that only swings open to the left—not all the way around, but enough to adjust the position of the connected pipe.
Why use this instead of a fully rotatory joint? Control. Fully rotatory joints can be too loose for some applications, leading to wobbly structures. The one way design lets you set a "stop" point, so the pipe rotates only as far as needed (e.g., 180°) before locking. This makes it perfect for adjustable shelves, tiltable work surfaces, or flow rack components that need to guide materials at a specific angle.
In our Workbench E, we'll use one way rotatory joints at the lower shelf's vertical connections. Each shelf side rail will connect to the vertical legs via these joints, allowing us to rotate the shelf up or down within a 180° range. That means 4 rotatory joints total for the shelf (one at each corner where the shelf rail meets the vertical leg).
It's important to note that not every joint in your project will be a one way rotatory type. Most will be fixed—like the 90° joints connecting the top frame rails to the vertical legs. So when calculating, you'll need to separate "rotatory joint needs" from "fixed joint needs." For now, let's focus on the rotatory ones, as that's our target component.

Step 4: Measure and Calculate Pipe Segments—The Devil's in the Details
With your design sketched and joints defined, it's time to measure the pipe segments accurately. Even a 1cm miscalculation can throw off your joint count, so grab a tape measure and double-check every dimension.
Let's revisit Workbench E's components and calculate the length of each lean pipe segment. Remember: pipe length is measured from the end of one joint to the end of the opposite joint. Joints add a small amount of length (usually 2-3cm per joint), but for simplicity, we'll assume the pipe length is the "clear span" between joints. If your pipe supplier provides pre-cut lengths, confirm their measurements—some suppliers cut pipes to the exact span, while others include the joint overlap.
| Component | Quantity | Length per Segment (cm) | Total Pipe Needed (cm) |
|---|---|---|---|
| Vertical Legs | 4 | 85 | 4 x 85 = 340 |
| Top Frame: Front/Back Rails | 2 | 120 | 2 x 120 = 240 |
| Top Frame: Side Rails | 2 | 60 | 2 x 60 = 120 |
| Lower Shelf: Front/Back Rails | 2 | 120 | 2 x 120 = 240 |
| Lower Shelf: Side Rails | 2 | 60 | 2 x 60 = 120 |
| Shelf Crossbars | 2 | 60 | 2 x 60 = 120 |
Now, let's verify these numbers. For the vertical legs: 4 legs at 85cm each = 340cm total. Top frame: 2 front/back rails (120cm each) + 2 side rails (60cm each) = 240 + 120 = 360cm. Lower shelf frame: same as top frame, 360cm. Crossbars: 2 x 60cm = 120cm. Total lean pipe needed: 340 + 360 + 360 + 120 = 1180cm (or 11.8 meters). This is helpful for ordering pipe, but we're here for joints—so let's shift focus.
Step 5: Map Joint Positions and Count Rotatory Joints—Connecting the Dots
Every pipe connection is a joint waiting to happen. Let's map out where joints go on Workbench E, focusing first on fixed joints, then isolating the one way rotatory straight lean pipe joint chrome.
Fixed Joints (Non-Rotatory)
- Top Frame to Vertical Legs: The top frame is a rectangle, so each corner connects a vertical leg to a front/back rail and a side rail. That's 4 corners, each requiring a 90° fixed lean pipe joint. Total: 4 joints.
- Top Frame Corners: The front/back rails connect to the side rails at the top frame's corners. Wait—no, actually, the vertical legs are the supports here. The front rail connects to the vertical leg via a joint, and the side rail connects to the same vertical leg via another joint. So each vertical leg has 2 fixed joints at the top (one for front/back rail, one for side rail). 4 legs x 2 joints = 8 fixed joints for the top frame connections.
- Shelf Crossbars to Side Rails: The crossbars on the lower shelf connect to the shelf's side rails. Each crossbar has 2 ends, so 2 crossbars x 2 ends = 4 connections. These use fixed 90° joints (since the crossbars don't need to rotate). Total: 4 joints.
Now, the star of the show: one way rotatory straight lean pipe joint chrome. These are used at the lower shelf's connection to the vertical legs. The lower shelf's side rails need to connect to the vertical legs, but with rotatory joints to allow height adjustment. There are 4 side rail ends (2 side rails, each with 2 ends), so 4 connections. Each connection uses one rotatory joint. Total rotatory joints so far: 4.
Wait—what about the lower shelf's front/back rails? Those connect to the shelf's side rails, right? Yes. Each front/back rail has 2 ends, connecting to the side rails. That's 2 front/back rails x 2 ends = 4 connections, each using a 90° fixed joint. Total fixed joints here: 4.
Let's tally fixed joints to ensure we're not missing anything: 8 (top frame to legs) + 4 (shelf crossbars) + 4 (shelf front/back to side rails) = 16 fixed joints. Rotatory joints: 4. But wait—are there any other rotatory joints we might need?
Suppose you decide to add a small tool holder on the side of the workbench, mounted on a swing arm so it can move out of the way when not in use. The swing arm would connect to the workbench's side rail via a one way rotatory joint. That adds 1 more rotatory joint. For now, let's keep it simple and stick to the adjustable shelf, so 4 rotatory joints.
Step 6: Account for Accessories and Adjustments—The Little Things That Add Up
Joints don't work alone. They rely on accessories like pipe end caps (to prevent sharp edges), clamps (to secure joints tightly), and sometimes mounting plates (if you're attaching lean pipe to aluminum profile, for example). While these don't directly affect the quantity of rotatory joints, they're worth noting to ensure your overall project stays on track.
For Workbench E, you'll need plastic pipe end caps for all exposed pipe ends (to avoid snags on clothing or tools). Each pipe has 2 ends, and we have 4 vertical legs + 2 top front/back rails + 2 top side rails + 2 shelf front/back rails + 2 shelf side rails + 2 crossbars = 14 pipes. 14 pipes x 2 ends = 28 end caps. But only the top and bottom of the vertical legs are exposed (the middle ends are covered by joints), so adjust accordingly—you'll need 4 vertical legs x 2 ends = 8 end caps (top and bottom), plus any exposed ends on rails (if they extend beyond joints, which they shouldn't if measured correctly). Moral of the story: accessories add up, but they don't change your joint count.
Another adjustment: pipe length tolerance. Most lean pipe is sold in standard lengths (e.g., 3 meters), so you'll need to cut it to size. If your pipe cutter isn't perfect, you might end up with a pipe that's 1cm shorter than planned. This won't affect joint count, but it could mean you need an extra pipe if you're short on length. Always order 5-10% extra pipe to account for cutting errors.
Step 7: Add a Contingency Buffer—Prepare for the Unexpected
Even the best-laid plans go awry. Maybe a joint gets dropped and cracks, or you decide mid-build to add a second shelf. That's why a contingency buffer is non-negotiable. For small projects like Workbench E, a 10% buffer on rotatory joints is safe. Since we calculated 4 rotatory joints, 10% of 4 is 0.4—round up to 1 extra joint. Total rotatory joints to order: 4 + 1 = 5.
Why 10%? It's a sweet spot between overbuying (wasting money) and underbuying (delaying the project). For larger projects—like a warehouse with 50 flow racks—you might drop to 5% to avoid excessive waste, but for a single workbench, 10% is reasonable.
Common Mistakes to Avoid—Learn from Others' Headaches
Even seasoned builders make mistakes when calculating joints. Here are the most frequent ones to watch for:
- Forgetting Hidden Connections: It's easy to miss connections like crossbars or diagonal braces. Always double-check your design for "invisible" supports—they add joints!
- Confusing Joint Types: Mixing up fixed and rotatory joints in your count. Create a separate list for each type to avoid overcounting rotatory joints.
- Ignoring Pipe Diameter: Most lean pipe is 28mm, but if you're using aluminum lean pipe (which can be 30mm or 40mm), joints are sized differently. Ordering the wrong size joint is a costly mistake.
- Skipping the Buffer: "I'll just run to the hardware store if I need more" sounds good until the store is out of stock. Always buffer.
Final Calculation for Workbench E: One Way Rotatory Joints = 5
Let's recap: Workbench E (120x60x85cm) with a lower adjustable shelf requires 4 one way rotatory straight lean pipe joints chrome for the shelf connections, plus 1 extra for contingency. Total: 5 joints. That's it! With this number, you can order confidently, knowing you have enough to build and a little extra for safety.
Conclusion: Build Smarter, Not Harder
Calculating the right quantity of one way rotatory straight lean pipe joint chrome doesn't have to be complicated. By defining your project scope, breaking down components, mapping joint positions, and adding a buffer, you can avoid the stress of running out of parts or wasting money on excess. Remember, the goal is to build a structure that works for you—flexible, sturdy, and tailored to your needs. With the right number of joints, you're one step closer to that seamless build.
Whether you're a small workshop owner or a production manager overseeing a large lean system rollout, this process applies. Take the time to sketch, measure, and count—your future self (and your budget) will thank you.