- Company Articles
- Products and Technology
- Installation And Maintenance
- How to Clean & Lubricate 40 Roller Track Placon Mount Flat for Optimal Performance

How to Clean & Lubricate 40 Roller Track Placon Mount Flat for Optimal Performance
Related Product
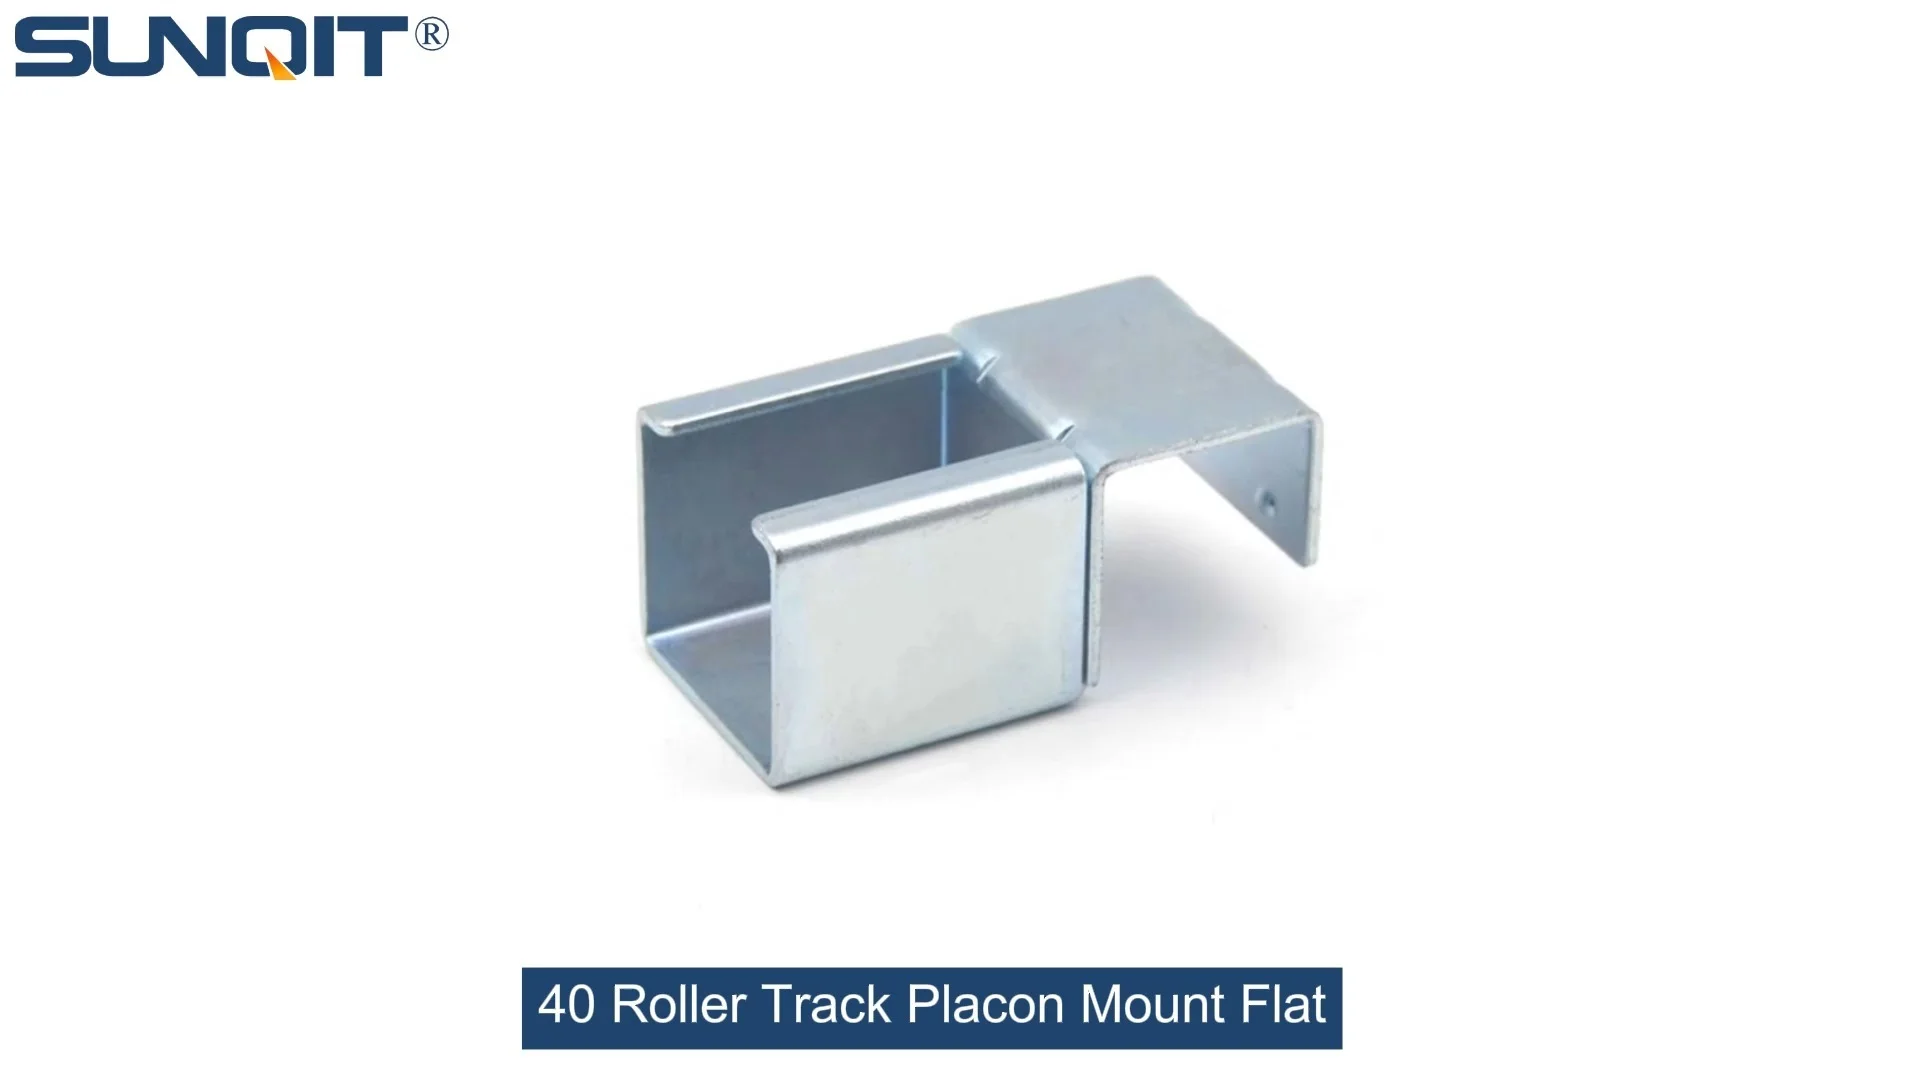
40 Roller Track Placon Mount Flat
Roller track placon mount work as a connector for roller track and pipe or aluminum profile in rack syetem, it is a necessary parts in rack system which widely used in industrial plant and logistic,warehouse storage.
Hey there! If you've ever walked through a busy production line, you've probably seen those sleek metal tracks where bins, parts, and products glide effortlessly from one workstation to another. Chances are, some of those tracks are the 40 Roller Track Placon Mount Flat—quiet, durable, and totally essential for keeping your workflow moving. But here's the thing: even the toughest equipment needs a little TLC. Over time, dust, grease, and tiny debris can build up, turning that smooth glide into a clunky, noisy hassle. And if you ignore it? You might end up with jams, slower production, or even damaged parts. Not exactly ideal, right?
Whether you're running a lean system in automotive manufacturing, managing a warehouse logistics setup, or assembling electronics on an aluminum profile workstation, keeping your roller tracks in top shape is non-negotiable. Today, we're breaking down everything you need to know to clean and lubricate your 40 Roller Track Placon Mount Flat like a pro. No fancy tools required, just some simple steps and a little patience. Let's dive in!
First Things First: What Even Is a 40 Roller Track Placon Mount Flat?
Before we get our hands dirty, let's make sure we're all on the same page. The 40 Roller Track Placon Mount Flat is a workhorse in material handling. It's designed to mount directly onto aluminum profiles (you know, those versatile metal frames that make up everything from workbenches to flow racks) and uses small, smooth rollers to let items slide with minimal effort. Think of it as the "conveyor belt lite" for your lean system—perfect for moving lightweight to medium-heavy loads without needing motors or complex setups.
What makes it special? Its flat design means it sits low on the aluminum profile, saving space, and the "placon mount" part refers to how it attaches—securely, sturdily, and without extra bulk. But here's the catch: all those nooks between the rollers, the tiny gaps in the roller track placon mount connector, and even the surface of the aluminum guide rail? They're magnets for dust, oil, and bits of debris. And when that gunk builds up, your track goes from "silent helper" to "squeaky troublemaker." Not cool.
Pro Tip:
The 40 Roller Track Placon Mount Flat is often paired with other roller track accessories like end supports, connectors, and side guides. When you clean the track, don't forget these smaller parts—they're just as important for smooth operation!
Why Bother with Cleaning & Lubrication? Let's Talk Consequences
Okay, so maybe you're thinking, "It's just a track—how bad can a little dust be?" Spoiler: worse than you think. Let's break it down:
- Slower Production: A dirty track creates friction. Friction means items don't slide as easily, so your team spends extra time pushing or adjusting loads. Over a day, that adds up to lost minutes (or hours!) of productivity.
- Unnecessary Wear & Tear: Debris like metal shavings or grit can scratch the rollers or the aluminum profile itself. Over time, those scratches turn into grooves, and suddenly you're replacing parts way earlier than you should.
- Safety Risks: A jammed track isn't just annoying—it's a hazard. If a bin gets stuck and someone yanks it, items could fall, or the track could even bend. No one wants that!
- Noise Pollution: Ever heard a rusty door hinge? Multiply that by 10, and you've got a dirty roller track. Constant squeaking and grinding can make your workspace stressful and distract your team.
But here's the good news: with regular cleaning and lubrication, you can avoid all of this. Think of it like changing the oil in your car—small, simple steps that keep the whole system running better, longer. Plus, if you're into lean manufacturing (and let's be real, if you're using roller tracks, you probably are), this is just good practice. Lean is all about efficiency, and a well-maintained track is the definition of efficient.

Tools You'll Need: Gather These Before You Start
No need to raid a hardware store—you probably already have most of these tools lying around your workshop. Here's what to grab:
| Tool | Why You Need It | Pro Tips |
|---|---|---|
| Microfiber cloths | To wipe away dust and loose debris without scratching surfaces | Use separate cloths for cleaning and drying—you don't want to spread moisture! |
| Soft-bristled brush (toothbrush or small paintbrush works!) | To get into tight spots between rollers and around connectors | Opt for a brush with synthetic bristles—they're stiffer than natural hair but still gentle. |
| Compressed air can or air compressor | Blows out stubborn dust from hard-to-reach gaps | Hold the nozzle 6-8 inches from the track to avoid damaging rollers. |
| Mild detergent (dish soap or neutral pH cleaner) | For greasy or sticky stains (think oil from machinery or food residue in a warehouse) | Never use harsh chemicals like bleach or ammonia—they can corrode the aluminum! |
| Small bucket of warm water | To mix with detergent for tough stains | Keep the water lukewarm, not hot—extreme temps can warp plastic roller parts. |
| Lint-free towels | To dry parts thoroughly after cleaning | Microfiber towels work here too—just make sure they're clean! |
| Industrial lubricant (light machine oil or silicone spray) | To reduce friction between moving parts | Check if your track is used in food production—if so, use food-grade lubricant! |
| Precision oiler or small brush | To apply lubricant exactly where it's needed (no messy overspray!) | A toothpick works in a pinch for tiny lubrication points. |
Heads Up!
Always disconnect power to any motorized parts near the track before you start. Even if your 40 Roller Track Placon Mount Flat is manual, safety first—no one wants to accidentally bump a switch and have parts moving while you're cleaning.

Step 1: Cleaning the 40 Roller Track Placon Mount Flat—Let's Get Rid of the Gunk
Now that you've got your tools ready, it's time to roll up your sleeves and start cleaning. Follow these steps, and you'll have that track looking (and working!) like new in no time.
1.1 Start with a Dry Clean: Remove Loose Debris
First, we're going to tackle the easy stuff—dust, dirt, and loose particles. Grab your microfiber cloth and gently wipe down the entire length of the track. Pay extra attention to:
- Between the rollers: Use the soft-bristled brush to sweep out any dust or hair that's gotten trapped. A toothbrush works great here for small gaps.
- Under the track: Yep, even the bottom! Debris can collect where the track mounts to the aluminum profile, so slide your cloth or brush underneath (gently—you don't want to loosen the roller track placon mount connector).
- End supports and connectors: These are the parts that hold the track in place. Wipe around the bolts and joints to remove any buildup.
If there's a lot of dust (we're looking at you, woodworking or metal shops!), hit the track with compressed air. Hold the can at a slight angle and sweep from one end to the other—this will blow debris away instead of pushing it into.
1.2 Tackle Sticky or Greasy Stains: Time for a Wet Clean
Dry cleaning handles dust, but what about oil, grease, or sticky spills? That's where the mild detergent comes in. Mix a few drops of dish soap with warm water in your bucket—you want a sudsy solution, not a bubble bath. Dip a clean microfiber cloth into the soapy water, wring it out thoroughly (you don't want water dripping into the roller bearings!), and gently wipe the stained areas.
For extra-tough grease (like the kind that builds up near machine tools), let the soapy cloth sit on the stain for 30 seconds before wiping. Avoid scrubbing too hard—you don't want to scratch the aluminum or damage the roller wheels. Once the stains are gone, take a dry microfiber cloth and wipe the area again to remove any soapy residue.
Pro Move:
If your track has plastic roller track guide rails (like the yellow or grey ones you might see in some setups), be extra gentle. Plastic can scratch more easily than metal, so use a softer cloth and avoid harsh scrubbing.
1.3 Dry Everything—No Moisture Left Behind!
Water and metal don't mix well, so drying is non-negotiable. After wet cleaning, use a lint-free towel to dry every part of the track: rollers, rails, connectors, and the aluminum profile it's mounted on. If you're in a hurry, you can use compressed air again to blow-dry small crevices, but always follow up with a towel to be safe. Any leftover moisture can lead to rust (especially on steel components) or mold (in humid warehouses)—yuck.
1.4 Inspect for Damage: Clean = Perfect Time to Check
Now that the track is clean, take a minute to inspect it closely. Look for:
- Scratches or dents: Deep scratches on the rollers or rails can catch on items and cause jams.
- Loose parts: Are the roller track placon mount connectors tight? Do any rollers wiggle or feel loose? Tighten bolts if needed, but don't overtighten—you could strip the threads.
- Worn rollers: Spin each roller with your finger. They should turn smoothly, with no grinding or sticking. If a roller feels rough or doesn't spin freely, it might need to be replaced.
If you spot any issues, note them down and fix them before moving on to lubrication. There's no point in lubricating a damaged track—it's like putting a band-aid on a broken arm.

Step 2: Lubrication—Keep It Smooth, Keep It Quiet
Cleaning removes the gunk, but lubrication is what keeps the track gliding like butter. Think of it as giving your track a spa day—moisturizing those moving parts so they don't get stiff and creaky. Here's how to do it right.
2.1 Choose the Right Lubricant: Not All Oils Are Created Equal
First, pick the right lubricant. The wrong one can do more harm than good. Here's a quick guide:
- Light Machine Oil: Great for general use in dry, indoor environments (like electronics assembly lines). It's thin, so it penetrates small gaps easily.
- Silicone Spray: Perfect for plastic parts (like plastic roller track guide rails) or if you need a lubricant that won't attract dust. It dries to a smooth finish and doesn't leave a greasy residue.
- Food-Grade Lubricant: If your track is used in food or pharmaceutical production, you must use food-grade oil or grease. Regular lubricants can contaminate products!
- Grease: For heavy-duty applications (like moving metal parts in automotive shops). It's thicker, so it stays in place longer, but it can attract dust in dirty environments.
Avoid WD-40 unless you're using it to clean (it's a solvent, not a long-term lubricant!). And never use cooking oil—yes, we've seen it happen. It goes rancid, smells bad, and attracts bugs. No thanks.
2.2 Identify Lubrication Points: Where Does the Track Need Love?
You don't need to lubricate the entire track—just the moving parts. For the 40 Roller Track Placon Mount Flat, focus on:
- Roller Bearings: Each roller has a small bearing in the center. This is where most friction happens, so it's your top priority.
- Roller Axles: The metal pins that hold the rollers in place. A drop of oil here prevents rust and keeps the rollers spinning freely.
- Joints and Connectors: If your track has moving joints (like those found in flexible roller track setups), a tiny bit of lubricant will keep them from squeaking.
Pro tip: Use a precision oiler or a small brush to apply the lubricant. This way, you can target exactly where it's needed without getting oil all over the track (which would just attract more dust).
2.3 Apply Lubricant: Less Is More
Now, let's get to applying. Remember: less is more . Too much lubricant will drip, attract dust, and make a mess. For roller bearings, place 1-2 drops of oil on each bearing (you can usually see a small gap where the bearing meets the roller). Spin the roller gently to work the oil into the bearing—you'll feel it start to move more smoothly right away.
For axles and joints, apply a tiny amount of oil or a light spray of silicone. Wipe away any excess with a clean cloth—you want a thin, even layer, not a puddle.
Watch Out!
If your track is part of an ESD workstation (used for sensitive electronics), make sure your lubricant is ESD-safe. Regular oils can conduct electricity, which is a big no-no around circuit boards or microchips.
2.4 Let It Sit, Then Test: Patience Is Key
After lubricating, let the track sit for 5-10 minutes. This gives the lubricant time to seep into all the tiny gaps. Then, test it out! Place a lightweight bin or box on the track and give it a gentle push. It should glide smoothly, with no sticking or squeaking. If it still feels stiff, check if you missed a lubrication point or if there's leftover debris you didn't clean.
How Often Should You Do This? Let's Talk Maintenance Schedules
"Okay, I cleaned and lubricated—now how long until I have to do it again?" Great question! The answer depends on how much you use the track and what environment it's in. Here's a general guide to help you plan:
| Environment | Cleaning Frequency | Lubrication Frequency | Extra Tips |
|---|---|---|---|
| Clean Indoor (e.g., 3C assembly, medical device production) | Every 2-3 weeks | Monthly | Wipe down weekly with a dry cloth to prevent dust buildup. |
| Moderate Dust (e.g., automotive parts, warehouse logistics) | Weekly | Every 2 weeks | Use compressed air twice a week to blow out debris from rollers. |
| High Dust/Moisture (e.g., woodworking, outdoor loading docks) | 3-4 times weekly | Weekly | Check for rust on metal parts; apply a rust inhibitor if needed. |
And don't forget daily checks! Take 30 seconds each morning to glance at the track. Is there any obvious debris? Are the rollers spinning? Catching small issues early saves big headaches later.
Troubleshooting: Common Problems and How to Fix Them
Even with regular maintenance, things can go wrong. Here are some quick fixes for common track issues:
Problem: Track is noisy (squeaking or grinding)
Cause: Likely due to dry or dirty roller bearings. If it's a grinding sound, there might be debris stuck between the rollers.
Fix: Clean the track with compressed air, then lubricate the bearings. If the noise persists, check for damaged rollers and replace if needed.
Problem: Items are getting stuck or sliding unevenly
Cause: Bent track, loose rollers, or debris blocking the path. If it's uneven, the track might not be mounted straight on the aluminum profile.
Fix: Tighten the roller track placon mount connector to ensure the track is straight. Clean between the rollers to remove debris. If the track is bent, you may need to replace the section.
Problem: Roller won't spin
Cause: Seized bearing (from lack of lubrication or rust) or debris jammed in the roller.
Fix: Try lubricating the bearing with a few drops of oil and spinning the roller manually. If it still won't move, replace the roller—it's cheaper than replacing the entire track!
Final Thoughts: Your Track Deserves the Love
At the end of the day, the 40 Roller Track Placon Mount Flat might not be the flashiest piece of equipment in your lean system, but it's one of the most important. A little time spent cleaning and lubricating now will save you time, money, and frustration down the line. Plus, your team will thank you—no one likes working with a squeaky, jammed track!
Remember, maintenance isn't just about fixing problems—it's about preventing them. By making cleaning and lubrication a regular habit, you'll keep your track running smoothly for years, keep your production line efficient, and maybe even extend the life of your entire lean system. And isn't that what lean is all about? Making small, consistent improvements to create a better, more efficient workflow.
So go ahead—grab your microfiber cloth, your lubricant, and give your 40 Roller Track Placon Mount Flat the care it deserves. Your future self (and your production numbers) will thank you!