- Company Articles
- Products and Technology
- Installation And Maintenance
- How to Clean and Maintain Duplex Aluminum Pipe Joints in Harsh Environments

How to Clean and Maintain Duplex Aluminum Pipe Joints in Harsh Environments
Related Product
Duplex Aluminum Pipe Joint
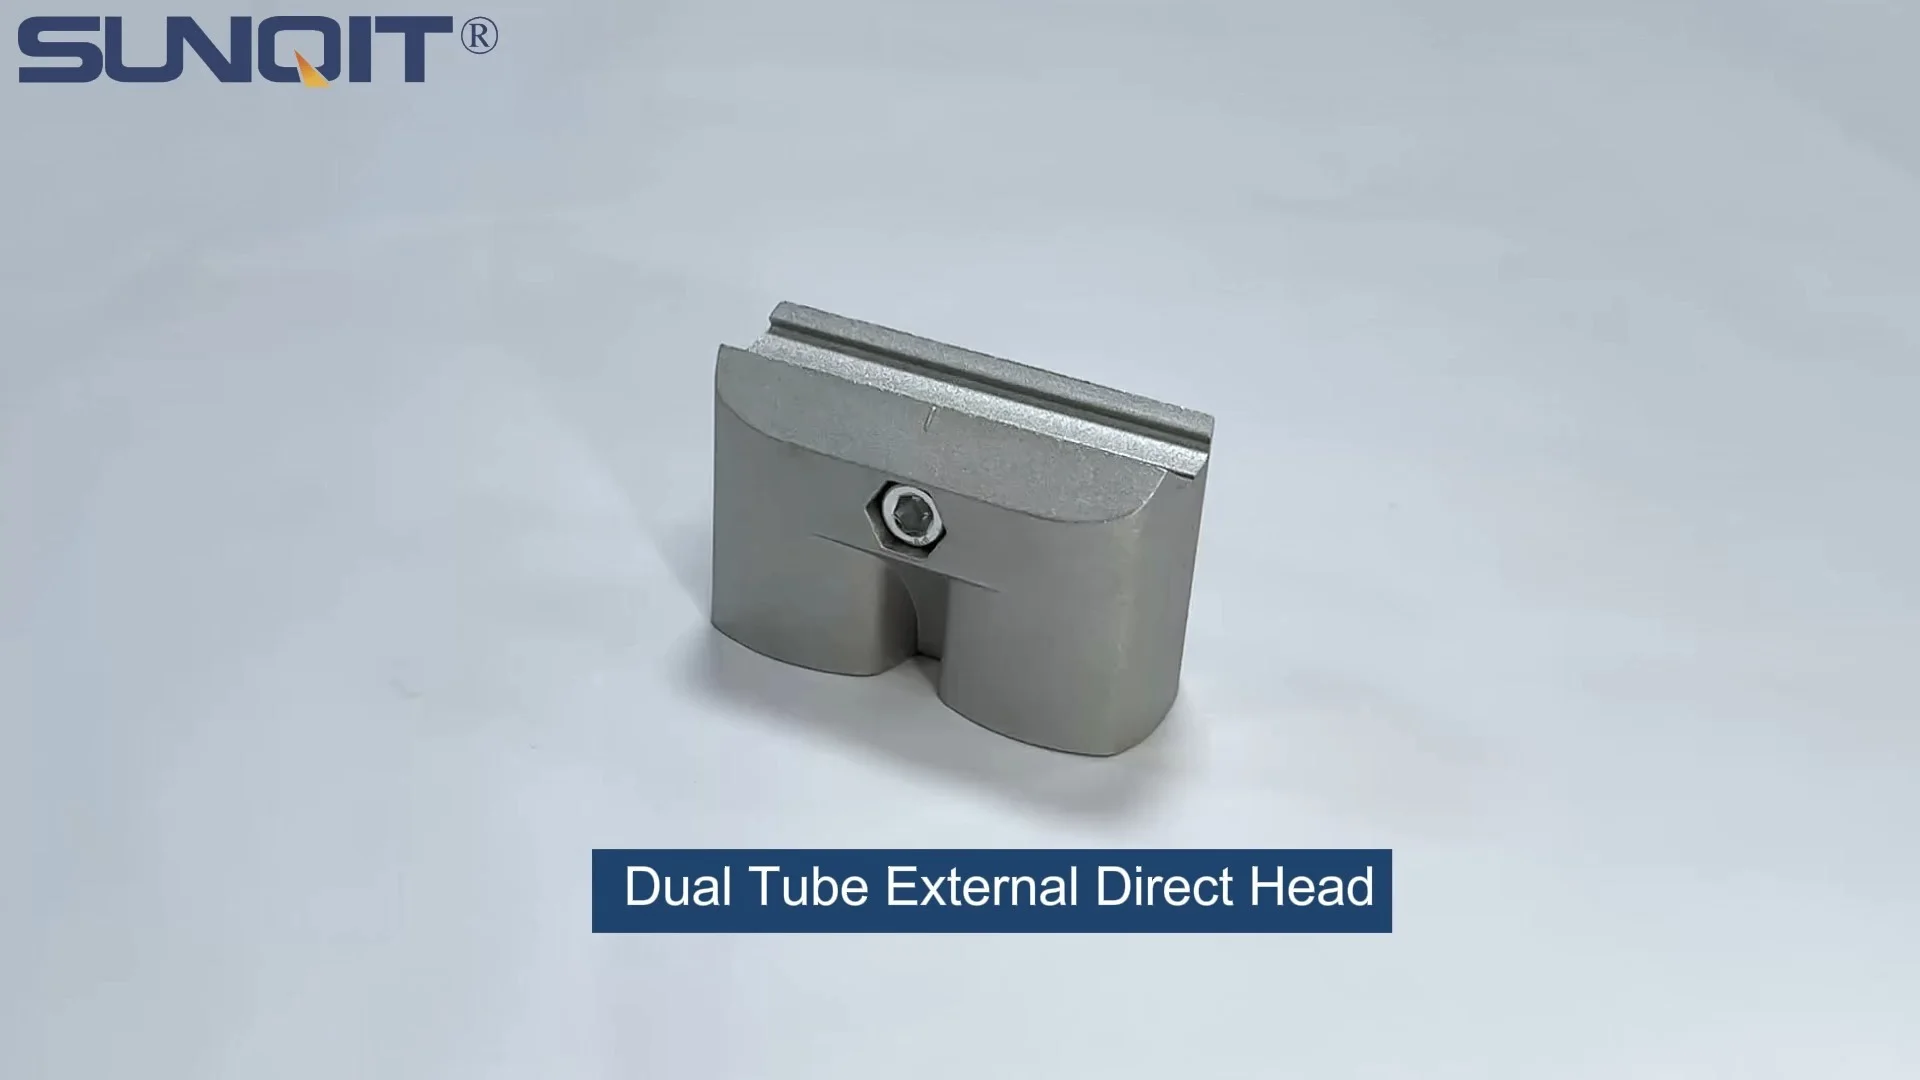
Duplex Aluminum pipe joint used for one pcs 28pcs aluminum pipe and one pcs of 28mm duplex pipe connection in straight angle.
If you've ever walked through a busy manufacturing plant, a warehouse with constant material flow, or a workshop where precision matters, you've likely encountered the unsung heroes of industrial efficiency: aluminum lean pipe structures. These versatile systems—workbenches, conveyor lines, material racks, and turnover trolleys—are the backbone of streamlined operations, and at their core lie components so critical yet often overlooked: duplex aluminum pipe joints. These small but mighty connectors hold together aluminum lean pipe frameworks, ensuring stability, flexibility, and longevity. But in harsh environments—where dust clogs crevices, moisture breeds corrosion, and chemicals eat away at surfaces—these joints face unique challenges. Neglecting their care isn't just a recipe for wobbly workbenches or jammed conveyors; it's a threat to productivity, safety, and your bottom line. In this guide, we'll dive deep into the art and science of cleaning and maintaining duplex aluminum pipe joints in even the toughest conditions, so your aluminum lean pipe systems keep performing at their best, day in and day out.
Understanding Duplex Aluminum Pipe Joints: More Than Just a "Connector"
Before we roll up our sleeves to clean and maintain, let's take a moment to appreciate what makes duplex aluminum pipe joints special. Unlike standard pipe connectors, duplex aluminum joints are engineered for durability and adaptability, making them ideal for aluminum lean pipe systems that need to withstand the rigors of industrial use. Composed of high-grade aluminum alloys—often with added elements like magnesium or silicon for strength—these joints are designed to resist rust, support heavy loads, and flex without breaking. Their "duplex" nature refers to their dual functionality: they not only connect pipes but also allow for adjustments, rotations, and reconfigurations, which is why they're a favorite in dynamic workspaces where layouts change with production needs.
In aluminum lean pipe setups, duplex joints act as the "knees and elbows" of the structure. A workbench, for example, relies on these joints to secure vertical supports to horizontal beams, ensuring the surface stays level even when loaded with tools, parts, or assemblies. Similarly, a conveyor system's roller tracks depend on properly aligned joints to keep materials sliding smoothly, preventing jams that can halt an entire production line. But here's the catch: their design—with crevices, threads, and moving parts—also makes them magnets for the very elements that define harsh environments. Dust settles in the threads, moisture pools in the gaps, and oils or chemicals from manufacturing processes coat their surfaces, all of which can degrade performance over time.
The Hidden Dangers of Harsh Environments: Why These Joints Struggle
Harsh environments come in many forms, but they all share one trait: they accelerate wear and tear on industrial equipment. Let's break down the biggest threats to duplex aluminum pipe joints and how they take their toll:
Dust and Debris: In woodworking shops, metal fabrication plants, or warehouses with unpaved yards, dust is everywhere. Fine particles settle into the threads and gaps of duplex joints, acting like sandpaper every time the joint is adjusted or vibrates during use. Over time, this abrasion wears down the joint's internal components, making connections loose or stiff. Imagine trying to tighten a bolt covered in sawdust—you can't get a secure grip, and the dust grinds against the metal with every turn. That's exactly what happens to your joints.
Moisture and Humidity: Food processing facilities, outdoor storage areas, or regions with high humidity levels expose joints to constant moisture. Aluminum is naturally corrosion-resistant thanks to its oxide layer, but when that layer is compromised—by scratches, chemicals, or prolonged moisture—rust (or more accurately, aluminum oxide) can form. Unlike iron rust, which flakes off, aluminum oxide creates a powdery white film that weakens the joint's structural integrity. In extreme cases, pitting can occur, leaving tiny holes that compromise the joint's ability to hold tension.
Chemicals and Oils: Manufacturing environments often use coolants, lubricants, solvents, or cleaning agents that spill or mist onto equipment. Many of these chemicals are harsh: oils can attract dust, creating a sticky sludge that clogs joints; acidic or alkaline solutions can eat away at the aluminum surface; and even mild detergents, if left on, can degrade the joint's finish over time. A single spill near a workbench might seem harmless, but repeated exposure turns small stains into big problems.
Mechanical Stress: Vibrations from nearby machinery, heavy loads placed on workbenches, or constant movement of materials on conveyor systems put stress on duplex joints. In harsh environments, this stress is amplified—if a joint is already weakened by dust or corrosion, the added strain can cause it to bend, crack, or fail entirely. A joint that works perfectly in a climate-controlled office would buckle under the daily punishment of a busy automotive plant.

Why Maintenance Matters: Beyond "Just Keeping It Clean"
You might be thinking, "We've got bigger fish to fry—why spend time on tiny joints when there are machines to fix and orders to ship?" The truth is, neglecting duplex aluminum pipe joint maintenance is a false economy. Here's why:
Safety First: A loose joint in a workbench could lead to a collapse, injuring an employee or damaging expensive equipment. A seized joint in a conveyor system might cause materials to pile up, creating a fire hazard or blocking emergency exits. In industries like aerospace or medical device manufacturing, where precision is non-negotiable, even a slightly misaligned joint could throw off measurements, leading to defective products and compliance issues.
Productivity Kills: When a joint fails, it doesn't just take down one workbench or conveyor section—it disrupts the entire workflow. Imagine a packaging line where a material rack's joint gives way, spilling boxes onto the floor. Workers stop to clean up, the line halts, and deadlines slip. According to a 2023 study by the Manufacturing Performance Institute, unplanned downtime costs manufacturers an average of $50,000 per hour. A $5 can of cleaner and 10 minutes of weekly maintenance suddenly seem like a bargain.
Longevity and Cost Savings: Aluminum lean pipe systems are designed to be modular and long-lasting, but their lifespan depends on component care. Replacing a single duplex joint costs a few dollars; replacing an entire workbench or conveyor section because multiple joints failed? That's hundreds or thousands. Regular maintenance extends the life of your joints, delaying the need for replacements and keeping your initial investment working harder for longer.
Quality Control: In environments where product quality is critical—like electronics assembly or pharmaceutical packaging—even minor vibrations from loose joints can affect precision. A wobbly workbench might cause a technician to misalign a circuit board, leading to defective products. By keeping joints tight and clean, you ensure consistency in every step of your process.

Step-by-Step Cleaning: How to Give Your Joints a Deep Clean
Cleaning duplex aluminum pipe joints isn't rocket science, but it does require attention to detail—especially in harsh environments. Follow this step-by-step guide to remove grime, prevent corrosion, and restore functionality:
Step 1: Gather Your Tools (and Aluminum Pipe Accessories)
Before you start, assemble the right supplies. You'll need:
- Soft-bristled brushes: A toothbrush (new, obviously!) or small parts brush works for tight crevices. Avoid steel wool or wire brushes—they'll scratch the aluminum, creating new spots for corrosion.
- Microfiber cloths: These trap dust and debris without leaving lint, which is crucial for avoiding future buildup.
- Clean water: Preferably distilled or deionized if your tap water is hard (mineral deposits from hard water can leave spots).
- Mild detergent: A pH-neutral soap (like dish soap without added moisturizers or antibacterials) for general cleaning. Avoid bleach, ammonia, or abrasive cleaners.
- Specialized cleaners: For tough grease or oil, use a citrus-based degreaser (biodegradable options are best for eco-friendly shops). For light corrosion, a 50/50 mix of white vinegar and water works wonders (test on a small, hidden area first to ensure it doesn't discolor the joint).
- Compressed air: A can of compressed air or an air compressor with a narrow nozzle helps blow dust out of threads and hard-to-reach gaps.
- Rubber gloves: Protect your hands from chemicals and grime, especially if using degreasers.
- Aluminum pipe accessories (optional): If joints are heavily corroded or seized, you might need replacement washers, O-rings, or even new joints—having spares on hand saves time.
Step 2: Pre-Inspection (Spot the Problem Areas)
Before diving into cleaning, take a few minutes to inspect each joint. Look for:
- Corrosion: White, powdery deposits or pitting on the surface.
- Loose connections: Wiggle the pipes gently—if there's movement, the joint may need tightening after cleaning.
- Debris buildup: Caked-on dust, grease, or dried chemicals in threads or around the joint's base.
- Damage: Cracks, bends, or stripped threads—these joints may need replacement, not just cleaning.
Note problem areas with a marker or phone photo—this helps you focus your cleaning efforts.
Step 3: Remove Loose Debris (Dry Cleaning First)
Never start with wet cleaning—moisture mixed with dust creates mud that's harder to remove. Instead:
- Use the compressed air to blow dust out of threads, crevices, and around the joint's edges. Hold the nozzle 2-3 inches from the joint to avoid damaging delicate parts.
- Brush away stubborn debris with the soft-bristled brush. For threaded joints, gently rotate the brush in the threads to dislodge trapped particles.
- Wipe the joint's exterior with a dry microfiber cloth to remove surface dust.
Step 4: Wet Cleaning (Tackle Grease, Oil, and Grime)
Now it's time to get wet. The goal here is to dissolve oils and lift remaining dirt without scratching the aluminum:
- For general grime: Mix a few drops of mild detergent with warm water. Dip the microfiber cloth into the solution, wring out excess water (you want damp, not dripping), and wipe the joint thoroughly. Pay extra attention to creases and threads—use the toothbrush to scrub gently if needed.
- For grease/oil: Apply a small amount of citrus degreaser to a clean microfiber cloth (avoid spraying directly on the joint, as overspray can damage nearby equipment). Rub the greasy areas in a circular motion until the grease breaks down. Let it sit for 2-3 minutes for heavy buildup, then wipe clean with a damp cloth.
- For light corrosion: Dip the toothbrush in the vinegar-water mix and scrub the affected area gently. The acid in vinegar dissolves aluminum oxide without harming the underlying metal. Rinse immediately with clean water to stop the reaction, then dry thoroughly.
Step 5: Rinse and Dry (Prevent Water Spots)
Residue from cleaners or hard water can leave spots or even etch the aluminum, so rinsing and drying are critical:
- Use a clean, damp microfiber cloth (rinsed in distilled water) to wipe away soap or cleaner residue. For threaded joints, run the damp cloth through the threads to ensure no cleaner is trapped.
- Immediately dry the joint with a dry microfiber cloth. For tight spots, use compressed air to blow out moisture—trapped water is a corrosion risk, especially in humid environments.
- Let the joint air-dry for 5-10 minutes in a well-ventilated area to ensure no moisture remains before reassembly or use.
Step 6: Post-Cleaning Inspection (Check for Wear)
After cleaning, inspect the joint again. Look for:
- Stripped threads (if the joint spins freely without tightening)
- Cracks or bends in the joint body
- Worn or damaged gaskets/O-rings (common in joints with moving parts)
If you spot any of these issues, replace the joint or its aluminum pipe accessories (like gaskets) immediately. A cleaned but damaged joint is still a liability.

Maintenance Routines: Keeping Joints Strong for the Long Haul
Cleaning is just one part of the equation—consistent maintenance is what keeps duplex aluminum pipe joints performing in harsh environments. Think of it like changing the oil in your car: a small, regular task that prevents catastrophic failure down the line. Here's a schedule to follow:
Daily: Quick Visual Checks
Take 30 seconds each day to scan your aluminum lean pipe structures. Look for:
- Loose joints (wobbly pipes, gaps between joint and pipe)
- Visible debris (dust, oil, or chemical spills on joints)
- Signs of corrosion (white powdery film, discoloration)
If you spot something, address it immediately—don't wait for "when you have time." A quick wipe with a dry cloth or a blast of compressed air can prevent a small dust buildup from becoming a big problem.
Weekly: Deep Cleaning (Focus on High-Stress Areas)
Set aside 15-20 minutes each week to clean joints in high-stress zones: workbenches where tools are constantly moved, conveyor systems with heavy material flow, or areas near machinery that vibrates heavily. Follow the step-by-step cleaning process above, paying extra attention to these hotspots.
Monthly: Tighten and Lubricate
Even with daily checks, joints can loosen over time due to vibration. Once a month, use a wrench (adjustable or socket, depending on the joint type) to gently tighten connections—*don't over-tighten*, as this can strip threads or crack the joint. Then, apply a small amount of dry lubricant (like graphite powder or silicone spray) to threaded joints and moving parts. Avoid oil-based lubricants—they attract dust and create sludge. For aluminum-on-aluminum contact points, a thin layer of anti-seize compound (copper or nickel-based, not graphite if electrical conductivity is a concern) can prevent galling (a form of wear where metal surfaces stick together).
Quarterly: Inspect Aluminum Pipe Accessories and replace as Needed
Joints don't work alone—they rely on washers, gaskets, and connectors (aluminum pipe accessories) to stay tight and protected. Every three months, inspect these parts for wear: cracked washers, brittle O-rings, or bent connectors. replace any damaged accessories—they're cheap insurance against joint failure. Keep a stock of common parts (like 45° and 90° joint washers, end caps, and thread sealants) in your maintenance closet to avoid delays.
Annually: Full System Audit
Once a year, take a holistic approach. Disassemble non-critical aluminum lean pipe structures (like unused material racks) to inspect hidden joints. Check for signs of internal corrosion or wear that might not be visible during daily checks. This is also a good time to reconfigure systems if needed—adding extra supports to joints that show stress, or relocating structures away from particularly harsh areas (like moving a workbench out of a drafty corner with high humidity).
Troubleshooting Common Issues: When Joints Go Wrong
Even with meticulous maintenance, duplex aluminum pipe joints can run into problems in harsh environments. Here's how to diagnose and fix the most common issues:
Problem 1: Corrosion (White Powder or Pitting)
Signs: White, powdery deposits on the joint; small pits or holes in the aluminum surface; joint feels rough to the touch.
Causes: Prolonged moisture exposure, chemical spills, or scratched oxide layers.
Solution:
- Clean the joint using the vinegar-water method outlined earlier to remove existing corrosion.
- Rinse and dry thoroughly, then apply a thin coat of clear, anti-corrosive spray (like a silicone-based protectant) to seal the surface. Avoid thick paints, which can interfere with joint movement.
- For severe pitting (holes deeper than 0.5mm), replace the joint—corroded metal can't be fully restored, and the joint's structural integrity is compromised.
Problem 2: Stiff or Seized Joints
Signs: Joint won't rotate or adjust; requires excessive force to move; makes grinding noises when adjusted.
Causes: Dust or debris in threads; lack of lubrication; corrosion between moving parts.
Solution:
- Blow out threads with compressed air, then brush with a dry toothbrush to remove debris.
- Apply a penetrating lubricant (like WD-40 Specialist Penetrant) to the joint, let it sit for 10-15 minutes, then gently work the joint back and forth to loosen it.
- Once moving freely, clean the joint with mild detergent, dry, and apply dry lubricant (graphite or silicone) to prevent future sticking.
Problem 3: Loose Connections (Wobbly Pipes)
Signs: Pipes move when touched; joint spins without tightening; gaps between joint and pipe.
Causes: Stripped threads, worn washers, or insufficient tightening.
Solution:
- Check if the joint is overtightened (stripped threads). If the joint spins freely on the pipe, replace the joint—stripped threads can't be repaired.
- If threads are intact, inspect the washer (if present). replace worn or flattened washers with new ones (use aluminum pipe accessories designed for your joint type—generic washers may not fit properly).
- Tighten the joint to the manufacturer's recommended torque (usually hand-tight plus 1/4 turn for most aluminum lean pipe joints). Use a torque wrench for critical applications (like load-bearing racks) to avoid over-tightening.
Advanced Tips for Extreme Environments: Going the Extra Mile
For environments that are truly punishing—think coastal facilities with salt air, chemical plants with heavy fumes, or outdoor setups exposed to rain and snow—basic maintenance might not be enough. Here are advanced strategies to protect your duplex aluminum pipe joints:
Pro Tip: In saltwater environments, rinse joints weekly with freshwater (even if they look clean) to remove salt crystals, which accelerate corrosion. Salt is invisible but deadly to aluminum!
Upgrade to Specialized Coatings
Standard aluminum joints can be coated with specialized finishes to boost resistance: anodizing (an electrolytic process that thickens the oxide layer), powder coating (for color and chemical resistance), or PTFE (Teflon) coating (for low friction and chemical inertness). These coatings add cost upfront but extend joint life by 2-3 times in harsh environments.
Use Environmental Barriers
Shield joints from direct exposure to harsh elements: install plastic or metal covers over outdoor joints; use dust boots (flexible rubber covers) on moving joints in dusty areas; or build simple enclosures around joints near chemical storage. For workbenches in wet environments, mount joints slightly above the work surface to prevent standing water from pooling around them.
Choose the Right Aluminum Lean Pipe System
Not all aluminum lean pipe systems are created equal. In extreme conditions, opt for heavy-duty duplex joints with thicker walls and reinforced threads. Look for joints made from 6061-T6 aluminum alloy, which offers superior strength and corrosion resistance compared to standard 6063 alloys. Pair them with anodized aluminum lean pipe for a system that works *with* you, not against you.
Integrate Maintenance into Workflows
The best maintenance plan is one that fits seamlessly into daily operations. Train operators to include joint checks in their pre-shift equipment inspections—they're the first to notice wobbly workbenches or stiff conveyor joints. Reward teams that report issues early, and make maintenance tools (brushes, cloths, lubricants) easily accessible near aluminum lean pipe structures so quick fixes can happen on the spot.
Conclusion: Small Joints, Big Impact
Duplex aluminum pipe joints might be small, but their role in keeping your aluminum lean pipe systems running smoothly is enormous. In harsh environments—where dust, moisture, and chemicals conspire to degrade equipment—their care isn't optional; it's essential. By following the cleaning steps, sticking to a maintenance schedule, and troubleshooting proactively, you'll ensure these unsung heroes keep supporting your operations for years to come. Remember: a little time spent today on a joint inspection or cleaning session saves hours of downtime, thousands in repairs, and countless headaches tomorrow. So grab your brush, your microfiber cloth, and get to work—your aluminum lean pipe systems (and your bottom line) will thank you.
Cleaning Agent Comparison Table
| Cleaning Agent | Best For | Effectiveness | Safety Notes | Application Method |
|---|---|---|---|---|
| Warm Water + Mild Soap | General dust, light grime | Good | Safe for all aluminum; avoid excessive suds | Damp cloth, gentle wiping |
| Citrus-Based Degreaser | Grease, oil, heavy grime | Excellent | Biodegradable; wear gloves; avoid eye contact | Apply to cloth, scrub, wipe clean |
| Vinegar-Water Mix (50/50) | Light corrosion, water spots | Very Good | Acidic; rinse immediately after use | Soft brush, scrub gently, rinse |
| Isopropyl Alcohol (70%) | Oils, fingerprints, residue | Good | Flammable; use in well-ventilated areas | Wipe with cloth, air dry |
| Compressed Air | Loose dust, debris in crevices | Excellent (for dry debris) | Wear eye protection; avoid high pressure on delicate parts | Blow directly into gaps and threads |