- Company Articles
- Products and Technology
- Installation And Maintenance
- How to Clean Anti-Slip Adjustable Leveling Feet for Longevity

How to Clean Anti-Slip Adjustable Leveling Feet for Longevity
Related Product
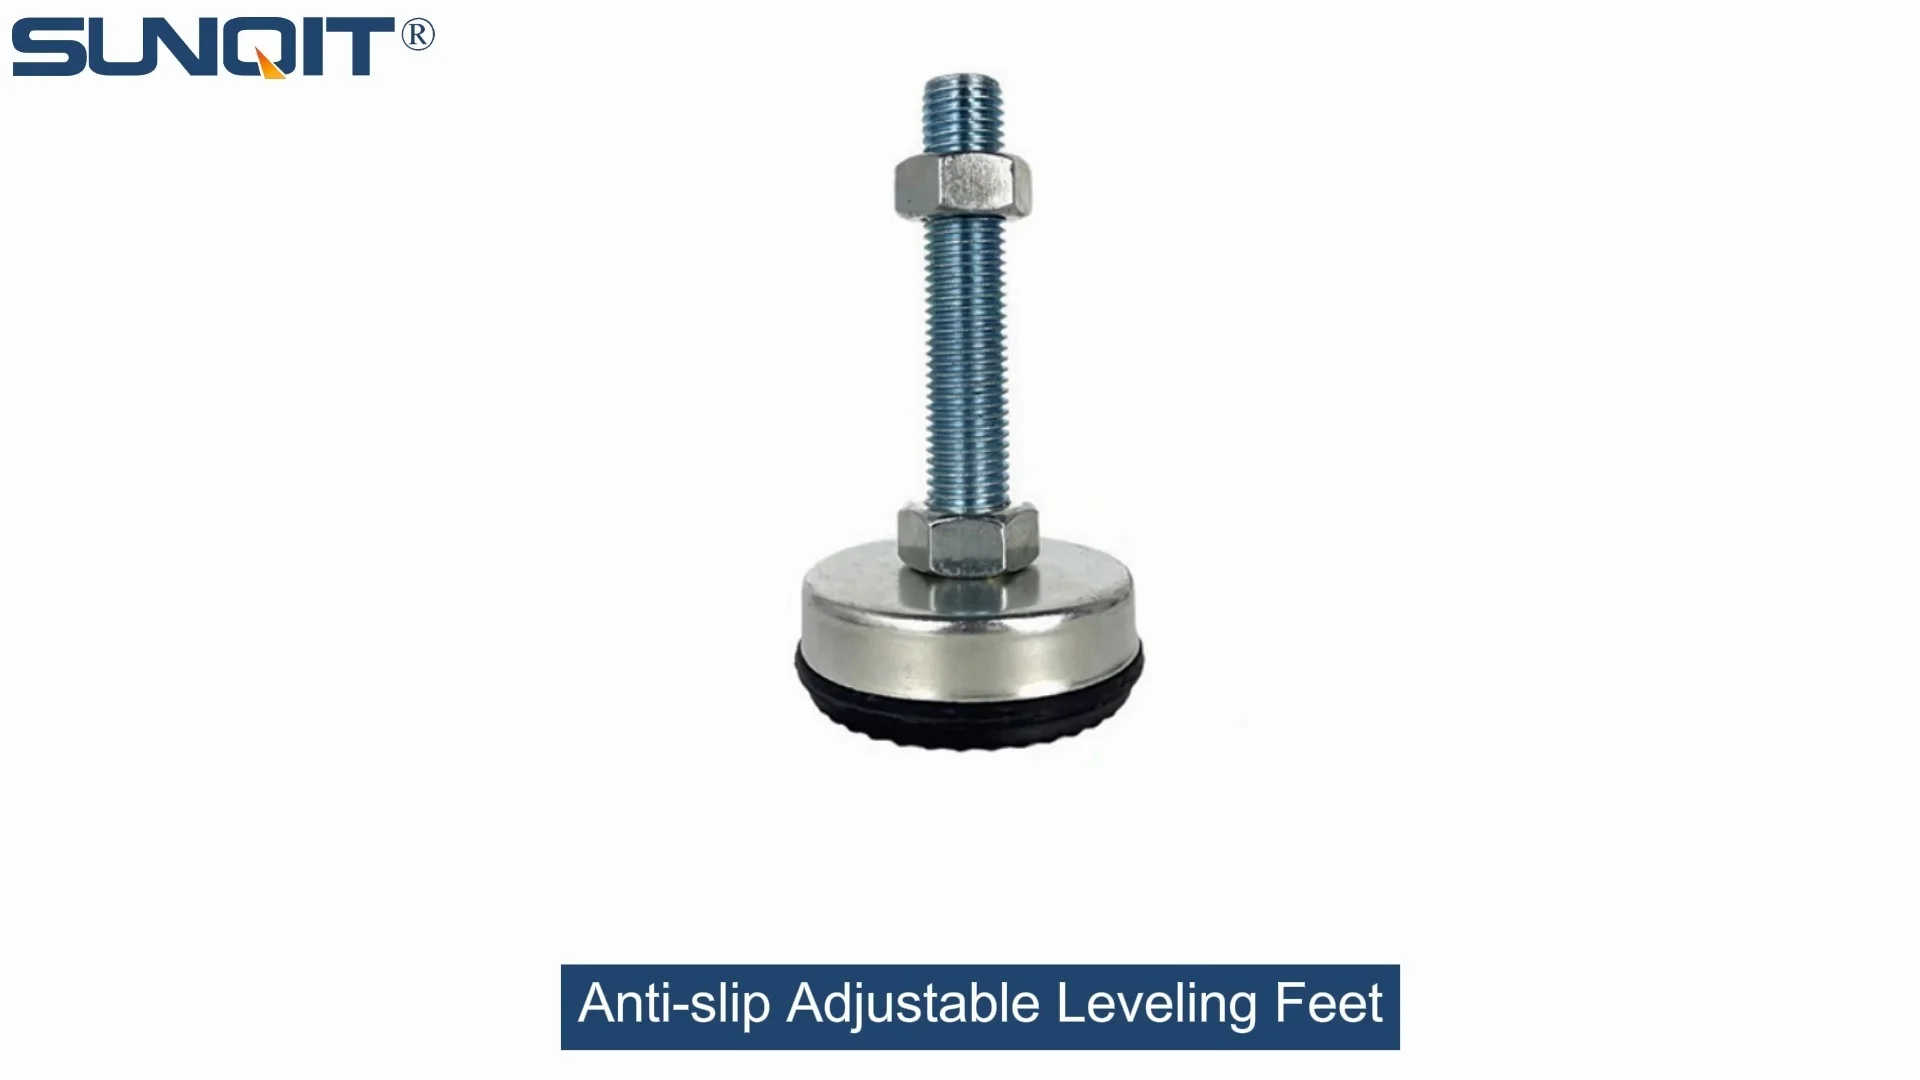
Anti-slip Adjustable Leveling Feet
Anti-slip Adjustable Leveling Feet are designed to keep machines level when placed on uneven or sloped ground, the rubber base will prevent product slip during work.
Maria runs a small electronics assembly workshop in a converted warehouse on the edge of town. Last summer, she noticed something frustrating: her team was spending more time adjusting workbenches than assembling circuit boards. "The tables keep wobbling," one technician muttered, pushing a soldering iron back from the edge of a tilted surface. Another complained that components were sliding off the workbench mid-assembly, even though the surfaces were supposed to be stable. When Maria knelt down to look under a workbench, she found the culprit: the anti-slip adjustable leveling feet—those small, threaded knobs that keep the bench balanced and steady—were caked in dust, grease, and bits of plastic from packaging. Some were so gunked up they wouldn't turn, while others had lost their grip entirely. "I never thought to clean these before," she admitted. "But once we started, it was like night and day."
If Maria's story sounds familiar, you're not alone. Anti-slip adjustable leveling feet are the unsung heroes of workshops, factories, and even home garages. They keep workbenches level on uneven floors, prevent sliding, and protect surfaces from scratches. But like any hardworking tool, they need care to keep performing. In this guide, we'll walk through why cleaning these little workhorses matters, how to do it right, and how to make their longevity work for you—no technical jargon, just practical, hands-on advice.
First Things First: What Are Anti-Slip Adjustable Leveling Feet?
Let's start with the basics. Anti-slip adjustable leveling feet are the small, often overlooked components bolted or screwed to the bottom of workbenches, shelves, and machinery. They have three main parts: a threaded stem (the "adjustable" part), a base (usually rubber or plastic, the "anti-slip" part), and a nut or locking mechanism to keep them in place once adjusted. Twist the stem, and the foot extends or retracts, letting you raise or lower one corner of the workbench to balance it. The anti-slip base? That's what keeps the whole setup from sliding around when you're hammering, sawing, or assembling parts.
You'll find them on all kinds of equipment, but they're especially critical for workbenches—including specialized ones like lean pipe workbenches, which are popular in manufacturing for their flexibility. Even if you don't know it by name, a lean pipe workbench is that modular setup with metal pipes and joints that you can reconfigure as your needs change. And yes, those workbenches rely heavily on anti-slip adjustable leveling feet to stay stable, even when loaded with tools and materials.
Why Bother Cleaning Them? The Hidden Costs of Neglect
You might be thinking, "They're just feet—how dirty can they get?" Trust us, dirt loves these little components. Every time you sweep the floor, move the workbench, or even walk by, dust, hair, and debris find their way into the threads and around the base. Over time, that gunk causes real problems. Let's break it down:
1. They Stop Adjusting (and Your Workbench Wobbles)
Imagine trying to screw a jar lid that's coated in peanut butter—it's not easy. The same goes for leveling feet. When dirt, grease, or metal shavings clog the threads, turning the stem becomes a struggle. You might end up using pliers (bad idea—you'll strip the threads) or giving up, leaving the workbench wobbly. A wobbly workbench isn't just annoying; it's dangerous. Tools slide off, parts roll away, and in extreme cases, the whole bench could tip. Maria's team learned this the hard way when a drill slid off and chipped a circuit board—costing them hours of rework.
2. The Anti-Slip Grip Fades
The rubber or plastic base of the leveling foot is designed to "grip" the floor, preventing the workbench from sliding during use. But when that base is covered in oil, dust, or sticky residue (from spilled glue, maybe?), it loses traction. Suddenly, a gentle push sends the bench creeping across the floor. In a busy workshop, that's a recipe for accidents. One of Maria's technicians nearly tripped over a sliding workbench—fortunately, they caught themselves, but it was a wake-up call.
3. Corrosion Sets In (and They Break)
Most leveling feet have metal stems, and metal + moisture + dirt = rust. Even a little rust can seize the threads, making the foot impossible to adjust. In humid environments or workshops where liquids are used (like auto repair shops), this happens fast. Once the stem corrodes, you'll have to replace the entire foot—a small cost, but avoidable with a little cleaning.
4. You're Wasting Time (and Money)
Maria added up the numbers after her team started maintaining their leveling feet: Before, they spent 10-15 minutes per day adjusting wobbly workbenches. Now? Maybe 2 minutes a week. Multiply that by 50 weeks a year, and that's over 40 hours saved—time better spent on actual work. Plus, replacing a corroded leveling foot costs $5-$15; cleaning them takes $0 and 10 minutes. It's a no-brainer.

Tools You'll Need (Spoiler: You Probably Already Have Them)
Cleaning leveling feet doesn't require fancy equipment. Here's what you'll need, most of which you can find in your garage, kitchen, or utility closet:
- Soft-bristled brush (an old toothbrush works great for tight spaces)
- Microfiber cloth (or a clean rag—avoid paper towels, which leave lint)
- Mild detergent (dish soap like Dawn works well; avoid harsh chemicals like bleach)
- Warm water (in a bucket or spray bottle)
- Toothpick or small screwdriver (for picking out stubborn debris in threads)
- Rubber gloves (optional, but good if you're dealing with grease or chemicals)
- Lubricant (WD-40 or a silicone-based spray—only for metal stems, not the anti-slip base)
Pro tip: If your leveling feet have rubber bases, skip the alcohol or solvent-based cleaners—they can dry out the rubber and make it brittle. Stick to soap and water.

Step-by-Step: How to Clean Anti-Slip Adjustable Leveling Feet (The Right Way)
Now, let's get hands-on. Follow these steps, and you'll have your leveling feet working like new in no time. We'll use a lean pipe workbench as an example—they're common in manufacturing and assembly, and their open design makes accessing the feet easy—but these steps work for any workbench or equipment with leveling feet.
Step 1: Unload the Workbench (Safety First!)
Before you start, clear everything off the workbench. Tools, parts, laptops—get them out of the way. A light workbench is easier to tilt, and you don't want anything falling off while you're cleaning. If the bench is heavy, ask a coworker to help tilt it—safety first, always.
Step 2: Inspect Each Foot (Get to Know the Problem Areas)
Kneel down and take a good look at each leveling foot. Are the threads covered in dirt? Is the base sticky or discolored? Are there any signs of rust? Note which feet need extra attention—this will save you time later. For example, if one foot is near a door, it might have more dirt from foot traffic. If another is under a leaky window, it might have moisture damage.
Step 3: Brush Away Loose Debris
Take your soft-bristled brush and gently scrub the threads and base of each foot. This removes loose dust, hair, and dry dirt. For the threads, brush in a circular motion to work debris out of the grooves. An old toothbrush is perfect here—it fits into tight spaces. If you're dealing with metal shavings (common in machine shops), be careful not to scratch the threads.
Step 4: Wipe with Soapy Water
Dampen your microfiber cloth with warm water and a drop of dish soap. Wring it out so it's not dripping—you don't want water pooling around the feet (remember, moisture + metal = rust). Wipe the entire foot: stem, threads, and base. For the base, use a little extra pressure to remove sticky residue. If there's stubborn grease, add a tiny bit more soap and let it sit for 30 seconds before wiping.
Step 5: Pick Out Stubborn Gunk (The Toothpick Trick)
Even after brushing and wiping, some debris might cling to the threads. Take your toothpick or small screwdriver and gently scrape it out. Be careful not to scratch the threads—you just want to dislodge the gunk, not damage the metal. Think of it like flossing: slow and steady wins the race.
Step 6: Dry Thoroughly (No Moisture Left Behind)
Use a dry microfiber cloth to wipe each foot again. Pay extra attention to the threads and the area where the stem meets the base—this is where moisture likes to hide. If you're in a hurry, you can use a hair dryer on the cool setting to speed things up, but air-drying works too. Just make sure the feet are completely dry before moving on.
Step 7: Lubricate Metal Stems (Optional, but Smart)
If your leveling feet have metal stems, a little lubricant goes a long way. Spray a tiny amount of WD-40 or silicone lubricant on a cloth (don't spray directly on the foot—you don't want it on the anti-slip base) and wipe the threads. This prevents rust and makes adjusting the feet smoother. Avoid oil-based lubricants, which can attract more dirt. For plastic stems, skip the lubricant—they don't rust, and oil can damage the plastic.
Step 8: Test Them Out (And Celebrate)
Once the feet are clean and dry, lower the workbench back down. Twist each stem to adjust the height—they should turn smoothly, with no sticking. Press down on the workbench from different corners to check for wobbling. Then, give the bench a gentle push to test the anti-slip grip—it should stay put. If everything feels solid, you're done! Maria's team high-fived after their first cleaning session—"It's like having a new workbench," one said.

Troubleshooting: When Cleaning Isn't Enough (And What to Do)
Sometimes, even a thorough cleaning can't fix every issue. Here's a quick troubleshooting guide to common problems, and how to solve them:
| Problem | Likely Cause | Solution |
|---|---|---|
| Stem still won't turn after cleaning | Rust or corrosion in threads | Apply a rust dissolver (like CLR) to the threads, let sit 10 minutes, then gently tap with a hammer (not too hard!) and twist. If that fails, replace the foot. |
| Anti-slip base still slides | Rubber/plastic base is worn or dried out | replace the base (some feet have replaceable pads) or the entire foot. If replacement isn't an option, try a rubber mat under the workbench. |
| Stem is bent or stripped | Over-tightening or using pliers | Unfortunately, stripped or bent stems can't be fixed. replace the foot—look for ones with metal stems (more durable) and rubber bases. |
| Foot keeps unscrewing on its own | Locking nut is loose or missing | Tighten the locking nut (the small nut above the foot) against the workbench leg. If it's missing, buy a replacement nut at a hardware store. |
Beyond Cleaning: How to Make Them Last Even Longer
Cleaning is the foundation, but a few extra habits will extend your leveling feet's lifespan even more. Here's what we recommend:
Stick to a Schedule (Set a Calendar Reminder)
Maria's team now cleans their leveling feet every two weeks—more often during busy seasons when the workshop is dustier. Pick a frequency that works for your space: high-traffic workshops might need monthly cleanings, while home garages could get by with quarterly. Write it on the calendar or set a phone reminder—out of sight, out of mind is how neglect happens.
Check Them When You Move the Workbench
Every time you move the workbench (to sweep, rearrange, or deep clean), take 30 seconds to inspect the leveling feet. Wipe off any visible dirt and test the adjustment. It's a quick habit that prevents buildup from getting out of hand.
Protect Them from Extreme Conditions
If you work in a humid environment (like a basement workshop) or near water, consider upgrading to stainless steel stems—they resist rust better than regular steel. For outdoor use, look for feet with UV-resistant bases (sunlight can crack plastic over time). And if you're storing the workbench for a while, prop it up on blocks to keep the feet off the floor—this prevents moisture from seeping in.
Pair Them with the Right Accessories
Workbenches often come with other accessories, like casters, that affect how leveling feet perform. Casters (those small wheels) make moving the bench easy, but when you're ready to work, you need the leveling feet to take over. Make sure the casters are locked or raised when using the bench—if the casters are still touching the floor, the leveling feet can't do their job. Think of it like a team: casters handle mobility, leveling feet handle stability. Together, they make your workbench versatile and reliable.
The Bottom Line: Small Care, Big Results
Anti-slip adjustable leveling feet might be small, but they play a huge role in keeping your workspace safe, efficient, and productive. By taking 10 minutes every few weeks to clean and maintain them, you'll avoid wobbly workbenches, sliding surfaces, and costly replacements. Maria's workshop now runs smoother than ever—tools stay put, workbenches stay balanced, and her team can focus on what they do best: building quality products.
So, the next time you're in the workshop, take a minute to kneel down and say hello to those little feet under your workbench. They've been working hard—give them a little love, and they'll keep working hard for you.