- Company Articles
- Products and Technology
- Installation And Maintenance
- How to Clean Flat Swivel Castor Wheels: Removing Debris for Smooth Operation

How to Clean Flat Swivel Castor Wheels: Removing Debris for Smooth Operation
Related Product
Flat Swivel Castor Wheel
Chair Casters Ball Bearing Wheels Rubber Base. Resistant to abrasion, impact and corrosion. Heavy payload can hold 70-90Kgs per pcs,which can make it works at a stable and smooth status.
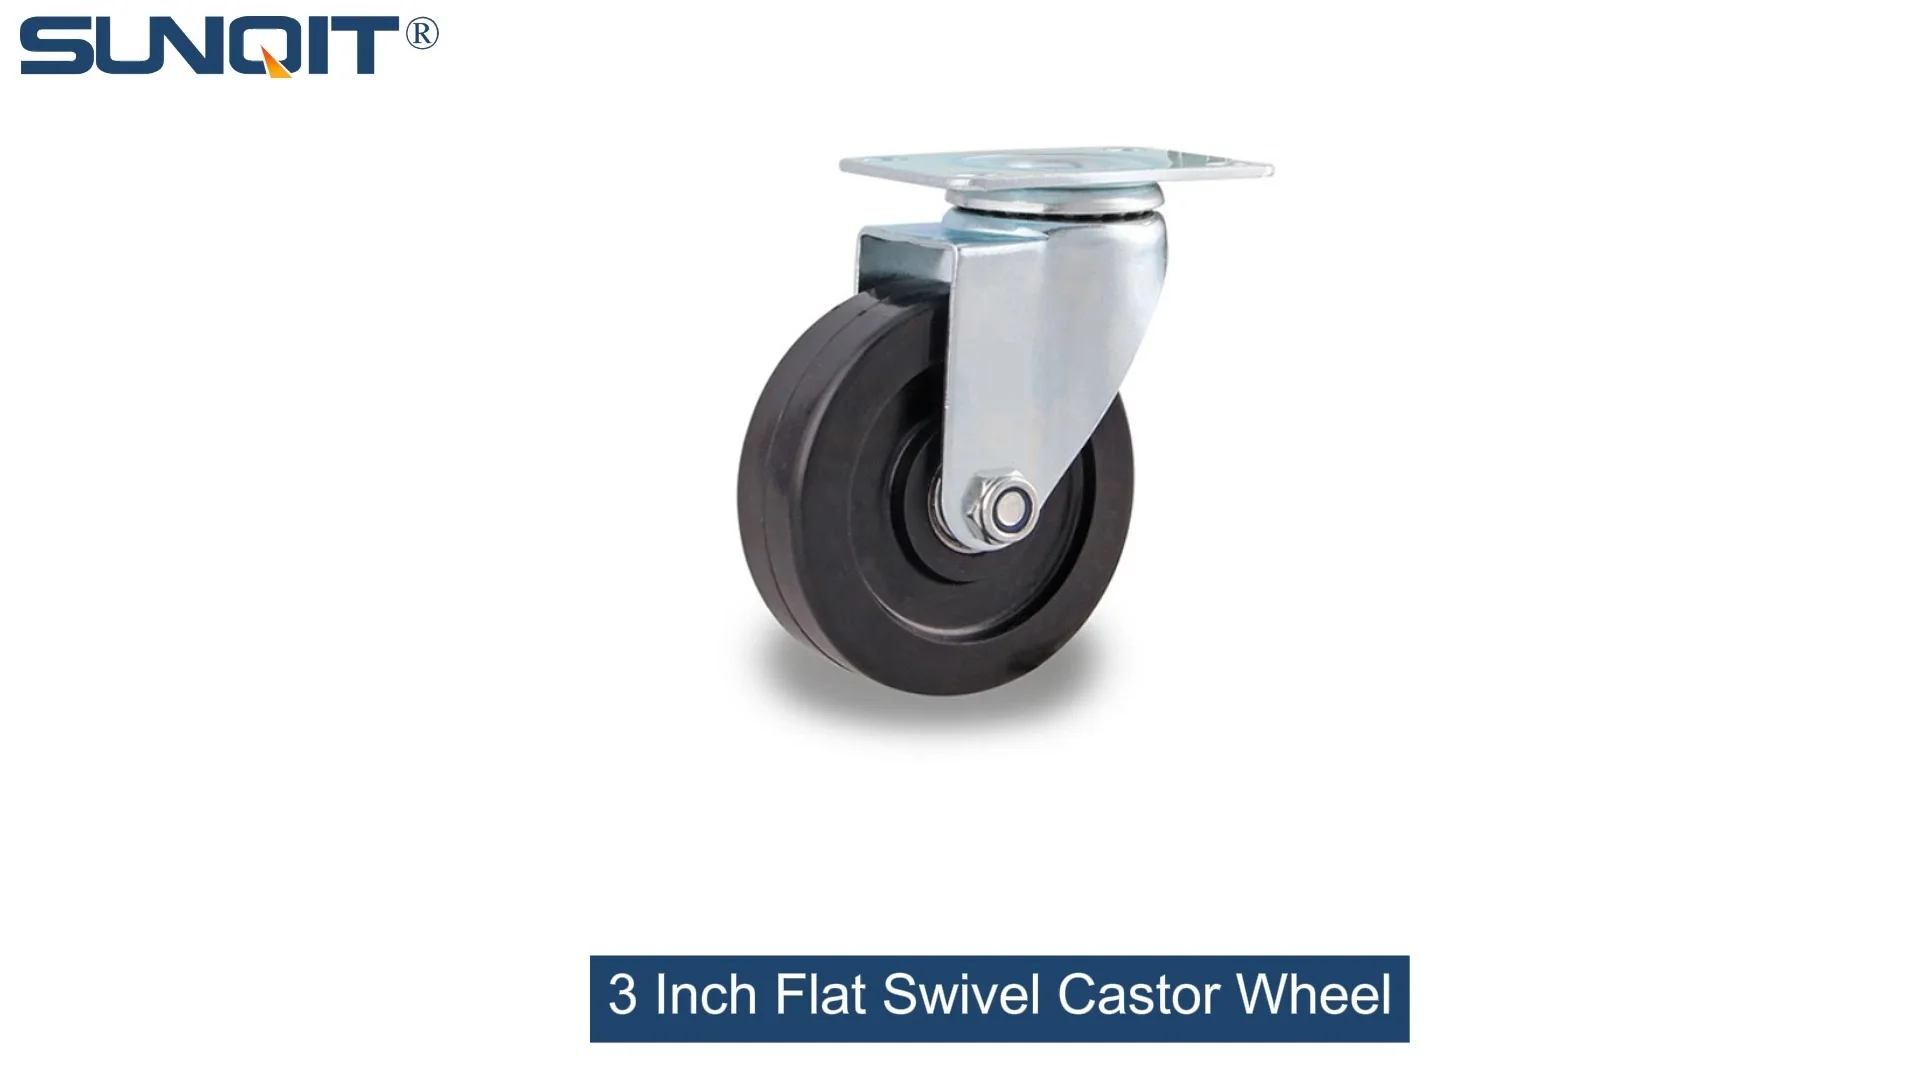
A guide to keeping your caster wheels rolling freely and your workspace efficient
Why Flat Swivel Castor Wheels Deserve Your Attention
Let's start with a simple truth: we rarely think about the small parts that keep our workspaces moving—until they stop working. Take the flat swivel castor wheel, for example. Tucked under your workbench, tool cart, or assembly station, these unassuming components do the heavy lifting (literally) to keep your operations flowing. Whether you're rearranging a production line, fetching supplies from a shelf, or adjusting your workbench to fit a new project, a smooth-rolling caster wheel can make the difference between a quick, easy task and a frustrating, time-consuming struggle.
But here's the thing: even the best caster wheels can't perform magic if they're clogged with debris, gunk, or grime. Over time, dust, hair, bits of plastic, metal shavings, and even spilled liquids can build up in the crevices of your flat swivel castor wheels. What starts as a tiny speck can turn into a major problem—squeaky joints, uneven rolling, or even a wheel that locks up entirely. And when your casters fail, so does your productivity. A stuck caster on a workbench might mean straining your back to move it, or worse, leaving tools out of reach because you can't reposition your setup. That's why taking 10 minutes every few weeks to clean and maintain your flat swivel castor wheels isn't just "maintenance"—it's an investment in keeping your workspace efficient, safe, and frustration-free.
In this guide, we'll walk you through everything you need to know to clean your flat swivel castor wheels like a pro. From spotting the early signs that your casters need attention to step-by-step cleaning techniques and pro maintenance tips, we'll help you keep those wheels rolling smoothly for years to come. And yes, we'll even touch on how your caster wheels and workbench work together to create a workspace that adapts to you—not the other way around.
Signs Your Flat Swivel Castor Wheels Are Begging for a Clean
Before you grab a brush and start scrubbing, it helps to know when your flat swivel castor wheels are actually in need of a cleanup. Caster wheels are pretty good at sending "help me" signals—you just need to know what to look for. Here are the most common red flags:
Squeaking or Grinding Noises
If moving your workbench now sounds like a symphony of squeaks, grinds, or rattles, debris is likely the culprit. When dirt or dust builds up in the swivel joint or around the wheel bearings, it creates friction. That friction doesn't just sound annoying—it's a sign that parts are rubbing together unnecessarily, which can wear down your caster wheel over time.
Uneven or "Sticky" Rolling
Ever tried to push your workbench and felt it pull to one side, or stop short even when you're applying steady pressure? That's often due to debris trapped in the wheel tread or around the axle. Small bits of plastic, wood, or metal can get wedged between the wheel and its housing, creating a "speed bump" effect that makes rolling feel jerky or uneven.
The Swivel Joint Feels Stiff
One of the best things about a flat swivel castor wheel is its ability to rotate 360 degrees, letting you maneuver tight corners with ease. But if that swivel starts to feel stiff—like it's "catching" or won't turn smoothly—it's probably because dirt has worked its way into the joint. Without cleaning, that stiffness can get worse, eventually making the swivel mechanism seize up entirely.
Visible Debris or "Gunk"
Sometimes, the problem is obvious: take a quick look at your caster wheels, and you'll see clumps of dust, hair, or even dried liquid (like old coffee spills) caked onto the tread or around the axle. Don't ignore this—what looks like a small mess can grow into a bigger issue if it's not addressed.
Your Workbench Feels "Heavier" Than Usual
We've all had days where even simple tasks feel harder, but if moving your workbench suddenly requires more effort than it did last week, your casters might be to blame. Debris creates extra friction, which means you're using more energy to move the same load. Over time, this not only slows you down but can also lead to fatigue—no one needs that added stress in a busy workspace.
Pro Tip: Make it a habit to check your flat swivel castor wheels every time you clean your workbench. A quick visual inspection takes 30 seconds and can catch small issues before they become big problems.
Gearing Up: Tools and Supplies You'll Need
Cleaning flat swivel castor wheels doesn't require fancy equipment or specialized skills—but having the right tools on hand will make the job faster, easier, and more effective. Most of these items you probably already have in your garage, kitchen, or toolbox. Here's what you'll need:
| Tool/Supply | Purpose | Why It Works |
|---|---|---|
| Soft-bristled brush (old toothbrush works too!) | Removing loose debris from crevices | The soft bristles reach into tight spaces around the axle and swivel joint without scratching the wheel or caster accessories. |
| Microfiber cloth or lint-free rag | Wiping away dust and cleaning surfaces | Microfiber traps dust and grime instead of pushing it around, leaving your caster wheels cleaner. |
| Mild dish soap or all-purpose cleaner | Cutting through grease and sticky residue | Harsh chemicals can damage plastic or rubber treads, so stick to gentle, pH-neutral cleaners. |
| Warm water | Diluting cleaner and rinsing | Warm (not hot!) water helps break down grime without warping plastic components. |
| Toothpick or small screwdriver | Picking out stubborn debris from tight spots | Perfect for dislodging hair or string wrapped around the axle—those tiny spaces a brush can't reach. |
| Silicone-based lubricant (WD-40 or similar) | Keeping swivel joints and axles moving smoothly | Silicone lubricants won't attract dust like oil-based products, so your casters stay cleaner longer. |
| Bucket or bowl | Holding soapy water for cleaning | Prevents making a mess on your workbench or floor while you clean. |
You might also want to grab a pair of gloves if you're dealing with particularly greasy or sharp debris (like metal shavings). And if your caster wheels are on a heavy workbench, a friend to help lift one side (gently!) while you clean can save your back—safety first!

Step-by-Step: Cleaning Your Flat Swivel Castor Wheels
Now that you've got your tools ready, let's dive into the cleaning process. Follow these steps, and you'll have your flat swivel castor wheels rolling like new in no time. We'll break it down into easy, manageable stages—no prior experience required.
Step 1: Prepare Your Workspace
First, clear the area around the caster wheels. Move any tools, boxes, or debris that might get in your way, and lay down a towel or old newspaper to catch dirt and water (this makes cleanup afterward a breeze). If your caster wheels are on a workbench or cart, gently lift one side of the furniture to take weight off the wheels—you don't need to lift it high, just enough so the wheel spins freely. Ask for help if the load is heavy!
Step 2: Remove Loose Debris with a Brush
Take your soft-bristled brush (or toothbrush) and start by brushing the tread of the caster wheel. Use short, firm strokes to dislodge dust, hair, and loose dirt. Pay extra attention to the grooves in the tread—this is where debris loves to hide. Next, brush around the axle and the base of the swivel joint (the part that connects the wheel to the caster housing). You'll be surprised how much gunk comes loose with just a few swipes!
For stubborn debris, like a hair wrapped tightly around the axle, use a toothpick or small screwdriver to gently pry it loose. Be careful not to scratch the wheel or damage any caster accessories, like the axle cap or swivel bearings—slow and steady wins here.
Step 3: Wipe Down with a Damp Cloth
Dampen your microfiber cloth with warm water (no soap yet!) and wipe the entire surface of the caster wheel, including the tread, axle, and swivel joint. This removes any remaining dust and prepares the wheel for deeper cleaning. If you notice sticky spots or dried liquid, hold the damp cloth against the area for a few seconds to soften the residue—this makes it easier to wipe away.
Step 4: Deep Clean with Soap and Water
Fill your bucket or bowl with warm water and add a few drops of mild dish soap (about 1 teaspoon per cup of water). Dip your cloth into the soapy water, wring it out so it's damp (not soaking), and gently scrub the caster wheel. Focus on areas with visible grime, like the tread or around the swivel joint. For extra stubborn spots, use the toothbrush dipped in soapy water to scrub in small, circular motions—this works wonders on dried grease or sticky spills.
Once you've scrubbed all surfaces, rinse the cloth with clean water and wipe away any soap residue. Soap left on the wheel can attract dust, so make sure to get it all off!
Step 5: Dry Thoroughly
Water and metal don't mix well, so dry your caster wheels completely before putting them back into use. Use a clean, dry microfiber cloth to wipe the tread, axle, and swivel joint. If you're in a hurry, you can also use a hair dryer on the cool setting to speed up drying—just hold it 6-8 inches away from the wheel to avoid overheating plastic parts.
Step 6: Lubricate the Swivel Joint and Axle
Now that your caster wheel is clean, it's time to keep it moving smoothly. Apply a small amount of silicone-based lubricant to the swivel joint (the part that allows the wheel to rotate) and the axle (where the wheel spins). A little goes a long way—1-2 drops on each area is enough. Spin the wheel and swivel the joint a few times to work the lubricant into the moving parts. You'll notice an immediate difference in how smoothly the wheel turns!
Step 7: Test and Repeat (If Needed)
Lower your workbench back down and give the caster wheel a test roll. Push it forward, backward, and swivel it from side to side—does it move freely? Is there any squeaking or sticking? If you still notice issues, repeat steps 2-6, focusing on areas you might have missed (like the inside of the swivel joint). Most of the time, a second pass with the brush and lubricant will fix the problem.
Pro Tip: If you're cleaning multiple caster wheels, clean one at a time so you don't mix up any caster accessories (like axle caps or washers) if you need to remove them. Labeling each wheel with tape (e.g., "front left") can help too!

Beyond Cleaning: Maintaining Your Flat Swivel Castor Wheels
Cleaning is crucial, but to keep your flat swivel castor wheels in top shape long-term, a little regular maintenance goes a long way. Think of it like changing the oil in your car—small, consistent efforts prevent breakdowns and extend the life of your equipment. Here are some simple habits to adopt:
Stick to a Cleaning Schedule
How often should you clean your caster wheels? It depends on your workspace. If you're in a dusty environment (like a woodshop or warehouse) or use your workbench daily, aim to clean your casters every 2-3 weeks. In cleaner spaces (like an office or small workshop), once a month is usually enough. Set a reminder on your phone or calendar—consistency is key!
Check for Wear and Tear
Cleaning is the perfect time to inspect your caster wheels for signs of damage. Look for cracks in the tread, bent axles, or loose caster accessories (like missing washers or broken swivel joints). If you notice any of these, it might be time to replace the wheel—waiting can lead to bigger issues, like a wheel failing mid-use.
Keep the Area Around Your Casters Clean
Prevention is better than cure! Sweep or vacuum the floor around your workbench regularly to reduce the amount of debris that ends up on your caster wheels. A clean floor means cleaner casters—simple as that.
Don't Overload Your Workbench
Every caster wheel has a weight limit (you can usually find this printed on the wheel or in the product manual). Exceeding this limit puts extra stress on the axle and swivel joint, leading to faster wear and tear. If you're not sure of the weight limit, err on the side of caution—moving a lighter load is always easier on your casters (and your back!).
Address Squeaks Immediately
Even with regular cleaning, casters can sometimes squeak. Don't ignore this—it's often a sign that the swivel joint or axle needs more lubricant. A quick spray of silicone lubricant will usually silence the squeak and keep the wheel moving smoothly.
Invest in Quality Caster Accessories
Sometimes, the difference between a caster wheel that lasts 6 months and one that lasts 5 years is the quality of its parts. If you need to replace a caster accessory (like a worn axle cap or broken swivel joint), opt for high-quality replacements from a reputable supplier. Cheap parts might save money upfront, but they'll cost you more in the long run with frequent replacements.
Troubleshooting Common Caster Wheel Issues
Even with regular cleaning and maintenance, you might run into occasional issues with your flat swivel castor wheels. Here's how to troubleshoot the most common problems:
Problem: The Wheel Won't Swivel at All
Why it happens: The swivel joint is likely stuck due to dried debris or rust (if the joint is metal). This can happen if you haven't cleaned the caster in a long time or if it's been exposed to moisture.
Fix: Repeat the cleaning process, focusing on the swivel joint. Use a toothpick to clear out any debris in the joint, then apply a liberal amount of lubricant. Let the lubricant sit for 5-10 minutes to loosen rust or dried gunk, then gently wiggle the joint back and forth to free it up. If it still won't move, the joint might be damaged and need replacement.
Problem: The Wheel is Wobbly
Why it happens: The axle nut or bolt might be loose, or the wheel hub (the part that holds the wheel to the axle) could be worn out.
Fix: Tighten the axle nut with a wrench (check your caster's manual for the correct size). If the wheel still wobbles, inspect the hub for cracks or wear—if it's damaged, replace the wheel.
Problem: The Tread is Peeling or Cracking
Why it happens: Tread damage is usually caused by overloading, exposure to harsh chemicals, or simply old age. Rubber and plastic treads break down over time, especially with heavy use.
Fix: Unfortunately, once the tread is damaged, it can't be repaired—you'll need to replace the caster wheel. Look for a replacement with a tread material suited to your workspace (e.g., rubber for smooth floors, polyurethane for rough surfaces).
Problem: Debris Keeps Getting Stuck in the Tread
Why it happens: Some tread patterns (like deep grooves) are more prone to trapping debris than others. If you work in a dusty or debris-heavy environment, this can be a constant issue.
Fix: Consider switching to a caster wheel with a smoother tread (like a flat, non-grooved design) or one with a self-cleaning tread (some models have channels that push debris out as the wheel rolls). In the meantime, clean the tread more frequently—every 1-2 weeks instead of monthly.
The Workbench-Caster Connection: Why It Matters
We've talked a lot about caster wheels, but let's circle back to the bigger picture: your workbench. A workbench is the heart of your workspace, and its mobility (thanks to flat swivel castor wheels) is what makes it versatile. Whether you're a hobbyist building furniture in a garage or a manufacturer assembling electronics on a production line, being able to move your workbench gives you the flexibility to adapt to new projects, collaborate with teammates, or make space for new equipment.
But a workbench is only as good as its casters. Imagine setting up a precision assembly station, only to find that your workbench drifts across the floor because one caster wheel is stuck. Or trying to align your workbench with a conveyor belt, but uneven casters make it sit at an angle. These aren't just minor annoyances—they can affect the quality of your work, slow down production, and even create safety hazards (a wobbly workbench is an accident waiting to happen).
That's why keeping your flat swivel castor wheels clean and well-maintained isn't just about the wheels themselves—it's about protecting your workbench, your projects, and your productivity. When your casters roll smoothly, your workbench becomes an extension of your workflow, not a barrier to it. You can focus on what matters—creating, building, and getting the job done—instead of struggling with stuck wheels or uneven surfaces.
So the next time you're tidying up your workspace, take a minute to show your caster wheels some love. They might be small, but they play a big role in keeping your workbench (and your business) moving forward.
Final Thoughts: Small Effort, Big Reward
Cleaning flat swivel castor wheels isn't the most glamorous task in your workspace, but it's one of the most impactful. In just 10-15 minutes, you can transform a frustrating, slow-moving workbench into a smooth, efficient tool that works with you—not against you. By following the steps in this guide, you'll extend the life of your caster wheels, reduce downtime, and keep your workspace safe and productive.
Remember: your caster wheels are like any other tool—they perform best when they're cared for. A little regular cleaning, lubrication, and inspection go a long way. And when you're ready to replace a worn-out wheel or upgrade your caster accessories, choose quality parts that match your workspace needs. After all, a smooth-rolling caster wheel is more than just a part—it's an investment in your success.
Now, go grab your brush, clean those casters, and enjoy the feeling of a workbench that moves as smoothly as your ideas do. Your future self (and your back) will thank you.