- Company Articles
- Products and Technology
- Installation And Maintenance
- How to Clean Parallel Lean Pipe Joint Chrome: Best Practices

How to Clean Parallel Lean Pipe Joint Chrome: Best Practices
Related Product
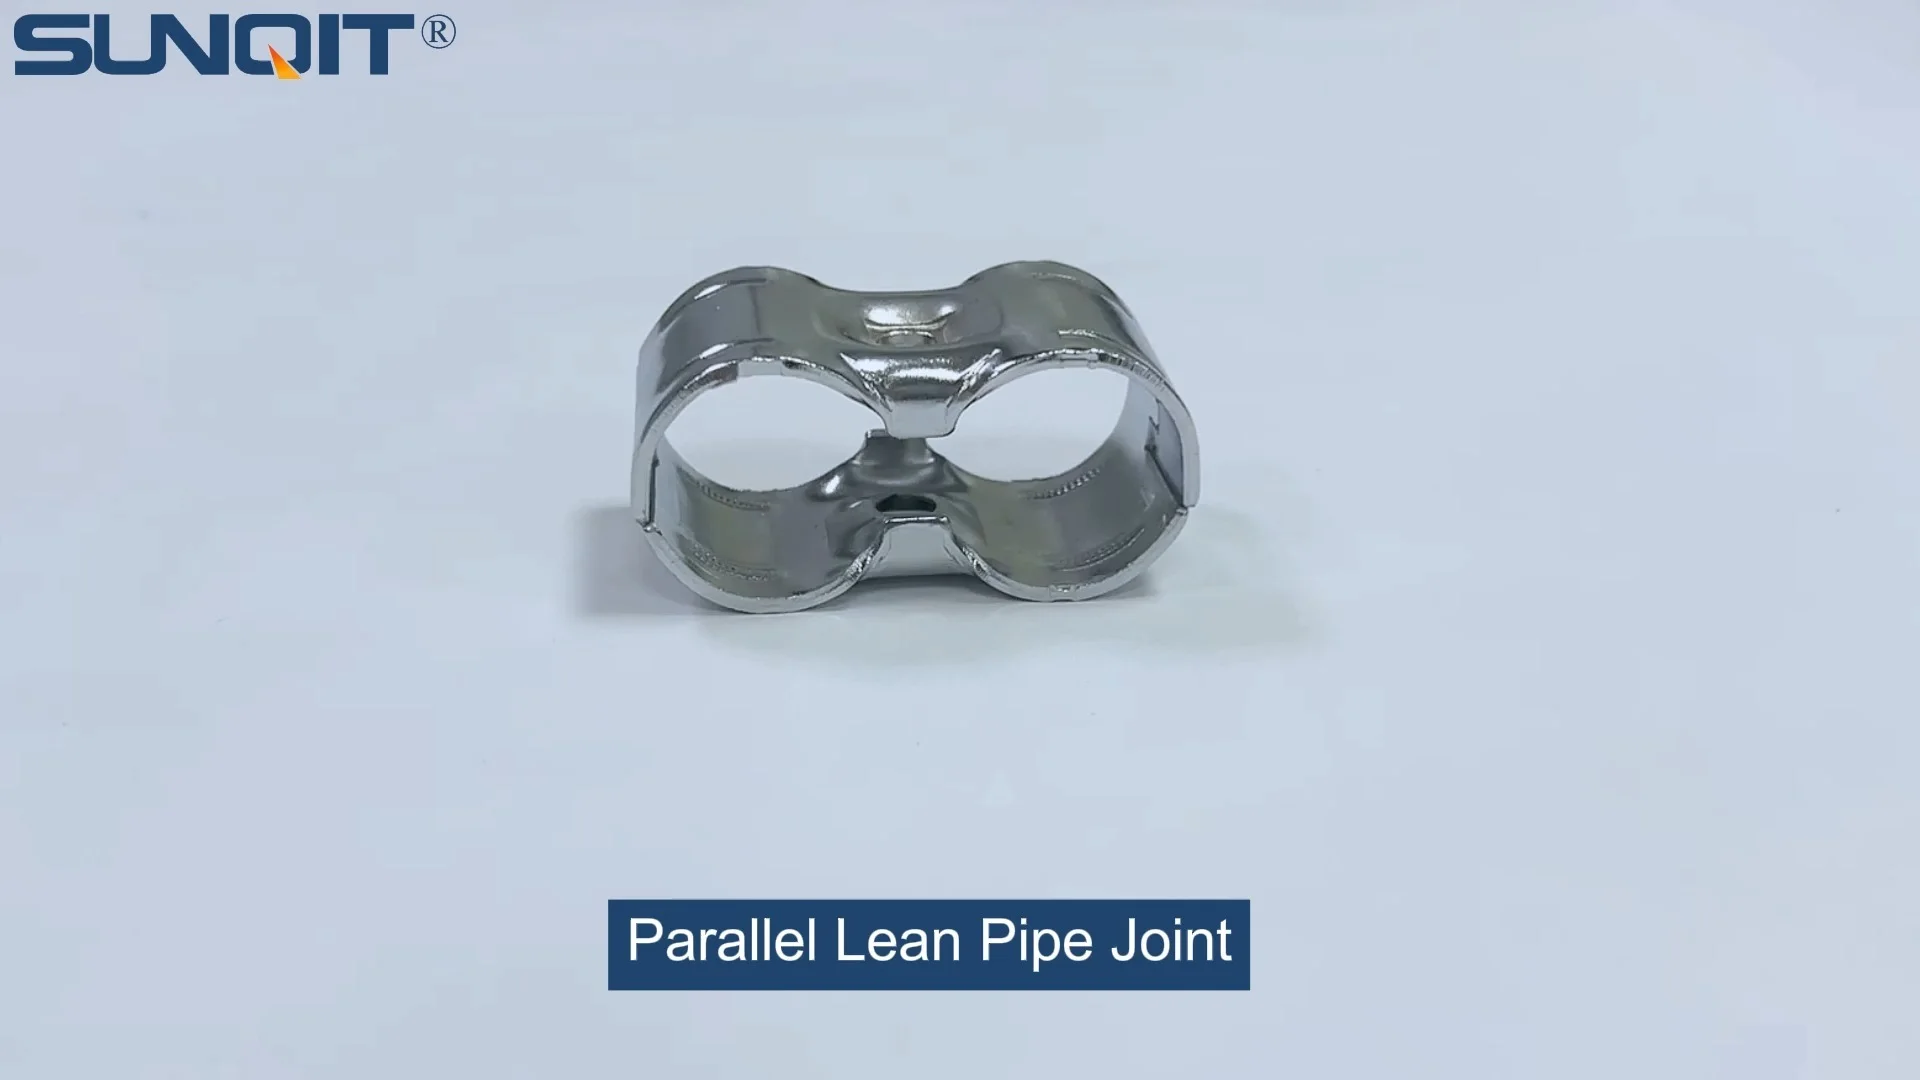
Parallel Lean Pipe Joint Chrome
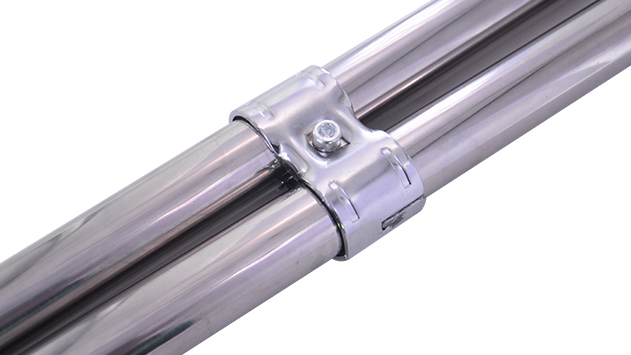
Parallel lean pipe joint used for 2 pcs 28MM lean pipe connection in parallel direction to enhance frame structure, usually for heavy payload requirement for workbench. flow rack, hand trolley.
Imagine walking into a bustling manufacturing workshop early on a Monday morning. The air hums with the low whir of conveyor belts, and workers move efficiently between workbenches stacked with components. But as you glance closer, something catches your eye: the chrome joints connecting the lean pipes on a nearby flow rack are dull, dotted with water spots, and even showing faint signs of rust. You watch as a technician struggles to adjust the rack—those tarnished joints feel sticky, resisting smooth movement. It's a small detail, but in a space built on lean principles, small details can throw off an entire workflow.
If this scenario feels familiar, you're not alone. Parallel lean pipe joint chrome, those shiny, durable connectors that hold together everything from workbenches to turnover trolleys, are workhorses of modern lean systems. They're designed to be tough, but they're not invincible. Dirt, grease, moisture, and even the occasional splash of coolant can take a toll over time, turning once-bright chrome into a lackluster, problematic part of your setup. The good news? With the right tools and a little know-how, keeping these joints clean and functional is easier than you might think. In this guide, we'll walk through why cleaning parallel lean pipe joint chrome matters, the tools you'll need, a step-by-step process to restore their shine, and how to make this maintenance part of your regular lean management routine.
What Are Parallel Lean Pipe Joint Chrome, Anyway?
Before we dive into cleaning, let's make sure we're on the same page about what these joints are and why they're so important. Parallel lean pipe joint chrome are specialized connectors used in lean manufacturing systems to join lean pipes—those modular, lightweight tubes that form the backbone of workbenches, material racks, conveyor systems, and more. Unlike basic joints, "parallel" joints are designed to connect pipes that run alongside each other, providing stability and flexibility in structures like double-deck workbenches or multi-tier flow racks.
The "chrome" part is key here. Chrome plating adds a protective layer to the underlying metal (usually steel), shielding it from corrosion and giving it that signature reflective finish. This isn't just for looks: a smooth, clean chrome surface resists rust, repels grime, and ensures that the joint moves freely when adjustments are needed—critical in environments where reconfiguring workstations or material flow is part of daily operations. Whether you're using them on an aluminum profile workbench or a stainless steel roller track, these joints are the unsung heroes keeping your lean system sturdy and adaptable.
Why Bother Cleaning Them? It's About More Than Shine
Let's get one thing straight: cleaning parallel lean pipe joint chrome isn't just about making your workshop look tidy (though that's a nice bonus). It's about protecting your investment, maintaining efficiency, and even keeping your team safe. Here's why it matters:
- Corrosion Prevention: Chrome resists rust, but only if it's clean. Dirt, oil, and moisture can trap contaminants against the surface, creating tiny pockets where corrosion starts. Over time, this can weaken the joint, leading to wobbly structures or even failure—something you don't want when a rack is holding heavy materials.
- Smooth Operation: Ever tried adjusting a joint that's gunked up with grease and dust? It's like trying to open a rusty door—it sticks, jams, and takes extra effort. Clean joints move smoothly, making it faster to reconfigure workbenches or adjust flow racks, which aligns perfectly with lean principles of minimizing waste (in this case, wasted time and effort).
- Safety First: A corroded or weakened joint is a safety hazard. If a joint fails, it could cause a rack to collapse or a workbench to tip, putting workers and materials at risk. Regular cleaning helps you spot early signs of damage (like pitting or cracks) before they become dangerous.
- Longevity: Lean systems are built to be durable, but they need care to live up to that promise. A little time spent cleaning today can extend the life of your parallel lean pipe joint chrome by years, saving you the cost of replacing them prematurely.
Think of it like maintaining a car: you don't skip oil changes just because the engine still runs. You do it to keep it running well for longer. The same logic applies here.
Gathering Your Tools: What You'll Need (and What to Avoid)
Cleaning chrome isn't complicated, but using the wrong tools can do more harm than good. Chrome is durable, but it's also prone to scratching if you're too rough. Here's your go-to toolkit:
Must-Haves:
- Microfiber Cloths: These are gentle on chrome and won't leave lint or scratches. Avoid paper towels—they're too abrasive.
- Soft-Bristled Brush: A small, soft brush (like a toothbrush or a detail brush) works great for getting into the nooks and crannies of the joint, where dust and grime like to hide.
- Mild Detergent: A few drops of dish soap or a gentle all-purpose cleaner (avoid anything with bleach or ammonia) mixed with warm water is perfect for regular cleaning.
- Distilled Water: Tap water can leave mineral deposits (those white, spotty marks) if it's hard. Distilled water avoids this, especially important for the final rinse.
- White Vinegar: For tougher stains (like hard water spots or light grease), a 50/50 mix of vinegar and water works wonders. It's acidic enough to break down grime but gentle enough not to damage chrome.
- Rubber Gloves: Protect your hands from cleaners and any sharp edges on the joints.
What to Avoid:
- Abrasive Cleaners: Steel wool, scouring pads, or harsh chemicals (like oven cleaner) will scratch the chrome, ruining its protective layer and making it more susceptible to rust.
- Acidic or Alkaline Cleaners: Bleach, ammonia, and industrial-strength degreasers can eat away at the chrome plating over time. Stick to mild, pH-neutral options.
- Excessive Force: Scrubbing hard won't make cleaning faster—it'll just scratch the chrome. Let the cleaner do the work instead.
Pro tip: If you're dealing with really stubborn stains (like old grease or dried coolant), keep a small bottle of chrome-specific polish on hand. We'll talk about when to use that later!

Step-by-Step: How to Clean Parallel Lean Pipe Joint Chrome
Now that you've got your tools ready, let's walk through the cleaning process. We'll break it down into simple steps, so even if you're new to maintenance, you'll feel confident.
Step 1: Prep the Area
Start by clearing the area around the joint. If the joint is on a workbench, move any tools or materials out of the way. If it's part of a rack or conveyor, consider disconnecting the joint if possible (just make sure the structure is stable first!). This gives you room to work and prevents cleaners from getting on other surfaces.
Next, do a quick visual inspection. Are there any loose parts, cracks, or deep pitting in the chrome? If so, you might need to replace the joint, but cleaning can still help prevent further damage. Note any problem areas to check again after cleaning.
Step 2: Dry Cleaning First
Before you break out the water and cleaners, remove loose debris. Use your soft-bristled brush to gently sweep away dust, dirt, and cobwebs from the joint. Pay extra attention to crevices where the joint meets the lean pipe—these are dust magnets. A dry microfiber cloth can help wipe away any remaining loose particles. This step prevents you from grinding dirt into the chrome when you start wet cleaning (which would scratch the surface).
Step 3: Wet Cleaning (The Main Event)
Now it's time to get the joint clean. Mix a few drops of mild detergent with warm distilled water in a bowl. Dip your microfiber cloth into the solution, wring it out so it's damp (not soaking wet), and gently wipe the joint. Follow the grain of the chrome (if you can see it) to avoid streaks. For hard-to-reach spots (like the inside of the joint where it connects to the pipe), use the soft brush dipped in the soapy water, then wipe clean with the cloth.
Why distilled water? Tap water with high mineral content can leave spots as it dries, which defeats the purpose of cleaning. If you don't have distilled water, at least dry the joint immediately after wiping to prevent spots (more on that in Step 5).
Step 4: Tackling Tough Stains
If the joint has stubborn stains (like oil, grease, or hard water spots), it's time to bring out the vinegar solution. Mix equal parts white vinegar and distilled water in a spray bottle. Spray the solution onto the stained area, let it sit for 5-10 minutes (don't let it dry!), then wipe with a damp microfiber cloth. The vinegar's acidity will break down the grime without harming the chrome.
For really tough grease, you can use a small amount of chrome polish on a clean cloth. Rub it gently into the stain in a circular motion, then wipe away with a damp cloth. Polish is optional for regular cleaning, but it's great for restoring shine and adding a protective layer after deep cleaning.
Step 5: Rinse and Dry Thoroughly
Once the joint is clean, rinse your microfiber cloth with distilled water and wipe the joint again to remove any leftover cleaner or vinegar. This step is crucial—residue from cleaners can attract dust and make the joint dirty faster. Then, dry the joint immediately with a clean, dry microfiber cloth. Water left on chrome can evaporate and leave spots, so don't skip this!
Step 6: Inspect and Protect (Optional)
Take a final look at the joint. Is it clean and shiny? Great! If you want to go the extra mile, apply a thin layer of chrome polish with a soft cloth, let it dry to a haze, then buff it off with another clean cloth. This adds a protective barrier that repels water and grime, keeping the joint cleaner for longer.
If you noticed any damage during the initial inspection, now's the time to address it. A small pit or scratch might not need replacement yet, but keep an eye on it during future cleanings. If the chrome is peeling or the metal underneath is exposed, replace the joint ASAP—it's no longer protected from corrosion.
Troubleshooting Common Chrome Cleaning Headaches
Even with the best intentions, you might run into issues while cleaning. Here's how to handle the most common problems:
Problem: Hard Water Spots Just Won't Budge
Solution: Mix a paste of baking soda and water, apply it to the spots, and let it sit for 10 minutes. Gently wipe with a damp cloth (don't scrub!). The baking soda is slightly abrasive but mild enough not to scratch chrome. Follow up with a vinegar rinse to neutralize any remaining residue.
Solution: Mix a paste of baking soda and water, apply it to the spots, and let it sit for 10 minutes. Gently wipe with a damp cloth (don't scrub!). The baking soda is slightly abrasive but mild enough not to scratch chrome. Follow up with a vinegar rinse to neutralize any remaining residue.
Problem: Rust Spots on Chrome
Solution: Small rust spots can sometimes be removed with a paste of baking soda and water (same as above). For larger spots, try a chrome rust remover (follow the manufacturer's instructions). If the rust has eaten through the chrome, though, it's time to replace the joint—rust under the chrome will only spread.
Solution: Small rust spots can sometimes be removed with a paste of baking soda and water (same as above). For larger spots, try a chrome rust remover (follow the manufacturer's instructions). If the rust has eaten through the chrome, though, it's time to replace the joint—rust under the chrome will only spread.
Problem: The Chrome Looks Dull After Cleaning
Solution: This usually means there's still residue left on the surface. Try rinsing again with distilled water and drying thoroughly. If that doesn't work, a quick polish with chrome polish should restore the shine.
Solution: This usually means there's still residue left on the surface. Try rinsing again with distilled water and drying thoroughly. If that doesn't work, a quick polish with chrome polish should restore the shine.
Pro Tip:
If you're cleaning joints on a mobile structure (like a turnover trolley with caster wheels), lock the caster wheels first to prevent it from rolling while you work. Safety first!
Creating a Maintenance Schedule: Make It a Habit
The key to keeping parallel lean pipe joint chrome clean is consistency. Waiting until they're visibly dirty means you're already behind the curve. Instead, build cleaning into your regular maintenance routine. Here's a sample schedule to follow:
- Weekly Quick Wipe: Every Friday (or the end of your workweek), have your team do a quick dry wipe of all visible joints with a microfiber cloth. This removes surface dust and prevents buildup. It takes 5 minutes per workstation and goes a long way.
- Monthly Deep Clean: Once a month, do a full wet cleaning (Steps 1-5 above) on all joints. Focus on high-traffic areas like workbenches and flow racks that get more exposure to dirt and grease.
- Quarterly Inspection: Every three months, combine cleaning with a thorough inspection. Check for signs of damage (cracks, pitting, loose parts) and replace any joints that look compromised. This is also a good time to polish joints with chrome polish to protect them for the next quarter.
This schedule aligns with lean management principles of preventive maintenance—spending a little time regularly to avoid big problems later. Plus, involving your team in weekly wipe-downs helps build a culture of care, where everyone takes ownership of keeping the workspace efficient and safe.
Cleaning Agents Compared: Which One Should You Use?
Not sure which cleaner to reach for? Here's a quick comparison to help you decide:
| Cleaning Agent | Best For | Pros | Cons | Safety Notes |
|---|---|---|---|---|
| Soap & Distilled Water | Regular, light cleaning | Gentle, affordable, easy to find | Not great for tough grease or stains | Non-toxic, safe for all chrome surfaces |
| Vinegar & Water Solution | Hard water spots, light grease | Natural, effective, inexpensive | Strong smell; avoid on damaged chrome | Wear gloves; avoid contact with eyes |
| Chrome Polish | Restoring shine, adding protection | Leaves a protective layer, enhances shine | More expensive; not needed for regular cleaning | Use in well-ventilated area; follow label instructions |
| Baking Soda Paste | Rust spots, stubborn stains | Mildly abrasive, natural, cheap | Can scratch if scrubbed too hard | Avoid on heavily damaged chrome; rinse thoroughly |
| Commercial Chrome Cleaner | Heavy grease, industrial grime | Powerful, fast-acting | Can be harsh; may contain chemicals | Wear gloves and eye protection; read label for chrome compatibility |
Wrapping Up: Clean Joints, Smooth Operations
Back to that workshop we imagined at the start. After a quick cleaning session, those once-tarnished parallel lean pipe joint chrome are now shiny and smooth. The technician adjusts the flow rack with ease, and the team moves materials without hesitation. The workshop feels brighter, more efficient, and just… better. That's the power of clean joints.
Parallel lean pipe joint chrome might seem like small parts of your lean system, but they play a big role in keeping everything running smoothly. By taking the time to clean them regularly, you're not just maintaining equipment—you're upholding the principles of lean manufacturing: minimizing waste, maximizing efficiency, and creating a workspace that works for your team, not against them.
So grab your microfiber cloth, mix up some soapy water, and give those joints the care they deserve. Your future self (and your bottom line) will thank you.