- Company Articles
- Products and Technology
- Installation And Maintenance
- How to Clean Parallel Rotatory Lean Pipe Joint Chrome: Best Practices

How to Clean Parallel Rotatory Lean Pipe Joint Chrome: Best Practices
Related Product
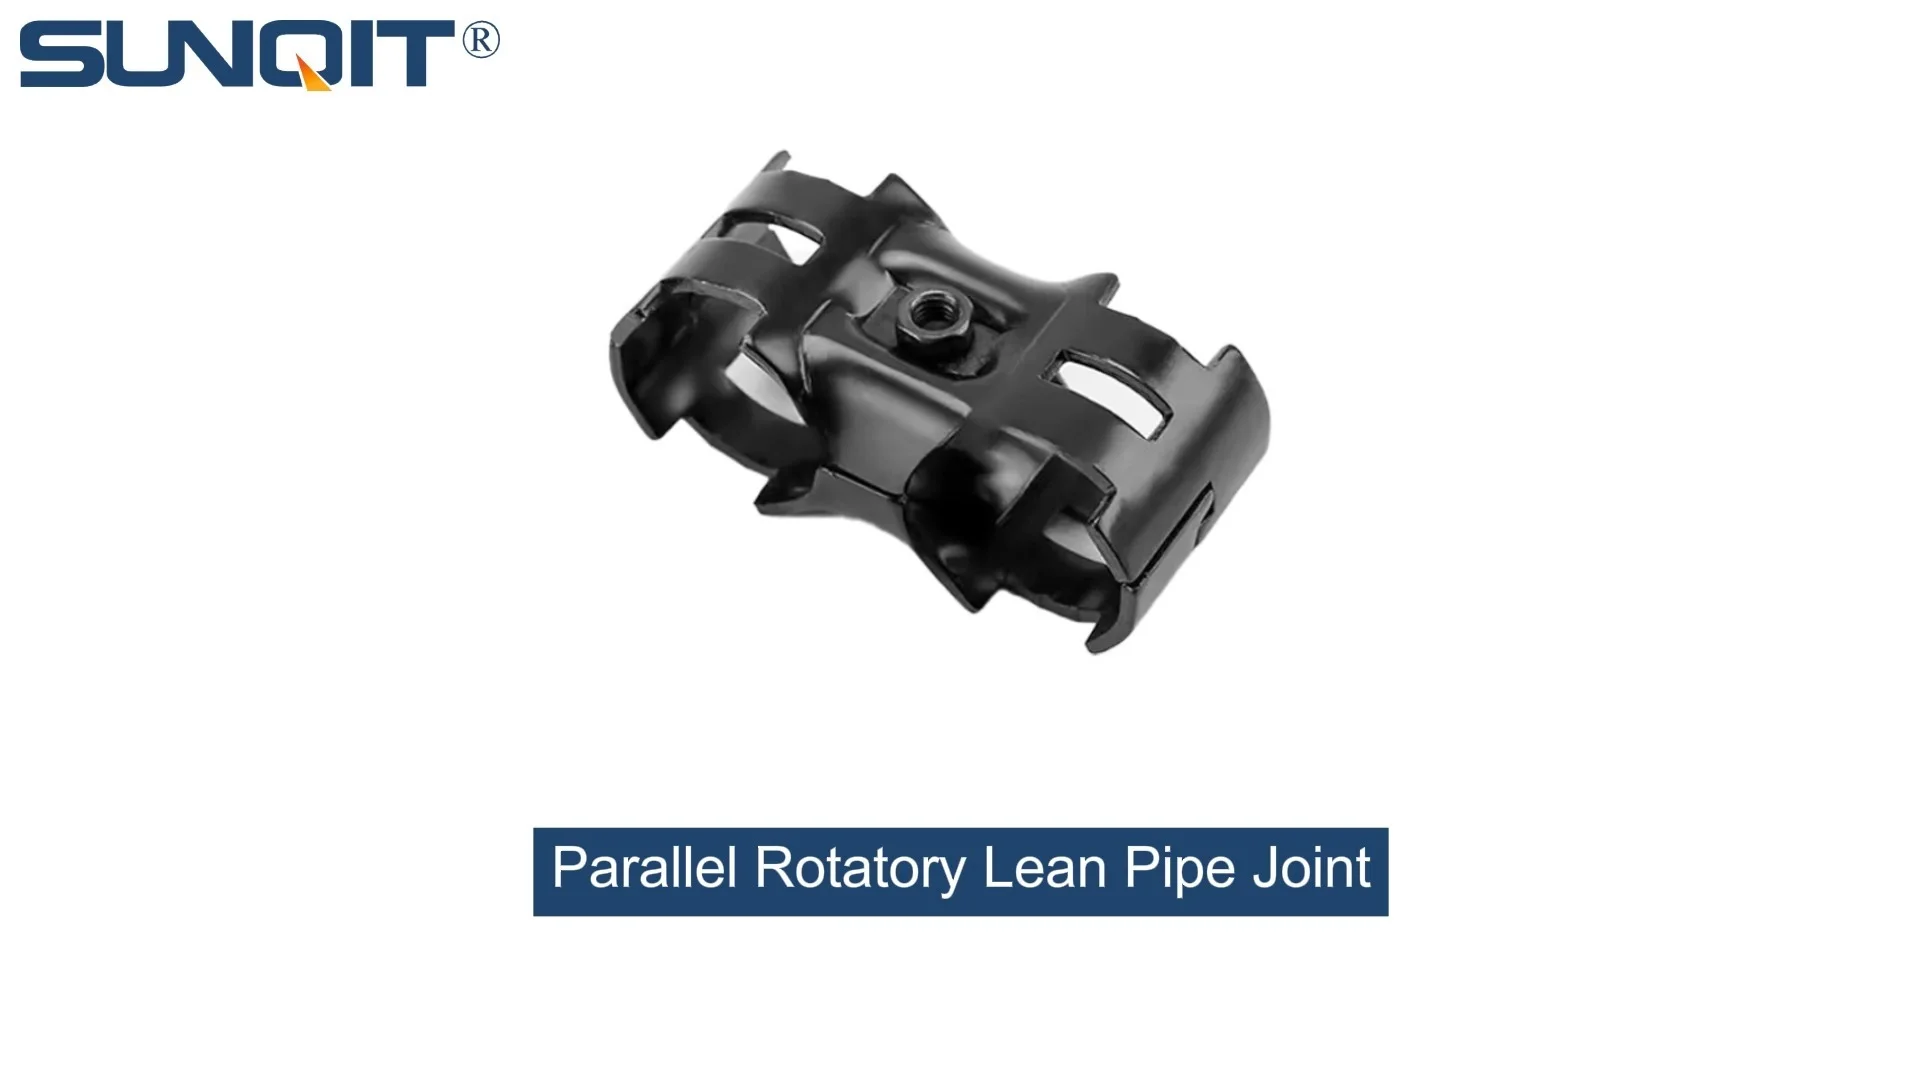
Parallel Rotatory Lean Pipe Joint
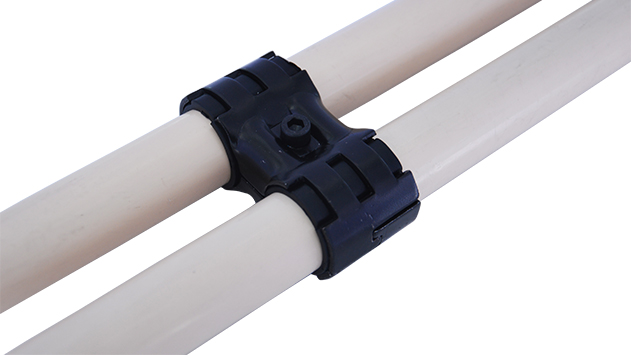
Parallel rotatory lean pipe joint, for 2 pcs pipe conenction in parallel direction with rotatory function.
In the world of lean manufacturing and efficient workspace design, every component plays a silent but critical role. Among these, the parallel rotatory lean pipe joint chrome stands out as a workhorse—quietly enabling flexibility, adjustability, and smooth movement in everything from workbenches to material racks. But like any hardworking tool, it needs care to keep performing at its best. In this guide, we'll walk through the why, what, and how of cleaning these essential joints, ensuring your lean system stays efficient, safe, and built to last.
Understanding the Role of Parallel Rotatory Lean Pipe Joint Chrome
Before diving into cleaning, let's take a moment to appreciate what makes the parallel rotatory lean pipe joint chrome so indispensable. These joints are the unsung heroes of lean pipe and accessories, acting as the "hinges" that connect lean pipes, aluminum pipes, and other components in dynamic work environments. Whether you're adjusting the height of a workbench, reconfiguring a flow rack, or repositioning a turnover trolley, these chrome-plated joints ensure smooth rotation and secure locking—key for maintaining the agility that lean systems are known for.
Chrome plating adds more than just a shiny finish; it's a protective barrier. It resists corrosion, minimizes friction, and stands up to the daily wear and tear of production assemble lines. But even the toughest chrome needs a little TLC. Dust, grease, metal shavings, and spilled liquids can build up over time, turning a smooth-rotating joint into a sticky, sluggish one. Ignore this buildup, and you risk reduced efficiency, premature wear, or even safety hazards like sudden jams. So, cleaning isn't just about aesthetics—it's about preserving the functionality that keeps your operations running like clockwork.
Why Cleaning Matters: The Impact of Neglect
You might be thinking, "It's just a joint—how much harm can a little dirt do?" More than you'd expect. Let's break down the consequences of skipping regular cleaning:
- Reduced Flexibility: A dirty joint struggles to rotate smoothly. Imagine trying to adjust a workbench's height mid-shift, only to have the joint seize up. That delay might seem small, but multiplied across a day (or a team), it adds up to lost productivity.
- Corrosion Risk: Chrome resists rust, but trapped moisture (from spills or humid environments) can sneak past dirt buildup and start eating away at the metal underneath. Once corrosion sets in, the joint's structural integrity weakens, and replacement becomes inevitable.
- Safety Hazards: Sticky joints don't just slow you down—they can surprise you. A joint that suddenly gives way after being stuck poses a risk of injury, especially if it's supporting heavy materials on a rack or trolley.
- Premature Replacement Costs: Lean systems are designed for longevity, but neglecting maintenance shortens their lifespan. Replacing a corroded joint costs more than a few minutes of cleaning, not to mention the downtime for repairs.
Think of it this way: Your lean system is only as strong as its weakest link. For many setups, that link is the small, hardworking components like parallel rotatory lean pipe joint chrome. Invest a little time in cleaning, and you'll keep that link—and your entire system—strong.
Tools and Materials: What You'll Need
Cleaning these joints doesn't require fancy equipment, but using the right tools is key to avoiding damage (like scratches to the chrome). Here's your go-to toolkit:
| Tool/Material | Purpose |
|---|---|
| Microfiber cloths | Gentle enough to clean chrome without scratching; traps dust and grease instead of pushing it around. |
| Soft-bristled brush (old toothbrush or small paintbrush) | Reaches into tight crevices where cloths can't—perfect for dislodging debris from joint grooves. |
| Mild dish soap (unscented) | Cuts through everyday grease and grime without harsh chemicals that can damage chrome. |
| White vinegar (distilled) | A natural degreaser and rust inhibitor—great for tackling stubborn oil or light corrosion spots. |
| Baking soda | Makes a gentle abrasive paste for stuck-on debris (think dried glue or paint splatters). |
| Compressed air can (with narrow nozzle) | Blows out loose dust from internal joint mechanisms—no need to disassemble. |
| Silicone-based lubricant (clear, non-drying) | Keeps the joint rotating smoothly after cleaning; avoids attracting dust like oil-based lubricants. |
| Nitrile gloves | Protects your hands from cleaning agents and sharp metal shavings that might hide in crevices. |
| Lint-free towel | Dries the joint thoroughly to prevent water spots and rust. |
Pro tip: Avoid harsh tools like steel wool, wire brushes, or abrasive sponges—they'll scratch the chrome, leaving it vulnerable to corrosion. Similarly, skip bleach, ammonia, or acidic cleaners (like toilet bowl cleaner) unless you want to strip the plating.

Step-by-Step Cleaning Guide: From Grimy to Gleaming
Now, let's get hands-on. Follow these steps to clean your parallel rotatory lean pipe joint chrome effectively, whether it's on a workbench, a material rack, or a turnover trolley.
Step 1: Prep the Area (and Yourself)
Safety first! Start by clearing the area around the joint. If the joint is part of a larger structure (like a workbench with caster and accessories), lock the casters to prevent movement. Put on your nitrile gloves to protect against sharp edges or cleaning agents. If the joint is greasy, lay down a rag or paper towel to catch drips—no one wants oil stains on the factory floor.
Step 2: Remove Loose Debris
Before introducing water, get rid of loose dust, dirt, and metal shavings. Grab your compressed air can, attach the narrow nozzle, and blast air into the joint's crevices. Hold the can upright (tilting it can spray liquid propellant, which is cold and can damage the chrome). Follow up with a soft-bristled brush, gently scrubbing around the joint's rotation points to dislodge any stubborn particles. Think of this as "dusting" the joint—you want to avoid grinding dirt into the chrome during the wet cleaning step.
Step 3: Wash with Mild Soap and Water
Fill a small bowl with warm water and add a drop or two of mild dish soap. Dip a microfiber cloth into the soapy water, wring it out until it's damp (not soaking), and wipe the chrome surface in gentle, circular motions. Pay extra attention to areas where grease builds up—often around the joint's locking mechanism or where hands frequently touch. For tight spots, use a soapy brush (an old toothbrush works great) to scrub without scratching.
Why mild soap? Harsh detergents can strip the chrome's protective layer, leaving it dull and prone to rust. Stick to unscented, phosphate-free options to keep the plating intact.
Step 4: Tackle Tough Stains with Vinegar or Baking Soda
For grease or light corrosion that soap alone can't handle, turn to white vinegar. Soak a corner of your microfiber cloth in vinegar, then press it onto the stain for 30 seconds (don't rub yet—let the vinegar break down the grime). Wipe gently, and the grease should lift right off. For dried-on debris like paint or glue, make a paste with baking soda and a few drops of water. Apply the paste to the stain, let it sit for 5 minutes, then scrub with a soft brush and rinse with a damp cloth. Baking soda is abrasive enough to remove gunk but gentle enough to avoid scratching chrome.
Step 5: Rinse and Dry Thoroughly
Once the joint is clean, dampen a fresh microfiber cloth with plain water and wipe away any soap or vinegar residue. Residue left behind can attract dust, so don't skip this step! Then, grab your lint-free towel and dry the joint completely—paying special attention to hidden areas where water might pool (like the base of the joint or around screws). Moisture is the enemy of chrome, so take your time here. If you're in a hurry, a hair dryer on the cool setting can speed things up (avoid heat, which can warp plastic components).
Step 6: Lubricate for Smooth Rotation
Cleaning removes not just dirt, but also the natural oils that keep the joint moving smoothly. Now it's time to replenish them—with the right lubricant. Silicone-based lubricants are ideal here: they're water-resistant, won't attract dust, and won't degrade plastic or rubber components (important if your joint has O-rings or gaskets). Apply a tiny amount (a drop or two) to the joint's rotation points. Use a toothpick or cotton swab to work the lubricant into tight spots. Then, rotate the joint back and forth a few times to distribute the lubricant evenly. Wipe off any excess with a clean cloth—you want a thin, invisible layer, not a goopy mess.
Step 7: Test and Inspect
Finally, give the joint a test run. Rotate it through its full range of motion—does it move smoothly? Are there any sticking points? If it still feels stiff, double-check for leftover debris or apply a tiny bit more lubricant. While testing, inspect the chrome for scratches, peeling, or pitting. Minor scratches are normal, but deep damage or peeling chrome might mean it's time to replace the joint (more on that in the troubleshooting section).

Common Mistakes to Avoid
Even with the best intentions, it's easy to slip up. Here are the top mistakes to steer clear of when cleaning parallel rotatory lean pipe joint chrome:
- Using Abrasive Tools: Steel wool, scouring pads, or even rough paper towels can scratch the chrome, creating tiny grooves where dirt and moisture collect. Stick to microfiber cloths and soft brushes.
- Over-Lubricating: More lubricant isn't better! Excess oil or silicone will attract dust and create a sticky mess. A little goes a long way—err on the side of too little, then add more if needed.
- Ignoring Hidden Areas: It's easy to wipe the visible chrome surface and call it a day, but dirt loves to hide in the joint's internal mechanisms. Use compressed air and a brush to reach those spots—your future self (and your lean system) will thank you.
- Using Acidic or Alkaline Cleaners: Bleach, ammonia, or industrial degreasers are too harsh for chrome. They can etch the plating, causing it to dull or peel over time. Stick to mild soap, vinegar, and baking soda.
- Rushing the Drying Step: Water spots are annoying, but the real risk is rust. Even a small puddle in a joint crevice can start corroding from the inside out. Take the time to dry thoroughly—patience pays off.
Creating a Maintenance Schedule
Cleaning once is great, but consistency is key. How often should you clean your parallel rotatory lean pipe joint chrome? It depends on how hard the joint works. Here's a general guideline to adapt to your workspace:
- Daily: For joints in high-use areas (like adjustable workbenches on production lines), a quick wipe with a dry microfiber cloth removes surface dust. This takes 10 seconds and prevents buildup.
- Weekly: Deep clean (steps 2–5) joints that see moderate to heavy use. Think of this as "maintenance light"—no need for vinegar or baking soda unless there's visible grime.
- Monthly: Full cleaning (all steps, including lubrication) for all joints. This is also a good time to inspect for wear, loose screws, or damage. Add this to your lean system maintenance checklist—consistency here prevents costly breakdowns.
- Quarterly: For joints in low-use areas (like backup material racks), a monthly wipe and quarterly deep clean should suffice. Even "idle" joints collect dust, so don't forget them!
Pro tip: Assign responsibility! In busy facilities, it's easy for maintenance tasks to fall through the cracks. Designate a team member to oversee lean pipe and accessories care, or rotate the duty among shifts. A simple checklist posted near the workbench can remind everyone to do their daily wipe-down.
Troubleshooting: When Cleaning Isn't Enough
Sometimes, even a thorough cleaning won't fix a stubborn joint. Here's how to diagnose common issues:
Issue: Joint Still Sticks After Cleaning
If rotation is still rough, check for misalignment. Over time, heavy loads or accidental bumps can shift the joint's components. Loosen the locking mechanism (if applicable), realign the pipes, and retighten. If that doesn't work, inspect the joint for debris trapped inside—you may need to disassemble it (consult the manufacturer's guide) to remove a stuck metal shaving or piece of plastic.
Issue: Chrome is Peeling or Pitting
Peeling chrome is a sign the protective layer is compromised. Small spots can be touched up with chrome polish, but widespread peeling means the joint is vulnerable to rust. In this case, replacement is safer than repair—corroded joints can fail unexpectedly, risking injury or damage to materials.
Issue: Unusual Noises (Squeaking, Grinding)
Squeaks often mean insufficient lubrication—try applying a bit more silicone lube. Grinding noises, however, are a red flag. They could signal worn internal parts (like bearings) or metal-on-metal contact due to loose screws. Stop using the joint immediately and inspect for damage—continuing to rotate it could make the problem worse.
Extending the Life of Your Lean Pipe Joints
Cleaning is the foundation of maintenance, but a few extra habits can make your parallel rotatory lean pipe joint chrome last even longer:
- Avoid Overloading: Every joint has a weight limit. Check the manufacturer's specs and resist the urge to hang heavy tools or materials from adjustable joints—overloading bends components and wears out chrome.
- Protect from the Elements: If your workspace is humid or exposed to water (like a washdown area), consider extra protection. A thin coat of car wax (applied quarterly) adds a water-repellent layer to the chrome.
- Store Spare Joints: Keep a few parallel rotatory lean pipe joint chrome in stock. That way, if one fails unexpectedly, you can swap it out without halting production.
- Train Your Team: Make sure everyone using the equipment knows how to adjust joints properly. Forcing a stuck joint (instead of cleaning it) is a common cause of damage—education prevents this!
Final Thoughts: Small Steps, Big Results
Cleaning a parallel rotatory lean pipe joint chrome might seem like a small task, but in the world of lean manufacturing, small steps add up to big results. A well-maintained joint keeps your workbench adjustable, your flow racks flexible, and your team efficient. It prevents downtime, reduces replacement costs, and ensures your lean system lives up to its promise of agility and productivity.
So, the next time you walk past a workbench or adjust a material rack, take a second to notice the joints holding it all together. Give them a quick wipe, add it to your schedule, and rest easy knowing you're keeping the heart of your lean system beating strong. After all, in lean manufacturing, efficiency starts with the details—and a clean joint is a detail that matters.