- Company Articles
- Products and Technology
- Installation And Maintenance
- How to Clean Parallel Rotatory Lean Pipe Joints Properly

How to Clean Parallel Rotatory Lean Pipe Joints Properly
Related Product
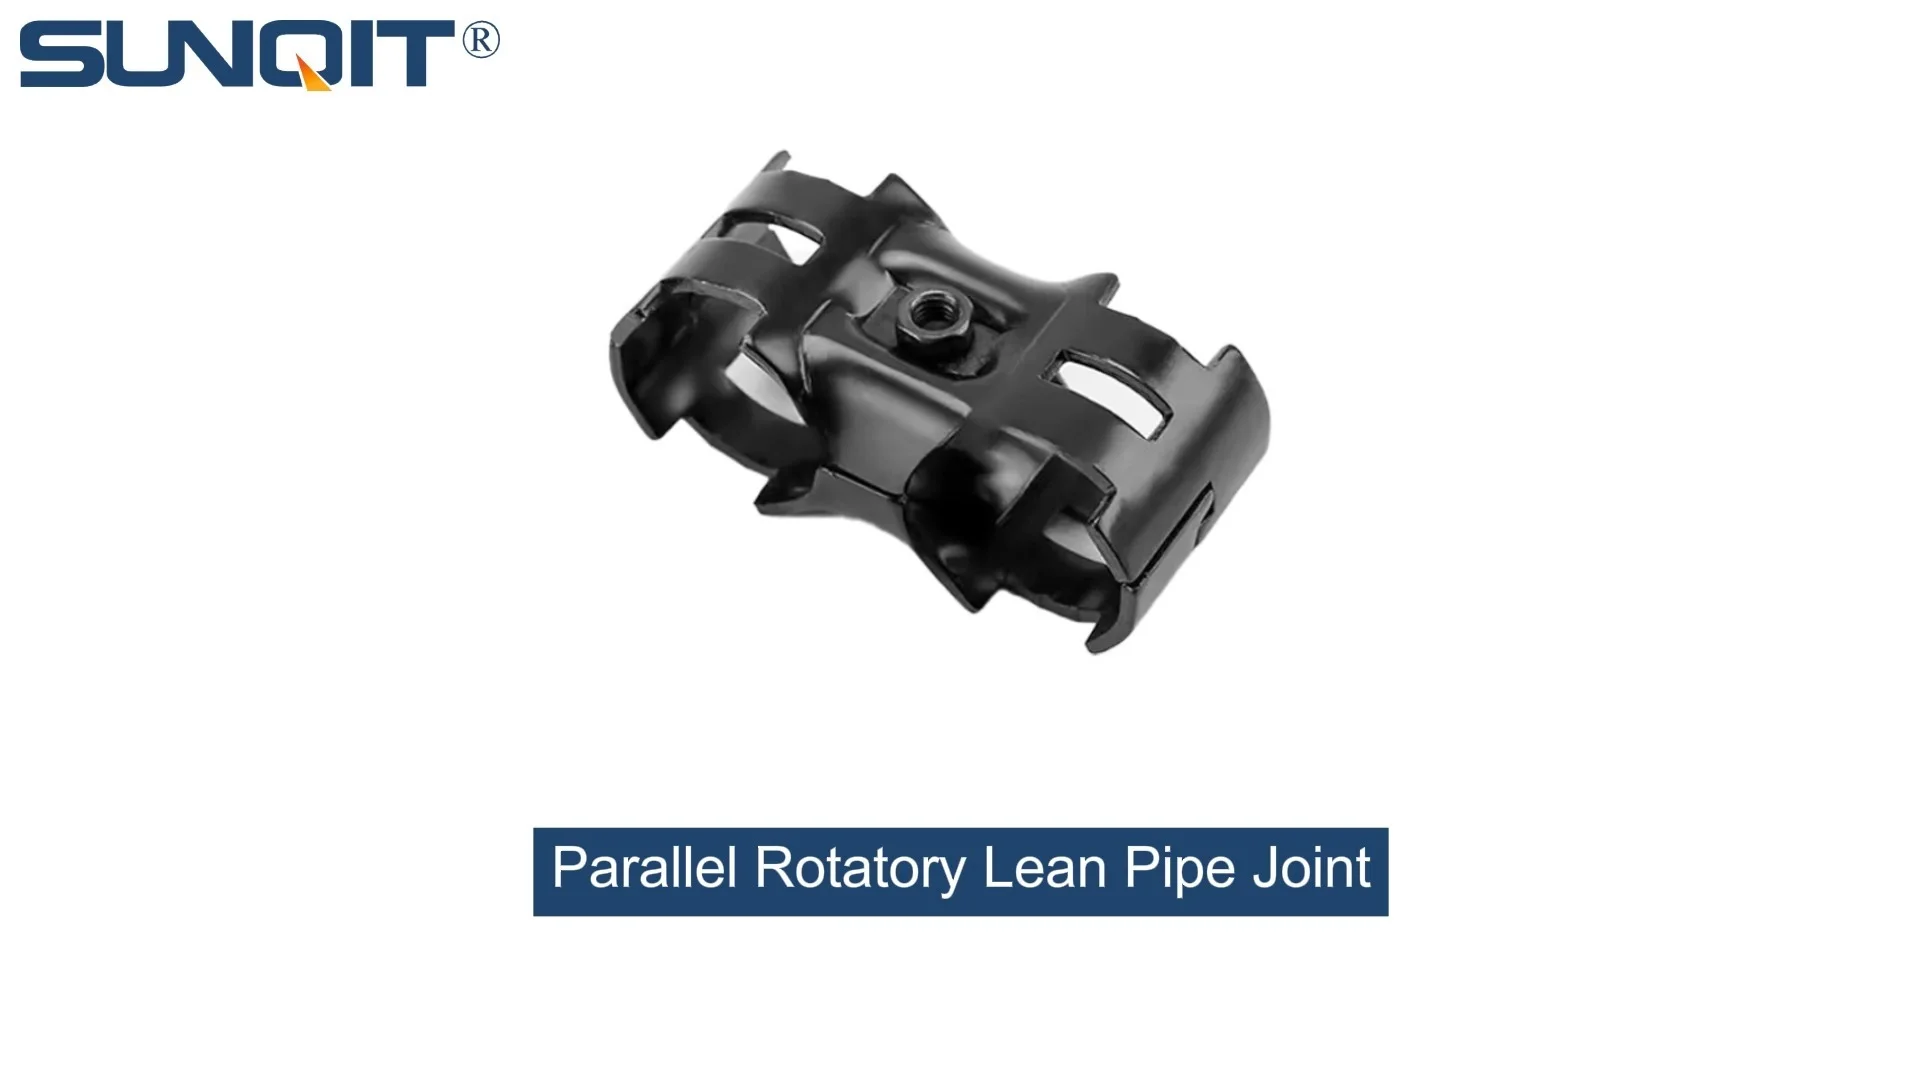
Parallel Rotatory Lean Pipe Joint
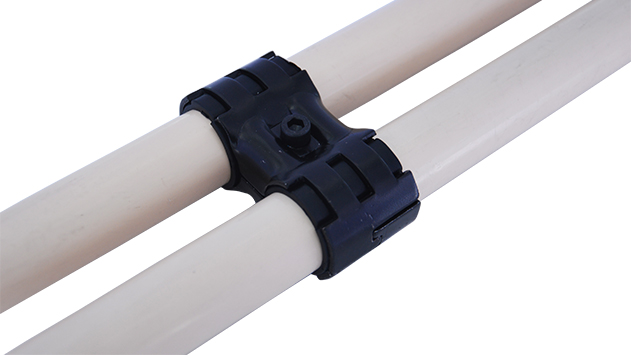
Parallel rotatory lean pipe joint, for 2 pcs pipe conenction in parallel direction with rotatory function.
In the world of lean manufacturing, where efficiency is king and waste is the enemy, every component plays a critical role in keeping operations running smoothly. Among these components, the parallel rotatory lean pipe joint might not be the most glamorous, but it's undoubtedly one of the hardest workers. Found in everything from assembly line workbenches to material transport systems, this small but mighty joint is responsible for enabling smooth, rotational movement—think of it as the "hinge" that lets lean pipe structures adapt, rotate, and function without a hitch. But like any hard worker, it needs a little TLC to keep performing at its best. That's where proper cleaning comes in. In this guide, we'll walk through exactly how to clean parallel rotatory lean pipe joints the right way, why it matters, and how to turn this simple maintenance task into a secret weapon for boosting your facility's productivity.
Why Cleaning Parallel Rotatory Lean Pipe Joints Matters More Than You Think
Before we dive into the "how," let's talk about the "why." You might be thinking, "It's just a metal joint—does it really need regular cleaning?" The short answer: absolutely. Here's why:
- Prevents Costly Jams and Downtime: Parallel rotatory lean pipe joints rely on smooth rotation to keep materials moving, workbenches adjusting, and workflows flowing. Even a tiny buildup of dust, grease, or debris can turn a seamless rotation into a frustrating, jerky movement—or worse, a full-on jam. In a busy production environment, a single jammed joint can bring an entire line to a halt, costing time, money, and momentum.
- Reduces Wear and Tear (Saves You Money): Dirt and grime act like sandpaper on moving parts. Every time a dirty joint rotates, that debris grinds against the metal, wearing down the joint's surfaces and shortening its lifespan. Regular cleaning removes this abrasive buildup, extending the life of your lean pipe joints and delaying the need for expensive replacements.
- Ensures Safety First: A stuck or jerky joint isn't just inefficient—it's a safety hazard. If a worker has to use extra force to rotate a jammed joint, they risk straining muscles or losing control, leading to accidents. Clean joints move predictably, reducing the chance of injuries and keeping your team safe.
- Protects Against Corrosion: Many lean pipe systems, including their joints, are made from aluminum or coated steel to resist rust. But even these materials aren't immune to corrosion if left unchecked. Moisture, combined with dirt or chemical residues (like oils from machinery), can eat away at protective coatings over time. Cleaning removes these corrosive agents, keeping your joints strong and rust-free.
- Maintains Lean Principles: At its core, lean manufacturing is about eliminating waste—including waste from broken equipment, downtime, and unnecessary repairs. By taking 10 minutes to clean a joint today, you're preventing hours of waste tomorrow. It's lean maintenance at its finest.
Gathering Your Tools: What You'll Need (and What to Avoid)
Cleaning parallel rotatory lean pipe joints doesn't require fancy equipment or industrial chemicals—in fact, using the wrong tools can do more harm than good. Here's a simple, effective toolkit to get the job done safely:
Soft-Bristle Brush (Toothbrush or Detail Brush)
A small, soft-bristle brush (an old toothbrush works great!) is perfect for dislodging debris from tight crevices in the joint. Avoid stiff-bristle brushes, which can scratch aluminum surfaces or strip protective coatings.
Microfiber Cloth
Microfiber cloths are gentle on metal and super absorbent, making them ideal for wiping away loosened dirt and drying the joint after cleaning. Skip paper towels—they can leave lint behind, which just creates more work later.
Mild Detergent (Dish Soap Works!)
For most grime, a few drops of mild dish soap mixed with warm water is all you need. Avoid harsh chemicals like bleach, ammonia, or abrasive cleaners—they can corrode aluminum or damage the joint's finish.
Compressed Air Canister or Air Compressor
Compressed air is perfect for blowing out dust and debris from hard-to-reach areas, like the inner rotating mechanism of the joint. If you don't have a compressor, a can of compressed air (the kind used for cleaning keyboards) works too—just hold it upright to avoid spraying liquid propellant.
Isopropyl Alcohol (Optional, for Tough Grime)
For sticky residues (like dried grease or adhesive), a small amount of isopropyl alcohol (70% or higher) on a microfiber cloth can cut through the mess. Test it on a small, hidden part of the joint first to ensure it doesn't damage the finish.
Step-by-Step: How to Clean Parallel Rotatory Lean Pipe Joints (The Right Way)
Now that you've got your tools ready, let's walk through the cleaning process step by step. This method works for most parallel rotatory lean pipe joints, whether they're made of aluminum, steel, or coated materials. Note: If your joint is part of a larger lean pipe structure, you may need to disconnect it temporarily for thorough cleaning—check your system's manual for guidance on safe disassembly.
1
Pre-Cleaning Inspection: Check for Damage or Wear
Before you start scrubbing, take a minute to inspect the joint. Look for signs of wear, like cracks, bent parts, or excessive rust—these issues can't be fixed by cleaning alone, and you'll want to address them separately (we'll cover troubleshooting later). Also, note where the dirt is concentrated: Is it caked around the rotation point? Stuck in the crevices between the joint and the lean pipe? This will help you target your cleaning efforts. If you notice loose parts or broken components, stop and replace them first—cleaning a damaged joint won't restore its function, and you could risk injury.
2
Remove Loose Debris with Compressed Air
Start by blowing away loose dust, dirt, and debris using compressed air. Hold the can or compressor nozzle about 6–8 inches from the joint, and aim at the rotation points, crevices, and any gaps where dirt might hide. Move the nozzle in a circular motion to cover all angles—this step is crucial because it prevents loose debris from getting pushed deeper into the joint during cleaning. Think of it like sweeping a floor before mopping: you wouldn't want to spread dirt around instead of removing it! If the joint is still attached to the lean pipe structure, be careful not to blow debris onto other components—you can use a small piece of cardboard as a "shield" to catch flying dust.
3
Deep Clean with Soap and Water (or Alcohol for Tough Grime)
Now it's time to tackle the remaining grime. Dip your soft-bristle brush into a bowl of warm, soapy water (a few drops of dish soap is enough—you don't need a sudsy mess) and gently scrub the joint's surfaces, focusing on the rotation points and crevices. Use small, circular motions to dislodge stuck-on dirt, but be gentle—you don't want to scratch aluminum or damage any plastic or rubber components. For extra-tough spots (like dried grease or oil), dampen a corner of your microfiber cloth with isopropyl alcohol and rub the area lightly. Let the alcohol sit for 30 seconds to dissolve the grime, then wipe it away with a clean part of the cloth.
Pro tip:
If the joint has moving parts, rotate it slowly while cleaning to ensure you reach all sides of the rotation mechanism.
4
Rinse and Dry Thoroughly (No Moisture Left Behind!)
Once the joint is clean, it's time to rinse— but skip the running water if possible. Instead, dampen a fresh microfiber cloth with clean water (no soap!) and wipe away any soap residue. This prevents water spots and ensures you don't introduce extra moisture into the joint. After rinsing, dry the joint immediately with another dry microfiber cloth. Pay special attention to the rotation points and crevices, where water can hide and cause rust or corrosion later. If you're in a hurry, you can use compressed air again to blow-dry hard-to-reach areas—just make sure the air is dry (moisture in the air compressor can undo your hard work!).
5
Lubricate (If Needed) and Reassemble
Some parallel rotatory lean pipe joints (especially those with metal-on-metal contact) benefit from a light lubricant to keep rotation smooth. If your joint came with lubrication instructions, follow them—but in most cases, a drop or two of lightweight machine oil (like 3-in-1 oil) on the rotation points is enough.
Less is more here!
Too much lubricant can attract dirt and create a new buildup problem. After lubricating, rotate the joint a few times to distribute the oil evenly. If you disconnected the joint from the lean pipe structure, now's the time to reassemble it—make sure it's tightened securely but not so tight that it restricts rotation. Give it a final spin to test: it should move smoothly, with no sticking or grinding.

Creating a Maintenance Schedule: How Often Should You Clean?
The key to keeping parallel rotatory lean pipe joints in top shape is consistency. How often you clean them depends on how much they're used and the environment they're in. Here's a quick guide to help you set a schedule:
| Usage Level | Environment | Cleaning Frequency | Pro Tips |
|---|---|---|---|
| High (Daily, constant rotation) | Dusty, greasy, or humid | Weekly | Add a quick compressed air blast mid-week to prevent buildup. |
| Medium (Daily use, occasional rotation) | Clean, dry factory floor | Every 2–3 weeks | Inspect for wear during cleaning—medium-use joints can develop hidden stress points. |
| Low (Occasional use, rarely rotated) | Climate-controlled storage | Monthly | Even low-use joints need love! Dust can settle and harden over time. |

Common Mistakes to Avoid (So You Don't Ruin Your Joints)
Even with the best intentions, it's easy to make missteps when cleaning parallel rotatory lean pipe joints. Here are the most common mistakes—and how to steer clear of them:
Mistake #1: Using Abrasive Tools (Scrub Brushes, Steel Wool, or Sandpaper)
It's tempting to grab a heavy-duty scrub brush to tackle tough grime, but abrasive tools scratch aluminum surfaces, remove protective coatings, and create tiny grooves where dirt can hide later. Stick to soft-bristle brushes and microfiber cloths—they're gentle enough to clean without damaging the joint.
Mistake #2: Over-Lubricating (More Oil = Better Rotation, Right? Wrong.)
Lubricant is great for smooth rotation, but too much turns your joint into a dirt magnet. Excess oil drips onto the lean pipe, attracts dust, and forms a sticky sludge that's even harder to clean. A good rule of thumb: 1–2 drops of oil per rotation point, max. If you see oil pooling, wipe it away immediately.
Mistake #3: Ignoring "Small" Debris (Dust, Lint, or Metal Shavings)
That tiny speck of dust might seem harmless, but over time, it adds up. Even small debris can wear down the joint's rotation mechanism or cause it to stick. Don't skip the compressed air step—those small particles are often the biggest troublemakers.
Troubleshooting: What If Your Joint Still Sticks After Cleaning?
You've cleaned the joint, dried it, and lubricated it—but it's still sticking or rotating roughly. Don't panic! Here's what might be going on:
- Misalignment: If the joint is bent or misaligned (common after heavy use), cleaning alone won't fix it. Check if the lean pipe is straight and the joint is mounted evenly. If not, loosen the mounting bolts, realign the joint, and retighten.
- Worn Parts: Over time, the joint's internal components (like bearings or washers) can wear out, causing friction. If cleaning doesn't help, inspect the joint for worn or broken parts—you may need to replace it with a new lean pipe joint. Look for reputable suppliers to ensure you're getting a high-quality replacement that fits your lean pipe system.
- Corrosion: If you see rust or corrosion (even after drying), the joint may have been exposed to moisture for too long. Light corrosion can sometimes be removed with a paste of baking soda and water (gently rubbed with a soft cloth), but severe corrosion means it's time for a new joint.
Final Thoughts: Cleaning as a Lean Habit
Cleaning parallel rotatory lean pipe joints might not be the most exciting task on your to-do list, but it's one of the most impactful. By taking 10–15 minutes every week or two to care for these small components, you're investing in smoother workflows, fewer breakdowns, and a longer lifespan for your lean pipe system. And isn't that what lean manufacturing is all about? Eliminating waste, maximizing efficiency, and making every part of your operation work smarter, not harder.
So the next time you walk past that assembly line or material rack, take a second to notice the parallel rotatory lean pipe joints hard at work. Give them a quick inspection, grab your brush and cloth, and show them a little appreciation. Your future self (and your production numbers) will thank you.