- Company Articles
- Products and Technology
- Installation And Maintenance
- How to replace Damaged Lean Pipe Clamps: Step-by-Step Process

How to replace Damaged Lean Pipe Clamps: Step-by-Step Process
Related Product
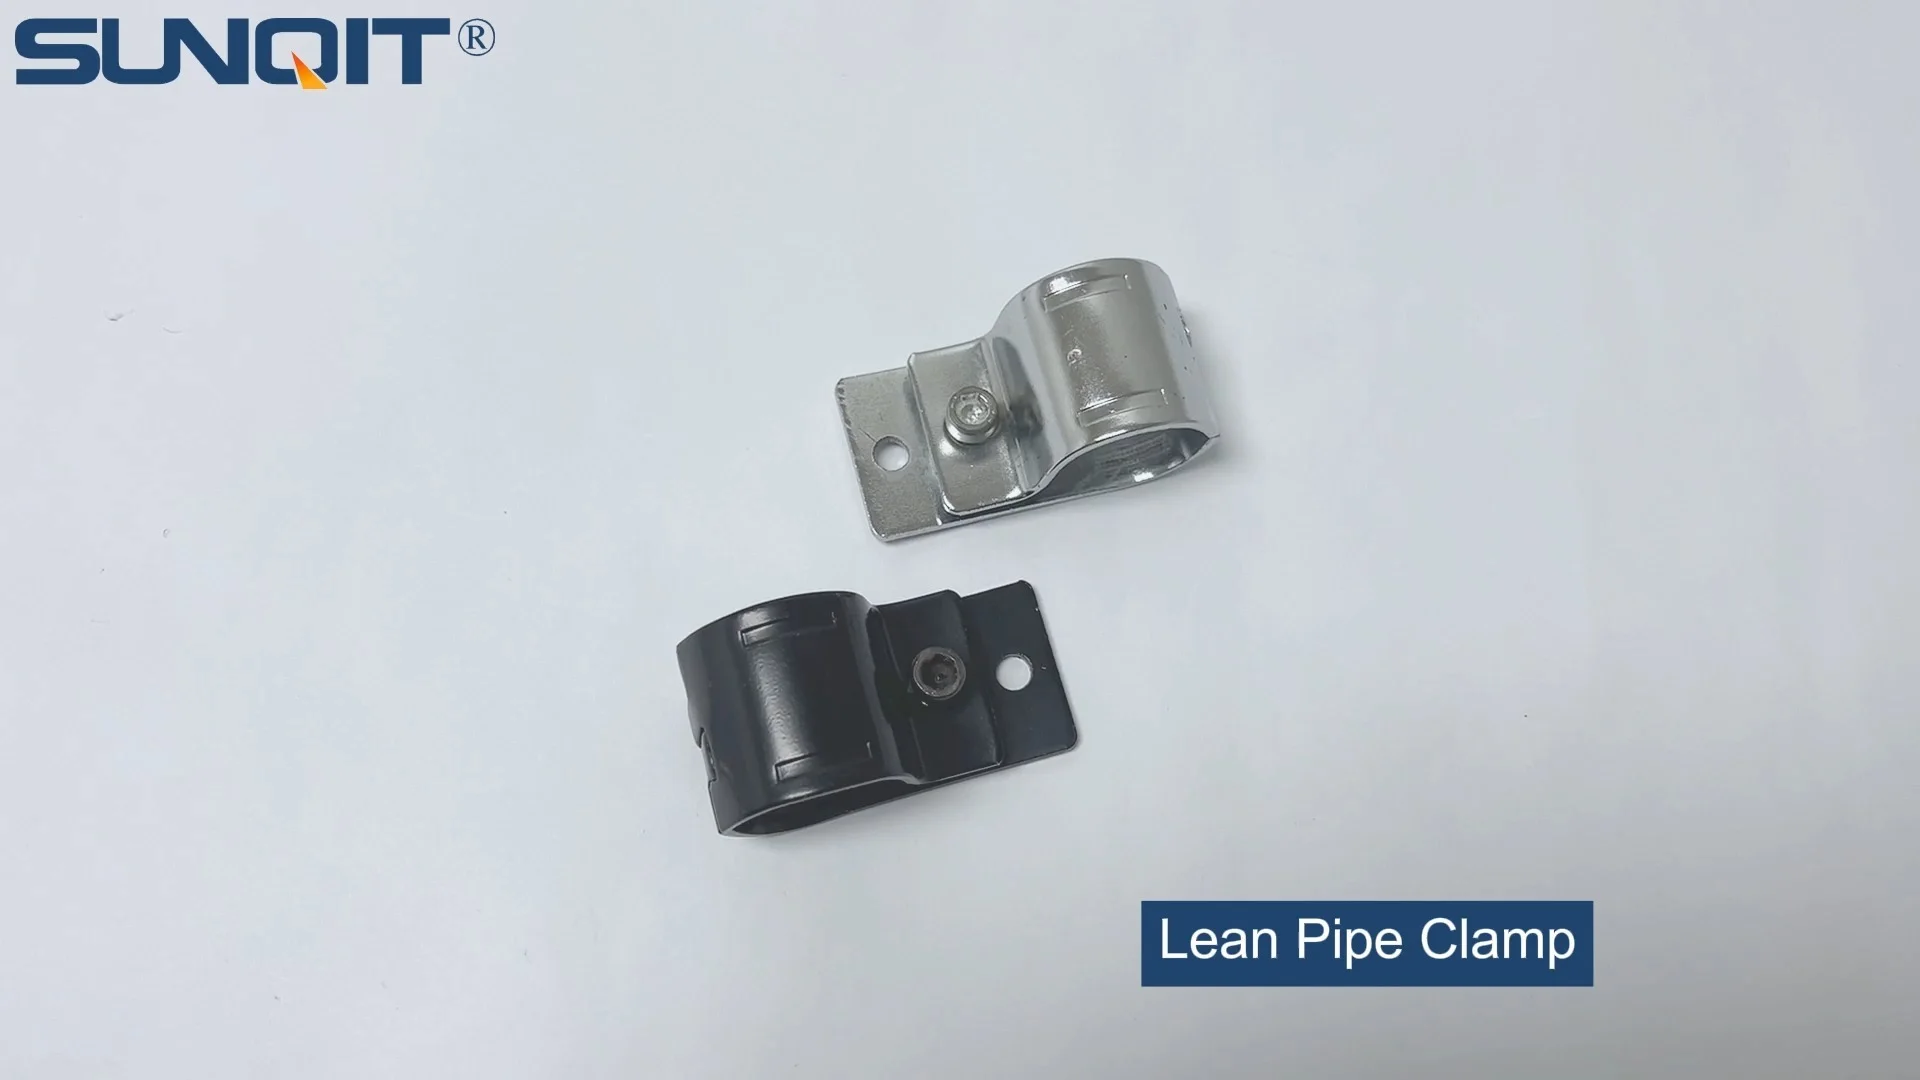
Lean Pipe Clamp
Lean pipe clamp is used for rack system hang monitor or other panel for workbenck, flowrack in production daily use.
Picture this: It's a busy Tuesday morning on your production floor. Your team is in the zone, assembling components at the lean pipe workbench, when suddenly, Maria from the assembly line calls out, "Hey, this workbench is wobbly again!" You walk over, give it a gentle shake, and sure enough—the whole structure tilts slightly to the left. A quick glance underneath reveals the culprit: a cracked lean pipe clamp where the aluminum pipe connects to the joint. "Not again," you sigh. But here's the thing: that small, unassuming clamp is the unsung hero holding your entire lean system together. When it fails, it's not just a minor annoyance—it can slow down production, create safety hazards, and even damage expensive equipment. The good news? Replacing a damaged lean pipe clamp is a straightforward task that anyone on your team can learn with the right guidance. In this article, we'll walk through the entire process, from identifying the problem to testing the repaired structure, so you can get your workbench (or flow rack, or conveyor—whatever your lean system entails) back to peak performance in no time.
Why Lean Pipe Clamps Matter (More Than You Think)
Before we dive into the "how," let's take a second to appreciate why these clamps are so critical. Lean pipe systems—whether they're workbenches, material racks, or turnover trolleys—are built on modularity. They use aluminum pipes, joints, and accessories to create flexible, customizable structures that adapt to your workflow. But without sturdy lean pipe clamps, that flexibility becomes a liability. Clamps are the glue that holds pipes and joints together, distributing weight evenly and ensuring stability. A damaged clamp might start as a small crack or a loose screw, but over time, it can lead to:
- Wobbly structures: A loose workbench or rack can throw off precision work, leading to errors in assembly.
- Slower production: Team members might waste time adjusting unstable equipment or avoiding using it altogether.
- Safety risks: In the worst case, a clamp could cause the structure to collapse, injuring workers or damaging materials.
The bottom line? Ignoring a damaged clamp is like ignoring a loose brick in your house's foundation—it might not seem urgent now, but it will only get worse. The sooner you replace it, the better.
Preparing for the Job: Tools, Materials, and Safety First
Like any DIY task, replacing a lean pipe clamp starts with preparation. You wouldn't bake a cake without preheating the oven, right? The same logic applies here. Gather these tools and materials before you start, and you'll breeze through the process:
| Item | Purpose | Notes |
|---|---|---|
| Replacement lean pipe clamp | To replace the damaged clamp | Ensure it matches the size and type of your existing clamp (e.g., 28mm for standard aluminum lean pipe). |
| Phillips-head screwdriver (or hex key) | To loosen/tighten screws on the clamp | Check the clamp's fasteners first—some use Phillips screws, others hex bolts. |
| Adjustable wrench | For stubborn or rusted fasteners | Use a rubber mallet to tap gently if the wrench slips (avoid overtightening). |
| Safety gloves | To protect hands from sharp edges or metal burrs | Leather or nitrile gloves work best—avoid latex if you're working with metal. |
| Safety glasses | To shield eyes from flying debris | Even a small metal shard from a rusted clamp can cause injury. |
| Clean cloth or rag | To wipe down the pipe and joint before installing the new clamp | A microfiber cloth works well for removing grease or dust. |
| Thread locker (optional) | To prevent screws from loosening over time | Use a medium-strength thread locker (like Loctite Blue) for best results. |
Safety First: A Quick Reminder
Before you start, take a minute to secure your workspace. If the damaged clamp is on a workbench with casters, lock the caster wheels to prevent the structure from rolling. If you're working on a flow rack or conveyor, power down any nearby machinery and put up a "Do Not Use" sign to keep others away. And always wear your gloves and safety glasses—even if you've done this a hundred times. Accidents happen when we get complacent, and a little precaution goes a long way.

Step-by-Step: Replacing Your Damaged Lean Pipe Clamp
Now that you're prepped and safe, let's get to the main event: replacing the clamp. We'll break this down into six simple steps, with tips to avoid common pitfalls along the way.
Step 1: Identify the Exact Clamp (and Check for Hidden Damage)
First, confirm which clamp is causing the problem. Sometimes, what looks like a single damaged clamp is actually part of a bigger issue. For example, if your workbench is wobbly, gently push on different parts of the structure to see where the movement is coming from. Is it the clamp connecting the vertical pipe to the horizontal pipe? Or is it where the pipe meets the caster base? Once you've pinpointed the culprit, inspect it closely. Look for cracks, stripped screws, bent metal, or rust that's eating through the material. If the clamp is merely loose (not cracked), you might be able to tighten it—but if there's visible damage (like a split in the metal), replacement is non-negotiable. Pro tip: While you're at it, check the surrounding lean pipe joints and accessories. A damaged clamp might be a sign that other components are wearing out too—better to catch them early!
Step 2: Remove the Old Clamp (The Gentle Way)
Now, it's time to take off the damaged clamp. Start by loosening the screws or bolts that hold it in place. Grab your screwdriver or hex key and turn counterclockwise—slowly. If the screws are rusted or stuck, spray a little penetrating oil (like WD-40) and let it sit for 5 minutes. Avoid forcing it—stripping the screw head will only make things harder. If the clamp is attached to an aluminum pipe, be extra careful not to scratch the pipe's surface (aluminum is softer than steel, so it dents easily). Once the screws are loose, gently wiggle the clamp back and forth to free it from the pipe and joint. If it's really stuck, use a flathead screwdriver to pry it open slightly—just don't bend the pipe in the process. Once the clamp is off, set it aside (you can recycle it later!) and take a moment to inspect the pipe and joint where it was attached. Are there any burrs, rust spots, or dents? If so, sand them down gently with fine-grit sandpaper to ensure the new clamp sits flush.
Step 3: Clean the Area (Yes, This Matters)
You might be tempted to skip this step—after all, it's just a little dirt, right? Wrong. Even a thin layer of dust, grease, or rust can prevent the new clamp from gripping properly, leading to loosening later. Take your clean cloth and wipe down the pipe and joint thoroughly. If there's caked-on grease, dampen the cloth with a little isopropyl alcohol (it evaporates quickly, so it won't leave residue). For rust spots, a wire brush (soft-bristled, to avoid scratching aluminum) works wonders. Once the area is clean, dry it completely—moisture trapped under the clamp can cause corrosion, defeating the purpose of replacing it. Trust us: This 2-minute step will save you from having to redo the job in a month.
Step 4: Position the New Clamp (Alignment Is Key)
Now, grab your replacement lean pipe clamp. Double-check that it's the right size—most standard clamps fit 28mm or 30mm pipes, but if you're using aluminum lean pipe, confirm the diameter matches. Hold the clamp up to the pipe and joint, and visualize how it should sit. The clamp should wrap tightly around the pipe, with the joint fitting snugly into the clamp's groove. If your clamp has a rotating joint (like an internal rotary aluminum joint), make sure it's facing the right direction—you don't want to install it upside down! Once you're happy with the position, hold the clamp in place with one hand (or ask a teammate to help if it's a large structure). Pro tip: If the pipe is vertical, use a level to ensure it's straight before securing the clamp—this will prevent the structure from leaning later.
Step 5: Secure the Clamp (Tight, but Not Too Tight)
Now, it's time to fasten the new clamp. insert the screws (reuse the old ones if they're in good shape, or use the new ones that came with the clamp) and tighten them clockwise with your screwdriver or hex key. Here's the golden rule: Tighten until the clamp is snug, but stop before you feel resistance. Over-tightening can strip the threads, crack the clamp, or warp the pipe—especially with aluminum. A good test: After tightening, try to wiggle the clamp with your hand. If it doesn't move, you're good. If it shifts, tighten a little more. If you're using thread locker (as we mentioned earlier), apply a small drop to the screw threads before inserting them—it will keep the screws from loosening due to vibration over time. Once the clamp is secure, give the pipe a gentle tug to make sure it doesn't budge. If it holds, you're halfway there!
Step 6: Test the Structure (Shake It Like You Mean It)
The final step is to test the repaired structure. Stand back and give the workbench (or rack, or trolley) a firm shake—simulate the kind of movement it would get during a busy workday. Does it wobble? If not, great! If it still moves, check the clamp again—maybe it's not aligned properly, or the screws need a little more tightening. You can also load the structure with its usual materials (e.g., place a box of components on the workbench) to see how it holds under weight. If everything feels solid, congratulations—you've successfully replaced the clamp! Take a moment to lock the caster wheels (if your structure has them) to prevent accidental movement, and clean up your tools. Your team will thank you for the stable workspace, and you'll rest easy knowing you've avoided a potential disaster.

Troubleshooting: Common Issues (and How to Fix Them)
Even with careful work, you might run into a few hiccups. Here are the most common problems and how to solve them:
Issue 1: The New Clamp Doesn't Fit
If the clamp is too loose or too tight on the pipe, double-check the size. Lean pipe clamps come in different diameters (e.g., 28mm for standard steel pipes, 30mm for aluminum), and using the wrong one is a common mistake. If you're sure it's the right size, check if the pipe is bent—even a slight curve can throw off the fit. In that case, you may need to straighten the pipe first (use a rubber mallet to gently tap it into shape) before reinstalling the clamp.
Issue 2: The Clamp Loosens After a Day of Use
This usually happens for one of two reasons: either the screws weren't tight enough, or there's too much vibration in the structure. If it's the former, tighten the screws a little more (but don't overdo it!). If it's vibration, add a washer under the screw heads to distribute pressure, or use thread locker as mentioned earlier. You can also check if the caster wheels are uneven—if the structure isn't level, it will rock, loosening the clamp over time.
Issue 3: The Pipe Is Scratched or Damaged
If you accidentally scratched the aluminum pipe while removing the old clamp, don't panic. Light scratches can be buffed out with a metal polish. For deeper dents, use a plunger (yes, really!)—moisten the pipe, place the plunger over the dent, and pull gently to pop it out. If the pipe is bent beyond repair, you'll need to replace the section—but that's a rare scenario for a simple clamp replacement.

Preventing Future Clamp Damage: Maintenance Tips
Now that your clamp is replaced, let's make sure it stays in good shape. A little maintenance goes a long way toward extending the life of your lean pipe and accessories:
- Inspect regularly: Add a monthly "clamp check" to your team's to-do list. Have someone walk around and tighten loose clamps—catching them early prevents damage.
- Clean often: Wipe down pipes and clamps with a damp cloth to remove dust and grease. In humid environments, dry them thoroughly to prevent rust.
- Lubricate moving parts: If your lean system has rotating joints (like swivel roller balls or internal rotary aluminum joints), apply a drop of machine oil every 3 months to reduce friction.
- Train your team: Teach everyone to report loose or damaged clamps immediately. The sooner you know, the sooner you can fix it.
- Stock spares: Keep a few extra lean pipe clamps and accessories in your tool closet. You never know when you'll need them, and waiting for a replacement can halt production.
Final Thoughts: Small Fixes, Big Impact
Replacing a lean pipe clamp might seem like a minor task, but it's a perfect example of how lean manufacturing works—focusing on small, incremental improvements to keep the whole system running smoothly. By taking the time to learn this skill, you're empowering yourself and your team to maintain your lean system independently, reducing downtime and keeping production on track. Remember: A well-maintained workbench, flow rack, or conveyor isn't just about efficiency—it's about creating a workspace where your team feels safe, supported, and able to do their best work. So the next time you spot a damaged clamp, don't dread it—grab your tools, follow these steps, and take pride in keeping your lean system strong. After all, every great production line starts with the basics: solid pipes, sturdy joints, and yes—reliable clamps.