- Company Articles
- Products and Technology
- Installation And Maintenance
- How to Disassemble & Reuse External Straight Aluminum Joints

How to Disassemble & Reuse External Straight Aluminum Joints
Related Product
External Straight Aluminum Joint
Aluminum pipe joint outside connection used for two pcs 28pcs aluminum pipe connection in straight angle,it connects two pcs pipe from outside.
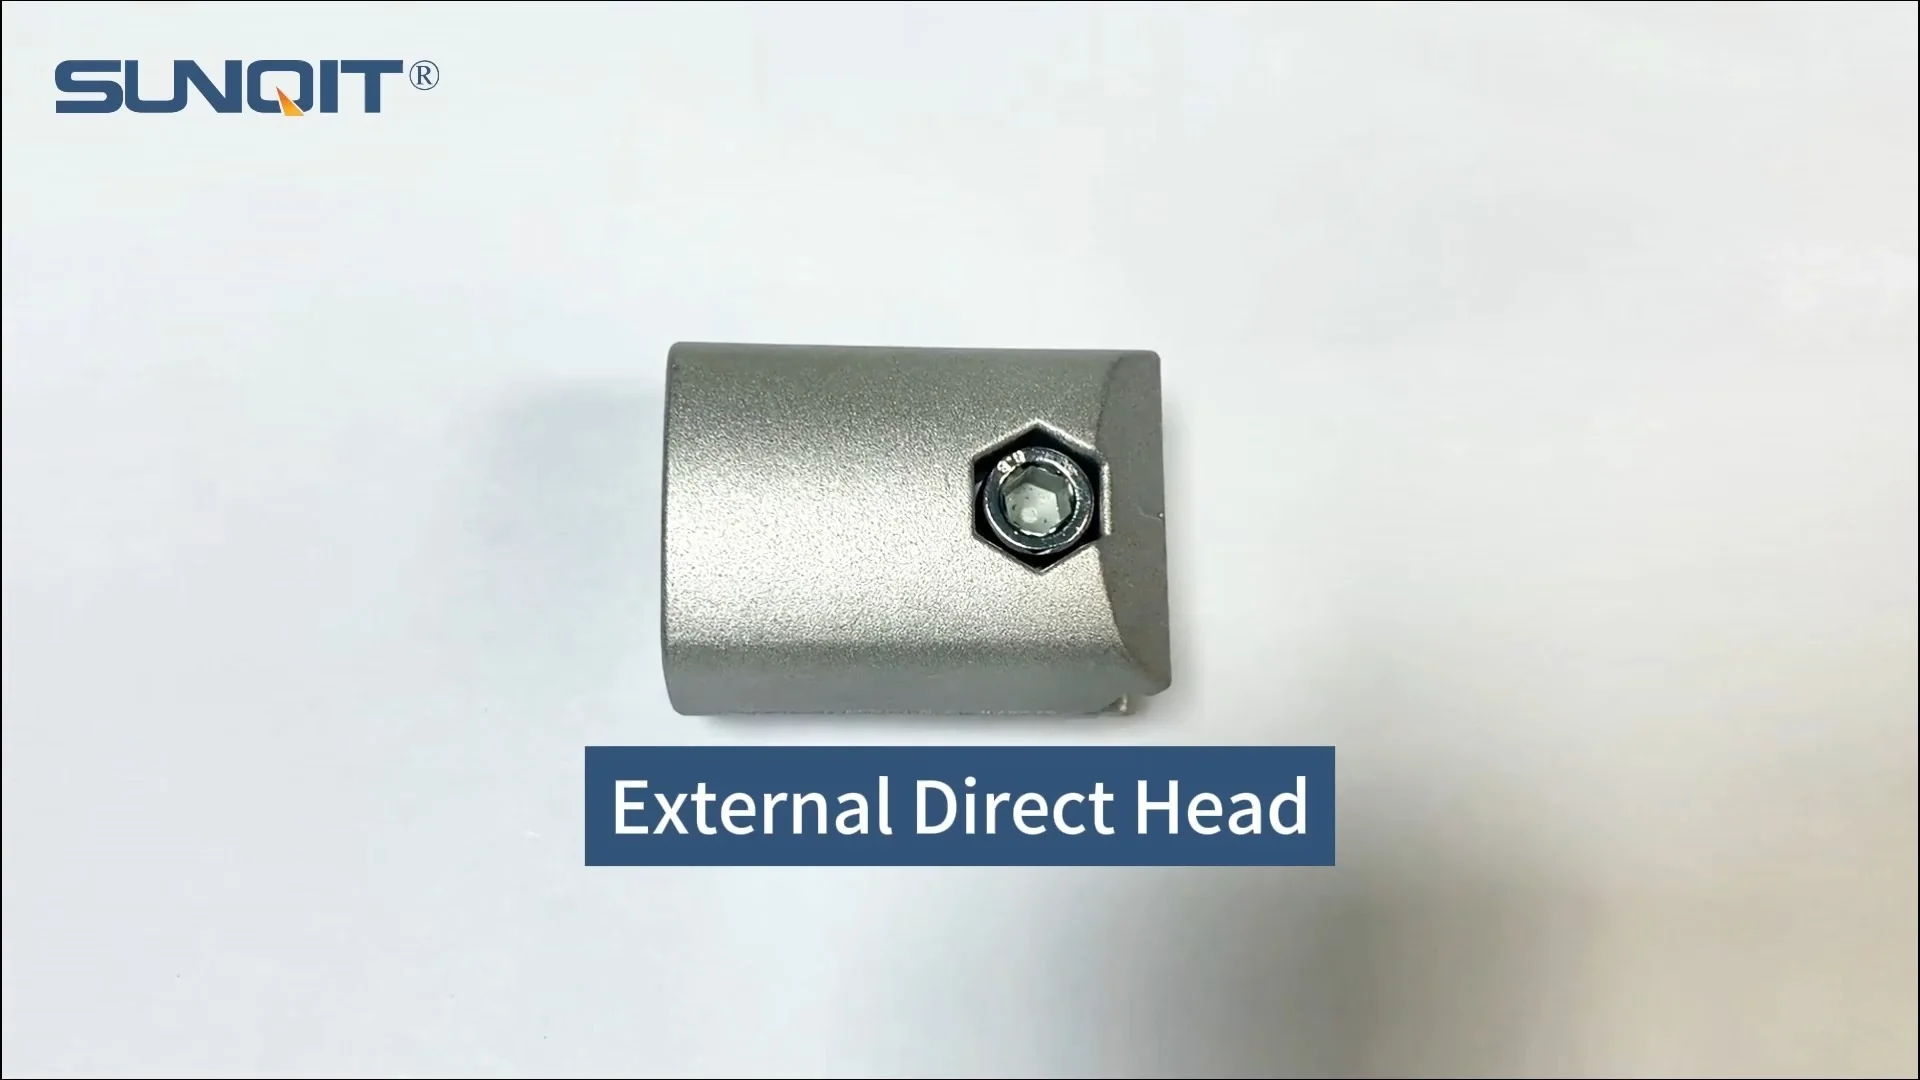
If you've ever walked through a manufacturing floor, a warehouse, or even a small workshop, you've probably seen them—those unassuming yet crucial components that hold everything together. I'm talking about aluminum joints, the silent workhorses of lean systems and modular setups. Today, we're zeroing in on one specific star: the external straight aluminum joint. These little connectors are the backbone of aluminum pipe structures, from workbenches to material racks, and knowing how to take them apart and give them a second life isn't just a skill—it's a game-changer for sustainability, cost-efficiency, and adaptability in any workspace.
Whether you're a seasoned facility manager, a small business owner looking to cut costs, or a DIY enthusiast building your own workspace, understanding how to disassemble and reuse external straight aluminum joints can transform how you approach projects. Let's dive in—no jargon, just practical steps, real-world insights, and why this matters more than you might think.
First Things First: What Even Is an External Straight Aluminum Joint?
Before we grab our tools, let's make sure we're on the same page. An external straight aluminum joint is exactly what it sounds like: a connector designed to join two aluminum pipes or profiles in a straight line, sitting externally (meaning it wraps around the outside of the pipes, not inside). Think of it as the glue that holds your aluminum lean pipe workbench together, or the hinge that keeps your material rack from wobbling. These joints are usually made from durable aluminum alloy, coated to resist rust and wear, and they come in various sizes to fit different aluminum pipe diameters—most commonly 20mm, 30mm, or 40mm, depending on the load they need to support.
What makes them special? Unlike fixed welds, these joints are modular. That means you can twist, turn, and take them apart without breaking a sweat (or a pipe). This modularity is why they're a staple in lean manufacturing—they let teams reconfigure workspaces on the fly, adapt to new production needs, and reduce waste. And here's the kicker: they're built to be reused. So if you're tossing out old joints when you redesign a workstation, you're leaving money (and sustainability points) on the table.
Why Bother Reusing Them? Let's Talk Sustainability & Savings
Let's get real: Running a workshop or manufacturing line isn't cheap. Between materials, labor, and unexpected hiccups, every dollar counts. Reusing external straight aluminum joints isn't just "green"—it's smart business. A single new joint might cost $5–$15, depending on the size and brand. If you're reconfiguring a large setup with 50 joints, that's $250–$750 you could save by reusing what you already have. Multiply that over a year, and it adds up fast.
But it's not just about money. The lean manufacturing philosophy—all about minimizing waste and maximizing value—hinges on reusability. When you reuse a joint, you're reducing the demand for new aluminum production, which in turn cuts down on energy use and carbon emissions. Plus, fewer trips to the supplier mean less downtime for your team. Win-win-win.
I once worked with a small electronics manufacturer that was struggling to keep up with seasonal demand. Their solution? Instead of buying new workbenches every time they needed to scale up, they disassembled old storage racks, salvaged the external straight aluminum joints, and built temporary assembly stations. They saved over $2,000 in three months and had the flexibility to shrink back down when the season ended. That's the power of reusing these little connectors.

Tools You'll Need: Gather These Before You Start
You don't need a fully stocked industrial workshop to tackle this, but having the right tools will make the process smoother (and save you from frustration). Here's what I recommend keeping handy:
| Tool | Why You Need It | Pro Tip |
|---|---|---|
| Hex Key Set (Allen Wrenches) | Most external straight aluminum joints are secured with hex screws. A set with metric sizes (common ones: 3mm, 4mm, 5mm) is a must. | Get a ball-end hex key set—it lets you reach screws at awkward angles without stripping them. |
| Rubber Mallet | For gently tapping joints loose if they're stuck (aluminum is soft—avoid metal hammers to prevent dents). | Wrap the mallet head in a microfiber cloth for extra protection on polished aluminum surfaces. |
| Pliers (Needle-Nose or Slip-Joint) | To grip and twist stubborn screws or to hold the joint steady while loosening. | Needle-nose pliers work best for tight spaces between pipes. |
| Wire Brush or Soft Scrub Pad | To clean dirt, grease, or rust off the joint threads and connection points. | Use a brass wire brush instead of steel to avoid scratching the aluminum coating. |
| Isopropyl Alcohol (70% or Higher) | For degreasing and sanitizing joints before reuse (critical if they'll be in food-safe or cleanroom environments). | Pour some on a lint-free cloth—avoid soaking the joint, as excess liquid can seep into threads. |
| Thread Lubricant (Dry Film or Silicone-Based) | To keep threads smooth for future disassembly (WD-40 works in a pinch, but dry film lubricant lasts longer). | A little goes a long way—apply a thin coat with a Q-tip to avoid gumming up the works. |
| Work Gloves | Aluminum edges can be sharp, and old joints might have burrs. Protect your hands! | Nitrile gloves are best—they're puncture-resistant and won't slip on metal. |
Pro move: Lay out a clean towel or work mat before you start. It'll keep small parts from rolling away and prevent scratches on your work surface.

Step-by-Step: Disassembling the External Straight Aluminum Joint
Now, let's get to the main event. Disassembling these joints is straightforward, but patience is key—rushing can lead to bent pipes or stripped threads. Follow these steps, and you'll have those joints free in no time.
Step 1: Safety First—Assess the Structure
Before you start unscrewing anything, make sure the structure you're working on is stable. If you're taking apart a workbench or material rack, empty it first—no one wants tools or parts crashing down mid-project. If the structure is tall (like a high rack), use a step stool instead of standing on the rack itself (aluminum can flex, and safety always comes first).
Also, check for any signs of damage to the joint or pipes before you begin. If a pipe is bent or the joint is cracked, it might not be reusable—and forcing it apart could make things worse. Better to set those aside for recycling than risk them failing later.
Step 2: Identify the Fasteners and Loosen Them
Most external straight aluminum joints have two or four hex screws that clamp down on the aluminum pipe. Take your hex key and start by loosening these screws—turn them counterclockwise. Go slow here: if the screw is stuck, don't force it. A little tap with the rubber mallet on the hex key (gentle!) can help break it free. If it's really seized, apply a drop of penetrating oil (like PB Blaster) and let it sit for 5–10 minutes—this works wonders on rusted or old screws.
Pro tip: Loosen screws in a "star pattern" if there are four (like tightening lug nuts on a car). This keeps pressure even and prevents the joint from warping as you loosen it.
Step 3: Gently Separate the Joint from the Pipe
Once the screws are loose, the joint should slide off the pipe—but sometimes, aluminum oxide (that white, powdery residue) or dried lubricant can make it stick. If that happens, grab your rubber mallet and tap the joint sideways (not directly on the pipe) to break the seal. Think of it like popping a lid off a jar—slow, steady pressure is better than brute force.
If the joint is connected to two pipes (common in straight-line setups), loosen the screws on both sides first before trying to separate them. Trying to pull one pipe free while the other is still tight can bend the joint or the pipe itself.
Step 4: Inspect the Joint for Reusability
Now that the joint is off, take a close look at it. What are you checking for?:
- Threads: Look at the screw holes—if the threads are stripped (they'll look flattened or uneven), the joint won't hold tight when reused. Toss it.
- Cracks: Check the body of the joint for hairline cracks, especially around the screw holes (stress points). Even small cracks can weaken the joint under load.
- Clamping Surface: The part of the joint that touches the pipe should be smooth and flat. If it's dented or warped, it won't grip the pipe properly, leading to a wobbly structure later.
If the joint passes these checks,—it's ready for a second life! If not, don't worry—recycle it (aluminum is 100% recyclable, so it won't end up in a landfill).

Cleaning and Prepping the Joint for Reuse
Even if a joint looks good, cleaning it before reuse is non-negotiable. Dirt, grease, or rust can gunk up the threads or prevent a tight fit, which means your new structure might not be stable. Here's how to get it sparkling clean:
Step 1: Brush Away Debris
Grab your wire brush or soft scrub pad and gently scrub the inside and outside of the joint. Focus on the clamping surfaces and screw holes—this is where buildup tends to hide. For stubborn grime (like old lubricant), a toothbrush works great for getting into small crevices.
Step 2: Degrease with Isopropyl Alcohol
Dampen a lint-free cloth with isopropyl alcohol and wipe down the entire joint. This removes any remaining grease or oil, which could interfere with the screws gripping properly when you reassemble. Let it air dry for a minute—alcohol evaporates quickly, so no need to rinse.
Step 3: Lubricate the Threads (Optional but Recommended)
If you plan to reuse the joint soon, a light coat of dry film lubricant on the screw threads will make assembly easier and prevent future seizing. Avoid heavy oils—they attract dust, which can gum up the works. A little goes a long way here—just a drop on each thread is enough.
Reusing the Joint: Tips for a Strong, Stable Reassembly
Now comes the fun part: putting that cleaned, inspected joint back to work. Whether you're building a new workbench, repairing a turnover trolley, or creating a custom material rack, these tips will ensure your reassembled structure is as strong as the day it was new.
Choose the Right Aluminum Pipe
External straight aluminum joints are designed to fit specific pipe diameters. Most commonly, you'll see them paired with 28mm or 30mm aluminum lean pipe, but double-check the joint's specs (look for markings like "30mm" on the joint itself) to make sure your pipe matches. Using a pipe that's too small will result in a loose fit; too large, and you'll warp the joint when tightening the screws.
Align Pipes Carefully
When sliding the joint onto the pipes, make sure they're perfectly straight—even a small kink can put stress on the joint and lead to premature failure. If you're joining two pipes, push them into the joint until they meet in the middle (most joints have a "stop" inside to help with alignment). This ensures equal weight distribution.
Tighten Screws Gradually and Evenly
Remember that star pattern from earlier? Use it again when tightening the screws. Start with all screws loose, then tighten each one a little at a time—this keeps the joint centered on the pipe and prevents clamping too hard on one side (which can bend the pipe). Tighten until the joint is snug—you'll feel resistance, but don't crank it until the screw strips (aluminum threads are softer than steel).
A good rule of thumb: Tighten until the screw head is flush with the joint, then give it a quarter-turn more. That's enough to secure the pipe without overdoing it.
Test the Structure Before Loading It Up
Once everything is assembled, give the structure a gentle shake or apply light pressure to the joint. If it wobbles, check the screws—they might need a little more tightening. If it still moves, the joint might be worn (even if you thought it was okay) or the pipes might be misaligned. Better to fix it now than have it fail when you're loading it with tools or materials.
Troubleshooting: Common Issues and How to Fix Them
Even with the best prep, things can go wrong. Here are a few hiccups I've run into (and how to solve them):
Issue: The joint is loose even after tightening the screws.
Possible causes: The pipe is too small, the joint's clamping surfaces are worn, or the screws are stripped. Try wrapping a thin layer of Teflon tape around the pipe (overlap it slightly) before sliding the joint on—this adds thickness and can help the joint grip better. If that doesn't work, it might be time to replace the joint.
Issue: The hex screw stripped while loosening.
Oh no—stripped screws are frustrating, but not the end of the world. Try using a rubber band: place it over the stripped screw head, then press your hex key into the band and turn. The rubber fills the gaps and gives the key extra grip. If that fails, a screw extractor kit (available at hardware stores) can drill into the screw and let you back it out. Pro tip: Go slow with the extractor—aluminum is soft, and you don't want to drill through the joint.
Issue: The joint is bent or warped.
Aluminum is malleable, so if you accidentally stepped on a joint or dropped something heavy on it, it might bend. Small bends can sometimes be gently straightened with pliers (wrap the joint in cloth to avoid scratches), but if it's kinked or the clamping surfaces are no longer flat, it's safer to recycle it. A warped joint won't hold pipes evenly, and that's a recipe for instability.
Final Thoughts: Reuse, Reduce, and Keep Your Workspace Flexible
Disassembling and reusing external straight aluminum joints might seem like a small task, but it's a big step toward building a more efficient, sustainable workspace. These little connectors are more than just parts—they're tools for adaptability, letting you pivot when projects change, save money when budgets are tight, and do your part for the planet along the way.
Next time you're tempted to toss out an old aluminum structure, pause and take a closer look. Those joints could be the key to your next project—all they need is a little cleaning, a careful inspection, and a second chance. And who knows? You might just inspire your team to think differently about waste, reuse, and the hidden value in the tools we already have.
So grab your hex key, dust off those old joints, and start building—your wallet (and the planet) will thank you.