- Company Articles
- Products and Technology
- Installation And Maintenance
- How to Disassemble & Reuse Vertical Lean Pipe Joints for Lean Reconfiguration

How to Disassemble & Reuse Vertical Lean Pipe Joints for Lean Reconfiguration
Related Product
Vertical Lean Pipe Joint
Vertical lean pipe joint is used for 28mm lean pipe fixed on ground and keep it stable.
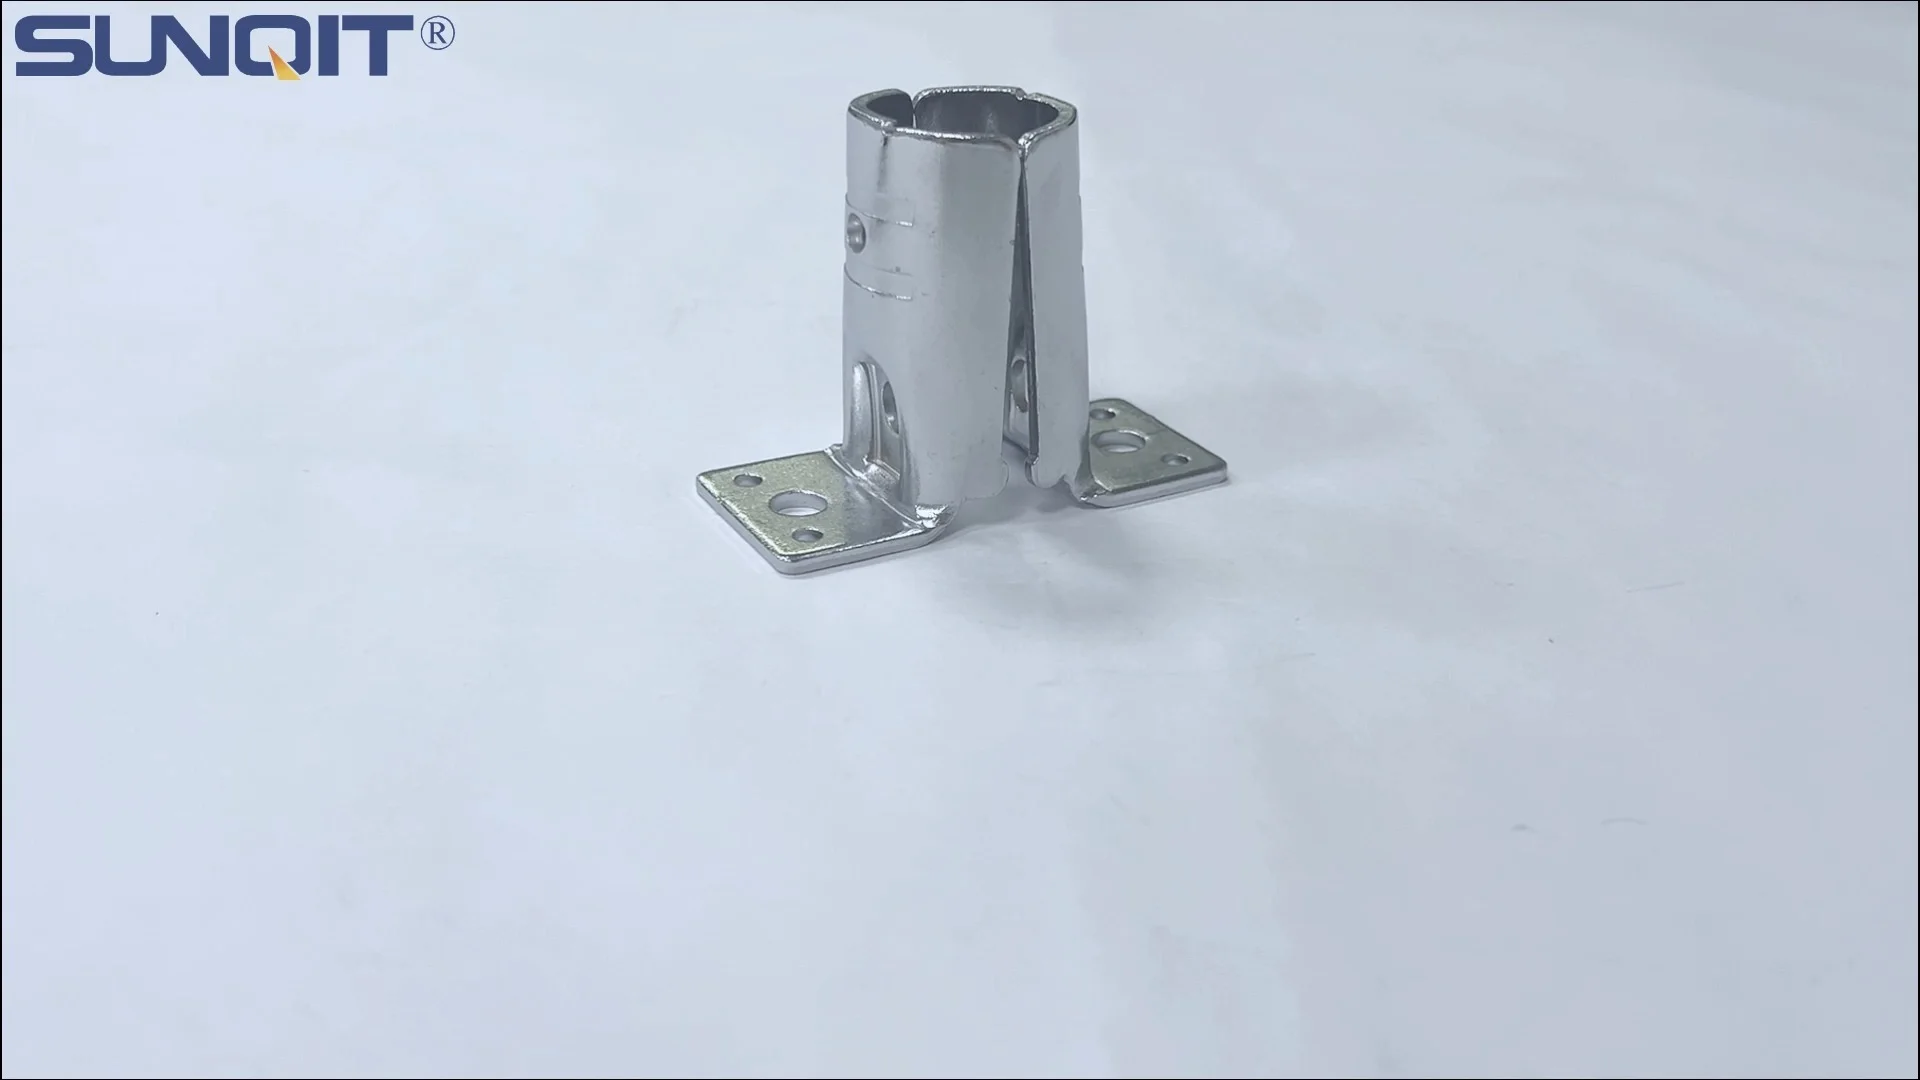
If you've spent any time in a workshop, factory, or warehouse that runs on lean principles, you've probably seen them: those unassuming metal or plastic connectors that hold together the backbone of your workspace. I'm talking about vertical lean pipe joints—the quiet workhorses that turn simple tubes into everything from workbenches to material racks. But here's the thing about lean systems: they're not meant to be permanent. As your production needs shift, your setup should shift too. That's where knowing how to take apart and reuse these joints becomes a game-changer.
In this guide, we're diving deep into the world of vertical lean pipe joints. We'll walk through how to disassemble them without breaking a sweat (or the parts), inspect them for future use, and get creative with reusing them in new configurations. Whether you're a seasoned lean practitioner or just starting to build your first lean pipe workbench, this is the hands-on, no-jargon breakdown you've been looking for. Let's get started.
Understanding Vertical Lean Pipe Joints: More Than Just a Connector
First, let's make sure we're all on the same page. What exactly is a vertical lean pipe joint? At its core, it's a specialized connector designed to join lean pipes (often steel, aluminum, or plastic-coated) at vertical angles—think supporting a shelf on a workbench or holding up a vertical section of a material rack. Unlike fixed joints, these are engineered to be sturdy yet adjustable, which is why they're a cornerstone of lean systems. They come in different materials too: you might find chrome-plated steel for heavy-duty setups, or lightweight aluminum lean pipe joints if you're aiming for a more portable system.
The magic of these joints lies in their simplicity. Most have a clamping mechanism—usually a screw or lever—that tightens around the pipe, creating a secure hold without welding or drilling. This is what makes them perfect for reconfiguration. When your workflow changes, you don't need to buy a whole new setup; you just loosen a few joints, rearrange the pipes, and tighten them back up. But to do that effectively, you need to know how they're put together.
Pro Tip: Spotting a Quality Joint
Not all vertical lean pipe joints are created equal. A good one will have smooth threads (if it uses screws), no cracks around the clamping area, and a snug fit when tightened. If you're working with older joints, check for rust or stripped screws—these are signs it might need a little extra care during disassembly.
Prepping for Disassembly: Tools, Safety, and Mindset
Before you grab a wrench and start twisting, let's talk prep work. Disassembling a vertical lean pipe joint might seem straightforward, but rushing in can lead to bent pipes, broken joints, or even a wobbly structure that doesn't hold up later. Here's what you'll need to get ready:
Gather Your Tools
You don't need a fully stocked toolbox, but having the right tools on hand will save you frustration. Here's a quick list:
| Tool | Why You Need It | Pro Tip |
|---|---|---|
| Adjustable wrench or hex key (Allen wrench) | Most joints use hex screws or bolt heads. Match the size to avoid stripping. | Magnetic hex keys are a lifesaver—they hold onto tiny screws so you don't drop them. |
| Pliers (needle-nose for tight spots) | Helps grip slippery or stuck parts, especially if screws are rusted. | Wrap the jaws in tape to avoid scratching aluminum or plastic-coated pipes. |
| Rubber mallet | Gently taps joints loose if they're stuck from years of tension. | Never use a metal hammer—you'll dent the pipes or crack the joint. |
| Wire brush or sandpaper (fine grit) | Cleans rust or debris from threads before reuse. | A quick brush now prevents stuck screws later. |
| Zip-top bags and a marker | Organizes small parts like screws or washers so you don't lose them. | Label bags with where the joint came from (e.g., "left leg of workbench E")—you'll thank yourself later. |
Safety First: It's Not Just About the Joints
Disassembling a structure means taking apart something that's probably holding weight—even if it's just a light shelf. Always start by removing any materials or tools from the structure first. If you're working on a tall rack, use a step stool instead of standing on a chair (we've all been there, but it's not worth the fall). And if the joint is really stuck, don't force it—apply a little penetrating oil (like WD-40) and let it sit for 10 minutes. Your hands (and the joint) will thank you.

Step-by-Step Disassembly: Taking Apart Vertical Lean Pipe Joints Without the Headache
Okay, tools ready? Safety checked? Let's dive into the disassembly process. I'll walk you through it with a common scenario: taking apart a vertical joint that's holding up a shelf on a lean pipe workbench. The steps will be similar for other setups, but adjust based on how many pipes your joint is connecting (some vertical joints link 2, 3, or even 4 pipes at once).
Step 1: Loosen the Clamping Mechanism
Start by identifying the clamping screw or lever. On most vertical lean pipe joints, this is a hex screw on the side or top of the joint. Grab your hex key and turn it counterclockwise—slowly. You'll feel tension release as the clamp loosens around the pipe. If it's a lever-style joint, flip the lever up to disengage the lock. Pro tip: Count the number of turns it takes to fully loosen the screw. This helps when reassembling later—you'll know how tight to go without overdoing it.
Step 2: Gently Separate the Pipe from the Joint
Once the clamp is loose, the pipe should wiggle a little. Don't yank it—instead, twist it slightly while pulling gently. If it's stuck (and this happens more often than you'd think, especially if the joint was overtightened), grab your rubber mallet and tap the joint lightly where the pipe meets the connector. The goal is to break the friction, not bash it apart. If it still won't budge, check if there's a second clamping point—some joints have two screws for extra stability.
Step 3: Inspect the Joint and Pipe for Damage
Now that the joint is free, take a close look. Are there cracks in the plastic or metal? Stripped threads on the screw? Bent parts? For the pipe, check for dents, rust, or scratches deep enough to weaken it. Minor surface rust is okay—scrub it off with sandpaper. But if the pipe is bent or the joint has cracks, it's time to retire that part. Lean systems rely on stability, and a compromised joint is a safety risk.
Step 4: Clean and Store for Reuse
Even if the joint looks good, give it a quick clean. Wipe off dust and grime with a rag, then use the wire brush to clean the threads (if it has screws). For aluminum lean pipe joints, a little rubbing alcohol on a cloth removes fingerprints and prevents oxidation. Once clean, pop the joint and any screws into a labeled zip-top bag. Store them in a dry place—moisture is the enemy here, especially for steel joints.

From Old to New: Creative Reuse Ideas for Vertical Lean Pipe Joints
Now comes the fun part: reusing those joints. The whole point of lean systems is to minimize waste, so why toss a perfectly good joint when you can give it a second life? Here are a few ideas to spark your creativity, using common setups like workbenches, material racks, and even mobile trolleys.
Idea 1: Build a Custom Lean Pipe Workbench
If you're replacing an old workbench, those vertical lean pipe joints can be the foundation of a new one. Let's say your old bench was too short—grab some longer aluminum lean pipes, use the vertical joints to add height, and top it with a plywood or aluminum honeycomb panel. Add a shelf halfway up using leftover horizontal joints, and you've got extra storage. Pro tip: Use casters (from that old trolley you disassembled last month) to make it mobile—suddenly, your workbench can follow you around the shop.
Idea 2: Upgrade a Material Rack
Material racks are workhorses, but they can get cluttered fast. Take those vertical joints and repurpose them to add dividers. For example, if you have a 3-row, 3-floor material rack (like "Material Rack B" from some suppliers), use vertical joints to add vertical dividers in each row. This keeps small parts from rolling around and makes inventory checks a breeze. You can even mix in other accessories, like swivel roller balls, to create a slide-out shelf for heavier items.
Idea 3: Create a Mobile Tool Trolley
Need a way to cart tools between stations? Use four vertical joints as the corners of a trolley frame. Connect them with horizontal pipes, add a flat top (plywood works great), and attach casters to the bottom. If you're feeling fancy, add a small shelf halfway up for smaller tools. The best part? When you don't need the trolley anymore, disassemble it and reuse the joints again—no waste, no extra cost.
Joint Comparison: Vertical vs. Other Common Types
Not sure if vertical lean pipe joints are the right fit for your next project? Here's a quick comparison with other joint types to help you decide:
| Joint Type | Best For | Disassembly Difficulty | Reuse Potential |
|---|---|---|---|
| Vertical Lean Pipe Joint | Supporting vertical structures (shelves, legs) | Easy (1-2 screws, no special tools) | High (works with most pipe sizes) |
| 90° Aluminum Crossing Joint | Horizontal/vertical intersections (e.g., workbench frames) | Medium (may require two wrenches for tight fits) | Medium (aluminum is lightweight but less durable than steel) |
| Parallel Lean Pipe Joint | Connecting parallel pipes (e.g., trolley sides) | Easy (clamping lever or single screw) | High (versatile for straight or angled setups) |

Troubleshooting Common Issues: When Disassembly or Reuse Goes Wrong
Even with the best prep, things can go sideways. Here are a few common problems you might run into and how to fix them:
Problem: The Screw is Stripped
We've all been there—you turn the hex key, and it just spins. If the screw head is stripped, try this: tap a slightly larger hex key into the stripped hole with a rubber mallet (the friction might give you enough grip to loosen it). If that fails, use a screw extractor tool (available at hardware stores) to drill into the screw and back it out. Once out, replace the screw with a new one—don't reuse stripped screws.
Problem: The Joint is Bent or Warped
If the joint is bent but not cracked, you might be able to straighten it gently with pliers (for small bends) or a vice (for larger ones). But be careful—over-bending weakens the metal. If it's aluminum, avoid bending it back and forth too much; aluminum fatigues easily. When in doubt, replace it—better safe than sorry.
Problem: Pipes Don't Fit Snugly During Reassembly
If the joint feels loose after reassembly, check two things: first, make sure the pipe is fully inserted into the joint (most have a mark or line indicating how far to push). Second, try adding a thin layer of Teflon tape to the screw threads—this adds friction and helps the screw grip tighter. If the pipe is too small (e.g., using a 20mm pipe with a 25mm joint), wrap a few layers of electrical tape around the pipe end to thicken it—temporary, but effective for light-duty use.
Best Practices for Long-Term Success
To keep your reused vertical lean pipe joints (and the structures they build) in top shape, follow these simple practices:
- Don't overtighten: Snug is good, but cranking the screw until it bends will strip threads or crack the joint.
- Check regularly: Every few months, give joints a quick once-over. Tighten any loose screws and clean off rust before it spreads.
- Mix and match carefully: Stick to the same pipe size (e.g., 28mm) for joints—mixing sizes leads to wobbly structures.
- Label everything: When disassembling, label joints by size, material, and original use. It saves time when you're rebuilding later.
- Embrace imperfection: Not every reused joint will look brand-new, and that's okay. Lean is about function first—if it holds weight and stays stable, it's doing its job.
Wrapping Up: Lean Reconfiguration is About Adaptability
Disassembling and reusing vertical lean pipe joints isn't just about saving money (though that's a nice bonus). It's about embodying the core of lean systems: adaptability. In a world where production needs change overnight, being able to pivot your workspace without starting from scratch is a superpower. And honestly? There's something deeply satisfying about taking something old and making it new again—whether it's a workbench, a rack, or a simple tool trolley.
So the next time you look at that rickety old structure in the corner, don't see it as something to replace—see it as a parts bin waiting to be unlocked. Grab your wrench, take it apart, and let those vertical lean pipe joints tell a new story. Your future self (and your bottom line) will thank you.
Now go build something awesome—and make it lean.