- Company Articles
- Products and Technology
- Installation And Maintenance
- How to Disassemble and Reuse Two Way Aluminum Pipe Joints for New Projects

How to Disassemble and Reuse Two Way Aluminum Pipe Joints for New Projects
Related Product
Two Way Aluminum Pipe Joint
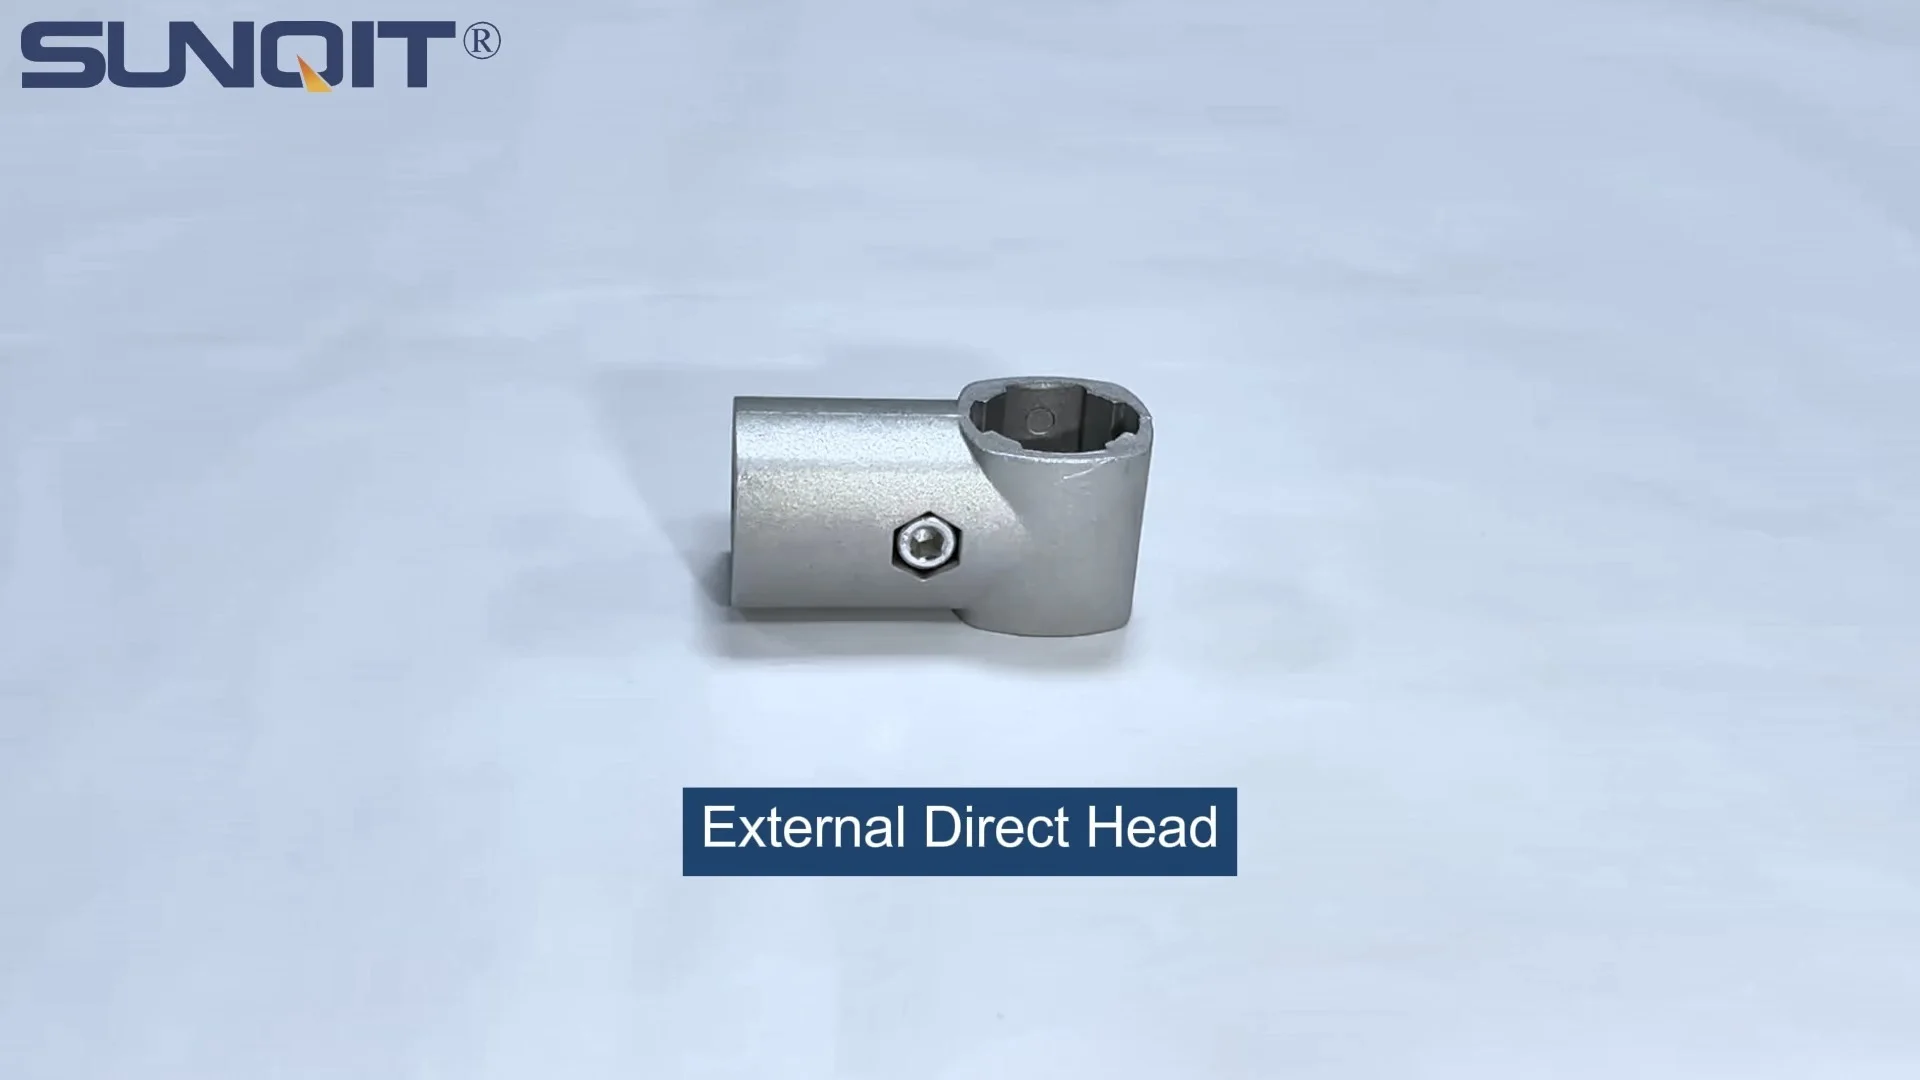
Aluminum 2 way pipe joint for 28mm aluminum pipe connection in 2 direction.
In the world of manufacturing and workshop setups, the principles of lean system thinking have become more than just a buzzword—they're a way of life. At the heart of lean systems lies the idea of maximizing value while minimizing waste, and one of the most tangible ways to embody this is by reusing components. Today, we're diving into a component that's but indispensable: the two way aluminum pipe joint. These small, unassuming connectors are the backbone of structures built with aluminum profile, holding together everything from workbenches to material racks. Disassembling and reusing them isn't just about saving money (though that's a big plus); it's about reducing your environmental footprint, fostering creativity in project design, and keeping your workspace adaptable. Let's walk through how to do it right.
Understanding Two Way Aluminum Pipe Joints: The Unsung Heroes of Aluminum Structures
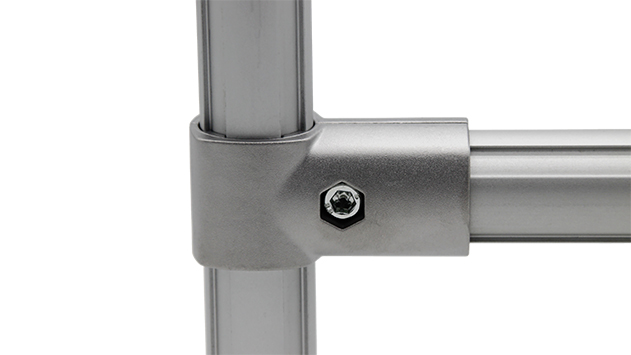
Before we grab our tools, let's get to know the star of the show: the two way aluminum pipe joint. If you've ever assembled a structure using aluminum pipe, you've likely encountered these. They're the connectors that allow two aluminum pipes to meet at a 90-degree angle (or sometimes other angles, depending on the design), forming the corners of frames, shelves, or work surfaces. Unlike rigid welds, these joints are designed to be adjustable and removable, which is exactly why they're perfect for reuse.
Most two way aluminum pipe joints are made from die-cast aluminum, chosen for its strength-to-weight ratio and resistance to corrosion. They typically feature set screws or clamping mechanisms that grip the aluminum pipe tightly, ensuring stability once assembled. What makes them unique is their versatility—pair them with basic aluminum tube, aluminum profile accessories like end caps or rubber strips, and you can build almost anything. From a simple material rack B (with 3 rows and 3 floors) to a custom workbench, these joints are the quiet workhorses holding it all together.
But why reuse them? For starters, aluminum is infinitely recyclable, but reusing avoids the energy cost of melting it down and remanufacturing. Plus, if you've ever purchased new aluminum pipe accessories, you know they aren't cheap. Reusing joints lets you stretch your budget further, especially if you're prototyping a new setup or need to adapt an existing structure quickly. Think of it as giving these joints a second life—and maybe even a better one than their first.
Gathering Your Tools: What You'll Need to Get Started
Disassembling two way aluminum pipe joints isn't complicated, but having the right tools will make the process smoother and prevent damage to the joints or pipes. Here's a breakdown of what you'll need, along with tips to use them effectively:
| Tool Name | Purpose | Pro Tips |
|---|---|---|
| Hex Key Set (Allen Wrenches) | Loosening set screws on the joints | Always use the exact size that fits the screw—too small and you'll strip the head; too large and it won't grip. |
| Rubber Mallet | Gently tapping joints to loosen stuck connections | Opt for a mallet with a soft rubber head to avoid denting or bending the aluminum pipes. |
| Needle-Nose Pliers | Removing debris or gripping small parts | Useful for extracting stripped set screws or clearing dirt from joint crevices. |
| Wire Brush (Soft Bristle) | Cleaning dirt and rust from joints and pipes | A brass brush works best—stiffer than nylon but gentler than steel, so it won't scratch the aluminum. |
| Isopropyl Alcohol (70%+) | Degreasing and sanitizing joints | Pour a small amount on a microfiber cloth to wipe down joints; avoids leaving residue like soap. |
| Zip-Top Bags or Small Bins | Organizing disassembled parts | Label each bag with the project name or joint type (e.g., "Workbench E Joints") to avoid mix-ups later. |
Pro tip: If you're working with older structures, you might encounter joints that have been in place for years, possibly with rust or caked-on grease. In that case, add a can of penetrating oil (like WD-40) to your toolkit. A few drops on stuck set screws can work wonders, but let it sit for 10–15 minutes to seep in before attempting to loosen.
Step-by-Step Disassembly: Taking It Apart Without Breaking It
Disassembling a structure with two way aluminum pipe joints is a bit like solving a puzzle—patience is key. Rushing can lead to bent pipes, stripped screws, or cracked joints, which defeats the purpose of reusing them. Follow these steps to keep everything intact:
1. Prepare the Structure: Safety First, Then Stability
Start by clearing the area around the structure. If you're working with a workbench or material rack, remove all tools, parts, or materials from it—you don't want anything to fall and get damaged (or damage you). If the structure is tall (like a multi-level rack), lean it against a wall or have a helper hold it steady to prevent tipping. Safety glasses are a good idea here, too—aluminum shavings or loose screws can easily fly into your eyes.
2. Identify the Joints and Their Orientation
Take a moment to study how the two way joints are positioned. Are they connecting horizontal and vertical pipes? Are there other joint types (like three-way or swivel) mixed in? Note their locations—taking a quick photo with your phone can help if you plan to reassemble the structure later or want to remember which joints went where. Each two way joint will have at least one set screw (sometimes two) that locks it onto the aluminum pipe; these are usually located on the side or top of the joint.
3. Loosen the Set Screws (The Most Critical Step)
Grab your hex key and insert it into the set screw. Turn counterclockwise slowly—you'll feel resistance at first, which is normal. If the screw feels stuck, don't force it! Apply a drop of penetrating oil to the screw head, wait 10 minutes, and try again. If it still won't budge, tap the hex key gently with your rubber mallet while turning—this can help break the seal of rust or dried lubricant. Remember: stripped screws are a nightmare to remove, so go slow. Once the screw is fully loosened, set it aside in your labeled bin—losing a tiny screw now means hunting for a replacement later, and that's a waste of time.
4. Gently Separate the Joint from the Pipes
With the set screws loosened, the joint should now slide off the pipes, right? Not always. Over time, aluminum pipes and joints can develop a tight fit due to pressure or minor corrosion. If the joint is stuck, hold the pipe firmly with one hand and tap the joint lightly with your rubber mallet. Tap in the direction you want the joint to move—for example, if you're removing a joint from a vertical pipe, tap upward. Avoid hitting the joint directly on the edges, as this can bend or crack it. If the pipe itself starts to move, stabilize it with your other hand. The goal is to loosen the joint, not bend the pipe or damage the threads.
5. Repeat and Organize as You Go
Work your way around the structure, repeating the process for each two way joint. As you remove them, place the joints, screws, and any aluminum pipe accessories (like end caps or guides) into separate zip-top bags. Labeling is crucial here—"Left Leg Joints" or "Top Shelf Connectors" will save you hours when it's time to reuse them. If a joint is particularly dirty or greasy, wipe it down briefly with a rag to prevent transferring grime to other parts in the bag.

Inspection and Cleaning: Making Sure Joints Are Reuse-Ready
Now that you've got a pile of disassembled two way aluminum pipe joints, it's time to give them a checkup. Not every joint will be fit for reuse—some might be too worn or damaged. But with a little cleaning and inspection, most will be good as new. Here's how to assess their condition:
What to Look For: Signs of Wear or Damage
Hold each joint up to the light and inspect it closely. Check for:
- Cracks or chips: Even small cracks in the aluminum can weaken the joint, making it unsafe for heavy loads. If you see a crack, set it aside for recycling—don't risk reusing it.
- Stripped threads: Look at the set screw holes. If the threads are worn or gapped, the screw won't grip properly, and the joint will be loose. A quick test: screw in a set screw by hand—if it spins freely without resistance, the threads are stripped.
- Bent prongs or misaligned ports: The parts of the joint that grip the pipe (the "prongs") should be straight and evenly spaced. If they're bent, the joint won't sit flush on the pipe, leading to wobbly structures.
- Corrosion: While aluminum is corrosion-resistant, joints that have been exposed to moisture or chemicals might have white, powdery oxidation. Light corrosion can be cleaned, but heavy pitting means the joint's integrity is compromised.
Cleaning 101: Making Joints Shine (and Function) Like New
Joints that pass inspection need a good cleaning to remove dirt, grease, or oxidation. Here's a simple process:
- Brush away debris: Use your soft-bristle wire brush to scrub the inside of the pipe ports and around the set screw holes. This removes loose dirt and rust flakes.
- Degrease with alcohol: Dampen a microfiber cloth with isopropyl alcohol and wipe down the entire joint, focusing on the set screw threads and pipe contact areas. Alcohol cuts through grease without leaving a residue, which is important for ensuring the set screws grip tightly later.
- Treat light corrosion: For minor oxidation, make a paste of baking soda and water, apply it to the corroded area with a toothbrush, and scrub gently. Rinse with water, then dry thoroughly with a cloth. Avoid steel wool here—it can scratch the aluminum.
- Dry completely: Moisture is the enemy of aluminum, so let the joints air-dry for 10–15 minutes or pat them dry with a clean towel. A quick pass with a hairdryer on low heat can speed this up if you're in a hurry.
Once clean, store the joints in their labeled zip-top bags, along with their matching set screws. Now they're ready to be called into action for your next project.

Reusing Two Way Aluminum Pipe Joints: From Scrap Pile to New Project
Now comes the fun part: putting those cleaned, inspected two way aluminum pipe joints to work in a new project. The beauty of these joints is their flexibility—they pair seamlessly with aluminum profile, basic aluminum tube, and aluminum pipe accessories, so the possibilities are nearly endless. Let's walk through a practical example: building a simple workbench using reused joints.
Project Idea: A Budget-Friendly Workbench (Inspired by Workbench E)
Workbench E (single deck, without casters) is a common setup in workshops, but buying one new can cost hundreds of dollars. By reusing two way aluminum pipe joints, you can build a custom version for a fraction of the price. Here's how:
Materials You'll Need (Reused and New)
- 4 reused two way aluminum pipe joints (for the corners)
- 4 pieces of basic aluminum tube (2 for the front/back rails, 2 for the sides; length depends on your desired workbench size—standard is 120cm long x 60cm deep)
- 1 aluminum honeycomb panel (for the work surface; cut to match your rail dimensions)
- 8 set screws (if your reused joints didn't come with theirs, or if some were stripped)
- Aluminum profile accessories: 4 end caps (to cover pipe ends) and 1 roll of T-slot rubber seal cover (to line the rail edges and prevent scratches)
- A drill (to pre-drill holes in the honeycomb panel for mounting)
Step-by-Step Assembly
- Build the frame: Take two aluminum tubes (your front and back rails) and connect them to the two way joints to form a rectangle. For a 120cm x 60cm bench, the front/back rails will be 120cm, and the side rails will be 60cm. insert the tubes into the joint ports, then tighten the set screws with your hex key—snug but not over-tightened (you can always adjust later).
- Square the frame: Lay the rectangle on a flat surface and measure the diagonals—they should be equal if the frame is square. If not, gently push or pull the corners until the measurements match. This ensures your workbench won't wobble.
- Add vertical legs (optional): If you want a standing-height bench, add four more aluminum tubes (legs) using additional two way joints (or four-way joints, if you have them). For a seated bench, legs are typically 75cm long; for standing, 90–100cm.
- Mount the work surface: Place the aluminum honeycomb panel on top of the frame. Pre-drill small holes through the panel and into the aluminum rails, then secure with screws (use self-tapping screws designed for aluminum to avoid splitting the panel).
- Finish with accessories: Pop the end caps onto the pipe ends to cover sharp edges, and press the T-slot rubber seal cover into the rail grooves to protect your tools and materials from scratches.
In just an hour or two, you've built a sturdy workbench using reused two way aluminum pipe joints—no welding, no expensive new parts, and a structure that's easy to disassemble again later if you need to reconfigure your space. That's lean system thinking in action.
Troubleshooting Common Issues: When Reused Joints Don't Behave
Even with careful disassembly and cleaning, you might run into hiccups when reusing two way aluminum pipe joints. Here are solutions to the most common problems:
Problem: The Joint Won't Grip the Pipe Tightly
If the set screw feels loose even when fully tightened, there are a few possible causes. First, check if the pipe is too small—aluminum tubes come in different diameters, and using a 20mm pipe with a joint designed for 25mm will never grip. If the pipe size is correct, the set screw threads might be worn. Try replacing the screw with a new one of the same size (most are M5 or M6). If the joint's internal pipe port is worn (from repeated assembly/disassembly), wrap a small strip of Teflon tape around the pipe before inserting it—this adds friction and helps the joint grip.
Problem: The Joint Is Misaligned, Causing a Wobbly Structure
If your frame isn't square or parts don't line up, the issue might be bent aluminum tubes rather than the joints. Lay the tubes on a flat surface to check for straightness—if they're bowed, gently bend them back (aluminum is malleable, but don't overdo it). If the tubes are straight, the joint itself might be warped. Compare it to a new joint (if you have one) to see if the ports are at a true 90-degree angle. Warped joints are best recycled—they'll only cause frustration in future projects.
Problem: Set Screws Keep Stripping
Stripped screws are usually a result of using the wrong hex key size or overtightening. Always match the hex key to the screw head exactly—if it's loose in the key, size up. When tightening, stop when you feel resistance—aluminum threads are softer than steel, so "cranking" will strip them. If a screw is already stripped, use a screw extractor tool (available at hardware stores) to remove it, then replace with a new screw.
Conclusion: Reuse, Adapt, Thrive
Disassembling and reusing two way aluminum pipe joints is more than a DIY hack—it's a mindset. It's about seeing potential in what others might throw away, about building a workspace that adapts to your needs without constantly buying new, and about honoring the principles of lean system by minimizing waste. Whether you're building a workbench, a material rack, or something entirely custom, these joints are ready to rise to the occasion—you just need to give them a second chance.
So the next time you're tempted to buy new aluminum profile or joints for a project, pause and look around. That old shelving unit gathering dust in the corner? Its two way joints might be the key to your next great build. With a little patience, the right tools, and a willingness to get your hands dirty, you'll be amazed at what you can create—sustainably, affordably, and with pride.