- Company Articles
- Products and Technology
- Installation And Maintenance
- How to Disassemble Parallel Rotatory Lean Pipe Joints Safely

How to Disassemble Parallel Rotatory Lean Pipe Joints Safely
Related Product
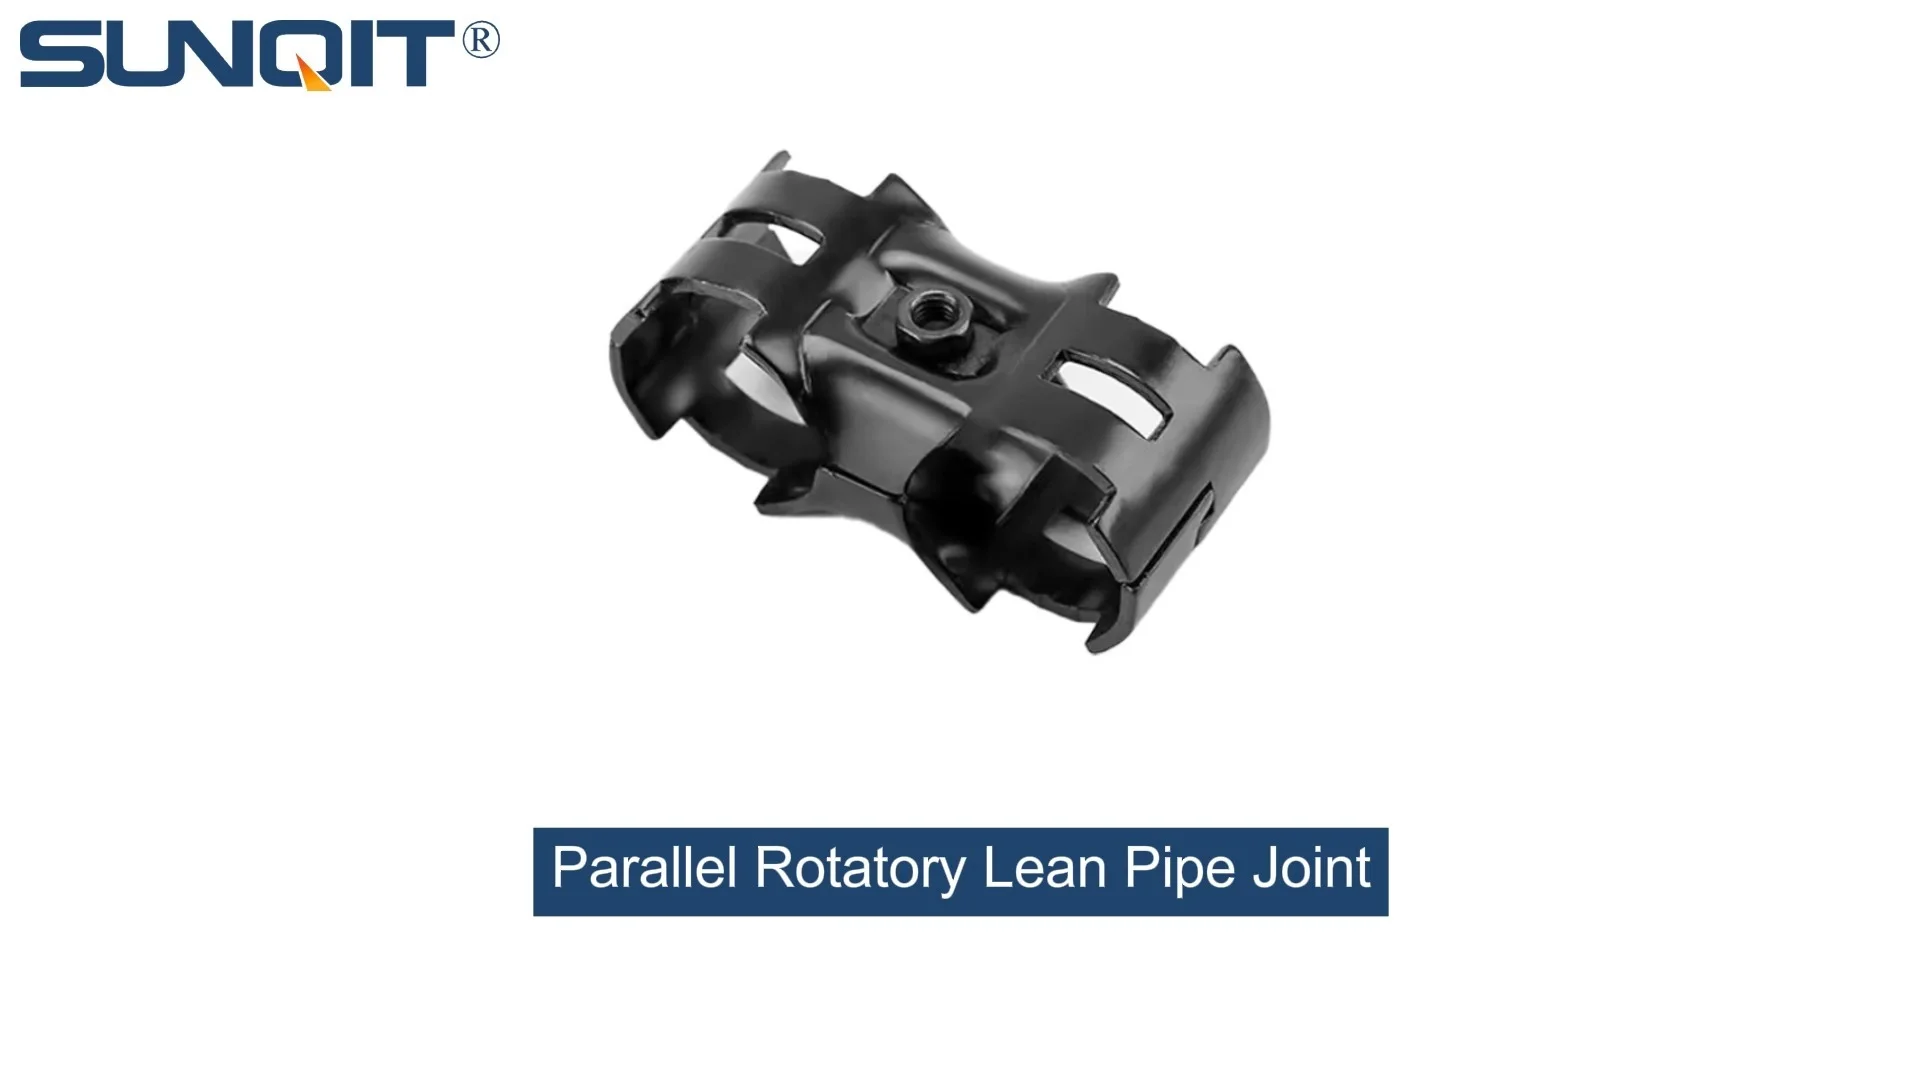
Parallel Rotatory Lean Pipe Joint
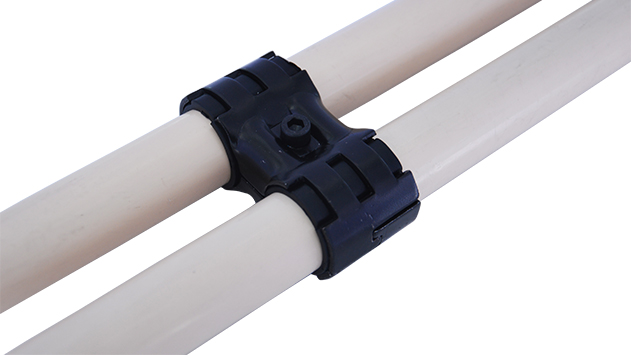
Parallel rotatory lean pipe joint, for 2 pcs pipe conenction in parallel direction with rotatory function.
In the world of manufacturing and workshop setups, lean systems are the backbone of efficiency. From workbenches to flow racks, these systems rely on sturdy, flexible components to keep operations running smoothly. One critical part of this ecosystem? The parallel rotatory lean pipe joint. These small but mighty connectors allow pipes to rotate, adapt, and reconfigure—making them essential for custom workspaces. But when it's time to disassemble them, whether for maintenance, reconfiguration, or upgrades, doing it safely and correctly is non-negotiable. In this guide, we'll walk through the step-by-step process of disassembling parallel rotatory lean pipe joints, ensuring you protect both yourself and your equipment.
Understanding the Parallel Rotatory Lean Pipe Joint
Before diving into disassembly, let's get familiar with what we're working with. The parallel rotatory lean pipe joint is a specialized connector designed to link lean pipes (often aluminum or steel) while allowing controlled rotation along a parallel axis. Unlike fixed joints, which lock pipes in place, these rotatory joints add flexibility—think of a workbench where a section needs to swivel, or a flow rack where materials glide along a rotating track.
Typically, these joints consist of a few key parts: an outer housing (often made of metal or high-strength plastic), internal bearings or bushings that enable smooth rotation, locking pins or screws to secure the joint in place when needed, and threaded ends that attach to the lean pipes. Over time, dust, debris, or regular wear can make rotation stiff or cause parts to loosen—hence the need for disassembly and maintenance.
It's also worth noting that parallel rotatory lean pipe joints come in various sizes and materials, depending on the load they need to bear. For example, joints used in heavy-duty material racks might be made of stainless steel, while those in lighter workbenches could be aluminum. Knowing your joint type (check manufacturer specs if unsure) will help you choose the right tools and techniques later.
Safety First: Precautions Before You Start
Disassembling any mechanical component carries risks—from pinched fingers to damaged equipment. Taking a few minutes to prep will save you from headaches (or injuries) down the line. Here's what to do before picking up a tool:
- Wear PPE: At minimum, gloves (to protect against sharp edges or pinch points) and safety glasses (to shield your eyes from flying debris) are a must. If you're working with heavy structures (like a loaded material rack), steel-toe boots add an extra layer of protection.
- Stabilize the Structure: If the joint is part of a larger system (e.g., a workbench or turnover trolley), ensure the entire setup is stable. Unload any materials from racks or shelves to reduce weight. If possible, secure the structure to a wall or floor with clamps to prevent tipping.
- Disconnect Power (If Needed): If the joint is near electrical components (like an ESD workstation with built-in lighting or tools), unplug the power source. Water or metal tools near live electricity is a recipe for disaster.
- Inspect for Damage: Take a close look at the joint before disassembly. Are there cracks in the housing? Rust on the locking pins? Stripped screws? If parts are already broken or compromised, proceed with extra caution—damaged joints can fail unexpectedly during disassembly.
- Clear the Area: Make sure your workspace is free of clutter. You'll need room to maneuver tools, and a clean surface to lay out parts as you remove them (this prevents losing small screws or pins).
Gathering Your Tools
Having the right tools on hand will make disassembly smoother and reduce the risk of damaging parts. Here's a breakdown of what you'll need, along with their uses:
| Tool | Purpose |
|---|---|
| Hex Keys (Allen Wrenches) | Most lean pipe joints use hex screws to secure components. Have a set of metric sizes (common ones are 3mm, 4mm, 5mm) handy. |
| Adjustable Wrench | For loosening nuts or larger threaded parts that hex keys can't handle. |
| Rubber Mallet | To gently tap stuck joints loose. Avoid metal hammers—they can dent or crack the joint housing. |
| Needle-Nose Pliers | Useful for pulling out small locking pins or gripping tiny screws. |
| Flathead Screwdriver | To pry off plastic covers (if your joint has them) or loosen slotted screws. |
| Container with Dividers | To organize small parts (screws, pins, washers) as you remove them—no more hunting for lost pieces! |
| Wire Brush or Compressed Air | To clean debris from the joint before and after disassembly. |
| Lubricant (e.g., WD-40) | For stuck joints—apply a small amount to loosen rust or grime. |
Pro tip: Lay out your tools on a towel or magnetic mat to keep them from rolling away. If you're new to this, take a quick photo of the joint before starting—this will help you remember how parts fit back together later!

Step-by-Step Disassembly: A Closer Look
Now that you're prepped and tooled up, let's walk through the disassembly process. We'll break it into clear, actionable steps to ensure you stay safe and avoid mistakes.
Step 1: Inspect the Joint for Wear or Damage
Start by giving the joint a thorough visual and physical check. Rotate it gently—does it move smoothly, or is there resistance? Are there any cracks in the housing? Are the locking screws loose or stripped? If you notice severe damage (e.g., a cracked bearing housing), you may need to replace the joint entirely instead of disassembling it. For minor issues (stiff rotation, loose screws), proceed with disassembly.
Also, check if the joint has any plastic covers or caps hiding the locking mechanism. These are often snapped or screwed on—use a flathead screwdriver to gently pry them off (be careful not to crack the plastic).
Step 2: Release the Locking Mechanism
Most parallel rotatory lean pipe joints have a locking mechanism to hold them in place when rotation isn't needed. This could be a set screw, a locking pin, or a threaded collar. Here's how to handle common types:
- Set Screws: These are small, hex-headed screws that tighten against the lean pipe to lock the joint. Use the correct size hex key to loosen them (turn counterclockwise). If the screw is stuck (common with rust), apply a drop of lubricant and let it sit for 5-10 minutes before trying again. Avoid over-tightening or stripping the screw—if it won't budge, gently tap the hex key with a rubber mallet to break the seal.
- Locking Pins: Some joints use spring-loaded pins that pop into holes on the pipe to lock rotation. Press the pin in with your finger or needle-nose pliers, then rotate the joint slightly to release the pin from the hole.
- Threaded Collars: These are rings that screw onto the joint housing to compress internal parts and lock rotation. Use an adjustable wrench to turn the collar counterclockwise until it's loose.
Once the locking mechanism is released, test the joint by rotating it—it should now move freely. If it's still stiff, double-check that you've fully loosened all locking components.
Step 3: Separate the Joint from the Lean Pipes
With the locking mechanism released, it's time to detach the joint from the pipes. Start by gripping the lean pipe with one hand and the joint housing with the other. Gently twist and pull the pipe away from the joint. In most cases, the pipe should slide out easily—if it doesn't, here's how to troubleshoot:
- Stuck Due to Debris: Dust or grime can build up between the pipe and joint. Use compressed air to blow out debris, or a wire brush to clean the pipe threads.
- Rust or Corrosion: For metal pipes, rust can fuse the pipe to the joint. Apply lubricant to the connection, let it sit for 15 minutes, then try twisting again. If that fails, wrap a cloth around the pipe (to prevent scratches) and use an adjustable wrench for extra leverage—be gentle to avoid bending the pipe.
- Over-Tightened Threads: If the pipe was screwed into the joint too tightly during assembly, it might need a little force. Place a block of wood against the joint housing (to protect it) and tap the wood with a rubber mallet while pulling the pipe—this should loosen the threads.
Once the first pipe is removed, repeat the process for the second pipe (since parallel joints connect two pipes). Set the pipes aside in a safe spot—if they're long, lean them against a wall to avoid tripping hazards.
Step 4: Disassemble the Joint Housing (If Needed)
Depending on your goal (cleaning, part replacement, or inspection), you may need to take apart the joint housing itself. This step is optional—if you're just reconfiguring the system, you might not need to open the housing. But for deep cleaning or bearing replacement, here's how:
- Remove Housing Screws: The joint housing is usually held together by small screws (often hex or Phillips head). Use the appropriate screwdriver to remove them, keeping track of which screw goes where (a divider container helps here—label sections like "top screws" or "side screws").
- Separate the Housing Halves: Gently pull the housing apart. Inside, you'll find the internal bearing or bushing, which allows rotation. Check for signs of wear: cracks in the bearing, rust, or debris buildup. If the bearing is damaged (e.g., it doesn't spin smoothly), replace it with a new one (check the manufacturer's specs for the correct size).
- Clean Internal Parts: Wipe down the housing, bearing, and any washers with a clean cloth. For stubborn grime, use a toothbrush (soft-bristled!) and mild soap (avoid harsh chemicals that can damage plastic parts). Dry thoroughly to prevent rust.
Pro tip: If you're unsure how to reassemble the housing, take a photo before taking it apart. It's easy to mix up small parts like washers or spacers!
Step 5: Inspect and Document
Once disassembled, take a moment to inspect all parts. Look for:
- Worn or cracked bearings/bushings
- Stripped threads on the joint or pipes
- Bent or damaged locking pins/screws
- Excessive rust or corrosion
If any part is damaged beyond repair, replace it with a compatible component. Using worn parts can lead to joint failure later, which could cause the entire structure (like a workbench or flow rack) to collapse. When replacing, stick to lean pipe and accessories from reputable suppliers to ensure compatibility—mixing brands or sizes can lead to poor fit and safety risks.
Finally, document your work! Jot down notes or take photos of the disassembly process, especially if you're working with a complex setup. This will save time if you need to reassemble the joint later or train a colleague.

Troubleshooting Common Disassembly Headaches
Even with careful prep, you might run into snags. Here's how to handle the most common issues:
Stuck Joints: When "Gentle" Isn't Enough
If the joint won't budge despite loosening the locking mechanism, try these tricks:
- Heat It Up: For metal joints, a hair dryer or heat gun (on low!) can expand the metal slightly, loosening rust or debris. Hold the heat 6-8 inches from the joint for 30 seconds, then try pulling again. Avoid open flames—they can damage plastic parts or paint.
- Freeze It: If heat doesn't work, try cooling the joint with ice (in a plastic bag to avoid water damage). Cold contracts metal, which might create enough space to loosen the connection.
- Use a Pipe Wrench (As a Last Resort): If all else fails, wrap the joint housing in a cloth (to prevent scratches) and use a pipe wrench to twist it loose. This should only be used for metal joints—plastic housing will crack under the pressure.
Lost or Stripped Screws
Stripped screws are frustrating, but not impossible to remove. Use a screw extractor kit (available at hardware stores)—drill a small hole in the stripped screw, insert the extractor, and turn counterclockwise. For lost screws, check your divider container first! If they're truly gone, replace them with the same size and thread type (metric vs. standard) to ensure a tight fit.
Damaged Bearings
If the internal bearing is seized or cracked, don't try to reuse it. Most bearings are press-fit into the housing, so you'll need a bearing puller tool to remove the old one. When installing a new bearing, tap it gently into place with a rubber mallet (or use a bearing press if you have one) to avoid damaging the new part.
Reassembly: Putting It All Back Together
Disassembly is often just the first step—whether you're cleaning, replacing parts, or reconfiguring your lean system, you'll need to put the joint back together. Here are a few quick tips to ensure a smooth reassembly:
- Align Parts Correctly: Use your earlier photos or notes to ensure parts like washers or spacers are in the right order. Misalignment can cause the joint to bind or fail.
- Don't Over-Tighten: Snug the locking screws or collars until they're secure, but stop before they're too tight—over-tightening can strip threads or crack the housing.
- Test Rotation: After reassembly, rotate the joint to ensure it moves smoothly. If it's stiff, check for misaligned parts or debris inside the housing.
- Re-Lock When Ready: Once the joint is back in place, re-engage the locking mechanism (set screws, pins, etc.) to secure it for use.
Maintaining Your Joints for Longevity
Disassembling a joint is a great opportunity to establish a maintenance routine. Regular care will keep your parallel rotatory lean pipe joints working smoothly for years:
- Clean Monthly: Wipe down joints with a dry cloth to remove dust. For deeper cleaning, use compressed air to blow out debris from the housing.
- Lubricate Quarterly: Apply a small amount of silicone-based lubricant (avoid oil-based lubes, which attract dust) to the internal bearing. This keeps rotation smooth and prevents rust.
- Inspect Bi-Annually: Check for loose screws, cracked housing, or worn bearings. Catching issues early means you can disassemble and repair before a joint fails mid-operation.
- Store Spare Parts: Keep extra bearings, screws, and locking pins on hand—this way, you won't have to halt work while waiting for replacements.
Final Thoughts
Disassembling parallel rotatory lean pipe joints might seem intimidating at first, but with the right tools, prep, and technique, it's a straightforward process. Remember: safety and patience are key. Rushing or forcing parts can lead to injury or damaged equipment, while taking the time to inspect, loosen, and separate components gently will ensure your lean system stays flexible, functional, and ready for whatever your workshop throws at it.
Whether you're a seasoned maintenance pro or a new workshop manager, mastering this skill will help you keep your lean system in top shape—saving time, reducing downtime, and extending the life of your equipment. And when in doubt, don't hesitate to consult the manufacturer's guide or reach out to your lean pipe supplier for tips specific to your joint model. Happy disassembling!