- Company Articles
- Products and Technology
- Installation And Maintenance
- How to Disinfect Two Way Aluminum Pipe Joints for Medical Device Assembly Areas

How to Disinfect Two Way Aluminum Pipe Joints for Medical Device Assembly Areas
Related Product
Two Way Aluminum Pipe Joint
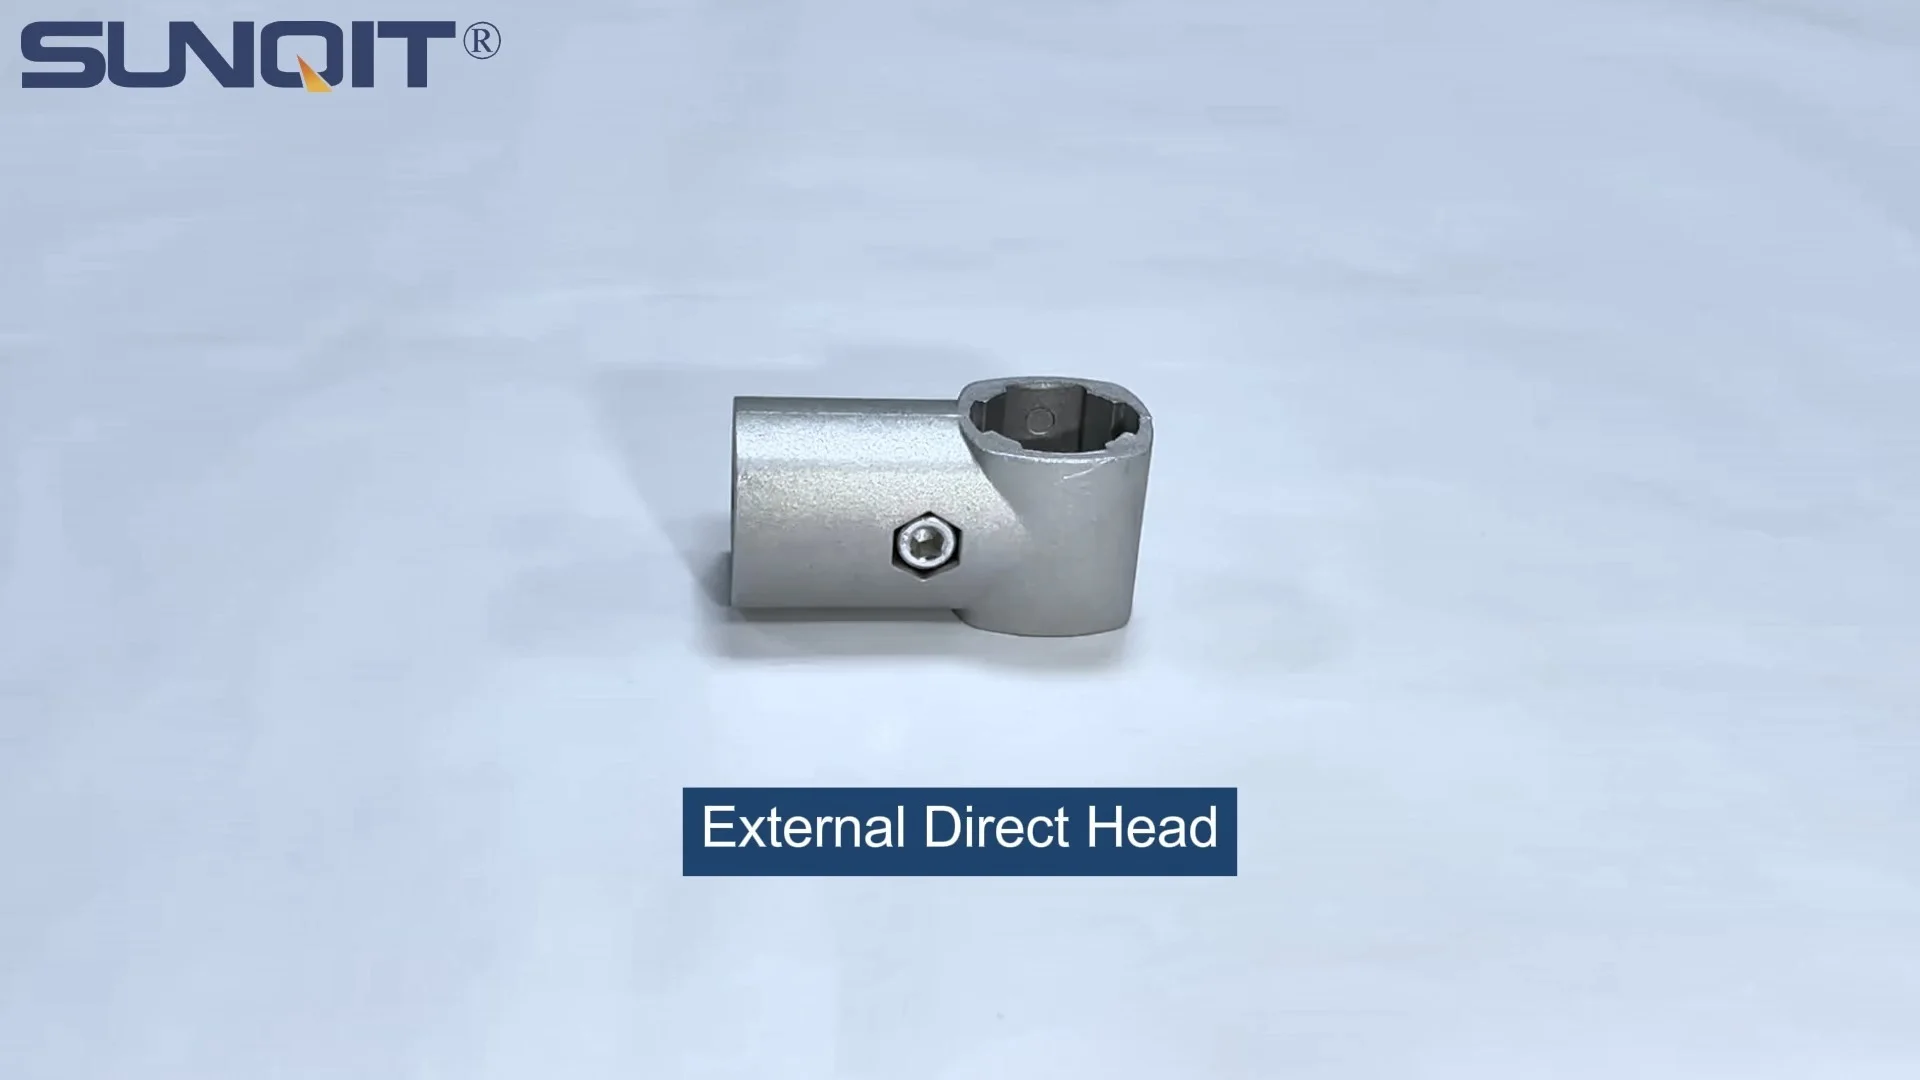
Aluminum 2 way pipe joint for 28mm aluminum pipe connection in 2 direction.
Introduction: The Critical Role of Cleanliness in Medical Device Assembly
In the world of medical device manufacturing, where precision can mean the difference between a life-saving tool and a dangerous liability, cleanliness isn't just a priority—it's a mandate. Every surface, every component, and every connection in the assembly line must adhere to the strictest hygiene standards to prevent contamination. Among these components, the humble two way aluminum pipe joint might not seem like a star player, but in reality, it's a silent workhorse that holds together everything from workbenches to material racks. These joints, often part of larger lean systems designed to streamline production, are surprisingly prone to harboring microscopic threats if not properly cared for. Today, we're diving deep into why disinfecting two way aluminum pipe joints matters, how to do it right, and the real-world impact of getting it wrong.
Imagine walking into a medical device assembly area. Rows of aluminum profile workbenches stretch across the floor, each holding delicate instruments in various stages of production. Above, overhead racks built with aluminum pipe and accessories keep tools within easy reach. Every corner is designed for efficiency—a hallmark of lean system thinking. But look closer at the connections where pipes meet joints: tiny crevices, hidden edges, and small gaps that, over time, collect dust, oils, and even biological residues. These aren't just cosmetic issues; they're potential breeding grounds for bacteria, viruses, or particulate matter that could compromise the sterility of the devices being built. For patients relying on these devices, the stakes couldn't be higher. That's why mastering the art of disinfecting two way aluminum pipe joints isn't just a maintenance task—it's a commitment to patient safety.
Understanding Two Way Aluminum Pipe Joints: Design, Use, and Vulnerabilities
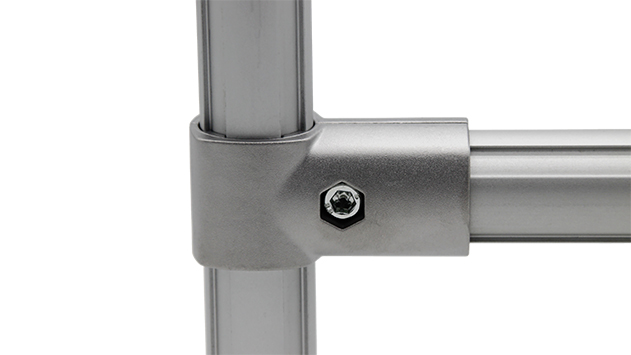
Before we jump into disinfection, let's get to know the two way aluminum pipe joint a little better. These small but mighty components are the unsung heroes of modular assembly systems. Unlike rigid, permanent connections, two way aluminum pipe joints allow for quick, tool-free assembly and reconfiguration of workbenches, material racks, and production lines. They're typically made from lightweight, corrosion-resistant aluminum, which makes them ideal for medical settings where durability and cleanliness are non-negotiable. The "two way" design means they connect two aluminum pipes at a fixed angle (often 90 degrees, though some are adjustable), forming the backbone of structures like the material rack b (3 row and 3 floor) or the simple workbench e (single deck-without caster) commonly seen in medical facilities.
But here's the catch: their design, while functional, creates spaces where contaminants love to hide. Let's break down the anatomy. A standard two way aluminum pipe joint has a central hub with two openings for inserting aluminum pipes. The connection is secured with internal mechanisms—sometimes a friction fit, sometimes a locking pin or set screw. Around the hub, there are often flanges or ridges to reinforce the joint, and between the pipe and the joint, there's a tiny gap where moisture, oils from hands, or airborne particles can settle. Over time, these gaps become invisible traps. Think of it like the seal around a window: even a hairline crack can let in drafts, and here, that "draft" is a steady stream of potential contaminants.
Another factor to consider is how these joints are used in daily operations. In a busy assembly area, technicians lean on workbenches, bump into material racks, or adjust pipe positions to accommodate new tools. Each interaction can transfer skin oils, sweat, or residues from gloves onto the joint. Cleaning protocols might wipe down the visible surfaces of the aluminum pipe or workbench top, but the joints—often tucked under shelves or at knee level—are easy to overlook. This oversight is dangerous because, unlike smooth surfaces, the joint's crevices can't be sanitized with a quick wipe. They require targeted attention, which is why understanding their vulnerabilities is the first step toward keeping them clean.
The Risks of Neglect: Why Contaminated Joints Threaten Medical Device Integrity
Let's talk about the real risks. What happens when two way aluminum pipe joints aren't properly disinfected? The answer isn't just "a little dirt"—it's a potential cascade of consequences that can ripple from the assembly line to the patient's bedside. Medical devices, from surgical tools to implantable devices, must meet stringent sterility requirements set by organizations like the FDA and ISO. Even a single contaminated component can lead to device recalls, costly production halts, or, worst of all, patient infections. And two way aluminum pipe joints, with their hidden crevices, are uniquely positioned to contribute to these risks.
Consider a scenario: a technician is assembling a diagnostic device on a workbench built with aluminum profile and two way joints. Over the past week, the joint under the workbench shelf hasn't been disinfected. It's collected dust, a few drops of spilled cleaning solution, and residue from a technician's latex gloves. When the technician reaches under the shelf to grab a tool, their sleeve brushes against the joint, dislodging some of that buildup. A small particle falls onto the device's circuit board, which later passes through initial quality checks (since the particle is too tiny to see with the naked eye). The device is packaged, shipped, and used in a hospital. Weeks later, the hospital reports a malfunction—traced back to that tiny particle shorting the circuit. Now, the manufacturer faces a recall, reputational damage, and the stress of ensuring no other devices are affected. All because of a neglected joint.
Biological contaminants are even scarier. In environments where human tissue samples or bodily fluids are present (common in medical device testing), a contaminated joint could harbor bacteria like Staphylococcus aureus or E. coli. If these pathogens transfer to a device, they could cause infections in patients with compromised immune systems. Unlike particulate matter, which might cause mechanical failures, biological contaminants pose direct health threats. And because aluminum is non-porous, these pathogens don't just "wash off"—they can cling to the joint's surface or hide in gaps, surviving routine cleaning and waiting for the next opportunity to spread.

Pre-Disinfection Preparation: Safety, Inspection, and Disassembly
Now that we understand the "why," let's focus on the "how." Disinfecting two way aluminum pipe joints isn't a one-size-fits-all process—it starts with careful preparation. Rushing this step is a common mistake, and it's often why disinfection efforts fail. Let's walk through the prep work step by step, from gathering supplies to inspecting joints for damage.
Gathering the Right Supplies
First, you'll need the right tools for the job. Here's a checklist tailored to aluminum pipe joints in medical settings:
- Personal Protective Equipment (PPE): Nitrile gloves (latex can leave residues), safety glasses (to protect from splashes), and a disposable gown if using harsh disinfectants.
- Cleaning Agents: A mild, pH-neutral detergent (avoid abrasive soaps that can scratch aluminum) for pre-cleaning, followed by a hospital-grade disinfectant approved for medical use (look for EPA registration numbers and claims against common pathogens like MRSA and norovirus).
- Application Tools: Soft-bristled brushes (to reach crevices without scratching), lint-free microfiber cloths (paper towels leave lint), cotton swabs (for tiny gaps), and a spray bottle for applying disinfectant.
- Disassembly Tools: If the joint is secured with set screws or pins, have the appropriate hex keys or pliers on hand. For friction-fit joints, you may need a rubber mallet to gently tap pipes loose.
- Drying Equipment: Compressed air (with a moisture filter) or clean, dry microfiber cloths to ensure no water spots remain (moisture can promote bacterial growth).
Inspecting Joints for Damage or Wear
Before disinfecting, take a few minutes to inspect each two way aluminum pipe joint. Look for signs of wear: cracks in the aluminum, bent flanges, or loose connections. A damaged joint isn't just harder to disinfect—it might also compromise the structural integrity of the workbench or rack. For example, a cracked joint could allow more moisture to seep in, creating an even bigger contamination risk. If you find a damaged joint, replace it immediately with a new one from a reputable lean pipe supplier. Don't try to "make do" with a compromised component—remember, this is about patient safety, not cutting costs.
Disassembling When Necessary
Here's a controversial question: should you disassemble the joint to disinfect it? In most cases, yes—especially if the joint hasn't been cleaned in a while or is visibly dirty. Disassembly allows you to access the inner surfaces where contaminants hide. For friction-fit joints, this is straightforward: gently pull or tap the aluminum pipes out of the joint. For joints with set screws, loosen the screws first (keep track of them—small parts are easy to lose!). Once disassembled, separate the joint from the pipes and set them on a clean, disinfected surface (like a disposable plastic mat) to avoid recontamination during cleaning.
Pro tip: If disassembly would disrupt production (e.g., the joint is part of an active assembly line), mark it for deep cleaning during a scheduled downtime. Never skip disassembly for high-risk joints—temporary inconvenience is better than permanent consequences.

Step-by-Step Disinfection Process: From Pre-Cleaning to Verification
With preparation out of the way, let's dive into the core of the process: disinfecting the two way aluminum pipe joint. This is where attention to detail matters most. We'll break it down into four phases: pre-cleaning, disinfection, rinsing (if needed), and drying. Each step builds on the last to ensure no contaminants are left behind.
Phase 1: Pre-Cleaning – Removing Visible Debris
Pre-cleaning is all about eliminating the "gunk" before disinfection. Even the best disinfectants can't work if they're blocked by layers of dust or oil. Start by wiping the exterior of the joint with a microfiber cloth dampened with mild detergent and warm water. For crevices, use a soft-bristled brush (an old toothbrush works great) to scrub gently. Pay special attention to the area where the pipe meets the joint—this is where most residue accumulates. If you've disassembled the joint, clean the inner surfaces of the hub and the ends of the aluminum pipes using cotton swabs dipped in soapy water. Rinse the joint and pipes with clean water to remove soap residue—leftover detergent can interfere with disinfection later.
Phase 2: Disinfection – Killing Microorganisms
Now it's time to bring out the heavy hitters: hospital-grade disinfectants. The key here is to choose a product that's effective against the specific pathogens in your environment and safe for aluminum (some harsh chemicals can cause pitting or discoloration). Common options include quaternary ammonium compounds (quats), hydrogen peroxide-based solutions, or accelerated hydrogen peroxide (AHP). Always follow the manufacturer's instructions for dilution and contact time—the latter is critical. "Contact time" is how long the disinfectant needs to stay wet on the surface to kill pathogens, and it can range from 30 seconds to 10 minutes. For two way aluminum pipe joints, aim for a contact time of at least 5 minutes to ensure all hidden areas are covered.
Application methods vary: you can spray the disinfectant directly onto the joint, use a cloth saturated with the solution, or submerge small joints in a disinfectant bath (if the manufacturer allows). For disassembled joints, make sure to coat the inner hub, pipe ends, and any moving parts (like locking mechanisms) thoroughly. Avoid "fogging" or "misting" as a primary disinfection method—these don't guarantee full coverage of crevices. After applying the disinfectant, let it sit undisturbed for the recommended contact time. Resist the urge to wipe it off early—patience here pays off in germ-free joints.
Phase 3: Rinsing (If Required) and Drying
Some disinfectants, like bleach-based solutions, require rinsing to remove residue that could corrode aluminum over time. Check the product label—if rinsing is needed, use sterile water or deionized water to avoid introducing new contaminants. After rinsing (or if no rinsing is required), dry the joint and pipes thoroughly. Moisture is the enemy here: even a small drop trapped in a crevice can become a breeding ground for bacteria. Use compressed air to blow out water from tight spaces, then wipe with a dry microfiber cloth. For disassembled joints, lay them on a clean towel and let them air-dry for an additional 10–15 minutes before reassembly.
Phase 4: Reassembly and Post-Disinfection Inspection
Once everything is dry, it's time to put the joint back together. For friction-fit joints, push the aluminum pipes firmly into the joint until you hear a "click" or feel resistance. For set-screw joints, tighten the screws just enough to secure the pipes—over-tightening can strip the threads or warp the joint. After reassembly, give the structure a gentle shake to ensure the joint is secure. Then, do a final visual inspection: are there any missed spots? Is the joint clean and dry? If everything looks good, you're done—for now.
Comparing Disinfection Methods: Which Works Best for Two Way Aluminum Pipe Joints?
Not all disinfection methods are created equal, and what works for a smooth aluminum profile workbench top might not work for the nooks and crannies of a two way joint. To help you choose the right approach for your facility, we've compared the most common methods below. Keep in mind that the "best" method depends on factors like your budget, the level of contamination, and the frequency of disinfection.
| Disinfection Method | How It Works | Pros for Two Way Joints | Cons for Two Way Joints | Ideal Use Case |
|---|---|---|---|---|
| Manual Cleaning with Disinfectant Wipes | Wiping joint surfaces with pre-moistened, disposable wipes containing disinfectant. | Quick, portable, no water needed; good for daily touch-ups. | Hard to reach crevices; wipes can leave lint; may not provide enough contact time. | Daily maintenance between deep cleans; low-contamination areas. |
| Spray-and-Wipe with Liquid Disinfectant | Spraying disinfectant directly on the joint, then wiping with a cloth after contact time. | Better coverage than wipes; can target specific crevices with a brush or swab. | Requires PPE; risk of over-spray; needs careful drying to prevent moisture buildup. | Weekly deep cleans; joints with visible residue. |
| Ultrasonic Cleaning | Submerging disassembled joints in a tank of disinfectant solution agitated by ultrasonic waves, which create tiny bubbles that dislodge contaminants. | Reaches all hidden areas; highly effective against stubborn residue; no manual scrubbing. | Expensive equipment; requires disassembly; not practical for large, fixed structures. | Monthly or quarterly deep cleans; high-risk areas (e.g., near tissue sample testing). |
| UV-C Light Disinfection | Exposing joints to UV-C light, which damages the DNA of microorganisms, killing them. | Chemical-free; no residue; good for surfaces that can't be wetted. | Requires direct line of sight—gaps and crevices may be missed; long exposure times needed. | Supplemental disinfection after manual cleaning; joints in hard-to-reach, dry areas. |
Our top recommendation? For most medical device assembly areas, a combination of spray-and-wipe disinfection (for weekly deep cleans) and manual wipe-downs (for daily maintenance) works best. Disassemble and use ultrasonic cleaning quarterly to tackle hidden buildup. UV-C can be a useful add-on but shouldn't replace manual cleaning, as it won't remove physical debris that can shield pathogens from light.
Best Practices for Long-Term Maintenance: Keeping Joints Clean Between Deep Cleans
Disinfecting two way aluminum pipe joints isn't a one-and-done task—it's an ongoing commitment. To keep joints clean between deep disinfection sessions, incorporate these simple habits into your daily workflow:
- Train Staff to Spot Contamination: Teach technicians to recognize signs of buildup on joints—greasy residue, discoloration, or visible dust. Make it part of their pre-shift checklist to report dirty joints to the maintenance team.
- Use Barriers When Possible: For high-touch joints (like those on frequently adjusted workbenches), apply a thin, removable plastic film or sleeve. replace the film weekly to prevent residue buildup.
- Limit Exposure to Contaminants: Keep assembly areas well-ventilated to reduce dust, and use mats at entry points to trap dirt from shoes. Store oily tools or lubricants away from aluminum profile structures to avoid accidental spills.
- Document and Schedule: Create a disinfection log to track when each joint was last cleaned, who did it, and which method was used. Set calendar reminders for deep cleans—consistency is key.
- replace Worn Joints Promptly: Over time, even well-maintained joints can develop cracks or loose connections. Inspect joints monthly and replace any that show signs of wear—don't wait for them to fail or become contamination hotspots.
Remember, the goal isn't perfection—it's progress. By integrating these practices into your lean system workflow, you'll create a culture of cleanliness where every team member understands their role in protecting patient safety. And when everyone is on board, even the smallest components—like two way aluminum pipe joints—become part of a larger, life-saving mission.
Conclusion: Small Joints, Big Responsibility
As we wrap up, let's circle back to why this matters. Two way aluminum pipe joints might be small, but their impact on medical device safety is enormous. They're the connective tissue of lean systems, holding together the workbenches, racks, and lines that produce life-changing devices. Neglecting their disinfection isn't just a maintenance oversight—it's a risk to the patients who depend on those devices to heal, monitor, or survive.
The good news? Disinfecting two way aluminum pipe joints doesn't have to be complicated. With the right tools, a little patience, and a commitment to regular maintenance, you can keep these joints clean, functional, and safe. Whether you're using spray-and-wipe for weekly cleans, ultrasonic baths for quarterly deep dives, or UV-C as a backup, the key is to be thorough and consistent. Remember: every crevice scrubbed, every second of contact time observed, and every worn joint replaced is a step toward safer medical devices and healthier patients.
So the next time you walk through your assembly area, take a moment to look at the two way aluminum pipe joints holding everything together. They might not shout for attention, but they deserve it. After all, in the world of medical manufacturing, the smallest details often make the biggest difference.