- Company Articles
- Products and Technology
- Installation And Maintenance
- How to Extend Lifespan of Vertical Lean Pipe Joint Chrome: Pro Tips

How to Extend Lifespan of Vertical Lean Pipe Joint Chrome: Pro Tips
Related Product
Vertical Lean Pipe Joint Chrome
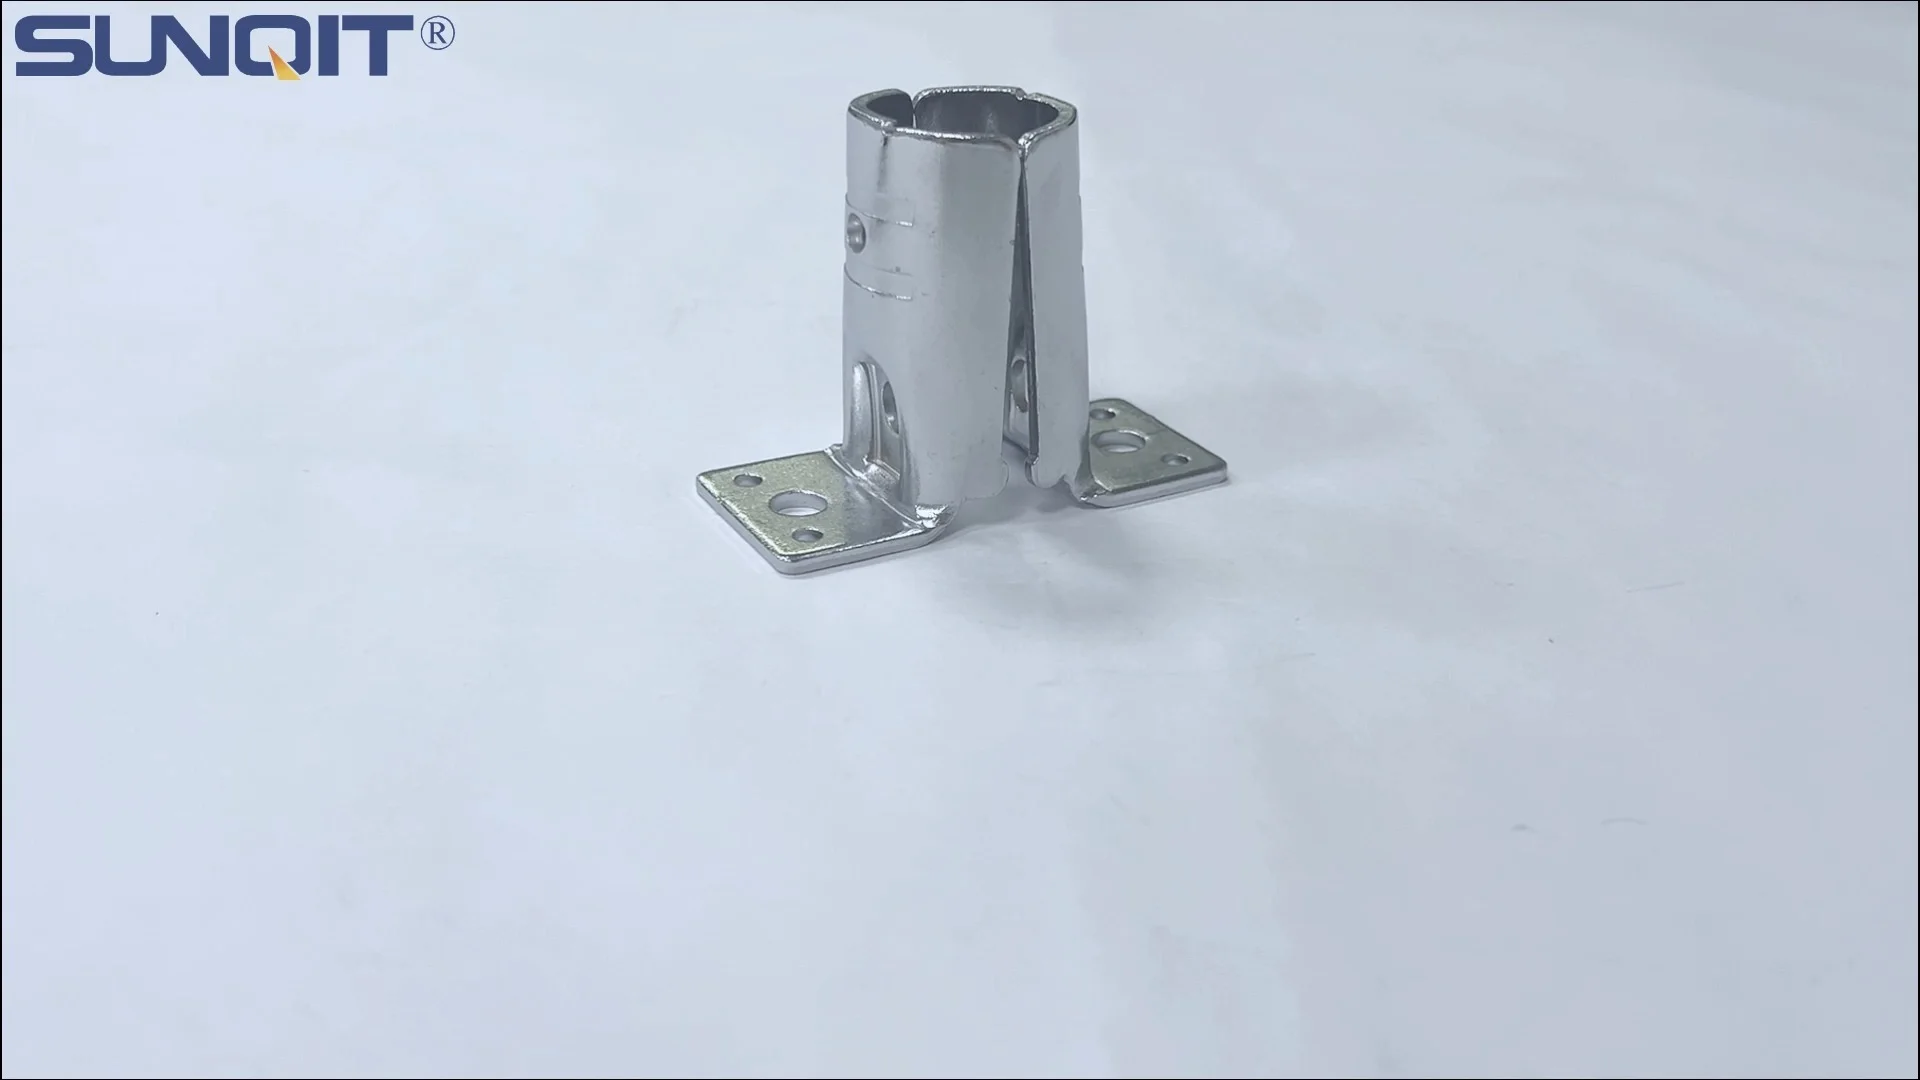
Vertical lean pipe joint is used for 28mm lean pipe fixed on ground and keep it stable.
Walk into any modern manufacturing facility, warehouse, or assembly line, and you'll likely spot a familiar sight: workbenches, material racks, and flow racks built with lean pipe systems. These structures, often made from aluminum or steel pipes connected by joints, are the backbone of efficient workflows—they're flexible, easy to assemble, and adapt to changing production needs. But among all the components that make up these systems, one small yet critical part often gets overlooked: the vertical lean pipe joint chrome. This unassuming connector holds everything together, ensuring stability for workbenches stacked with tools, flow racks moving parts, and even turnover trolleys navigating busy floors. When it fails, the consequences ripple through your operation: wobbly workstations slow down assembly, loose joints risk product damage, and unexpected downtime eats into your bottom line. The good news? With the right care, your vertical lean pipe joint chrome can last years longer than the average lifespan. In this guide, we'll break down why these joints wear out, how to maintain them like a pro, and even share real-world examples of teams that turned around their joint durability. Let's dive in.
Understanding the Role of Vertical Lean Pipe Joint Chrome in Your System
Before we talk maintenance, let's get clear on what makes the vertical lean pipe joint chrome so important. These joints are the "glue" of lean pipe and accessories systems—they connect vertical pipes to horizontal ones, secure shelves to frames, and even anchor structures to the floor. Unlike plastic or uncoated steel joints, the chrome finish isn't just for looks: it adds a layer of corrosion resistance, making the joint more durable in environments with moisture, oils, or dust. But here's the catch: chrome plating can chip, and the internal mechanisms (like threads or locking pins) can wear down over time, especially if the joint is under constant stress. Think about a workbench in a busy electronics assembly line: every time an operator places a heavy tool on the surface, the vertical joints absorb that weight. Over weeks and months, that stress can loosen threads or bend internal components. Add in daily exposure to workshop debris—metal shavings, oil drips, or even just dust—and you've got a recipe for premature wear. The first step to extending lifespan? Recognizing that these joints aren't "set it and forget it" parts. They need attention, just like the machinery they support.
Common Culprits Behind Shortened Joint Lifespan
Why do some vertical lean pipe joints fail in a year, while others last five? It often comes down to four key factors. Let's break them down:
1. Dirt and Debris Buildup
Even in clean facilities, dust and small particles find their way into joint crevices. Over time, this grime acts like sandpaper: when you adjust the joint (to reposition a shelf, for example), the dirt scratches the chrome plating and wears down the threads. In factories with metalworking or woodworking, metal shavings or sawdust can be even more damaging—they get trapped between the joint and pipe, causing friction that weakens the connection.
Even in clean facilities, dust and small particles find their way into joint crevices. Over time, this grime acts like sandpaper: when you adjust the joint (to reposition a shelf, for example), the dirt scratches the chrome plating and wears down the threads. In factories with metalworking or woodworking, metal shavings or sawdust can be even more damaging—they get trapped between the joint and pipe, causing friction that weakens the connection.
2. Improper Lubrication
Many teams assume joints don't need lubrication because they're "just metal on metal." Big mistake. The threads and moving parts inside vertical joints (like those with rotating components) rely on a thin layer of lubricant to reduce friction. Without it, every twist or adjustment grinds away at the metal, leading to stripped threads or seized mechanisms. Using the wrong lubricant—like a heavy grease that traps dirt—can be just as bad as using none at all.
Many teams assume joints don't need lubrication because they're "just metal on metal." Big mistake. The threads and moving parts inside vertical joints (like those with rotating components) rely on a thin layer of lubricant to reduce friction. Without it, every twist or adjustment grinds away at the metal, leading to stripped threads or seized mechanisms. Using the wrong lubricant—like a heavy grease that traps dirt—can be just as bad as using none at all.
3. Overloading and Misalignment
Lean pipe systems are designed to handle specific weight limits, but it's easy to push those boundaries. Stacking a material rack b (3 row and 3 floor) with more boxes than recommended, or using a workbench to hold equipment heavier than its rating, puts extra stress on vertical joints. Misalignment during installation compounds the problem: if a pipe isn't perfectly vertical, the joint bears uneven weight, leading to cracks or bent components over time.
Lean pipe systems are designed to handle specific weight limits, but it's easy to push those boundaries. Stacking a material rack b (3 row and 3 floor) with more boxes than recommended, or using a workbench to hold equipment heavier than its rating, puts extra stress on vertical joints. Misalignment during installation compounds the problem: if a pipe isn't perfectly vertical, the joint bears uneven weight, leading to cracks or bent components over time.
4. Environmental Factors
Where your joint lives matters. A vertical joint in a climate-controlled office (yes, lean systems are used there too!) will last longer than one in a warehouse with high humidity, frequent temperature swings, or exposure to chemicals. Even something as simple as proximity to a pressure washer (common in food processing plants) can blast water and cleaning agents into joints, accelerating rust under the chrome plating.
Where your joint lives matters. A vertical joint in a climate-controlled office (yes, lean systems are used there too!) will last longer than one in a warehouse with high humidity, frequent temperature swings, or exposure to chemicals. Even something as simple as proximity to a pressure washer (common in food processing plants) can blast water and cleaning agents into joints, accelerating rust under the chrome plating.
Pro Tip:
Not sure if your joints are overloaded? Check the manufacturer's specs for your lean pipe system. Most suppliers (like lean pipe workbench suppliers or lean system suppliers) provide weight limits for each joint type. If you can't find the specs, a good rule of thumb: if the joint wobbles when you push the structure gently, it's likely under too much stress.

Pro Maintenance Tips to Extend Joint Lifespan
Now that we know what's hurting your joints, let's fix it. These maintenance steps are simple, low-cost, and take just minutes per joint—yet they can double or even triple lifespan.
Step 1: Regular Cleaning – Keep Debris at Bay
The single most effective way to protect your vertical lean pipe joint chrome is to keep it clean. Here's how to do it right:
Tools You'll Need: Soft-bristle brush (old toothbrushes work great!), lint-free cloth, mild detergent (like dish soap), and a can of compressed air (optional).
Process:
- Start by brushing away loose debris from the joint's crevices. Pay extra attention to the area where the joint meets the pipe—this is where dust and shavings love to hide.
- Mix a small amount of mild detergent with warm water, dampen the cloth, and wipe the joint gently. Avoid soaking the joint, as excess water can seep into threads and cause rust under the chrome.
- For hard-to-reach spots (like internal threads), use compressed air to blow out debris. Hold the can 6-8 inches from the joint to avoid damaging the chrome.
- Dry the joint thoroughly with a clean cloth. Moisture left on the surface can lead to water spots or, worse, corrosion.
Frequency: In low-debris areas (like office workstations), clean joints monthly. In high-debris environments (factories, warehouses), step it up to weekly. After any major cleanup (like a floor scrub or equipment maintenance), do a quick wipe-down—you'd be surprised how much dust gets kicked up.
Tools You'll Need: Soft-bristle brush (old toothbrushes work great!), lint-free cloth, mild detergent (like dish soap), and a can of compressed air (optional).
Process:
- Start by brushing away loose debris from the joint's crevices. Pay extra attention to the area where the joint meets the pipe—this is where dust and shavings love to hide.
- Mix a small amount of mild detergent with warm water, dampen the cloth, and wipe the joint gently. Avoid soaking the joint, as excess water can seep into threads and cause rust under the chrome.
- For hard-to-reach spots (like internal threads), use compressed air to blow out debris. Hold the can 6-8 inches from the joint to avoid damaging the chrome.
- Dry the joint thoroughly with a clean cloth. Moisture left on the surface can lead to water spots or, worse, corrosion.
Frequency: In low-debris areas (like office workstations), clean joints monthly. In high-debris environments (factories, warehouses), step it up to weekly. After any major cleanup (like a floor scrub or equipment maintenance), do a quick wipe-down—you'd be surprised how much dust gets kicked up.
Step 2: Lubrication – The Right Lube for the Job
Lubrication reduces friction, prevents rust, and keeps joint mechanisms moving smoothly. But not all lubricants are created equal. Here's what to use (and what to avoid):
Best Lubricants:
- Silicone-based spray lubricant: Ideal for chrome-plated joints. It's lightweight, won't attract dust, and provides long-lasting protection. Look for a spray with a precision nozzle to target small crevices.
- Dry film lubricant: Great for joints in dusty environments (like woodworking shops). It dries to a thin, protective layer that repels dirt and doesn't gum up moving parts.
What to Avoid:
- Heavy greases (like automotive wheel bearing grease): They trap dust and debris, turning into a gritty paste that wears down joints. - WD-40 (as a long-term lubricant): It's a solvent and water displacer, not a lubricant. Use it to clean rust, but follow up with a proper lube.
Application Tips:
- Apply lubricant sparingly—you only need a thin film. Too much will drip onto floors or attract dirt. - After spraying, move the joint gently (twist or adjust it) to work the lubricant into threads and moving parts. - Wipe away excess with a clean cloth to prevent buildup.
Frequency: Lubricate joints every 3 months in normal conditions. In high-moisture or high-use areas (like turnover trolleys that move daily), do it monthly.
Best Lubricants:
- Silicone-based spray lubricant: Ideal for chrome-plated joints. It's lightweight, won't attract dust, and provides long-lasting protection. Look for a spray with a precision nozzle to target small crevices.
- Dry film lubricant: Great for joints in dusty environments (like woodworking shops). It dries to a thin, protective layer that repels dirt and doesn't gum up moving parts.
What to Avoid:
- Heavy greases (like automotive wheel bearing grease): They trap dust and debris, turning into a gritty paste that wears down joints. - WD-40 (as a long-term lubricant): It's a solvent and water displacer, not a lubricant. Use it to clean rust, but follow up with a proper lube.
Application Tips:
- Apply lubricant sparingly—you only need a thin film. Too much will drip onto floors or attract dirt. - After spraying, move the joint gently (twist or adjust it) to work the lubricant into threads and moving parts. - Wipe away excess with a clean cloth to prevent buildup.
Frequency: Lubricate joints every 3 months in normal conditions. In high-moisture or high-use areas (like turnover trolleys that move daily), do it monthly.
Step 3: Inspection – Catch Problems Early
Regular inspections let you spot issues before they turn into failures. Make this part of your team's weekly or monthly checklist. Here's what to look for:
Visual Checks:
- Chrome Plating: Look for chips, scratches, or peeling. Exposed steel underneath will rust quickly—address these spots immediately (more on that below).
- Threads: Check for signs of stripping (damaged or flattened threads) or corrosion (white, green, or brown spots). Stripped threads mean the joint can't tighten properly, risking collapse.
- Movement: Twist the joint gently. It should move smoothly without grinding or sticking. If it's seized, that's a sign of internal wear or lack of lubrication.
Physical Checks:
- Tightness: Use a wrench (if applicable) to test if the joint is loose. A little give is normal, but if it spins freely, it needs to be tightened or replaced.
- Cracks: Run your finger along the joint's edges. Even small cracks (especially around the base) can weaken the joint under load.
Pro Tip: Take photos of joints during inspections. Comparing photos over time makes it easier to spot gradual changes (like spreading corrosion) that might otherwise go unnoticed.
Visual Checks:
- Chrome Plating: Look for chips, scratches, or peeling. Exposed steel underneath will rust quickly—address these spots immediately (more on that below).
- Threads: Check for signs of stripping (damaged or flattened threads) or corrosion (white, green, or brown spots). Stripped threads mean the joint can't tighten properly, risking collapse.
- Movement: Twist the joint gently. It should move smoothly without grinding or sticking. If it's seized, that's a sign of internal wear or lack of lubrication.
Physical Checks:
- Tightness: Use a wrench (if applicable) to test if the joint is loose. A little give is normal, but if it spins freely, it needs to be tightened or replaced.
- Cracks: Run your finger along the joint's edges. Even small cracks (especially around the base) can weaken the joint under load.
Pro Tip: Take photos of joints during inspections. Comparing photos over time makes it easier to spot gradual changes (like spreading corrosion) that might otherwise go unnoticed.
Step 4: Addressing Damage – Fix Small Issues Before They Grow
Found a chipped chrome spot or a slightly stripped thread? Don't panic—many small issues can be fixed with simple DIY solutions:
- Minor Chrome Damage: Clean the area with alcohol, then apply a thin coat of clear nail polish or a rust-inhibiting primer. This seals the exposed steel and prevents rust.
- Loose Threads: If the joint still tightens but feels wobbly, wrap a small amount of Teflon tape around the threads (in the direction of tightening) to add grip. For more severe stripping, consider using a thread repair kit (available at hardware stores).
- Mild Corrosion: Remove rust with a wire brush (gently—don't scratch the remaining chrome), then clean with alcohol and apply a corrosion-resistant spray (like a clear enamel).
When to replace: If a joint has deep cracks, severely stripped threads, or widespread corrosion, it's time to replace it. Trying to "make do" with a damaged joint puts your entire structure at risk. Most lean pipe suppliers offer replacement joints at low cost—investing in a new one now is cheaper than fixing a collapsed workbench later.
- Minor Chrome Damage: Clean the area with alcohol, then apply a thin coat of clear nail polish or a rust-inhibiting primer. This seals the exposed steel and prevents rust.
- Loose Threads: If the joint still tightens but feels wobbly, wrap a small amount of Teflon tape around the threads (in the direction of tightening) to add grip. For more severe stripping, consider using a thread repair kit (available at hardware stores).
- Mild Corrosion: Remove rust with a wire brush (gently—don't scratch the remaining chrome), then clean with alcohol and apply a corrosion-resistant spray (like a clear enamel).
When to replace: If a joint has deep cracks, severely stripped threads, or widespread corrosion, it's time to replace it. Trying to "make do" with a damaged joint puts your entire structure at risk. Most lean pipe suppliers offer replacement joints at low cost—investing in a new one now is cheaper than fixing a collapsed workbench later.
Step 5: Environmental Protection – Shield Joints from Harsh Conditions
Even with perfect maintenance, environmental factors can shorten joint lifespan. Here's how to protect joints in tough conditions:
- High Moisture (e.g., Food Processing, Car Washes): Use stainless steel pipe series joints instead of chrome-plated steel—they're more corrosion-resistant. If you already have chrome joints, apply a marine-grade wax (like car wax) every 2 months to repel water.
- Dusty or Dirty Environments (e.g., Construction, Woodworking): Cover unused joints with plastic caps (available from lean pipe and accessories suppliers) to keep debris out. For active joints, clean and lubricate more frequently (every 2 weeks).
- Extreme Temperatures (e.g., Freezers, Outdoor Storage): Cold can make metal brittle, while heat can dry out lubricants. Use a high-temperature lubricant in hot areas and check joints for cracks in cold environments.
- High Moisture (e.g., Food Processing, Car Washes): Use stainless steel pipe series joints instead of chrome-plated steel—they're more corrosion-resistant. If you already have chrome joints, apply a marine-grade wax (like car wax) every 2 months to repel water.
- Dusty or Dirty Environments (e.g., Construction, Woodworking): Cover unused joints with plastic caps (available from lean pipe and accessories suppliers) to keep debris out. For active joints, clean and lubricate more frequently (every 2 weeks).
- Extreme Temperatures (e.g., Freezers, Outdoor Storage): Cold can make metal brittle, while heat can dry out lubricants. Use a high-temperature lubricant in hot areas and check joints for cracks in cold environments.

Maintenance Schedule: A Quick Reference
To make it easy, we've put together a maintenance schedule for vertical lean pipe joint chrome. Adjust based on your environment!
| Task | Normal Environments (Office, Clean Factories) | Harsh Environments (Dusty, High Moisture, High Use) | Tools Needed |
|---|---|---|---|
| Cleaning | Monthly | Weekly | Soft brush, cloth, mild detergent |
| Lubrication | Every 3 Months | Monthly | Silicone spray or dry film lubricant |
| Inspection | Monthly | Weekly | Flashlight, wrench (for tightness checks) |
| Corrosion Treatment | As Needed | Bi-Monthly | Rust remover, clear enamel spray |
Real-World Success: How One Factory Extended Joint Lifespan by 200%
Let's talk results. A mid-sized electronics manufacturer in Ohio was struggling with vertical lean pipe joint failures. Their assembly line workbenches, which used chrome-plated joints, were needing joint replacements every 6-8 months. The maintenance team was spending hours swapping out joints, and loose workbenches were causing delays in production. Frustrated, they reached out to their lean pipe supplier for advice—and implemented the maintenance plan we've outlined here.
Here's what changed:
- They trained assembly line operators to clean and inspect joints during their daily 10-minute "5S" cleanup (a lean manufacturing practice for workplace organization).
- They switched to silicone-based lubricant and set a calendar reminder to lubricate joints monthly.
- They added a "joint health" section to their weekly maintenance checklist, with photos of what to look for (chipped chrome, loose threads).
The results? Within 3 months, joint failures dropped by 75%. After a year, they hadn't replaced a single joint—and the original joints were still going strong. The maintenance manager estimated the change saved the company $12,000 in replacement parts and downtime. As he put it: "We were throwing money away replacing joints when all they needed was a little attention."
Here's what changed:
- They trained assembly line operators to clean and inspect joints during their daily 10-minute "5S" cleanup (a lean manufacturing practice for workplace organization).
- They switched to silicone-based lubricant and set a calendar reminder to lubricate joints monthly.
- They added a "joint health" section to their weekly maintenance checklist, with photos of what to look for (chipped chrome, loose threads).
The results? Within 3 months, joint failures dropped by 75%. After a year, they hadn't replaced a single joint—and the original joints were still going strong. The maintenance manager estimated the change saved the company $12,000 in replacement parts and downtime. As he put it: "We were throwing money away replacing joints when all they needed was a little attention."
Conclusion: Small Efforts, Big Returns
The vertical lean pipe joint chrome might be small, but its impact on your operation is huge. By taking the time to clean, lubricate, inspect, and protect these joints, you're not just extending their lifespan—you're ensuring smoother workflows, reducing downtime, and protecting your team from accidents. Remember: proactive maintenance is always cheaper than reactive repairs. Whether you're running a small workshop or a large factory, these tips are easy to implement and deliver real results. So grab a brush, a can of lubricant, and start giving your joints the care they deserve. Your bottom line (and your team's productivity) will thank you.