- Company Articles
- Products and Technology
- Installation And Maintenance
- How to Install 40 Aluminum Roller Track Green: Step-by-Step Guide for Factories

How to Install 40 Aluminum Roller Track Green: Step-by-Step Guide for Factories
Related Product
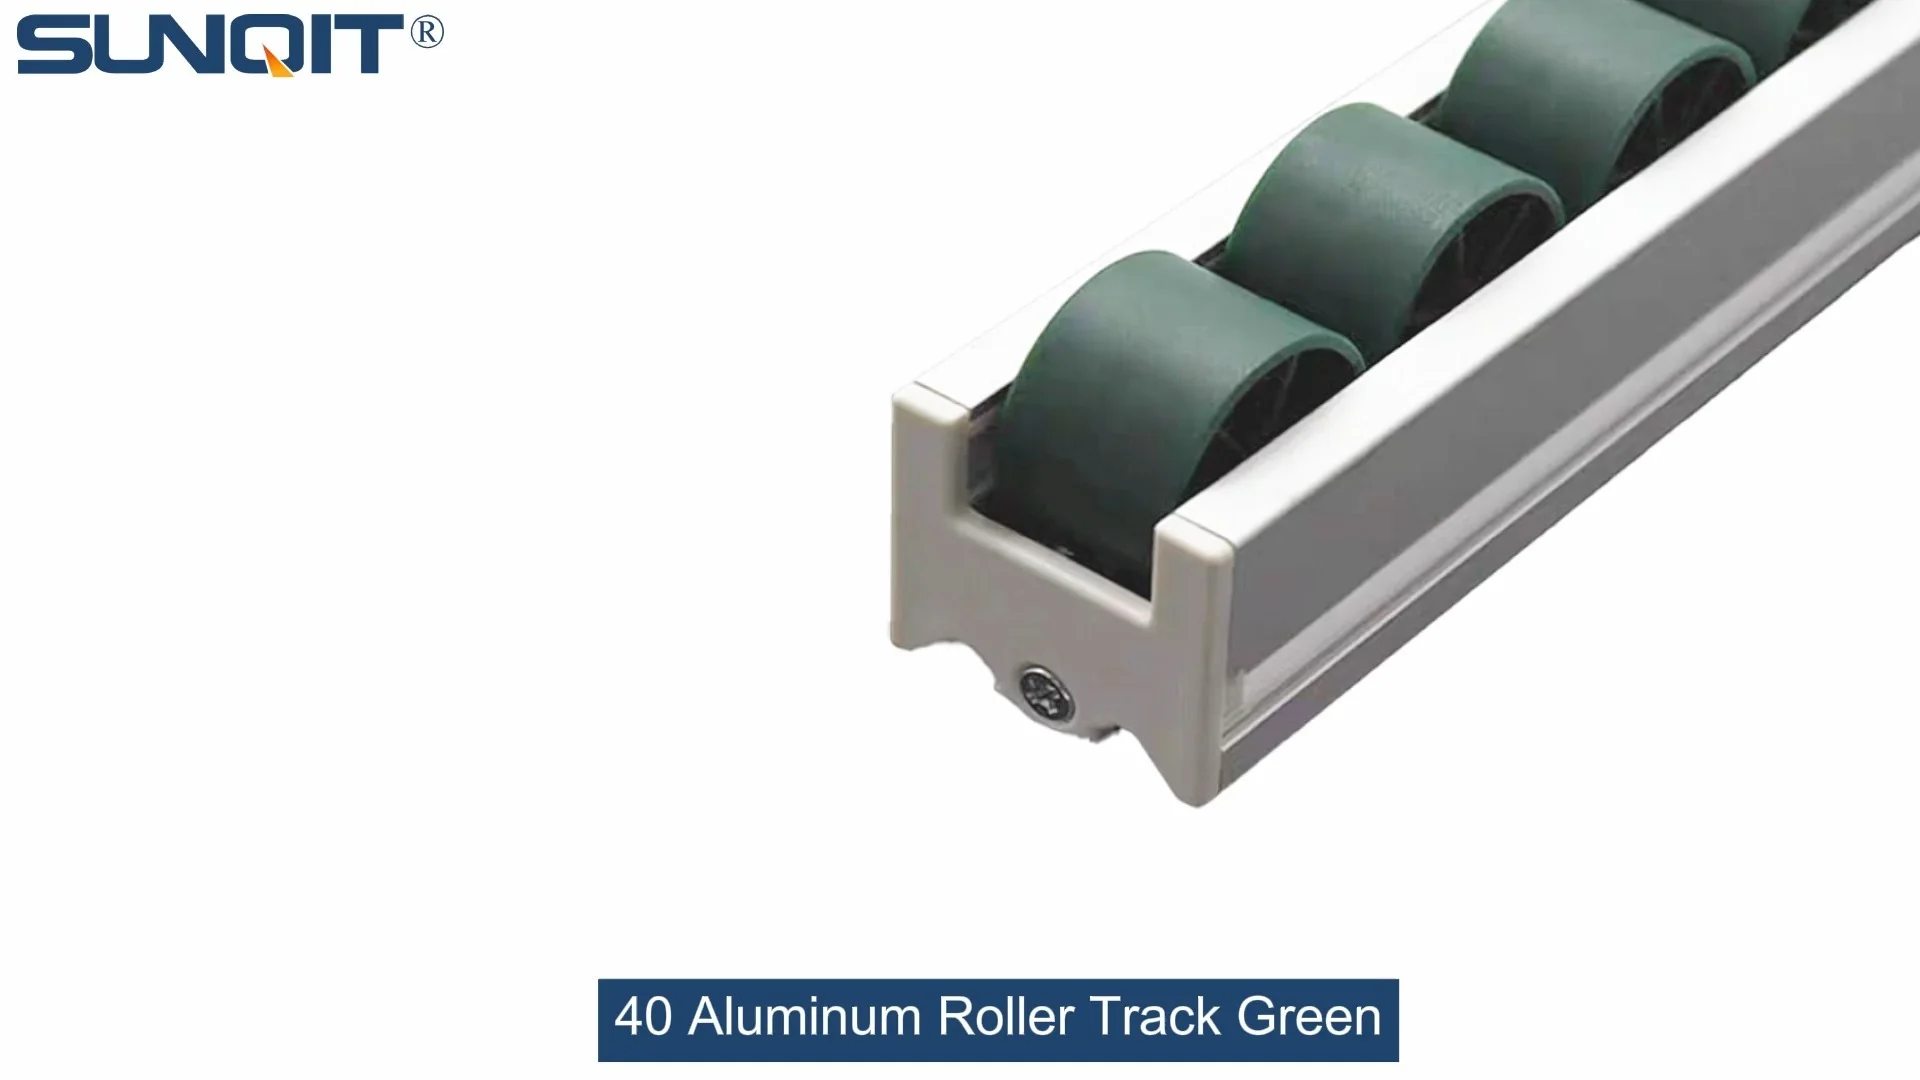
40 Aluminum Roller Track Green
Durable and smooth-running modular roller rails. The system is fully assembled. The roller rail profile contains plastic rollers mounted on steel axles. Aluminum frame with plastic wheel make it anti corrosion,and material convey more smooth.
How to Install 40 Aluminum Roller Track Green: Step-by-Step Guide for Factories
In the fast-paced world of manufacturing, every second counts. Efficient material handling isn't just a convenience—it's a cornerstone of lean manufacturing principles, where minimizing waste and maximizing value are paramount. That's where components like the 40 Aluminum Roller Track Green come into play. This robust, versatile track is more than just a piece of hardware; it's a building block for flow racks, conveyors, and entire lean system setups that keep production lines moving smoothly. Whether you're setting up a new assembly line or upgrading an existing one, knowing how to install this roller track correctly is essential to unlock its full potential.
The 40 Aluminum Roller Track Green is designed for durability and ease of use. Its green finish isn't just aesthetic—it's a visual cue that often signifies eco-friendly or safety-compliant components in many factories. But beyond looks, this track offers low-friction movement, making it ideal for transporting parts of various sizes across workstations. When integrated into flow racks, it allows for first-in-first-out (FIFO) inventory management, a key lean practice that reduces overstock and waste. In conveyors, it ensures that products move consistently without jams, keeping your production line on schedule. And as part of a lean system, it adapts to changing needs, letting you reconfigure your setup as your processes evolve.
But installing this track isn't a job you can rush. A poorly installed track can lead to stuck parts, misaligned workflows, and even safety hazards. That's why we've put together this comprehensive step-by-step guide. We'll walk you through everything from pre-installation preparation to post-installation checks, ensuring that your 40 Aluminum Roller Track Green is set up to perform at its best. Along the way, we'll highlight key tips, common pitfalls to avoid, and how this track fits into your broader lean manufacturing goals.
Pre-Installation Preparation
Before you pick up a tool, proper preparation is critical. This phase sets the foundation for a smooth installation and ensures that you have everything you need to get the job done right the first time. Let's break down what you need to do.
1. Gather the Necessary Tools
Having the right tools on hand will save you time and frustration. Here's a list of what you'll need:
- Allen wrench set (sizes matching your fasteners)
- Tape measure (preferably a 5-meter or longer one for accurate measurements)
- Spirit level (to ensure the track is perfectly horizontal)
- Rubber mallet (for gently tapping parts into place without damaging them)
- Phillips-head screwdriver (for securing screws where Allen wrenches aren't applicable)
- Marker or pencil (for marking installation points)
- Safety gloves (to protect your hands from sharp edges)
- Safety glasses (to shield your eyes from debris)
2. Safety First
Manufacturing environments can be hazardous, so never skip safety precautions. Wear your gloves and safety glasses throughout the installation process. Clear the workspace of any obstacles or loose parts that could trip you up. If you're working at height, use a stable ladder or platform. And always follow your factory's safety guidelines—they're there to keep you and your colleagues safe.
3. Check All Parts
Before starting installation, lay out all the components you'll need. This includes:
- 40 Aluminum Roller Track Green sections (measure the total length you need and confirm you have enough)
- Roller track connectors (to join multiple track sections together)
- Mounting brackets (to attach the track to aluminum profiles or other surfaces)
- Screws and nuts (matching the size of your brackets and profiles)
- Aluminum profile accessories (like end caps to cover sharp edges, or rubber strips to reduce noise)
- Any additional roller track accessories specific to your setup (like guides or stops)
It's a good idea to create a checklist and mark off each item as you verify it. This helps prevent delays later when you realize a part is missing. For example, if you're installing 5 meters of track, you might need 5 track sections (1 meter each), 4 connectors (to join 5 sections), 10 mounting brackets (2 per meter), and 20 screws (2 per bracket). A simple table can help organize this:
| Component | Quantity |
|---|---|
| 40 Aluminum Roller Track Green (1m sections) | 5 |
| Roller Track Connectors | 4 |
| Mounting Brackets | 10 |
| M5 Screws | 20 |
| M5 Nuts | 20 |
| Aluminum Profile End Caps | 2 |
| Rubber Mallet | 1 |
| Spirit Level | 1 |
Common mistake to avoid: Forgetting to check if the roller track sections are straight. Even a slight bend can cause jams later, so inspect each section carefully before installation.
Step-by-Step Installation Instructions
Step 1: Measure and Mark the Installation Area
The first step is to determine where the roller track will go. Whether you're attaching it to a flow rack, a conveyor frame, or a lean workstation, accurate measurements are crucial.
- Start by measuring the length of the area where the track will be installed. Use your tape measure to get precise dimensions. For example, if you're adding the track to a flow rack shelf, measure the inner width of the shelf to ensure the track fits perfectly.
- Mark the positions where the mounting brackets will go. Typically, brackets are placed every 50 cm along the track for stability. Use a pencil or marker to make clear marks on the aluminum profile or surface.
- Use a spirit level to ensure the marked line is horizontal. A tilted track will cause parts to roll unevenly, leading to jams or slow movement. Adjust the marks if necessary until the line is perfectly level.
Pro tip: If you're installing multiple parallel tracks (common in conveyors), measure the distance between each track to ensure they're evenly spaced. This prevents parts from getting stuck between tracks.
Step 2: Attach Mounting Brackets to the Aluminum Profile
Once the marks are in place, it's time to attach the mounting brackets. These brackets hold the roller track securely to the frame.
- Take a mounting bracket and align it with one of the marks you made. Make sure the bracket is positioned so that the track will sit at the correct height.
- insert the screws through the bracket holes and into the aluminum profile. Use an Allen wrench to tighten the screws, but don't over-tighten—this can strip the threads or damage the profile.
- Repeat this process for all brackets. Double-check that each bracket is aligned with the marked line and that they're all at the same height. A level can help here—place it across the brackets to ensure they're even.
Common mistake: Not using the right size screws. Using screws that are too long can protrude through the profile and damage parts, while screws that are too short won't hold the bracket securely. Always check the screw size against the bracket and profile specifications.
Step 3: Align and Connect Roller Track Sections
Now it's time to assemble the roller track sections. This is where roller track connectors come into play.
- Lay out the 40 Aluminum Roller Track Green sections on a flat surface. If you're working on the floor, place a protective mat to avoid scratching the track.
- Take two track sections and align their ends. insert a roller track connector into the end of one section, then slide the other section onto the connector. Make sure the sections are perfectly aligned—any gap or misalignment will cause parts to get stuck.
- Use a rubber mallet to gently tap the sections together until they're flush. Avoid using a metal hammer, as this can dent or damage the aluminum track.
- Repeat this process until all sections are connected. For longer tracks, it's helpful to have a colleague assist with holding the sections in place while you connect them.
Pro tip: If the connector is tight, apply a small amount of lubricant (like silicone spray) to the end of the track. This makes it easier to slide the sections together without damaging them.
Step 4: Secure the Track to the Brackets
With the track sections connected, it's time to attach them to the mounting brackets.
- Lift the assembled track and place it onto the mounting brackets. Make sure the track is centered on the brackets to distribute weight evenly.
- For each bracket, insert screws through the bracket and into the pre-drilled holes on the bottom of the roller track. Use an Allen wrench to tighten the screws securely.
- As you tighten each screw, check the alignment of the track. If it starts to shift, adjust the bracket position slightly before fully tightening.
- Once all brackets are secured, use a spirit level to check the entire track again. If any part is tilted, loosen the screws on the corresponding bracket and adjust until the track is level.
Common mistake: Tightening screws in the wrong order. Start from the middle of the track and work your way out to both ends. This helps prevent the track from warping due to uneven tension.
Step 5: Test the Roller Movement and Adjust
The final step in installation is testing the track to ensure it works as expected.
- Take a test part (similar to the ones that will be used on the track) and place it at one end. Push it gently and observe how it rolls. It should move smoothly without getting stuck or slowing down unexpectedly.
- If the part gets stuck at a certain point, check that area for debris or misaligned rollers. Clean any debris with a brush or compressed air. If a roller is misaligned, gently adjust it with your fingers or a small tool.
- Test the track with multiple parts of different sizes and weights to ensure it can handle the intended load. For example, if the track is for small electronic components, test with a few different sizes of circuit boards. If it's for heavier parts, test with a metal component that matches the maximum weight capacity.
- Finally, add any additional accessories like end stops or guides. End stops prevent parts from rolling off the end of the track, while guides keep parts centered. Attach these using the appropriate screws and brackets.
Post-Installation Checks & Maintenance Tips
Once the installation is complete, there are a few checks you should perform to ensure everything is in order.
1. Final Alignment Check
Use a spirit level to confirm the entire track is still level. Walk along the track and check each bracket connection to make sure they're tight.
2. Roller Functionality
Spin each roller by hand to ensure it rotates freely. If any roller is stiff, apply a small amount of lubricant.
3. Load Test
Place the maximum intended load on the track and let it sit for a few minutes. Check if the track sags or the brackets bend. If so, you may need to add more brackets for support.
Maintenance Tips
Maintenance is key to keeping the track working well over time. Here are some tips:
- Clean the track weekly: Use a dry cloth or brush to remove dust and debris. For stubborn dirt, use a mild detergent and water, then dry thoroughly.
- Lubricate rollers monthly: Apply a small amount of silicone lubricant to each roller to keep them spinning smoothly. Avoid using oil-based lubricants, as they can attract dust.
- Tighten screws quarterly: Over time, vibrations from production can loosen screws. Use an Allen wrench to tighten all bracket and connector screws every three months.
- Inspect for damage: Check the track for dents, bends, or worn rollers every six months. replace any damaged parts immediately to prevent further issues.
Application Scenarios of 40 Aluminum Roller Track Green
The 40 Aluminum Roller Track Green is incredibly versatile and can be used in a variety of manufacturing settings. Let's explore some common applications:
1. Flow Racks
Flow racks are a staple in lean manufacturing, used for storing and picking parts. The roller track allows parts to slide down to the picking area, following the FIFO principle. This reduces the time workers spend searching for parts and minimizes waste from expired inventory. For example, in a 3C assembly line, flow racks with 40 aluminum roller track green can hold small components like screws, connectors, and circuit boards, making them easily accessible to assembly workers.
2. Conveyors
Conveyors are used to move parts between workstations in an assembly line. The 40 aluminum roller track green is often used in gravity conveyors, where parts move due to gravity. This type of conveyor is energy-efficient and low-maintenance, perfect for lean systems. In an automotive factory, gravity conveyors with this track can transport small parts like bolts or washers from the storage area to the assembly station.
3. Lean Workstations
Lean workstations are designed to optimize the workflow for a specific task. The roller track can be integrated into the workstation to allow easy movement of parts from the storage area to the work surface. For example, in a medical device assembly workstation, the track can be used to slide components to the worker, reducing the need for reaching and bending.
4. Material Handling Carts
Material handling carts with roller tracks make it easy to transport parts between different areas of the factory. The track allows parts to be loaded and unloaded quickly, improving efficiency. In a warehouse, these carts can be used to move boxes from the storage area to the shipping dock.
Each of these applications ties into the lean system philosophy of reducing waste and improving productivity. The 40 aluminum roller track green is a small but essential component that helps make these systems work seamlessly.
Troubleshooting Common Issues
Even with proper installation, you may encounter issues with the roller track over time. Here are some common problems and how to fix them:
1. Rollers Are Stuck
Cause:
Debris or dirt in the roller bearings.
Solution: Clean the rollers with a brush or compressed air. If the problem persists, apply a small amount of silicone lubricant.
Solution: Clean the rollers with a brush or compressed air. If the problem persists, apply a small amount of silicone lubricant.
2. Track Is Misaligned
Cause:
Loose brackets or uneven floor.
Solution: Tighten the bracket screws. If the floor is uneven, use shims under the brackets to level the track.
Solution: Tighten the bracket screws. If the floor is uneven, use shims under the brackets to level the track.
3. Parts Are Slowing Down or Stopping
Cause:
Track is tilted in the wrong direction or rollers are worn.
Solution: Adjust the track to ensure it's tilted slightly downward (for gravity conveyors). replace any worn rollers.
Solution: Adjust the track to ensure it's tilted slightly downward (for gravity conveyors). replace any worn rollers.
4. Track Is Sagging
Cause:
Insufficient number of brackets.
Solution: Add more brackets along the track to distribute the load evenly.
Solution: Add more brackets along the track to distribute the load evenly.
5. Noise When Parts Roll
Cause:
Metal-on-metal contact or loose parts.
Solution: Add rubber strips between the track and brackets to reduce noise. Tighten any loose screws.
Solution: Add rubber strips between the track and brackets to reduce noise. Tighten any loose screws.
Conclusion
Installing the 40 Aluminum Roller Track Green correctly is more than just a technical task—it's an investment in your factory's efficiency and productivity. By following the step-by-step guide outlined here, you can ensure that your track is installed properly, integrates seamlessly into your flow racks, conveyors, and lean system setups, and provides reliable performance for years to come.
Remember, the key to success is preparation, attention to detail, and regular maintenance. Take the time to measure accurately, check all parts, and test the track thoroughly. By doing so, you'll minimize downtime, reduce waste, and create a smoother workflow that aligns with lean manufacturing principles.
Whether you're a seasoned maintenance technician or a new factory manager, this guide provides the knowledge you need to install the 40 Aluminum Roller Track Green with confidence. So roll up your sleeves, gather your tools, and get ready to enhance your material handling processes with this versatile component.