- Company Articles
- Products and Technology
- Installation And Maintenance
- How to Install 40 Roller Track Placon Mount drop High: Step-by-Step Installation Guide

How to Install 40 Roller Track Placon Mount drop High: Step-by-Step Installation Guide
Related Product
40 Roller Track Placon Mount drop High
Roller track placon mount work as a connector for roller track and pipe or aluminum profile in rack syetem, it is a necessary parts in rack system which widely used in industrial plant and logistic,warehouse storage.
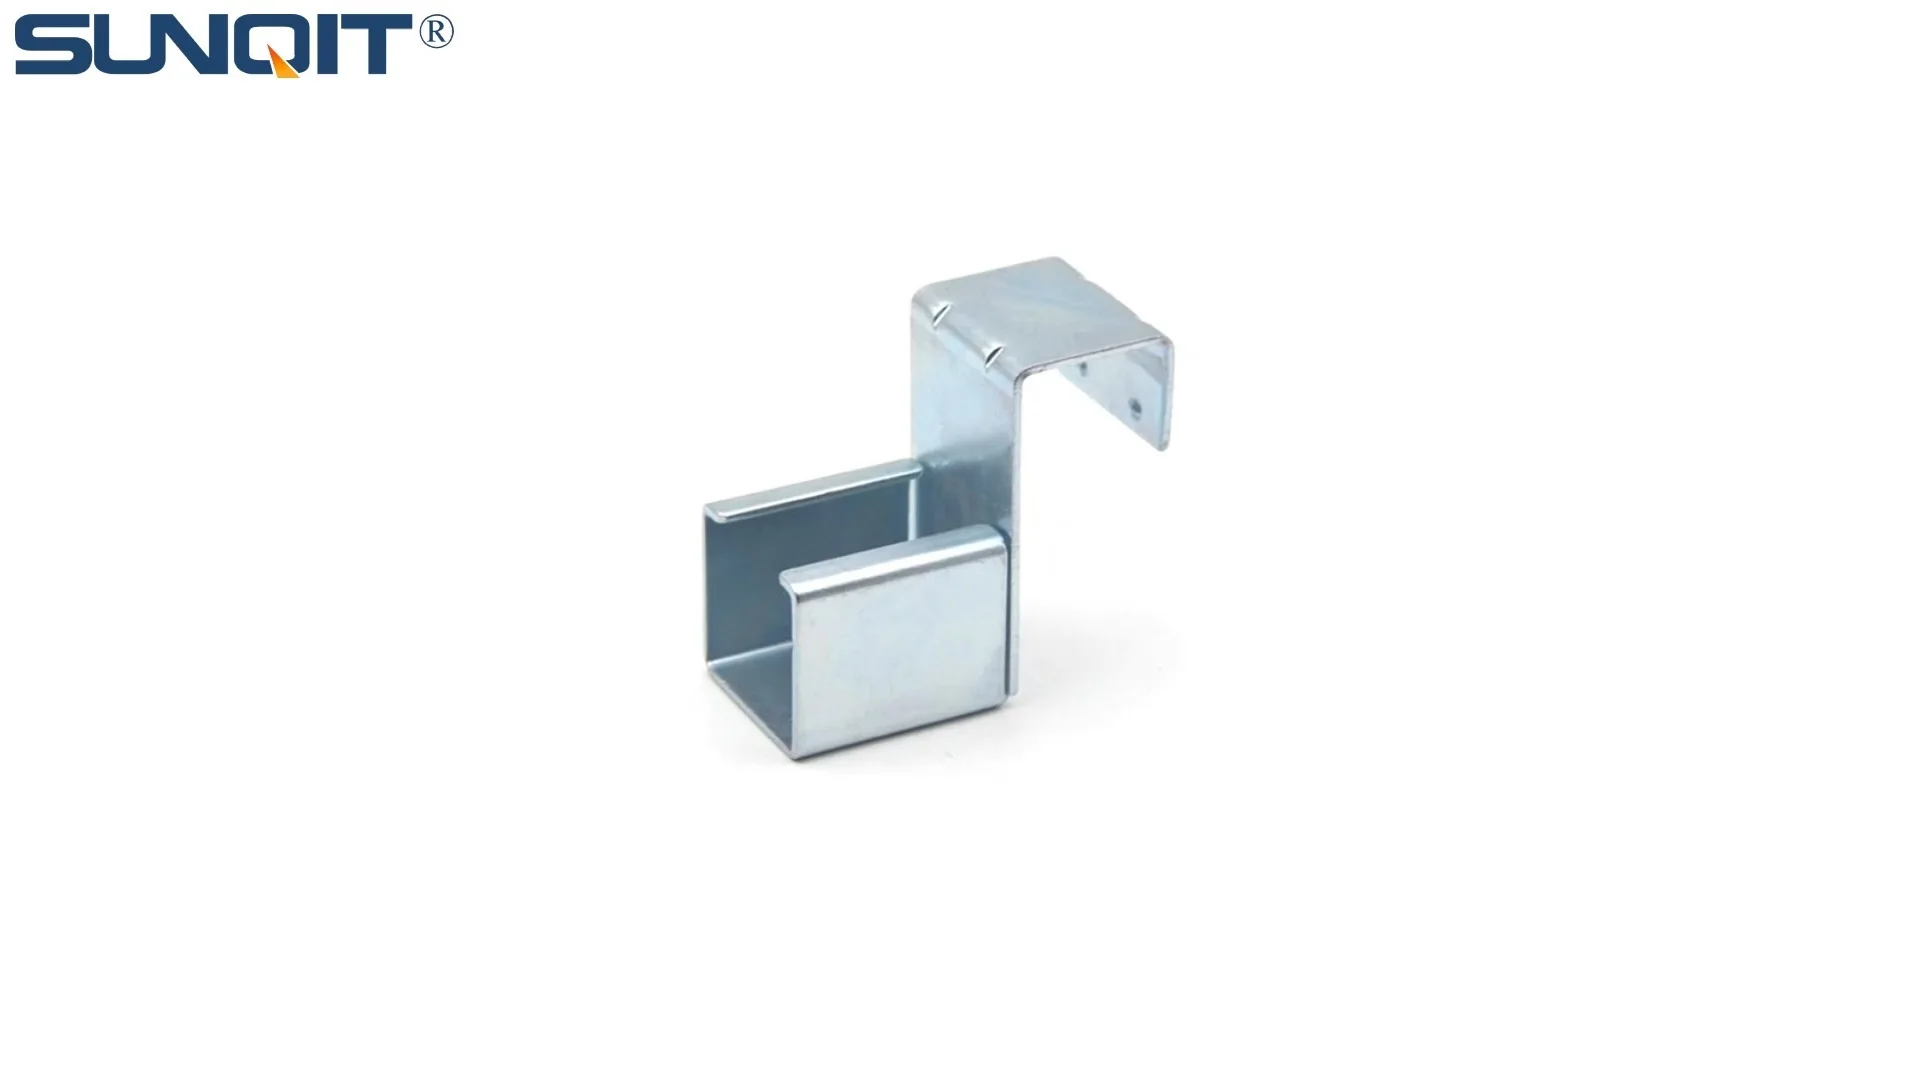
So, you've got your hands on the 40 Roller Track Placon Mount drop High – nice choice! Whether you're kitting out a new warehouse section, upgrading your production line, or just trying to make material handling smoother, this roller track is about to become your new best friend. But let's be real: installing industrial equipment can feel a bit overwhelming, right? Wires, brackets, tiny screws… it's easy to stare at the parts and think, "Where do I even start?" Don't worry – I've been there, and I'm here to walk you through it like we're just chatting over a cup of coffee. By the end, you'll have a perfectly installed roller track that glides like butter, and you'll probably even feel a little proud (you should – this stuff matters!). Let's dive in.
Why Bother with Proper Installation? (Spoiler: It's a Big Deal)
Before we grab our tools, let's talk about why getting this right matters. A wonky roller track isn't just annoying – it can slow down your workflow, damage products, or even create safety hazards. Imagine sliding a box down and having it get stuck halfway, or worse, tipping over. Not fun. But when it's installed correctly? You'll notice the difference immediately: parts move faster, your team spends less time wrestling with materials, and everything just… flows. That's the whole point of lean manufacturing, right? Making work easier, not harder. So let's do this right the first time.
Tools You'll Need (Gather These First – Trust Me)
No one likes stopping mid-project to hunt for a missing screwdriver. Grab these tools before you start, and you'll sail through the installation:
| Tool | Why You Need It | Pro Tip |
|---|---|---|
| Tape Measure | To mark where the track will go – precision here prevents wonky alignment later. | Use a retractable one with a lock – it stays put while you mark, so no second-guessing measurements. |
| Phillips-Head Screwdriver | For securing the placon mounts to your frame (usually aluminum profile or workbench). | Magnetic tip = no more fumbling with tiny screws that roll across the floor. Life saver. |
| Power Drill (Optional but Recommended) | Speeds up screwing into aluminum profile – saves your wrist for more important things. | Stick to low torque (3-4 Nm) – aluminum is soft, and you don't want to strip the threads. |
| Spirit Level (Small 9-inch One Works Best) | To make sure the track is perfectly level – even a 1-degree tilt can cause jams. | Check both left-right and front-back – level in all directions = smooth sailing. |
| Adjustable Wrench | For tightening the locking nuts on the placon mounts – keeps the track from shifting. | Wrap the wrench jaws in electrical tape if you're worried about scratching your aluminum profile. No one wants ugly marks! |
| Work Gloves | Aluminum edges can be sharp, and screws? They love leaving metal splinters. | Nitrile gloves are my go-to – they grip better than latex, and you can still feel what you're doing. |
| Clean Cloth (Microfiber is Best) | To wipe dust or oil off the roller wheels and rails – gunk = bumpy rides. | A quick wipe before installation prevents dust from getting trapped under the track. |
Heads-Up:
If your roller track came with a mounting kit (it should!), double-check that all parts are there before starting. Look for placon mounts, screws, washers, and the track rails themselves. Missing a part? Pause and reach out to your supplier – better to wait than jury-rig something that won't hold.

Step-by-Step Installation (Let's Make This Happen)
Okay, tools in hand, parts laid out – let's install this thing. I'll break it down into simple steps, and I'll even throw in some "been there" tips along the way.
1
Unpack and Inspect the Parts (Yes, Even the "Boring" Bits)
First, unbox everything and spread it out on a clean surface (a workbench works great here – maybe that lean pipe workbench you're pairing this track with?). Take a minute to look at each part: the roller track rails (they'll have the wheels attached), the placon mounts (those bracket-y things that hold the track), and the screws/washers. Check for any dents, bent wheels, or cracked plastic – rare, but it happens. If something looks off, don't force it – contact support. A damaged part now = problems later.
Pro move: Take a quick photo of the parts layout before you start. If you get confused later, you can reference it. I've done this more times than I'd like to admit.
2
Mark Your Installation Area (Measure Twice, Drill Once – Oldie but Goodie)
Now, figure out where the roller track is going. Is it on an aluminum profile frame? A workbench? A wall-mounted shelf? Wherever it is, grab your tape measure and mark the spots where the placon mounts will go. Most roller tracks use two placon mounts per rail (one at each end), but check your specific model – some longer tracks need a middle mount for extra support.
Measure the distance between the mounts carefully – they need to line up perfectly with the holes on the roller track rails. A good rule of thumb: if the track is 100cm long, the mounts should be 98cm apart (leaving a tiny gap for adjustment). Write the measurements down – memory is tricky when you're holding a pencil and a tape measure at the same time.
Once you've marked the spots, use your spirit level to draw a straight line across the marks. This ensures the mounts are aligned – no "zig-zag" track here.
3
Attach the Placon Mounts (The "Base" of Your Track)
Time to secure those placon mounts to your frame (probably aluminum profile – that stuff is so versatile, right?). Grab your screws and screwdriver (or power drill, if you're using one). Line up the mount with your marks, then start threading the screws. Go slow at first – you don't want to cross-thread the holes (aluminum is soft, remember?).
Here's a hack: If you're screwing into aluminum profile, put a drop of dish soap on the screw tip. It acts as a lubricant and makes screwing in way easier. Just wipe off the excess afterward!
Tighten the screws until the mount feels snug – not so tight that the aluminum bends, but tight enough that it doesn't wiggle. Give it a gentle tug – if it moves, tighten a bit more.
4
Slide in the Roller Track Rails (The "Glide" Part)
Now, the star of the show: the 40 Roller Track Placon Mount drop High rails. These should have the wheels already attached (if not, check the box – sometimes they come separate, but that's rare). Hold the rail so the wheels are facing UP (yes, I've seen someone install them upside down – oops). Slide it into the placon mounts – it should fit snugly but not so tight that you have to force it.
Once the rail is in, check that the wheels are all pointing the same direction (they should be, but better safe than sorry). Give the rail a little push – it should sit evenly in the mounts without tilting. If it's crooked, double-check that your placon mounts are level (grab that spirit level again!).
5
Lock It Down and Test the Glide (The Moment of Truth!)
Almost there! Most placon mounts have a locking screw or lever to hold the rail in place. Grab your wrench or screwdriver and tighten those – you don't want the rail sliding out when you're moving heavy stuff. Now, the fun part: TEST IT!
Grab a small box, a plastic bin, or even a can of soda (empty, please – we're testing, not snacking). Place it on one end of the track and let go. It should roll smoothly to the other end, no sticking, no stopping, no "clunking" sounds. If it jams, here's what to check:
- Is the track level? Use the spirit level on top of the rail – even a tiny slope can cause issues.
- Are the wheels clean? Dust or debris can make them stick. Wipe with a dry cloth.
- Are the placon mounts aligned? If they're not straight, the rail will kink. Loosen the mounts, realign, and retighten.
Keep testing until it glides – trust me, that "ahhh" moment when it works perfectly is worth the extra minute.

Pro Tips for Long-Lasting Performance (Because You Want This to Last)
You're installed – nice! But let's keep this track rolling smoothly for months (or years) to come. Here's how:
- Clean the wheels monthly: Wipe them with a dry cloth to remove dust, grease, or product residue. A quick once-over prevents buildup that causes sticking.
- Lubricate sparingly: If wheels start squeaking, a tiny drop of machine oil on the axles (not the wheels themselves!) will quiet them down. Too much oil = slippery mess, so go easy.
- Check screws quarterly: vibrations from daily use can loosen screws. A quick tighten every few months keeps the track secure.
- Match it with your lean system: If this track is part of a bigger setup (like a conveyor or lean pipe workbench), make sure heights align. No one wants a "speed bump" between the track and the next station.
Safety First!
Always wear gloves when handling the track – those metal edges can be sharp. And if you're installing overhead (like under a shelf), use a ladder or step stool – no standing on chairs. We want you safe, not sore (or worse).

FAQs (Because I Know You're Wondering)
Q: My roller track is installed, but it's not level – can I shim it?
A: Yep! If the surface itself is uneven, use thin metal shims (you can find them at hardware stores) under the placon mounts. Just make sure the shims are secure – you don't want them slipping out. A little double-sided tape can help hold them in place.
Q: Can I cut the roller track to make it shorter?
A: Maybe, but be careful! If the rail is aluminum, you can cut it with a hacksaw or miter saw (use a metal blade). But check if the ends need caps (to prevent sharp edges) and make sure you don't damage the wheels. If you're not confident, ask your supplier for a custom length – it's usually cheaper than ruining a track.
Q: How much weight can this track hold?
A: Great question! The 40 Roller Track Placon Mount drop High typically handles 50-75 lbs per linear foot (check your spec sheet for exact numbers). Don't overload it – too much weight bends the rails or breaks wheels. When in doubt, spread the load across multiple tracks or add a middle support mount.
Where Does This Roller Track Shine? (Spoiler: Everywhere)
Now that it's installed, you might be thinking, "What can I use this for, exactly?" Oh, the possibilities! Here are a few places where this track really shines:
- Warehouse Picking: Mount it between shelves to slide bins from upper levels to picking stations – no more climbing ladders with heavy boxes.
- 3C Assembly Lines: Pair it with a lean pipe workbench to slide phone cases, circuit boards, or small parts to workers – faster access = faster assembly.
- Medical Supply Rooms: In hospitals or clinics, use it to move sterile packages between stations – smooth movement means less risk of damaging delicate items.
- Retail Backrooms: Slide inventory from storage to the sales floor – perfect for busy seasons when you need to restock fast.
Heck, I've even seen someone use a short section in their garage to slide toolboxes between cabinets. Industrial equipment, but make it useful everywhere!
You did it! You've installed your 40 Roller Track Placon Mount drop High, and now you're ready to enjoy smoother, faster material handling. Take a second to admire your handiwork – that track didn't install itself! Remember, the key here is patience and attention to detail. A little time now means less hassle later, and that's what lean manufacturing is all about: working smarter, not harder. If you run into issues, don't stress – refer back to this guide, or reach out to your supplier. You've got this, and your workflow is about to thank you.
Happy rolling!