- Company Articles
- Products and Technology
- Installation And Maintenance
- How to Install 4040 Aluminum Profile End Caps: Step-by-Step Guide for Beginners

How to Install 4040 Aluminum Profile End Caps: Step-by-Step Guide for Beginners
Related Product
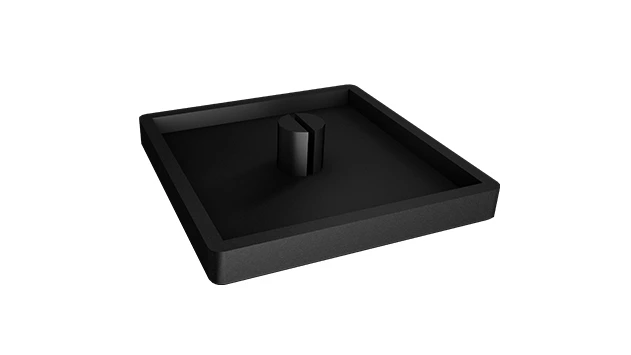
4040 Aluminum Profile End Cap
The aluminum profile end cap adds a finishing touch to your project and closes off profile ends to limit dust and debris buildup, also it can avaid some scratch for material and labor during the assemble work.
Let's start with a little story. A friend of mine recently built a sleek aluminum extrusion profile workbench for his garage. He spent weekends measuring, cutting, and assembling, and when he finally stepped back to admire his handiwork, he felt something was off. The ends of the aluminum profiles—those hollow, open tubes—stuck out like unfinished sentences. They collected dust, caught on his sleeves, and even gave his forearm a tiny scratch when he leaned against the bench. "I didn't think those little caps mattered," he told me later. "Turns out, they're the difference between a 'good enough' project and a professional-looking one."
If you're here, you probably get it. Whether you're building a lean pipe workbench, a shelving unit, or a custom machine frame, aluminum extrusion profiles are the backbone of your project. Lightweight, durable, and infinitely customizable, these profiles (with their signature T-slots) make DIY and industrial builds a breeze. But to truly finish the job, you need to pay attention to the details—and that includes installing 4040 aluminum profile end caps. These small, often-overlooked accessories are the unsung heroes of clean, safe, and long-lasting aluminum projects. In this guide, we'll walk through everything a beginner needs to know to install these end caps like a pro, from why they matter to the tools you'll need and every step in between.
Why Bother with Aluminum Profile End Caps?
Before we dive into the "how," let's talk about the "why." You might be thinking, "Can't I just leave the ends open? They're just little holes, right?" Spoiler: No, you can't. Here's why 4040 aluminum profile end caps are non-negotiable:
1. Safety First: No More Sharp Edges
Aluminum extrusion profiles are cut to length during projects, and even with careful cutting, the raw ends can have tiny burrs or sharp edges. These aren't just annoying—they're potential hazards. A quick brush against an exposed end could leave a scratch, or worse, snag clothing or skin. End caps cover these edges, turning a potential ouch into a smooth, safe surface.
2. Keep the Inside Clean (and Functional)
Aluminum profiles are hollow, and those hollow channels love to collect dust, dirt, and debris. Over time, gunk buildup inside can make it harder to use T-slot accessories (like brackets or screws) or even corrode the interior. End caps act as a barrier, keeping out everything from sawdust in your workshop to rain if your project lives outdoors.
3. Aesthetics: Polished = Professional
There's something about a finished edge that elevates a project. Exposed profile ends look unfinished, like you ran out of time or forgot a step. 4040 aluminum profile end caps, on the other hand, give your build a clean, intentional look. They come in colors that match or complement aluminum (think silver, black, or white), so they blend in seamlessly—no more "work in progress" vibe.
4. Protect the Profile Itself
Aluminum is tough, but it's not indestructible. Moisture trapped inside an open profile can lead to oxidation (yes, even aluminum can corrode over time), and accidental impacts to the end can dent or bend the profile's edges. End caps add a layer of protection, absorbing minor bumps and keeping moisture at bay.
Gather Your Tools: What You'll Need
Installing end caps isn't rocket science, but having the right tools on hand will make the process smooth and frustration-free. Most of these items you might already have in your toolbox; if not, they're easy to find at hardware stores or online aluminum profile accessories suppliers. Here's your checklist:
| Tool/Item | Purpose | Pro Tips |
|---|---|---|
| 4040 Aluminum Profile End Caps | The star of the show! These are specifically designed to fit 40mm x 40mm aluminum extrusion profiles. | Double-check the label—end caps are sized by profile width (e.g., 2020, 3030, 4040). "4040" means 40mm x 40mm. |
| Rubber Mallet | Gently taps the end cap into place without damaging the aluminum or the cap. | A soft-faced hammer works too, but avoid metal mallets—they'll scratch the end cap or profile. |
| Cleaning Cloth (Microfiber Preferred) | Wipes away dust, oil, or debris from the profile end before installation. | For stubborn grime, dampen the cloth with isopropyl alcohol (let it dry fully before installing the cap). |
| Small Flathead Screwdriver (Optional) | Helps pry off misaligned end caps or adjust tight-fitting caps with clips. | Wrap the tip in tape to avoid scratching the profile if you need to use it. |
| Measuring Tape (Optional) | Confirms your profile is indeed 40mm x 40mm (handy if you're unsure of the size). | Measure the width and height of the profile end—40mm on both sides means you need 4040 end caps. |
Pro move: Buy a few extra end caps. They're cheap, and it's better to have spares in case one gets damaged during installation or you misplace one. Trust me—nothing kills momentum like realizing you're one cap short halfway through the project.

Step-by-Step: Installing 4040 Aluminum Profile End Caps
Now, let's get to the fun part: actually installing the end caps. Follow these steps, and you'll have professional-looking, secure end caps in no time. We'll break it down into simple, beginner-friendly stages—no prior experience required!
Step 1: Prep the Profile End (Yes, Cleaning Matters)
Before you even touch an end cap, take a minute to prep the aluminum extrusion profile end. This step is easy to skip, but it's the secret to a tight, long-lasting fit. Here's how:
- Wipe it down: Grab your microfiber cloth and give the end of the profile a thorough wipe. Focus on the inner edges and the surface where the end cap will sit. Dust, oil from your fingers, or leftover cutting fluid can create a barrier between the cap and the profile, preventing a snug fit.
- Check for burrs: Run your finger gently around the edge of the profile (be careful!). If you feel any rough spots or tiny metal burrs (leftover from cutting the profile), grab a piece of fine-grit sandpaper (220-grit or higher) and sand them off. Even a small burr can tear the end cap or make it sit unevenly.
- Dry completely: If you used alcohol to clean, wait a minute or two for it to evaporate. Moisture trapped between the cap and profile can lead to mold or corrosion over time.
Pro tip: If your profile is brand new, it might have a protective plastic film on the ends. Peel that off first—you'd be surprised how many beginners miss this step!
Step 2: Get to Know Your End Cap
Not all 4040 aluminum profile end caps are identical, so take a second to examine yours before installing. Most end caps are made of plastic (PVC or polypropylene) or rubber, and they come in two main styles:
- Push-fit (most common): These end caps have a slightly larger diameter than the profile's inner opening, relying on friction to stay in place. They often have a tapered edge that compresses as you push them in, creating a tight seal.
- Clip-on: Some end caps have small plastic clips or tabs that snap into the profile's T-slots for extra security. These are less common for basic 4040 profiles but worth noting if your end caps have visible clips.
Hold the end cap up to the profile end. You should see a clear "top" and "bottom"—the side with the taper or clips should face into the profile. The flat, finished side faces outward. If you're unsure, look for branding or a logo on the end cap—usually, that side goes out.
Step 3: Align and Start Pressing (Gently!)
Now it's time to position the end cap. Place the tapered end of the cap against the profile end, making sure it's centered. The edges of the end cap should line up evenly with the edges of the profile—no overhang on one side. If it's off-center, the cap won't seat properly, and it might pop off later.
Once aligned, use your thumbs to press firmly on the center of the end cap. Apply even pressure—you should feel it start to "give" and slide into the profile. If it's a push-fit cap, you might get it partway in with just your hands. If it's tight, don't force it—this is where the rubber mallet comes in.
Step 4: Tap It Home with the Rubber Mallet
Grab your rubber mallet. Hold the end cap steady with one hand, and use the mallet to tap the center of the cap gently . Start with light taps—think of it like knocking on a door, not pounding a nail. The goal is to compress the tapered edge of the cap slightly so it slides into the profile. Here's the key: tap evenly . If you tap harder on one side, the cap will (wāi—Chinese for "tilt"), and you'll end up with a lopsided fit.
You'll know the end cap is seated correctly when:
- It sits flush with the profile end—no part of the cap sticks out.
- There's no gap between the cap and the profile edge (run your finger around the edge to check).
- It doesn't wiggle when you push on it lightly.
If the cap feels loose after tapping, don't panic! It might just need a few more taps. If it's too loose, double-check that you have the right size (remember: 4040 caps for 4040 profiles). A cap that's too small will never stay in place.
Step 5: Check the Fit (and Fix if Needed)
Once the cap is installed, give it a final inspection. Wiggle it gently—there should be no movement. Run your finger around the edges to ensure it's flush. If you notice a gap on one side, or the cap is tilted, here's how to fix it:
- For minor tilting: Use your rubber mallet to tap the high side of the cap gently. This will nudge it into alignment.
- For major misalignment: If the cap is crooked and won't budge, use a small flathead screwdriver (wrapped in tape!) to pry it out. insert the screwdriver between the cap and profile edge, and gently lever upward. Once removed, clean the profile end again, realign the cap, and try pressing/tapping again.
Pro tip: If you're installing multiple end caps (like on a workbench with four legs), do one at a time. Rushing through can lead to mistakes, and it's easier to troubleshoot one cap than four.

Troubleshooting: Common Issues (and How to Fix Them)
Even with careful prep, things can go wrong. Here are the most common problems beginners run into when installing 4040 aluminum profile end caps, and how to solve them:
Issue 1: The End Cap Won't Go In All the Way
If you're tapping and tapping, but the cap still sticks out, there are three likely culprits:
- Debris in the profile: Even a tiny piece of sawdust or metal shavings can block the cap. Remove the cap, re-clean the profile end with a cloth (or use compressed air to blow out debris), and try again.
- Burrs on the profile: A sharp burr inside the profile can catch the end cap. Use fine sandpaper to gently smooth the inner edge of the profile, then clean again.
- The cap is the wrong size: Double-check the cap's label. If it says "3030" instead of "4040," it's too small. If it's labeled "4040" but still won't fit, the cap might be defective (return it for a replacement).
Issue 2: The End Cap Pops Off Easily
A cap that falls off with a light touch is frustrating, but fixable:
- Not enough friction: Push-fit caps rely on a tight squeeze. If your cap is loose, try wrapping a thin layer of Teflon tape around the tapered edge (this adds thickness without damaging the cap). Press it in firmly and tap gently.
- Damaged cap: If the cap's tapered edge is cracked or worn, it won't compress properly. Toss it and use a new one—end caps are cheap, and a damaged one will never stay put.
- Profile is out of round: Rare, but possible—if the profile was bent during shipping, the opening might be oval instead of round. Use a rubber mallet to gently tap the profile end back into shape (be careful not to dent it!), then try the cap again.
Issue 3: The End Cap Cracks When Tapping
Cracking usually happens because of too much force. Plastic end caps are durable, but they're not indestructible. To avoid this:
- Use a rubber mallet: Metal hammers concentrate force and will crack caps. A rubber mallet spreads the impact evenly.
- Tap gently: You don't need to hit hard—friction is what holds the cap, not brute force. If it's not going in, check for debris or burrs instead of hitting harder.
- Warm the cap (for cold environments): In cold weather, plastic becomes brittle. If you're working in a garage or workshop below 50°F (10°C), warm the end cap in your hands for 30 seconds before installing—it'll be more flexible.
Pro Tips: Go from Beginner to Expert
You've got the basics down—now here are some extra tricks to make your end cap installation even better:
1. Match the Color to Your Project
End caps come in colors like black, white, silver, or even custom hues. Matching the cap color to your profile (or your project's theme) adds a polished touch. For example, if you're building a lean pipe workbench with black accessories, black end caps will blend in seamlessly.
2. Use End Caps to Brand Your Project
Some aluminum profile accessories suppliers offer custom end caps with logos or text. If you're building something for a business or want a personal touch, this is a fun (and affordable) upgrade.
3. Store Spare End Caps with Your Tools
Keep a few extra 4040 end caps in your toolbox. Over time, end caps can get damaged (e.g., from a heavy object hitting them) or fall off. Having spares on hand means you can fix issues quickly without ordering replacements.
4. Consider Vented End Caps for Enclosed Projects
If your aluminum profile is part of an enclosed system (like a machine frame with electronics inside), look for vented end caps. These have small holes that allow air circulation, preventing heat buildup or moisture trapping.
Final Thoughts: The Little Details Make the Big Difference
Installing 4040 aluminum profile end caps might seem like a small step, but it's a step that transforms your project from "homemade" to "high-quality." These little accessories protect you from sharp edges, keep your profiles clean, and add that professional finish that makes you proud to show off your work. And the best part? It's easy once you know how.
Remember: Prep the profile, align the cap, tap gently, and troubleshoot if needed. With the right tools and a little patience, you'll be installing end caps like a pro in no time. So go ahead—grab your rubber mallet, your 4040 aluminum profile end caps, and finish that project the right way. Your future self (and your forearms) will thank you.
Happy building!