- Company Articles
- Products and Technology
- Installation And Maintenance
- How to Install a Castor Fixed Plate on Workbench E: Step-by-Step Guide

How to Install a Castor Fixed Plate on Workbench E: Step-by-Step Guide
Related Product
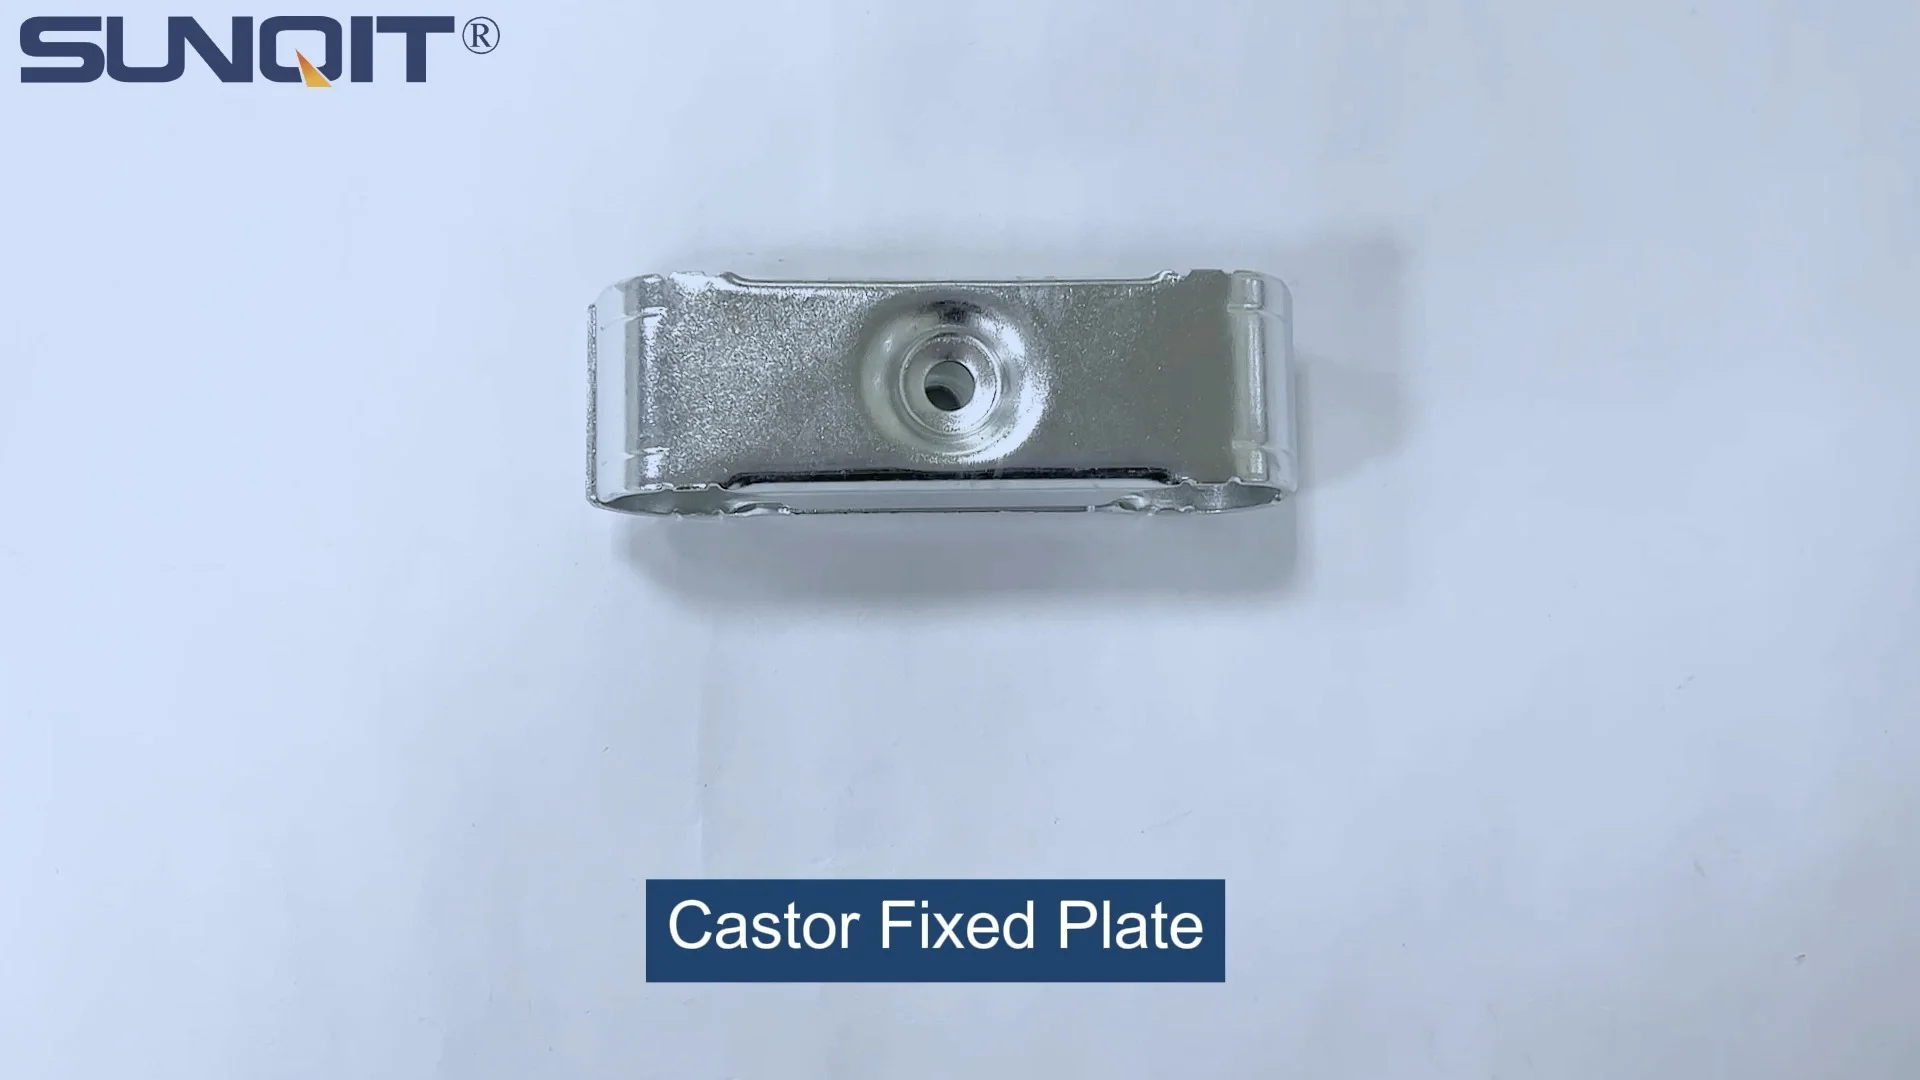
Castor Fixed Plate
Castor fixed plate, used for castor installation, one castor need two pcs castor plate to fix under the workbench, flow rack, and hand trolley.
Picture this: You're in the middle of a busy production assemble line, and your Workbench E (single deck-without caster) is holding all the tools and parts you need. It's sturdy, reliable, and exactly where you set it up—but today, you need to shift it three feet to the left to align with a new conveyor. Suddenly, its stationary design feels less like a feature and more like a frustration. That's where installing a castor fixed plate comes in. This unassuming piece of hardware, part of the broader "caster and accessories" category, is the key to turning your static workbench into a mobile asset. In this guide, we'll walk through every detail of the installation process, from prepping your workspace to testing the finished product, so you can add mobility to your Workbench E with confidence. No fancy tools or prior experience required—just a little patience and this step-by-step roadmap.
Understanding the Basics: Why Castor Fixed Plates Matter
Before diving into the "how," let's talk about the "why." Workbench E (single deck-without caster) is designed for stability—its solid frame and fixed legs make it ideal for precision tasks where movement could throw off measurements or damage materials. But in dynamic environments—think warehouses, manufacturing floors, or even busy home workshops—mobility is often just as important as stability. That's where castor fixed plates shine. These metal plates attach to the bottom of your workbench legs, creating a secure base to mount casters. Without them, trying to attach casters directly to the legs would risk splitting wood, bending metal, or creating wobbly connections that fail under weight.
But not all fixed plates are created equal. The ones designed for Workbench E are engineered to fit its specific leg dimensions, with pre-drilled holes that align perfectly with standard caster mounts. They're also built to handle the weight of a fully loaded workbench—think tools, parts, and even heavy machinery components. In short, they're the unsung heroes that bridge the gap between stability and mobility, making your workbench adaptable to whatever the day throws at you.
Tools and Materials You'll Need
Preparation is half the battle. Gather these tools and materials before you start, and you'll avoid mid-project trips to the hardware store. Most items are standard in a basic toolkit, but double-checking ensures you have everything you need:
| Item | Quantity | Purpose |
|---|---|---|
| Workbench E (single deck-without caster) | 1 | The base workbench requiring modification |
| Castor fixed plate (Workbench E compatible) | 4 | Metal mounting plates for securing casters to legs |
| Machine screws (M6 x 16mm recommended) | 16 (4 per plate) | To fasten plates to workbench legs |
| Washers (M6) | 16 | Prevent screws from digging into the plate surface |
| Power drill with Phillips-head bit | 1 | For driving screws (a manual screwdriver works, but a drill saves time) |
| 3/16-inch drill bit (for pilot holes) | 1 | To pre-drill holes in legs (prevents splitting or bending) |
| Measuring tape | 1 | Ensure even placement of plates across all legs |
| Carpenter's pencil | 1 | Mark hole positions and plate alignment |
| Bubble level (12-inch or longer) | 1 | Verify workbench is level before and after installation |
| Rubber mallet | 1 | Gently tap plates into alignment if needed |
| Isopropyl alcohol and clean cloth | 1 set | Clean leg surfaces for better screw adhesion |
| Optional: Thread locker (e.g., Loctite Blue) | 1 small tube | Prevent screws from loosening due to vibration |
Pro tip: If you're unsure about the compatibility of your caster fixed plate with Workbench E, check the manufacturer's specs or contact your lean pipe supplier. Reputable suppliers will have detailed compatibility charts to ensure you get the right part the first time.

Step-by-Step Installation Guide
Now that you have your tools and materials, let's get to work. Follow these steps in order, and you'll have your castor fixed plates installed in under an hour (plus drying time for cleaning and thread locker).
Step 1: Prepare the Workbench and Workspace
Start by clearing everything off your Workbench E. Tools, parts, coffee mugs—if it's on the bench, move it to a temporary surface. You need a clean, unobstructed workspace to avoid accidents and ensure you can access all four legs easily. Next, sweep or vacuum the area around the bench to remove dust, debris, or small parts that could trip you up.
Once the bench is clear, flip it upside down. This might sound intimidating, but Workbench E is surprisingly manageable with two people—one at each end, lifting slowly and keeping the bench level to avoid straining your back. If you're working alone, prop one end up on a sturdy sawhorse, then carefully lift the other end and rest it on another sawhorse. The goal is to have the legs suspended in the air, giving you full access to their bottoms.
Now, clean the legs. Over time, grease, dust, and grime can build up on the bottom surfaces, and this gunk can prevent the castor fixed plate from sitting flush. Dampen a cloth with isopropyl alcohol and wipe each leg thoroughly, paying extra attention to the areas where the plate will attach. Let the legs dry completely (about 5-10 minutes) before moving on—moisture can cause screws to rust or weaken the connection.
Step 2: Position the Castor Fixed Plates
With the workbench upside down and legs clean, it's time to position the fixed plates. Each leg gets one plate, and alignment is critical here—off-center plates will lead to wobbly casters and uneven weight distribution later. Here's how to do it right:
Take one castor fixed plate and hold it against the bottom of a leg. The plate should be centered both horizontally and vertically—imagine drawing a crosshair on the leg's bottom surface; the plate's center should align with that point. For Workbench E's standard 2x2-inch legs, most fixed plates will have a 2.5-inch diameter or square base, leaving a small gap (about 0.25 inches) between the plate edge and the leg edge. This gap ensures the plate doesn't hang over the leg, which could catch on floors or cause instability.
Once you have the plate positioned, use your carpenter's pencil to trace around its edges. This creates a reference mark in case the plate shifts while you're marking holes. Next, use the pre-drilled holes in the plate as a template: hold the plate steady, and mark the center of each hole with your pencil. These marks will guide your drill when creating pilot holes.
Repeat this process for all four legs, double-checking alignment each time. A quick way to ensure consistency is to measure the distance from the plate's edge to the leg's edge on one leg (e.g., 0.25 inches from the left and right edges) and replicate those measurements on the other legs. Consistency here saves time and frustration in later steps!
Step 3: Drill Pilot Holes
Pilot holes are small, pre-drilled holes that make driving screws into wood or metal easier and more precise. Without them, you risk splitting the leg (if wooden), bending the screw (if metal), or having the screw wander off course. For Workbench E, which typically has steel or aluminum legs (check your model specs), a 3/16-inch drill bit is ideal for M6 screws.
Fit your drill with the 3/16-inch bit and adjust the depth stop (if your drill has one) to match the length of your screws minus 1/4 inch. This prevents you from drilling all the way through the leg (which could weaken it) or not drilling deep enough (which makes screws hard to drive). If your drill doesn't have a depth stop, mark the bit with tape at the desired depth—just wrap a piece of masking tape around the bit, 1.25 inches from the tip (since M6 x 16mm screws are about 0.63 inches long, and you want the pilot hole to be slightly deeper than the screw).
Line up the drill bit with one of the marked hole centers and apply gentle, steady pressure as you drill. Let the bit do the work—pushing too hard can cause the bit to slip or overheat. Stop when the tape reaches the leg surface (or when you feel the bit break through to the other side, if drilling through thin metal). Repeat this for all four holes on each leg. When you're done, blow or wipe away any metal shavings or wood dust—these can interfere with the screw's grip.
Step 4: Attach the Castor Fixed Plates
Now comes the moment you've been preparing for: attaching the plates. Grab your M6 screws, washers, and drill (with Phillips-head bit). For each leg:
- Place the castor fixed plate back onto the leg, aligning its holes with the pilot holes you just drilled.
- insert a washer onto an M6 screw, then thread the screw into one of the holes by hand. Turn it clockwise until it's snug—this ensures it starts straight and doesn't cross-thread.
- Repeat with the remaining three screws on the plate. At this point, all screws should be hand-tight but not fully tightened.
- Use your drill to fully tighten the screws, working in a "star" pattern (tighten the top-left screw, then bottom-right, then top-right, then bottom-left). This distributes pressure evenly across the plate, preventing it from warping or sitting unevenly.
Stop tightening when the screw head is flush with the plate surface—over-tightening can strip the pilot hole or crack the leg. If you're using thread locker, apply a small drop to each screw's threads before inserting it. Thread locker is especially useful in high-vibration environments (like production assemble lines), as it forms a bond that prevents screws from loosening over time.
Once all four plates are attached, give each screw a final check with your drill (on low speed) to ensure none are loose. Then, flip the workbench back over—slowly and with help, if needed—to its upright position. Set it on a flat surface and give it a gentle shake. If it wobbles, check that all plates are seated evenly—you may need to loosen a screw, tap the plate with a rubber mallet to realign it, then retighten.
Step 5: Test Stability and Make Adjustments
Installing the plates is just the first part—now you need to ensure they'll support the workbench (and its contents) safely. Start by placing your bubble level on the workbench surface. The bubble should sit centered between the two lines. If it's off, the issue is likely uneven plates. To fix this:
- Identify the "low" leg using the level. For example, if the bubble drifts to the left, the left legs are lower than the right.
- Flip the workbench back over and check the screws on the low leg's plate. Are they fully tightened? If not, tighten them slightly and retest.
- If the screws are tight but the leg is still low, place a small shim (a piece of aluminum or steel, no thicker than 1/16 inch) between the plate and the leg, then retighten the screws. Shims help compensate for minor unevenness in leg length or plate alignment.
Next, test the plates' strength by applying downward pressure to each corner of the workbench. The plates should not bend, creak, or shift. If a plate moves, check that all four screws are tight—sometimes one loose screw can cause the entire plate to wobble. For wooden legs, look for cracks around the pilot holes; if you see any, reinforce the area with wood glue or replace the leg (a cracked leg is unsafe to use with casters).
Finally, simulate real-world use by placing a heavy object (like a 50-pound toolbox) on the workbench and gently pushing it from side to side. The bench should feel stable, with no excessive movement or creaking from the plates. If everything checks out, you're ready to add casters!
Step 6: Attach Casters (Optional but Essential for Mobility)
While this guide focuses on installing castor fixed plates, the next logical step is adding casters to those plates. Most casters in the "caster and accessories" category come with their own mounting screws, which should align with the holes in your fixed plates. To attach them:
Place a caster on top of a fixed plate, aligning its holes with the plate's holes. insert the caster's screws through the holes and tighten them with a wrench or screwdriver (follow the caster manufacturer's torque specs—over-tightening can damage the caster's swivel mechanism). Repeat for all four casters, then test the mobility by pushing the workbench across the floor. It should roll smoothly, with no sticking or wobbling. For added safety, choose casters with brake levers—these let you lock the bench in place when you need it stationary, preventing accidental movement during precision tasks.

Troubleshooting Common Issues
Even with careful planning, you might run into snags. Here's how to fix the most common problems:
- Screws won't tighten: If the screw spins without gripping, the pilot hole is too large. Try a slightly larger screw (e.g., M8 instead of M6) or use a screw with a thicker thread. For wooden legs, you can also fill the hole with wood glue and sawdust, let it dry, then redrill a smaller pilot hole.
- Plate sits unevenly: If one corner of the plate is lifted off the leg, check for debris (like a metal shaving or wood splinter) under the plate. Clean the area, then retighten the screws in a star pattern.
- Leg bends when drilling: This happens with thin metal legs. Use a slower drill speed and apply less pressure, or clamp a scrap piece of wood to the leg to reinforce it while drilling.

Maintenance Tips for Long-Lasting Performance
Your castor fixed plates will last for years with minimal maintenance. Here's how to keep them in top shape:
- Check screws monthly: Vibration from moving the workbench can loosen screws over time. Tighten any loose screws with a drill or screwdriver.
- Clean plates and legs: Wipe down the plates and legs with a damp cloth every few months to remove dust and grime, which can cause rust (especially on steel plates).
- Lubricate casters (if installed): If you've added casters, apply a drop of lubricating oil to the swivel joints every six months to keep them rolling smoothly.
- replace worn plates: If a plate becomes bent, cracked, or rusted through, replace it immediately. A damaged plate compromises the entire workbench's stability and safety.
Final Thoughts: From Static to Dynamic
Installing castor fixed plates on your Workbench E (single deck-without caster) is more than a simple upgrade—it's a transformation. What was once a stationary piece of equipment is now a mobile workhorse, ready to adapt to your changing needs. Whether you're rearranging your production assemble line, moving tools between workstations, or simply cleaning around the bench, the mobility you've added will save time, reduce strain, and make your workspace more efficient.
And remember: if you ever need replacement plates, screws, or casters, your local lean pipe supplier should have a wide selection of "caster and accessories" to choose from. With the right parts and a little know-how, you can keep your mobile Workbench E rolling strong for years to come.
So go ahead—grab your drill, gather your materials, and take the first step toward a more flexible workspace. You've got this!