- Company Articles
- Products and Technology
- Installation And Maintenance
- How to Install a Swivel Stem Caster Wheel with Brake on Material Handling Carts

How to Install a Swivel Stem Caster Wheel with Brake on Material Handling Carts
Related Product
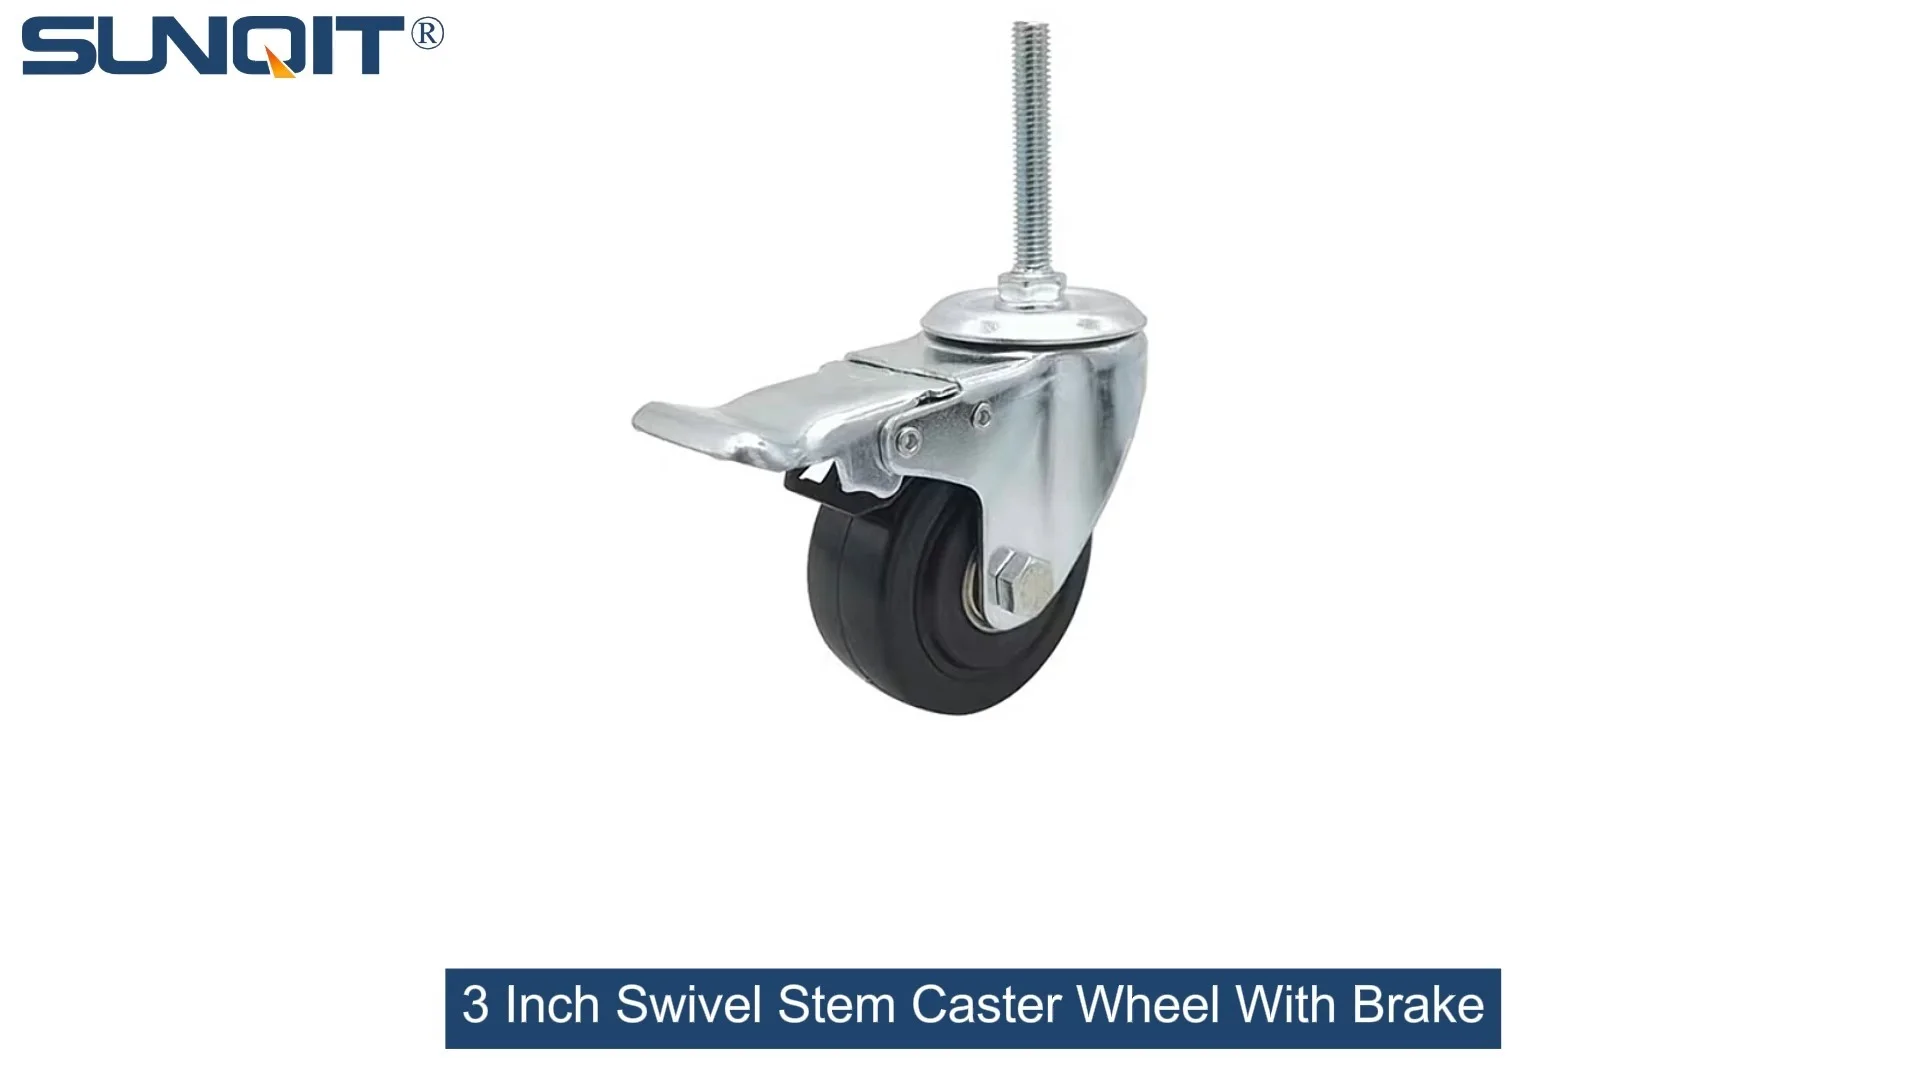
Swivel Stem Caster Wheel with Brake
360 Degree Swivel Stem Caster with brake. Threaded-post mount design, castors diameter 3 inch.Each swivel caster wheels loading 70KGS. Heavy enough and widely suit for carts, chairs, cabinet, flow rack, workbench, turnover rolley.
In the hustle of a busy warehouse or factory, material handling carts are the unsung heroes—moving parts, tools, and products from point A to point B without breaking a sweat. But even the sturdiest cart is only as good as its wheels. That's where the swivel stem caster wheel with brake comes in. These little workhorses let you maneuver tight corners with ease, lock the cart in place when loading/unloading, and keep operations running smoothly. But if they're installed wrong? You're looking at wobbly rides, stuck brakes, or worse—safety hazards that could slow down your team or cause accidents.
Whether you're upgrading an old turnover trolley and rack or building a new cart from scratch, installing a swivel stem caster with brake doesn't have to be a headache. In this guide, we'll walk through the process step by step, from understanding the parts you'll need (like the caster installation base and caster accessories ) to troubleshooting common issues. By the end, you'll have the confidence to get those casters on right the first time—saving time, money, and plenty of frustration.
Understanding Your Caster Components
Before diving into installation, let's get familiar with the star players. A swivel stem caster wheel with brake isn't just a "wheel on a stick"—it's a system of parts working together. Let's break them down so you know exactly what you're handling:
1. The Swivel Stem Caster Wheel with Brake Itself
This is the main unit, and it has a few key parts: the wheel (usually made of rubber, polyurethane, or steel, depending on your floor type), the swivel head (the part that lets the wheel turn 360 degrees), the stem (the metal rod that attaches to the cart), and the brake mechanism. The brake is typically a foot pedal that, when pressed, locks the wheel in place—critical for keeping the cart steady when you're loading heavy items or working on an incline.
2. Caster Installation Base
Think of this as the "bridge" between the caster and your cart. Most material handling carts don't have built-in holes for caster stems, so the caster installation base (a flat metal plate with pre-drilled holes) screws onto the cart's leg or frame. The caster's stem then inserts into or screws into this base, creating a secure connection. Bases come in different sizes and shapes—make sure yours matches both the caster stem diameter and the cart's leg width!
3. Caster Accessories
These are the small but mighty parts that make installation (and long-term durability) possible. Caster accessories can include lock washers (to prevent bolts from loosening), thread locker (a glue-like substance that keeps screws tight), grease (for lubricating the swivel head), and replacement brake pads (good to have on hand for future maintenance). Don't skip these—they're the difference between a caster that lasts 6 months and one that lasts 6 years.
4. Adjustable Leveling Feet (For Pre-Install Prep)
Not a caster part, but a must-have tool for setup: adjustable leveling feet . These screw into the cart's legs temporarily, letting you stabilize the cart while you install the casters. If your cart is wobbly on the floor during installation, you'll struggle to align the caster installation base correctly. Leveling feet take the guesswork out of keeping the cart steady—just twist them until the cart sits flat, then remove them once the casters are on.
Tools and Materials You'll Need
Before you start, gather these tools and materials. Having everything within arm's reach will save you trips to the toolbox (and keep your momentum going). Here's a handy checklist:
| Tool/Material | Purpose | Notes |
|---|---|---|
| Swivel stem caster wheel with brake (1-4 units, depending on cart size) | The main component—choose the right weight capacity for your cart! | Check the load rating (e.g., 300 lbs per caster) to match your cart's typical load. |
| Caster installation base (one per caster) | Mounting plate that attaches to the cart frame. | Ensure the base has holes that line up with your cart's leg/frame (measure first!) |
| Caster accessories: bolts, lock washers, nuts | Securing the base to the cart and the caster to the base. | Use bolts that are long enough to go through the base and cart frame, but not so long they stick out. |
| Adjustable wrench or socket set | Tightening bolts and nuts. | A socket set with multiple sizes is more versatile than a single wrench. |
| Power drill + drill bits | Pre-drilling holes in the cart frame (if no existing holes). | Use a bit slightly smaller than your bolts to prevent stripping. |
| Level (2-foot or longer) | Checking if the cart is flat during installation. | A digital level works too, but a bubble level is easier for quick checks. |
| Adjustable leveling feet (temporary use) | Stabilizing the cart while installing casters. | 4 feet per cart (one for each leg) is ideal. |
| Cleaning supplies (rag, degreaser) | Wiping down the cart frame to remove dirt/rust before mounting the base. | Grease or dirt under the base can cause it to shift over time—clean thoroughly! |
| Thread locker (optional but recommended) | Preventing bolts from loosening due to vibration. | Use medium-strength thread locker (not permanent!) so you can remove bolts later if needed. |
| Grease (for caster swivel head) | Lubricating the swivel mechanism for smooth turning. | Silicone-based grease works best for most casters (check the manufacturer's specs). |
Pro Tip:
Always check the caster manufacturer's instructions! Some brands have specific torque settings for bolts or require certain
caster accessories
(like their own proprietary washers). Skipping this step could void a warranty or lead to poor performance.

Pre-Installation Prep: Setting Yourself Up for Success
You've got your tools, you know your parts—now it's time to prep. Rushing this step is the #1 reason installations go wrong. Take 15-20 minutes to do these checks, and you'll avoid headaches later.
Step 1: Inspect the Cart Frame
First, look over your cart (whether it's a turnover trolley and rack or a custom build). Are there cracks, rust, or bent legs? If the frame is damaged, mounting the caster installation base won't hold—you'll need to repair or replace the cart first. Pay extra attention to the areas where the casters will mount: if the metal is thin or weakened, reinforce it with a metal plate (called a "gusset") before installing the base.
Step 2: Clean the Mounting Area
Grease, dirt, and rust love to hide on cart frames—especially if the cart's been sitting in a warehouse corner for a while. Grab a rag and degreaser, then scrub the spots where the caster installation base will attach. Even a thin layer of grime can prevent the base from sitting flush, leading to wobbly casters. For tough rust, use a wire brush to scrape it off—you want a smooth, clean surface.
Step 3: Stabilize the Cart with Adjustable Leveling Feet
Pop those adjustable leveling feet into the cart's leg holes (or screw them into the bottom if the legs are threaded). Twist each foot until the cart sits flat on the floor—use your level to check. A level cart ensures that when you mount the casters, they'll all bear weight evenly. If one caster is higher than the others, it'll wear out faster, and the cart will lean—no good for maneuverability.
Step 4: Test-Fit the Caster Installation Base
Before drilling or tightening anything, hold the caster installation base up to the cart leg. Does it fit? Are the holes in the base aligned with where you can drill into the cart frame? If the base is too big, it might hang off the leg (risking damage), too small, and it won't distribute weight evenly. If it doesn't fit, don't force it—swap for a different base size. Most suppliers carry bases in 4", 6", and 8" lengths to fit standard cart legs.

Step-by-Step Installation: Putting It All Together
Now for the fun part! Follow these steps, and you'll have your swivel stem caster wheel with brake installed in no time. We'll assume you're working with a 4-legged cart (most common), but the process works for 2- or 3-legged carts too—just adjust the number of casters.
1 Mark the Drill Holes (If Needed)
Hold the caster installation base against the cleaned, level cart leg. Use a pencil to mark the center of each hole in the base onto the cart frame. These marks will guide where you drill. Pro tip: Use a center punch (a small metal tool with a sharp point) to make a tiny indent at each mark—this prevents the drill bit from slipping when you start drilling.
Skip This Step If:
Your cart frame already has pre-drilled holes that line up with the base. Lucky you! Just double-check that the holes are the right size for your bolts (they should be slightly smaller than the bolt diameter to create a tight fit).
2 Drill Pilot Holes
Grab your drill and a bit that's slightly smaller than the bolts you're using (e.g., for 1/4" bolts, use a 3/16" drill bit). Drill straight into the marks you made—keep the drill perpendicular to the cart frame to avoid angled holes (angled holes mean bolts won't tighten properly). Go slow, and let the drill do the work—pushing too hard can bend the bit or damage the frame.
Once the holes are drilled, wipe away any metal shavings with a rag. You don't want those getting stuck between the base and frame later!
3 Attach the Caster Installation Base to the Cart
Now, line up the base's holes with the pilot holes you just drilled. insert a bolt through each hole, then add a lock washer and nut to the back (inside the cart frame, if possible). Tighten the nuts with your wrench or socket set—snug, but not so tight you strip the threads. A good rule: tighten until you feel resistance, then give it a 1/4 turn more. If you're using thread locker, apply a drop to the bolt threads before inserting them—this keeps the nuts from vibrating loose over time.
Repeat this for all four bases (one per cart leg). Double-check that each base is flush against the frame—no gaps! A gap means the base isn't supporting the caster properly, leading to stress cracks.
4 Lubricate the Caster Swivel Head
Before attaching the caster to the base, pop off the swivel head cover (if it has one) and apply a dollop of grease to the bearings inside. This keeps the swivel mechanism smooth—no squeaking or stiff turns. Wipe away excess grease with a rag so it doesn't attract dirt later.
5 Mount the Swivel Stem Caster Wheel with Brake
Now, take your swivel stem caster wheel with brake and align the stem with the hole in the caster installation base . Push the stem into the base—you might need to twist it slightly to get it to seat. For threaded stems (instead of smooth), screw the caster into the base until it's tight. If the stem is smooth, there might be a setscrew on the side of the base—tighten that with a hex key to lock the stem in place.
Important: Make sure the brake pedal is facing outward (toward the edge of the cart). If it's facing inward, you won't be able to reach it with your foot! Adjust the caster's rotation as needed before fully tightening.
6 Test the Brake and Swivel
With the caster mounted, press the brake pedal down—does it lock the wheel? Try to spin the wheel; it should stay still. Release the pedal—wheel should spin freely. Now, push the caster side to side—does it swivel smoothly? If it's stiff, you might need more grease. If the brake doesn't lock, check if the brake pad is worn (replace it with a new one from your caster accessories kit) or if the pedal is bent (gently straighten it with pliers).
7 Repeat for All Casters and Check Level
Install the remaining casters using steps 4-6. Once all are on, remove the adjustable leveling feet and let the cart rest on its new casters. Grab your level and place it on the cart's top surface—does it sit flat? If one corner is higher, check if the caster stem is fully seated in the base, or if the base bolts are loose. Tighten or adjust as needed until the cart is level—this ensures even weight distribution across all casters, preventing premature wear.

Troubleshooting: Fixing Common Installation Issues
Even with careful prep, things can go wrong. Here are the most common problems and how to fix them:
| Problem | Why It's Happening | Fix |
|---|---|---|
| Caster wobbles when rolling | Base isn't mounted flush, or stem is bent. | Loosen base bolts, reposition to sit flush, then retighten. If stem is bent, replace the caster. |
| Brake won't stay locked | Brake pad is worn, or setscrew is loose. | replace the brake pad (use caster accessories kit). Tighten the setscrew on the brake mechanism. |
| Swivel head is stiff | Not enough grease, or dirt in the bearings. | Clean bearings with degreaser, reapply fresh grease. |
| Base bolts keep coming loose | No lock washers or thread locker used. | Remove bolts, add lock washers, apply thread locker, and retighten. |
| Cart leans to one side | Casters aren't all the same height, or one base is mounted higher. | Check caster height (replace if uneven). Loosen and reposition the higher base to match others. |
Pro Troubleshooting Hack:
If you're unsure why a caster is acting up, swap it with another one (e.g., move the wobbly caster to a different base). If the problem moves with the caster, the issue is the caster itself. If not, it's the base or mounting area.
Maintenance: Keeping Your Casters Rolling Smoothly
Installing your swivel stem caster wheel with brake is just the start—with a little care, they'll last for years. Here's how to maintain them:
1. Clean the Wheels Weekly
Dirt, debris, and even small rocks can get stuck in wheel treads, causing uneven wear or squeaking. Every week, wipe the wheels with a damp rag, and use a toothpick or small brush to dislodge gunk from crevices. For polyurethane wheels (common in warehouses), avoid harsh chemicals—they can degrade the material.
2. Lubricate Swivel Joints Monthly
Over time, grease dries out, making swivel heads stiff. Once a month, apply a small amount of grease to the swivel joint (under the caster's top plate). Wipe away excess to keep dirt from sticking.
3. Tighten Bolts Quarterly
Vibration from rolling can loosen base bolts and setscrews. Every 3 months, grab your wrench and give each bolt a gentle tighten. This simple step prevents bases from coming loose and causing damage.
4. replace Brake Pads When Worn
Brake pads wear down with use—if you notice the brake isn't holding as well, check the pad. Most caster accessories kits include replacement pads; swapping them takes 5 minutes with a screwdriver.
Wrapping Up: You're Ready to Roll
Installing a swivel stem caster wheel with brake might seem intimidating at first, but with the right parts (like the caster installation base and caster accessories ), a little prep, and patience, it's totally doable. Whether you're upgrading a turnover trolley and rack or building a custom cart, proper installation means smoother rides, safer operations, and less downtime.
Remember: the key is to take your time. Rushing leads to mistakes, and mistakes lead to wobbly casters, stuck brakes, or worse. Follow the steps, troubleshoot when needed, and keep up with maintenance—and those casters will be rolling strong for years to come. Now go out there and make that cart work for you!