- Company Articles
- Products and Technology
- Installation And Maintenance
- How to Install an Aluminum Pipe with Board Holder: Step-by-Step Guide

How to Install an Aluminum Pipe with Board Holder: Step-by-Step Guide
Related Product
Aluminum Pipe with Board Holder
The linear rolling assembly can be arbitrarily connected in the protruding part of the card slot to increase the rigidity of the track.
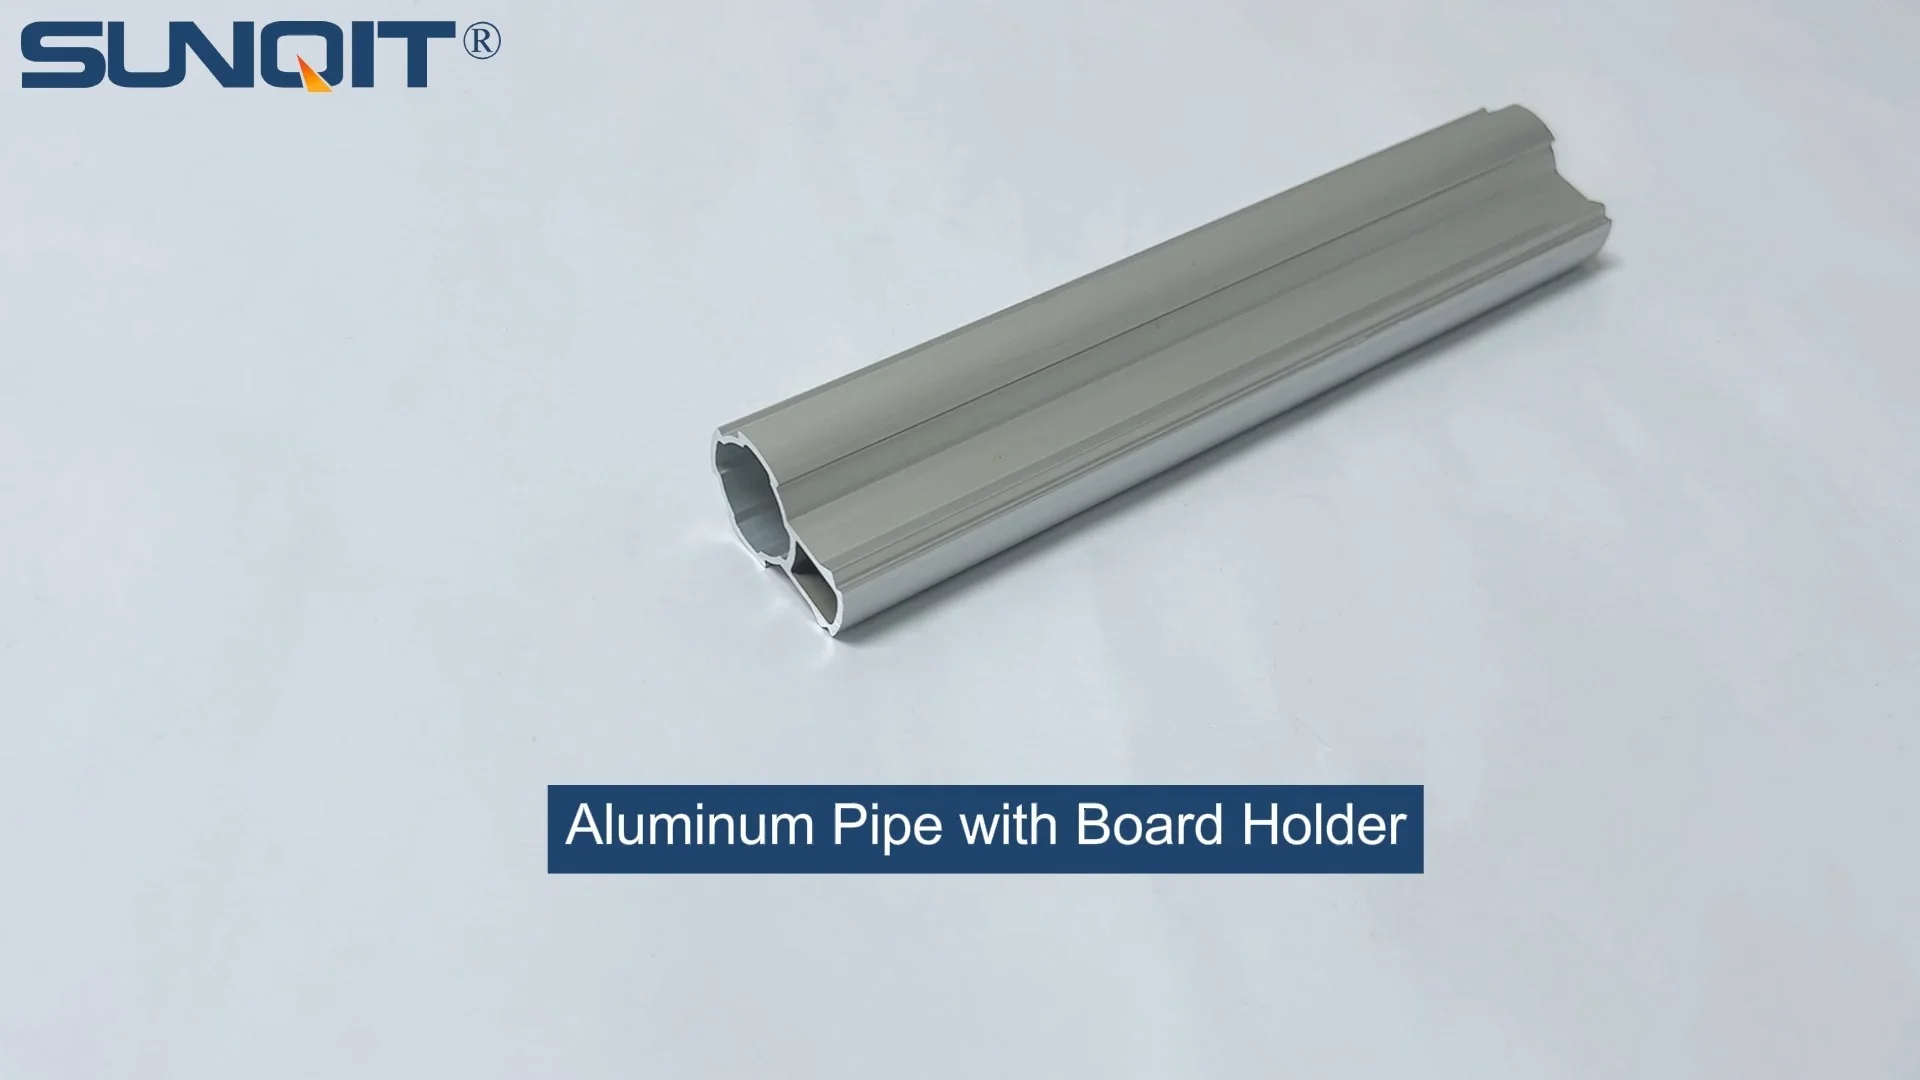
If you've ever spent time organizing a workshop, setting up a home garage, or even putting together a small business workspace, you know the value of a system that's both sturdy and flexible. Aluminum pipes, with their lightweight yet durable nature, have become a go-to for DIY enthusiasts and professionals alike. And when paired with a board holder, they transform into a functional solution for holding tools, materials, or even work surfaces. Whether you're building a custom workbench, a material rack, or a wall-mounted storage unit, installing an aluminum pipe with a board holder doesn't have to be intimidating. In this guide, we'll walk through the process step by step, using simple tools and common aluminum profile accessories to ensure your setup is secure, level, and built to last. Let's dive in!
Why Aluminum Pipe with Board Holder?
Before we get our hands dirty, let's talk about why this combo is worth your time. Aluminum pipe is a standout choice for several reasons: it's resistant to rust, lightweight enough to handle without heavy machinery, and strong enough to support everyday loads. When you add a board holder—essentially a bracket or attachment that secures a wooden or metal board to the pipe—you create a surface that can hold anything from power tools to paint cans.
This setup is especially popular for workbenches, where the board acts as a stable top, or for material racks, where the board keeps items from sliding off the pipe. And because aluminum profiles and their accessories (like brackets, connectors, and end caps) are widely available, you can customize the size and shape to fit your space perfectly. No more one-size-fits-all solutions that leave you with wasted space or wobbly surfaces!
This setup is especially popular for workbenches, where the board acts as a stable top, or for material racks, where the board keeps items from sliding off the pipe. And because aluminum profiles and their accessories (like brackets, connectors, and end caps) are widely available, you can customize the size and shape to fit your space perfectly. No more one-size-fits-all solutions that leave you with wasted space or wobbly surfaces!
Tools and Materials You'll Need
Before starting, gather your tools and materials. Having everything on hand will save you trips to the hardware store mid-project. Here's what you'll need:
| Item | Quantity | Purpose |
|---|---|---|
| Aluminum pipe (1.2m or custom length) | 1 (or more, depending on size) | Main structural component; supports the board holder |
| Board holder (aluminum or metal) | 1-2 (depending on board length) | Attaches to the pipe to hold the board in place |
| Aluminum profile accessories (brackets, connectors) | 4-6 (varies by setup) | Secures the pipe to frames, walls, or other structures |
| Measuring tape | 1 | Ensures accurate cuts and placement |
| Spirit level | 1 | Keeps the pipe and board holder horizontal/vertical |
| Cordless drill + bits | 1 | Drives screws into aluminum and mounting surfaces |
| Hex key set (or screwdrivers) | 1 set | Tightens bolts on aluminum profile accessories |
| Rubber mallet | 1 | Gently taps joints or brackets into place without damaging aluminum |
| Self-tapping screws (3-4mm diameter) | 10-15 | Attaches board holder to pipe and pipe to brackets |
| End caps (optional) | 2 | Covers sharp ends of the aluminum pipe for safety |
Pro Tip:
If you're unsure about the length of your aluminum pipe, measure twice and cut once! Most hardware stores will cut aluminum pipe to size for a small fee, which saves you the hassle of using a pipe cutter at home.

Step 1: Plan Your Space and Measure
1.1 Sketch Your Design
Start by sketching a rough idea of where your aluminum pipe with board holder will go. Will it be part of a freestanding workbench? Wall-mounted? Or maybe a shelf above a desk? Write down the dimensions: how long should the pipe be? How high off the ground? Will the board holder span the entire pipe, or just a section?
For example, if you're building a workbench, the pipe might run along the back edge, with the board holder supporting a 2x4 board that acts as a tool rail. In this case, the pipe length would match the workbench's width (say, 120cm), and the board holder would be two small brackets—one at each end of the pipe—to keep the board from tipping.
For example, if you're building a workbench, the pipe might run along the back edge, with the board holder supporting a 2x4 board that acts as a tool rail. In this case, the pipe length would match the workbench's width (say, 120cm), and the board holder would be two small brackets—one at each end of the pipe—to keep the board from tipping.
1.2 Measure the Space
Now, grab your measuring tape and head to the installation area. Measure the width (for horizontal pipes) or height (for vertical pipes) where the aluminum pipe will go. Don't forget to account for any obstacles: a window sill, a power outlet, or a stud in the wall. If you're mounting the pipe to a wall, use a stud finder to mark where the studs are—this is crucial for stability, especially if you plan to put heavy items on the board.
Write down all measurements and add 5cm to the pipe length to be safe—you can always trim it later, but you can't add length back! For the board holder, measure the width of the board you'll use (a standard 1x6 board is 15cm wide, for reference) to ensure the holder is wide enough to grip it securely.
Write down all measurements and add 5cm to the pipe length to be safe—you can always trim it later, but you can't add length back! For the board holder, measure the width of the board you'll use (a standard 1x6 board is 15cm wide, for reference) to ensure the holder is wide enough to grip it securely.
Common Mistake:
Skipping the stud finder. Drywall alone can't support much weight—even a lightweight aluminum pipe with a board will pull out of drywall if not anchored to a stud. Save yourself the headache and mark those studs!

Step 2: Prepare the Aluminum Pipe and Accessories
2.1 Cut the Aluminum Pipe (If Needed)
If your aluminum pipe is longer than your measured length, it's time to cut it. Use a pipe cutter or a hacksaw with a fine-tooth blade (aluminum is soft, so a coarse blade will leave jagged edges). Clamp the pipe to a workbench first to keep it steady—this ensures a straight cut. Rotate the cutter around the pipe, tightening it slightly with each turn, until it cuts through. If using a hacksaw, apply gentle pressure and let the blade do the work to avoid bending the pipe.
After cutting, use sandpaper (120-grit) to smooth the edges. Sharp aluminum burrs can cut skin, so this step is non-negotiable! If you're using end caps (recommended for safety and a finished look), test-fit them on the pipe ends to make sure they slide on easily. If they're tight, sand the edges a bit more until they fit snugly.
After cutting, use sandpaper (120-grit) to smooth the edges. Sharp aluminum burrs can cut skin, so this step is non-negotiable! If you're using end caps (recommended for safety and a finished look), test-fit them on the pipe ends to make sure they slide on easily. If they're tight, sand the edges a bit more until they fit snugly.
2.2 Assemble the Board Holder
Most board holders come as separate brackets that attach directly to the aluminum pipe. Check the package for instructions—some might require assembling the holder first (e.g., attaching a clamp to a bracket). Lay out the holder parts on a flat surface and use the included screws or bolts to put them together. Tighten them just enough to hold the pieces in place—you'll adjust them later when attaching to the pipe.
If your board holder has adjustable arms (common for fitting different board thicknesses), set them to the thickness of your board now. For example, a 2cm-thick plywood board would need the arms set to 2cm apart. Test the fit by placing the board in the holder—there should be no wiggle room, but the board shouldn't be so tight that it bends.
If your board holder has adjustable arms (common for fitting different board thicknesses), set them to the thickness of your board now. For example, a 2cm-thick plywood board would need the arms set to 2cm apart. Test the fit by placing the board in the holder—there should be no wiggle room, but the board shouldn't be so tight that it bends.
2.3 Gather Aluminum Profile Accessories
Aluminum profile accessories are the "glue" that holds your setup together. For wall mounting, you'll likely need L-brackets or pipe clamps that attach to the wall studs and then to the pipe. For freestanding setups (like a workbench frame), use T-connectors or corner brackets to join the aluminum pipe to vertical supports.
Lay out all accessories and match them to your design: if the pipe is 40mm in diameter, make sure the brackets are sized for 40mm pipes. Check that you have enough screws—most brackets come with small self-tapping screws, but it's smart to have extras on hand. Sort them by size to avoid confusion later (nothing slows down a project like hunting for the right screw!).
Lay out all accessories and match them to your design: if the pipe is 40mm in diameter, make sure the brackets are sized for 40mm pipes. Check that you have enough screws—most brackets come with small self-tapping screws, but it's smart to have extras on hand. Sort them by size to avoid confusion later (nothing slows down a project like hunting for the right screw!).
Step 3: Mount the Aluminum Pipe
3.1 Mark the Bracket Locations
Grab your pencil, measuring tape, and spirit level. If mounting horizontally (e.g., above a workbench), measure up from the floor (or down from the ceiling) to your desired height and draw a light horizontal line with the level to keep it straight. If mounting vertically (e.g., as a side support for a shelf), draw a vertical line using the level.
Next, mark where the brackets will go. For a horizontal pipe, space brackets 40-60cm apart—this prevents sagging in the middle. If your pipe is 120cm long, two brackets (one at each end) might be enough, but for longer pipes (180cm+), add a third bracket in the center. Align each bracket mark with a stud (for wall mounting) and mark the screw holes with the pencil.
Next, mark where the brackets will go. For a horizontal pipe, space brackets 40-60cm apart—this prevents sagging in the middle. If your pipe is 120cm long, two brackets (one at each end) might be enough, but for longer pipes (180cm+), add a third bracket in the center. Align each bracket mark with a stud (for wall mounting) and mark the screw holes with the pencil.
3.2 Attach the Brackets to the Wall or Frame
Now it's time to secure the brackets. For wall mounting: drill pilot holes into the studs at your marked locations (the drill bit should be slightly smaller than the screws). Then, use a drill to drive wood screws through the bracket holes and into the studs. Tighten until the bracket is flush against the wall—don't over-tighten, as this can strip the wood or bend the bracket.
For freestanding setups (e.g., attaching to an aluminum profile frame), use the aluminum profile accessories like corner brackets. Align the bracket with the frame and pipe marks, then use the included bolts (often M5 or M6) to attach it. Use a hex key to tighten the bolts—aluminum threads are softer than steel, so stop when you feel resistance to avoid stripping.
After attaching all brackets, double-check with the level to ensure they're straight. A crooked bracket means a crooked pipe, and that's a recipe for a wobbly board holder!
For freestanding setups (e.g., attaching to an aluminum profile frame), use the aluminum profile accessories like corner brackets. Align the bracket with the frame and pipe marks, then use the included bolts (often M5 or M6) to attach it. Use a hex key to tighten the bolts—aluminum threads are softer than steel, so stop when you feel resistance to avoid stripping.
After attaching all brackets, double-check with the level to ensure they're straight. A crooked bracket means a crooked pipe, and that's a recipe for a wobbly board holder!
3.3 Secure the Aluminum Pipe to the Brackets
Slide the aluminum pipe into the brackets. Most brackets have a clamp-style design: loosen the clamp screw, place the pipe in the bracket, then tighten the screw until the pipe is held firmly. If the brackets use set screws (small screws that press directly into the pipe), tighten them gently—you want enough pressure to hold the pipe, but not so much that they dent the aluminum.
Once the pipe is in all brackets, check for movement. Gently twist the pipe—if it rotates or slides, the brackets are too loose. Tighten them a little more, but again, avoid over-tightening. If the pipe is still loose, wrap a small piece of rubber (like a rubber band or a strip from an old tire) around the pipe where it meets the bracket for extra grip.
Once the pipe is in all brackets, check for movement. Gently twist the pipe—if it rotates or slides, the brackets are too loose. Tighten them a little more, but again, avoid over-tightening. If the pipe is still loose, wrap a small piece of rubber (like a rubber band or a strip from an old tire) around the pipe where it meets the bracket for extra grip.
Pro Tip:
If your pipe is horizontal, roll a marble or small ball along the top—if it rolls to one side, the pipe is sloped. Adjust the brackets up or down until the marble stays put—this ensures the board will sit level later.
Step 4: Install the Board Holder on the Aluminum Pipe
4.1 Position the Board Holder
Decide where on the pipe the board holder should go. For a workbench top, you might want it centered; for a tool rack, you might space multiple holders evenly. Mark the pipe with a pencil where the holder will attach. If using two holders (for a longer board), measure the distance between them to match the board's length—this prevents the board from tipping.
Slide the board holder onto the pipe and align it with your mark. Most holders have a set screw or clamp to lock them in place. Loosen the screw, position the holder, then tighten it just enough to hold it temporarily—we'll finalize the position after testing the board.
Slide the board holder onto the pipe and align it with your mark. Most holders have a set screw or clamp to lock them in place. Loosen the screw, position the holder, then tighten it just enough to hold it temporarily—we'll finalize the position after testing the board.
4.2 Attach the Board Holder to the Pipe
Now, secure the board holder to the aluminum pipe. Depending on the holder design, this might involve drilling small holes through the holder and into the pipe, then inserting self-tapping screws, or using the clamp screw we loosened earlier. If drilling, use a drill bit that matches the screw size (too big, and the screw won't hold; too small, and you'll crack the holder).
For clamp-style holders: Tighten the clamp screw until the holder is snug against the pipe. Give it a gentle tug—if it moves, tighten a little more. For screw-on holders: Drive the screws in slowly, keeping them straight to avoid bending. Once both screws are in, check that the holder is level with the pipe—use the spirit level against the holder's top surface to confirm.
For clamp-style holders: Tighten the clamp screw until the holder is snug against the pipe. Give it a gentle tug—if it moves, tighten a little more. For screw-on holders: Drive the screws in slowly, keeping them straight to avoid bending. Once both screws are in, check that the holder is level with the pipe—use the spirit level against the holder's top surface to confirm.
4.3 Test the Board Fit
It's time to test the board! Place the board into the holder and push it back until it's flush with the pipe. The board should sit level and not rock side to side. If it does rock, check if the holder is loose or if the pipe is crooked. Tighten the holder screws or adjust the pipe brackets as needed.
Add some weight to the board (a few heavy books or a toolbox) to simulate real use. Let it sit for 10-15 minutes—this helps identify any slow sagging. If the board dips in the middle, you might need an extra board holder in the center. Better to add it now than to have the board warp later!
Add some weight to the board (a few heavy books or a toolbox) to simulate real use. Let it sit for 10-15 minutes—this helps identify any slow sagging. If the board dips in the middle, you might need an extra board holder in the center. Better to add it now than to have the board warp later!
Step 5: Final Adjustments and Safety Checks
5.1 Tighten All Connections
Go through every bracket, screw, and clamp one last time. Tighten any that feel loose, but remember: aluminum is soft, so "snug" is better than "cranked down." Pay special attention to the board holder—this is where most of the weight will sit. If the holder has adjustable arms, double-check that they're gripping the board tightly but not bending it.
If you're using end caps on the aluminum pipe, pop them into place now. They'll cover any sharp edges and give the project a polished look. For extra security, add a drop of super glue to the inside of the end cap before pressing it on—this prevents it from falling off over time.
If you're using end caps on the aluminum pipe, pop them into place now. They'll cover any sharp edges and give the project a polished look. For extra security, add a drop of super glue to the inside of the end cap before pressing it on—this prevents it from falling off over time.
5.2 Check for Sharp Edges or Hazards
Walk around the installation and run your hand along the aluminum pipe, board, and brackets. Feel for any sharp edges, protruding screws, or loose parts. Sand down any burrs you missed earlier, and use a screwdriver to recess any screws that stick out (this prevents snags on clothes or skin).
If the board overhangs the pipe, round the corners with sandpaper to avoid sharp edges. Safety first—even a small nick can turn into a big annoyance (or worse) during daily use.
If the board overhangs the pipe, round the corners with sandpaper to avoid sharp edges. Safety first—even a small nick can turn into a big annoyance (or worse) during daily use.
Troubleshooting Common Issues
Even with careful planning, things can go wrong. Here's how to fix the most common problems:
Problem 1: The pipe sags in the middle. This usually happens with long pipes (over 180cm) or heavy boards. Solution: Add a center bracket or board holder to support the middle. Use an aluminum profile accessory like a T-bracket to attach the pipe to a vertical support in the center.
Problem 2: The board slides out of the holder. The holder might be too loose or the board is too thin. Solution: Tighten the holder's adjustable arms, or add a strip of rubber shelf liner to the holder's grip surface for extra friction.
Problem 3: Brackets pull out of the wall. You probably didn't hit a stud. Solution: Remove the bracket, find the nearest stud (use the stud finder again!), and re-drill. If there's no stud nearby, use a drywall anchor rated for the weight (look for "heavy-duty" anchors—they can hold up to 25kg).
Problem 4: The pipe is crooked. The brackets weren't level during installation. Solution: Loosen the bracket screws, adjust with the spirit level, then retighten. A small shim (like a piece of cardboard) behind a low bracket can help level it out.
Problem 1: The pipe sags in the middle. This usually happens with long pipes (over 180cm) or heavy boards. Solution: Add a center bracket or board holder to support the middle. Use an aluminum profile accessory like a T-bracket to attach the pipe to a vertical support in the center.
Problem 2: The board slides out of the holder. The holder might be too loose or the board is too thin. Solution: Tighten the holder's adjustable arms, or add a strip of rubber shelf liner to the holder's grip surface for extra friction.
Problem 3: Brackets pull out of the wall. You probably didn't hit a stud. Solution: Remove the bracket, find the nearest stud (use the stud finder again!), and re-drill. If there's no stud nearby, use a drywall anchor rated for the weight (look for "heavy-duty" anchors—they can hold up to 25kg).
Problem 4: The pipe is crooked. The brackets weren't level during installation. Solution: Loosen the bracket screws, adjust with the spirit level, then retighten. A small shim (like a piece of cardboard) behind a low bracket can help level it out.
Maintaining Your Aluminum Pipe Setup
Aluminum is low-maintenance, but a little care will keep your setup looking and working great for years:
Clean regularly: Wipe the pipe and board holder with a damp cloth to remove dust and grime. For greasy spots (common in workshops), use a mild soap and water solution—avoid harsh chemicals, as they can damage the aluminum's finish.
Tighten screws seasonally: Temperature changes and vibrations can loosen screws over time. Every 3-6 months, go through and tighten all brackets and holder screws with a hex key or screwdriver.
replace worn accessories: If a bracket cracks or a board holder's clamp wears out, swap it with a new aluminum profile accessory. Most are inexpensive and easy to find at hardware stores or online suppliers.
Protect from heavy impacts: Aluminum is strong, but it can bend if hit with a heavy tool or dropped object. Keep the area around the pipe clear of clutter to avoid accidents.
Clean regularly: Wipe the pipe and board holder with a damp cloth to remove dust and grime. For greasy spots (common in workshops), use a mild soap and water solution—avoid harsh chemicals, as they can damage the aluminum's finish.
Tighten screws seasonally: Temperature changes and vibrations can loosen screws over time. Every 3-6 months, go through and tighten all brackets and holder screws with a hex key or screwdriver.
replace worn accessories: If a bracket cracks or a board holder's clamp wears out, swap it with a new aluminum profile accessory. Most are inexpensive and easy to find at hardware stores or online suppliers.
Protect from heavy impacts: Aluminum is strong, but it can bend if hit with a heavy tool or dropped object. Keep the area around the pipe clear of clutter to avoid accidents.
Final Thoughts
Installing an aluminum pipe with a board holder is a project that combines practicality with creativity. With the right tools, a little patience, and some basic aluminum profile accessories, you've built a custom solution that fits your space and needs. Whether it's holding tools, supporting a workbench, or organizing materials, this setup will serve you well for years to come.
Remember, the beauty of aluminum is its flexibility—if you ever need to reconfigure your space, you can easily disassemble the pipe and brackets and start fresh. So go ahead, load up that board with your favorite tools, and enjoy the fruits of your labor. Happy building!
Remember, the beauty of aluminum is its flexibility—if you ever need to reconfigure your space, you can easily disassemble the pipe and brackets and start fresh. So go ahead, load up that board with your favorite tools, and enjoy the fruits of your labor. Happy building!