- Company Articles
- Products and Technology
- Installation And Maintenance
- How to Install Corrugated Aluminum Pipe: A Practical Guide for Manufacturers

How to Install Corrugated Aluminum Pipe: A Practical Guide for Manufacturers
Related Product
Corrugated Aluminum Pipe
Product Description The slot side is 10mm which can work with a T sliding block for connection accessories Quick Detail Product name Corrugated Aluminum pipe model GLT28-T-3010A Material Science 6005-T6 thickness 1.7mm surface treatment anodic oxidat
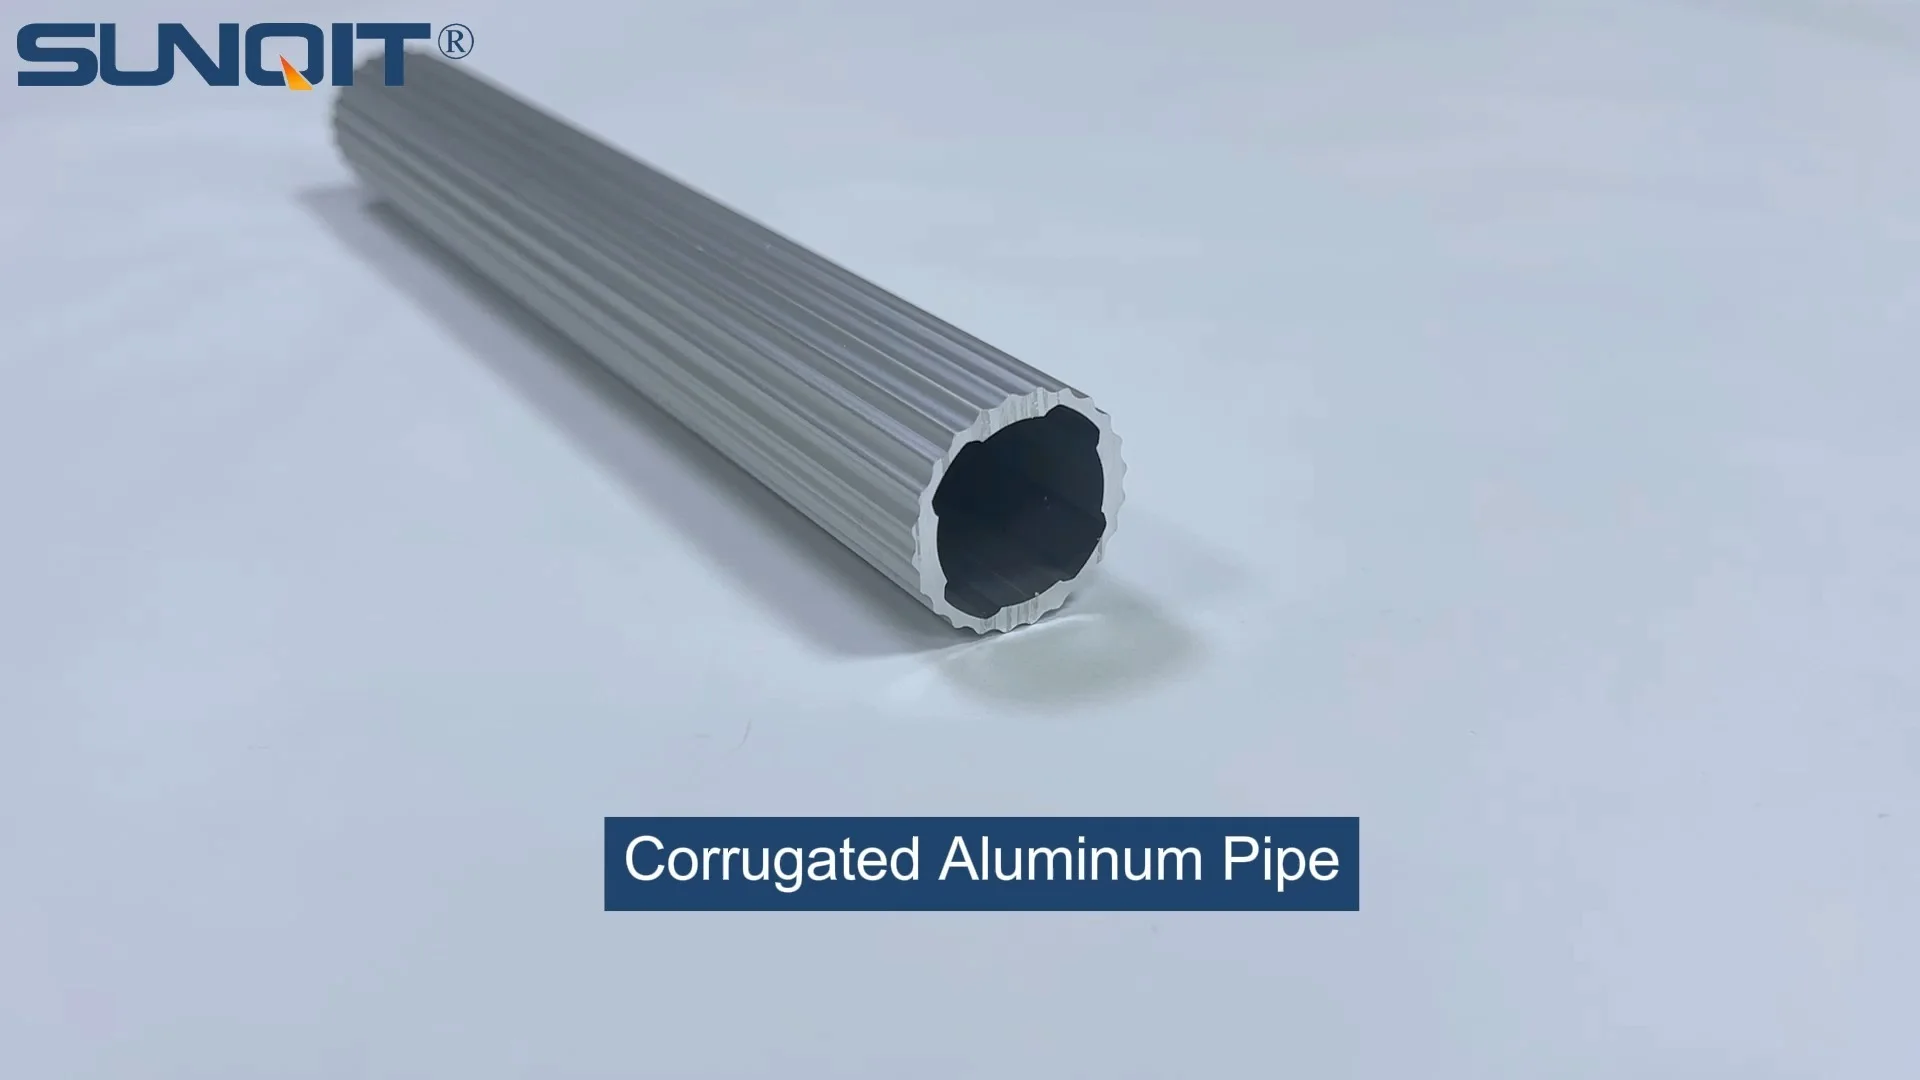
If you've spent any time on a manufacturing floor, you know that efficiency isn't just a buzzword—it's the backbone of getting things done. Every component, from the workbench where assemblies happen to the conveyor belts moving parts between stations, plays a role in keeping the workflow smooth. One unsung hero in this ecosystem? Corrugated aluminum pipe. Lightweight yet surprisingly tough, flexible enough to adapt to tight spaces, and resistant to the wear and tear of daily use, it's a staple in setups like material racks, flow racks, and even custom workbench frames. But like any tool, its effectiveness depends on how well it's installed. In this guide, we'll walk through the entire process—from prepping your workspace to troubleshooting common hiccups—so you can get your corrugated aluminum pipe up and running without the guesswork.
Why Corrugated Aluminum Pipe Matters in Manufacturing
Before we dive into the "how," let's quickly cover the "why." Corrugated aluminum pipe (a type of aluminum extrusion profile) stands out for a few key reasons. First, it's lightweight—much easier to handle than steel, which means your team can assemble and reconfigure setups without heavy lifting equipment. Second, it's durable: aluminum resists rust and corrosion, even in humid or dusty factory environments. Third, its corrugated design adds strength without extra weight, making it ideal for supporting materials or guiding products along a production line. And finally, it pairs seamlessly with aluminum pipe accessories like joints, clamps, and brackets, letting you build everything from simple material racks to complex multi-level flow systems. Whether you're setting up a new workbench or upgrading an old roller track, getting the pipe installation right ensures safety, stability, and long-term reliability.
Pre-Installation Preparation: What You'll Need (and Why)
Installing corrugated aluminum pipe isn't complicated, but rushing into it without prep is a recipe for frustration. Think of it like baking: you wouldn't start mixing without gathering ingredients first. Here's what you'll need to round up before you begin:
Tools & Materials
| Item | Purpose | Pro Tip |
|---|---|---|
| Measuring tape + straightedge | To measure pipe lengths and mark cuts accurately | Use a metal straightedge for marking—flexible rulers can warp, leading to uneven cuts |
| Hacksaw or pipe cutter | Cutting the corrugated aluminum pipe to size | A pipe cutter with a aluminum-specific blade will give cleaner edges than a hacksaw |
| Deburring tool or sandpaper | Removing sharp edges from cut pipe ends | Even small burrs can scratch hands or catch on materials later—don't skip this step |
| Aluminum pipe accessories (joints, clamps, brackets) | Connecting pipes and securing them to frames/workbenches | Match joints to your needs: 90° aluminum pipe joint for corners, parallel aluminum joint for straight runs |
| Power drill + Phillips-head bits | Driving screws to fasten accessories to pipes/frames | Use a drill with adjustable torque to avoid stripping screws (aluminum is softer than steel!) |
| Level (bubble or digital) | Ensuring pipes and frames are straight/even | A 2-foot level works for small sections; use a longer one for larger assemblies |
| Workbench or flat surface | Assembly station for cutting and connecting parts | Clear off clutter first—you'll need space to lay out pipes and accessories |
| Safety gear: gloves, safety glasses, ear protection (if using power tools) | Preventing cuts, eye injuries, and hearing damage | Aluminum shavings are sharp—leather gloves offer better protection than nitrile |
Planning Your Layout
Even with the right tools, installing pipe without a plan is like navigating a new city without a map. Start by sketching your desired setup: Are you building a material rack with 3 rows and 3 floors? Adding a corrugated pipe section to a roller track? Mounting pipes under a workbench to hold tools? Note measurements (length, height, width) and mark where joints or brackets will go. If you're working with a team, walk through the sketch together—someone might spot a better way to route the pipe or a potential obstacle (like a caster wheel on a nearby trolley) that could get in the way.
Pro tip: If you're reconfiguring an existing setup (say, modifying a workbench E with a single deck), take photos before disassembling. It'll help you remember how parts fit together later!

Step-by-Step Installation: From Cutting to Testing
Now that you're prepped, let's get to the installation. We'll break this into 6 clear steps, each with actionable tips to keep things smooth.
Step 1: Measure Twice, Cut Once (Yes, It's a Cliché for a Reason)
You've heard it a million times, but it bears repeating: measuring incorrectly is the most common cause of wasted materials. Here's how to do it right:
- Mark your cut line: Use a measuring tape to find your desired length, then hold a straightedge along the pipe and draw a line with a pencil or marker. For corrugated pipe, align the line with a valley (the indented part) of the corrugation—this makes cutting straighter easier.
- Secure the pipe: Clamp the pipe to your workbench so it doesn't roll while cutting. Leave the section to be cut hanging off the edge (this prevents the bench from getting in the way of your saw).
- Cut carefully: If using a hacksaw, use slow, steady strokes—let the blade do the work. If using a pipe cutter, rotate it around the pipe, tightening slightly with each turn, until it cuts through. Avoid forcing the tool; aluminum is soft, so gentle pressure is better.
- Deburr the edges: Use a deburring tool or sandpaper to smooth the cut end. Run your finger along the edge—if it catches, keep sanding until it's smooth. This step is critical if the pipe will be handled by workers or used to guide products (sharp edges can tear packaging or scratch parts).
Step 2: Prep Your Aluminum Pipe Accessories
With your pipe cut to size, it's time to get your accessories ready. Aluminum pipe accessories come in all shapes and sizes, but the most common are joints (to connect pipes), brackets (to secure pipes to surfaces), and end caps (to cover sharp ends). Here's how to prep them:
- Sort and inspect: Lay out all joints, clamps, and brackets on your workbench. Check for cracks, bent parts, or missing screws—defective accessories will weaken your setup. For example, a 90° aluminum pipe joint with a stripped screw hole won't hold tight, leading to wobbly frames.
- Pre-thread screws (if needed): Some accessories, like parallel aluminum joint A, require screws to fasten to pipes. To make assembly easier, pre-thread the screws into the joint holes (without overtightening) so they're ready to go when you need them.
- Apply lubricant (optional): If you're using internal rotatary aluminum joints (which let pipes swivel), a drop of light machine oil on the moving parts will keep them turning smoothly.
Step 3: Assemble the Frame (or Structure)
Now comes the fun part: putting it all together. Whether you're building a simple two-pipe frame or a multi-section flow rack, the key is to start with the base and work upward. Let's use a basic material rack (similar to "material rack B (3 row and 3 floor)") as an example:
- Start with the vertical supports: Take four long corrugated aluminum pipes (these will be the legs) and attach a 90° aluminum pipe joint to the top of each. Tighten the joint screws just enough to hold them in place—you'll adjust for level later.
- Add horizontal crossbars: Connect the vertical pipes with shorter horizontal pipes using the 90° joints. For stability, space the crossbars evenly (e.g., one at the top, one in the middle, one at the bottom). Use your level to check that the horizontal pipes are straight—if one side is higher, loosen the joint and adjust until the bubble is centered.
- Secure with parallel joints (for shelves): If building a multi-level rack, add parallel aluminum joint B to the horizontal crossbars. These joints will hold the shelf pipes (the "rows" of your rack). Slide the shelf pipes into the parallel joints and tighten the screws—make sure they're snug but not so tight that they bend the pipe.
- Check for wobble: Once the frame is assembled, gently shake it. If it wobbles, check for loose joints or uneven legs. A quick fix: add diagonal braces (using 45° aluminum pipe joints) between the vertical and horizontal pipes for extra stability.
Step 4: Mounting to a Workbench or Surface
Many corrugated aluminum pipe setups (like those under a workbench or along a roller track) need to be secured to a stable surface. Here's how to do it without damaging your workbench or the pipe:
- Mark mounting points: Place the assembled pipe structure on your workbench (or desired surface) and use a pencil to mark where the brackets will go. Make sure the structure is centered and aligned with any existing features (e.g., a roller track on the workbench edge).
- Drill pilot holes: If mounting to wood or particleboard, drill small pilot holes into the workbench at your marked points—this prevents the wood from splitting when you drive in screws. For metal workbenches, use a metal drill bit and lubricate it with cutting oil to avoid overheating.
- Attach with brackets: Use aluminum pipe clamps or L-brackets to secure the pipe structure to the workbench. Tighten the screws until the structure doesn't move, but be careful not to overtighten—aluminum can bend if squeezed too hard.
- Add anti-slip protection: If the pipe will be used to slide materials (e.g., along a flow rack), consider adding a plastic roller track guide rail (yellow or grey, depending on your preference) to the top of the corrugated pipe. These rails reduce friction, making it easier for products to glide along.
Step 5: Testing and Adjusting for Functionality
You're almost done, but don't skip testing! A setup that looks solid might fail when put to work. Here's what to check:
- Load test: If building a material rack, place a few boxes or parts on the shelves to simulate real use. Does the structure sag? Are the joints holding? If a shelf dips, add extra parallel joints or reinforce with a center support bracket (like roller track placon mount center support bracket).
- Movement test (for dynamic setups): If the pipe is part of a roller track or conveyor, run a test product (like a plastic bin) along it. Does it move smoothly? If it gets stuck, check for misaligned pipes or debris in the corrugation. A quick wipe with a dry cloth often fixes this.
- Level recheck: After testing, recheck with your level—sometimes loading the structure can shift joints slightly. Tighten any loose screws or adjust joints as needed.
Step 6: Finishing Touches for Safety and Longevity
The final step is adding small details that make a big difference in safety and durability:
- Cap exposed pipe ends: Use plastic or aluminum end caps on any cut pipe ends that aren't connected to joints. This prevents workers from catching their hands or clothes on sharp edges.
- Add rubber strips: If the pipe is near a walkway or work area, apply aluminum profile rubber strip along the edges. This softens impacts (e.g., if a tool is dropped on the pipe) and reduces noise.
- Label (optional): For complex setups, label sections of the pipe structure (e.g., "Shelf A: Small Parts" or "Roller Track: Finished Products") to help your team use it correctly.
Troubleshooting Common Installation Hiccups
Even with careful prep, things can go wrong. Here are fixes for the most common issues:
- Joints won't tighten: If a joint slips or the screw spins without gripping, check if the pipe is bent—even a slight bend can prevent the joint from seating properly. Straighten the pipe (gently!) or replace it if it's too warped. If the screw is stripped, try a slightly larger screw (e.g., M5 instead of M4) or use thread-locking adhesive (like Loctite) on the threads.
- Pipes are misaligned: If horizontal pipes aren't level, loosen the joints and use shims (small pieces of cardboard or metal) under the lower side until the level bubble centers. For vertical pipes that lean, check if the floor is uneven—adjusting the feet (with anti-slip adjustable leveling feet) can fix this.
- Accessories don't fit: If a joint or bracket is too loose on the pipe, wrap a thin strip of aluminum tape around the pipe end before inserting it into the joint—this adds thickness for a snug fit. If it's too tight, sand the pipe end slightly (be careful not to overdo it—aluminum sands quickly!).
Maintenance Tips: Keeping Your Corrugated Aluminum Pipe in Top Shape
Installing your pipe is just the start—regular maintenance ensures it lasts for years. Here's what to add to your team's checklist:
- Monthly inspections: Walk around the setup and check for loose joints, bent pipes, or worn accessories (like cracked brackets). Tighten screws with a screwdriver—over time, vibration from the factory floor can loosen them.
- Quarterly cleaning: Wipe down pipes and accessories with a damp cloth to remove dust and debris. For greasy areas (near machinery), use a mild detergent—avoid harsh chemicals like bleach, which can damage the aluminum's finish.
- replace worn parts: If a joint starts to stick or a roller track guide rail cracks, replace it immediately. Waiting can lead to bigger issues (e.g., a shelf collapsing under weight). Keep spare aluminum pipe accessories on hand so you're not waiting for replacements.
- Reconfigure as needed: One of the best things about corrugated aluminum pipe is its flexibility. If your production needs change (e.g., you need a taller rack or a wider workbench), don't hesitate to disassemble and reconfigure—just follow the installation steps again for the new layout.
Wrapping Up: Your Turn to Install
Installing corrugated aluminum pipe might seem intimidating at first, but with the right tools, prep, and a little patience, it's a task any manufacturing team can handle. Remember: measure carefully, use quality aluminum pipe accessories, test as you go, and don't skip maintenance. Whether you're building a simple workbench frame or a complex flow system, a well-installed corrugated aluminum setup will make your production line smoother, safer, and more efficient. Now grab your tools, gather your team, and get started—your future (and more organized) factory floor will thank you.