- Company Articles
- Products and Technology
- Installation And Maintenance
- How to Install External Straight Aluminum Joints: Step-by-Step Instructions

How to Install External Straight Aluminum Joints: Step-by-Step Instructions
Related Product
External Straight Aluminum Joint
Aluminum pipe joint outside connection used for two pcs 28pcs aluminum pipe connection in straight angle,it connects two pcs pipe from outside.
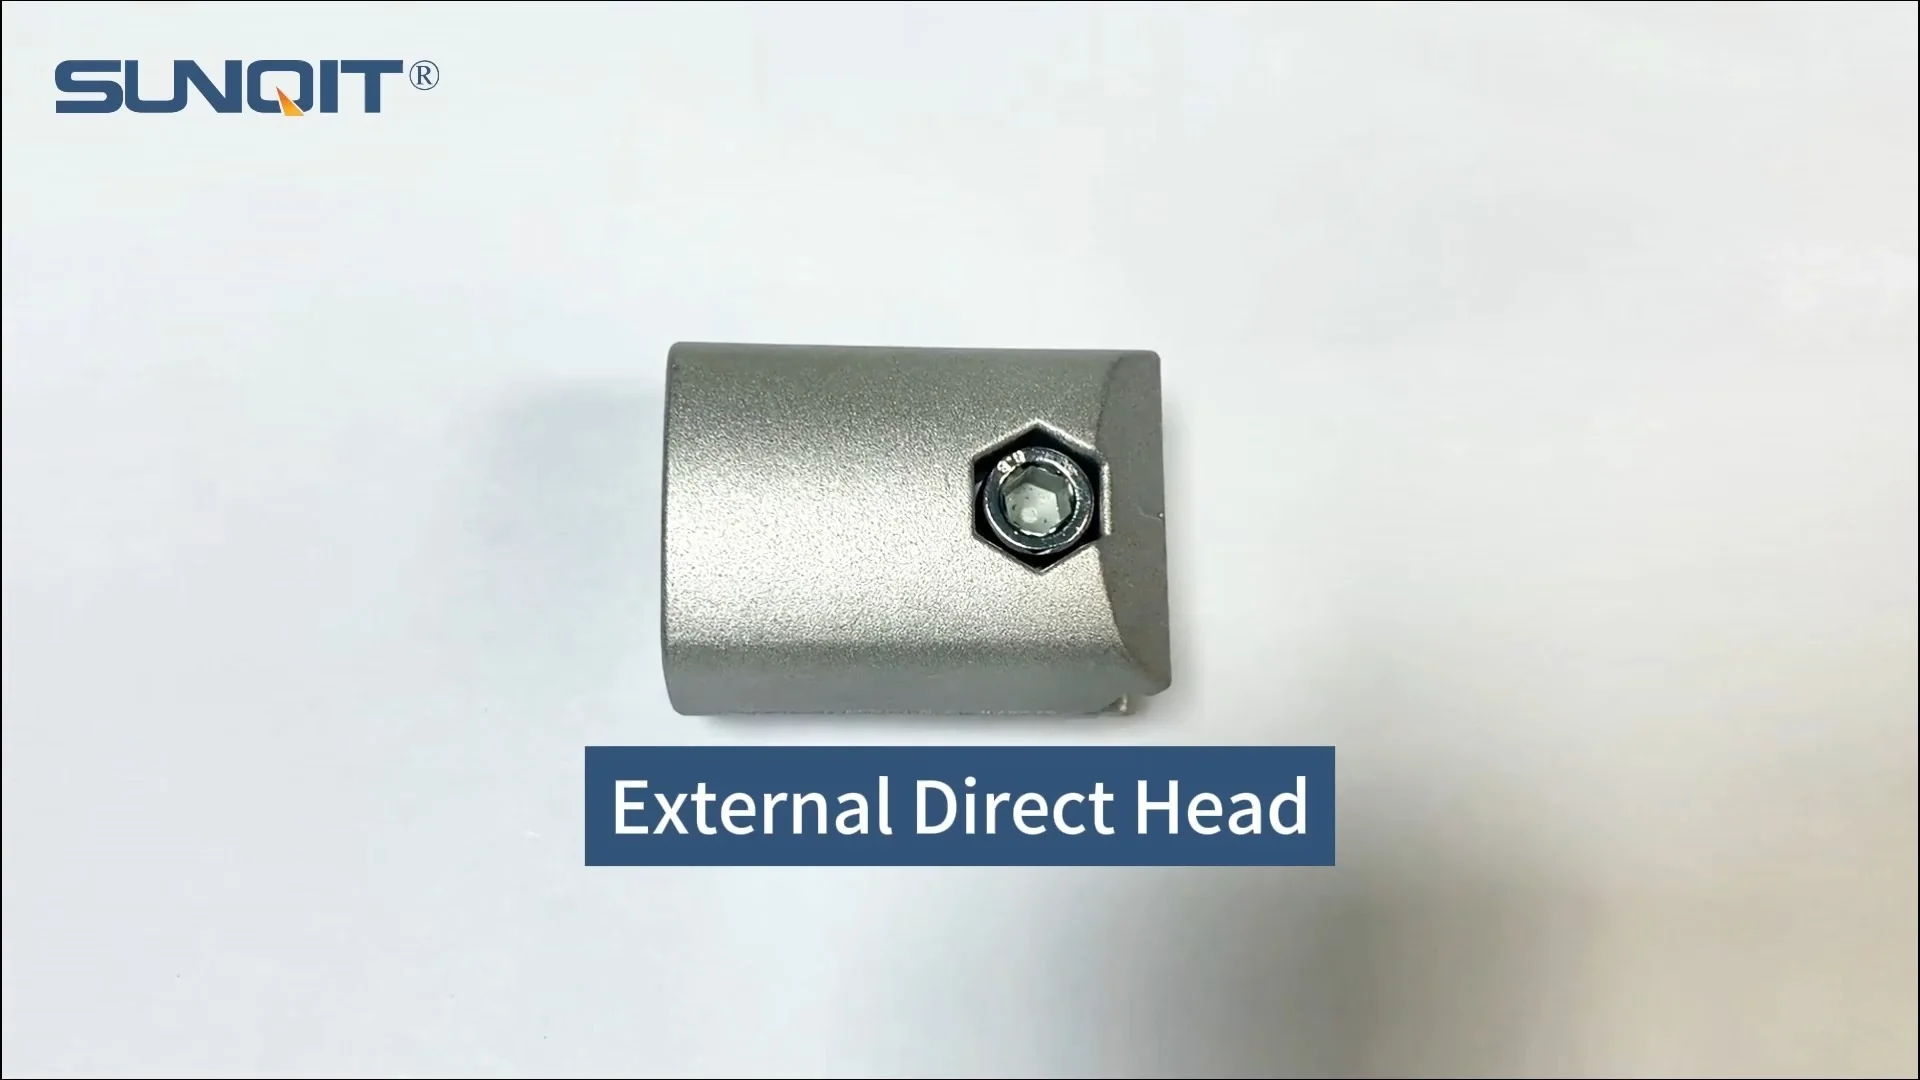
External straight aluminum joints are the unsung heroes of modular aluminum structures. They connect lengths of aluminum pipe (or aluminum profile) in straight lines, forming the backbone of workbenches, flow racks, turnover trolleys, and more. Whether you're setting up a new production line, upgrading an existing workstation, or building a custom storage solution, installing these joints correctly is key to ensuring your structure is stable, safe, and built to last. A poorly installed joint can lead to wobbly frames, misaligned shelves, or even structural failure—risks no workshop manager or DIY enthusiast wants to take.
In this guide, we'll walk you through the entire process of installing external straight aluminum joints, from gathering the right tools to testing the final structure. We'll break down each step with clear, conversational instructions, share pro tips to avoid common mistakes, and even troubleshoot issues you might run into along the way. By the end, you'll have the confidence to tackle your aluminum structure project with precision—no prior engineering experience required. Let's dive in!
Tools and Materials You'll Need
Before you start, let's make sure you have everything on hand. Having the right tools and materials ready will save you time and frustration later. Here's what you'll need:
- External straight aluminum joints : The star of the show! Make sure you have the correct size for your aluminum pipe (most common sizes are 28mm or 30mm, but check your pipe's diameter first).
- Aluminum pipe : The lengths you'll be connecting. Cut them to your desired size beforehand (we'll cover measuring and cutting tips later).
- Measuring tape and straightedge : For ensuring your pipes are cut to the right length and aligned properly.
- Level (4-foot or longer) : To check that your structure is straight and plumb once the joints are installed.
- Hex key (Allen wrench) : Most external straight aluminum joints use hex bolts to secure pipes. Check the joint's packaging for the correct size (often 4mm or 5mm).
- Rubber mallet : For gently tapping pipes into joints without damaging the aluminum.
- Deburring tool or sandpaper (fine-grit) : To smooth rough edges on cut aluminum pipe—sharp burrs can scratch hands or prevent a tight fit in the joint.
- Aluminum pipe clamp (optional but helpful) : If you're working alone, a clamp can hold pipes steady while you tighten the joint.
- Work gloves and safety glasses : Aluminum shavings can be sharp, and a stray hex key or falling pipe is no joke—protect your hands and eyes!
- Marker or pencil : For marking cut lines on the aluminum pipe.
- Clean cloth : To wipe away dust, oil, or debris from pipes and joints before assembly—dirt can prevent a tight seal.
Pro tip: Lay out all your materials on a flat, clean workspace before starting. A workbench or large table works best—avoid uneven floors, which can throw off your measurements.
Step-by-Step Installation Guide
Now that you have your tools ready, let's walk through installing external straight aluminum joints step by step. Take your time with each step—rushing leads to mistakes, and precision here pays off in a sturdier structure.
1
Prepare Your Workspace and Inspect Materials
Start by clearing your workspace of clutter—you need room to lay out pipes, joints, and tools without tripping over cords or other equipment. If you're working on the floor, lay down a sheet of plywood or a thick blanket to protect the aluminum pipe from scratches.
Next, inspect your materials. Check the external straight aluminum joints for any defects: cracks in the plastic or metal components, stripped threads in the bolt holes, or burrs on the connection points. Even a small defect can weaken the joint. Then, examine your aluminum pipe—look for dents, kinks, or bent ends, which can make it hard to insert into the joint. If you spot any issues, replace the defective part before proceeding.
Finally, wipe down both the pipes and joints with a clean cloth. Dust, oil from your hands, or residue from manufacturing can create a barrier between the pipe and joint, making it harder to get a tight fit. A quick wipe ensures maximum contact between the two surfaces.
Next, inspect your materials. Check the external straight aluminum joints for any defects: cracks in the plastic or metal components, stripped threads in the bolt holes, or burrs on the connection points. Even a small defect can weaken the joint. Then, examine your aluminum pipe—look for dents, kinks, or bent ends, which can make it hard to insert into the joint. If you spot any issues, replace the defective part before proceeding.
Finally, wipe down both the pipes and joints with a clean cloth. Dust, oil from your hands, or residue from manufacturing can create a barrier between the pipe and joint, making it harder to get a tight fit. A quick wipe ensures maximum contact between the two surfaces.
2
Measure and Mark Your Aluminum Pipe (If Cutting is Needed)
Unless you're using pre-cut aluminum pipe, you'll need to measure and cut your pipes to the correct length. Start by confirming the dimensions of your project—for example, if you're building a workbench with a 120cm top, your horizontal pipes should be 120cm long (plus a little extra if you're adding end caps, but we'll cover that later).
Use a measuring tape to mark the cut line on the pipe. For straight cuts, hold a straightedge (like a metal ruler or a level) along the pipe and draw a line with your marker—this ensures the cut is perpendicular to the pipe's length. If the cut is even slightly angled, the joint won't sit flush, leading to a wobbly connection.
Pro tip: Measure twice, cut once! It's an old saying, but it's true. Double-check your measurements before cutting—there's no going back if you cut a pipe too short.
If you need to cut the pipe, use a pipe cutter (for thin-walled aluminum) or a miter saw with a metal-cutting blade (for thicker pipes). Secure the pipe in a vice or clamp to prevent it from moving while cutting. Take your time—jerky movements can bend the pipe or leave a ragged edge.
Use a measuring tape to mark the cut line on the pipe. For straight cuts, hold a straightedge (like a metal ruler or a level) along the pipe and draw a line with your marker—this ensures the cut is perpendicular to the pipe's length. If the cut is even slightly angled, the joint won't sit flush, leading to a wobbly connection.
Pro tip: Measure twice, cut once! It's an old saying, but it's true. Double-check your measurements before cutting—there's no going back if you cut a pipe too short.
If you need to cut the pipe, use a pipe cutter (for thin-walled aluminum) or a miter saw with a metal-cutting blade (for thicker pipes). Secure the pipe in a vice or clamp to prevent it from moving while cutting. Take your time—jerky movements can bend the pipe or leave a ragged edge.
3
Deburr the Pipe Ends
After cutting the aluminum pipe, you'll notice sharp burrs along the cut edge. These burrs are dangerous (they can slice through gloves!) and will prevent the pipe from sliding smoothly into the external straight aluminum joint. Deburring is a quick step, but it's critical for safety and fit.
To deburr, use a dedicated deburring tool—a small, handheld tool with a rotating blade that shaves off burrs. insert the tool into the pipe end and twist it gently until the inner edge is smooth. Then, flip the tool to the external blade and run it along the outer edge of the pipe to remove any sharpness there. If you don't have a deburring tool, fine-grit sandpaper (220-grit or higher) works too—wrap the sandpaper around the pipe end and rub in a circular motion until the edges feel smooth to the touch.
After deburring, wipe the pipe end again to remove any aluminum shavings—you don't want these getting stuck inside the joint.
To deburr, use a dedicated deburring tool—a small, handheld tool with a rotating blade that shaves off burrs. insert the tool into the pipe end and twist it gently until the inner edge is smooth. Then, flip the tool to the external blade and run it along the outer edge of the pipe to remove any sharpness there. If you don't have a deburring tool, fine-grit sandpaper (220-grit or higher) works too—wrap the sandpaper around the pipe end and rub in a circular motion until the edges feel smooth to the touch.
After deburring, wipe the pipe end again to remove any aluminum shavings—you don't want these getting stuck inside the joint.
4
Dry Fit the Joint and Pipes
"Dry fitting" means assembling the joint and pipes without tightening any bolts—this lets you check alignment, confirm pipe lengths, and make adjustments before you commit. It's like trying on a shirt before sewing the buttons—you wouldn't skip that step, and you shouldn't skip this one either.
Take one external straight aluminum joint and slide one end of an aluminum pipe into one side of the joint. Push it in as far as it will go—you should feel it hit a stop inside the joint (this is the internal ridge that prevents over-insertion). Then, take a second aluminum pipe and slide it into the other side of the joint, again pushing until it hits the stop.
Now, check the alignment: Are the pipes perfectly straight? If one pipe is angled even slightly, the joint isn't seated correctly. Pull the pipes out, check for debris in the joint, and try again. If the pipes still won't align, double-check that your cuts were straight—an angled cut will always cause misalignment.
Also, measure the total length of the assembled section (pipe + joint + pipe). Does it match your project's specifications? If it's too long or too short, now's the time to adjust—either trim a pipe slightly (if too long) or replace it with a longer one (if too short). Dry fitting saves you from disassembling a fully tightened joint later!
Take one external straight aluminum joint and slide one end of an aluminum pipe into one side of the joint. Push it in as far as it will go—you should feel it hit a stop inside the joint (this is the internal ridge that prevents over-insertion). Then, take a second aluminum pipe and slide it into the other side of the joint, again pushing until it hits the stop.
Now, check the alignment: Are the pipes perfectly straight? If one pipe is angled even slightly, the joint isn't seated correctly. Pull the pipes out, check for debris in the joint, and try again. If the pipes still won't align, double-check that your cuts were straight—an angled cut will always cause misalignment.
Also, measure the total length of the assembled section (pipe + joint + pipe). Does it match your project's specifications? If it's too long or too short, now's the time to adjust—either trim a pipe slightly (if too long) or replace it with a longer one (if too short). Dry fitting saves you from disassembling a fully tightened joint later!
5
Secure the Joint with Hex Bolts
Once your dry fit looks good, it's time to secure the joint. External straight aluminum joints typically have two hex bolts (one on each side) that tighten against the aluminum pipe, holding it in place. Here's how to do it:
Step 5.1: Loosen the bolts first. Before inserting the pipes again, use your hex key to loosen the bolts in the joint. Turn them counterclockwise until they're loose enough that the pipe can slide in without resistance—you don't need to remove them completely, just back them out 2-3 turns.
Step 5.2: Re-insert the pipes. Slide the first pipe into the joint until it hits the internal stop, then do the same with the second pipe. Make sure both pipes are fully seated—if one is sticking out more than the other, the joint will be uneven.
Step 5.3: Tighten the bolts (finger-tight first). Hold the joint steady with one hand (or use an aluminum pipe clamp to secure the joint to a workbench if you're alone). With your hex key, tighten each bolt clockwise until you feel resistance—this is "finger-tight." Don't overdo it yet—you'll fully tighten after checking alignment.
Step 5.4: Check for rotation. Gently twist the pipes back and forth—they shouldn't rotate inside the joint. If they do, the bolts are too loose; tighten them a little more until the pipes feel secure but still allow for minor adjustments.
Step 5.1: Loosen the bolts first. Before inserting the pipes again, use your hex key to loosen the bolts in the joint. Turn them counterclockwise until they're loose enough that the pipe can slide in without resistance—you don't need to remove them completely, just back them out 2-3 turns.
Step 5.2: Re-insert the pipes. Slide the first pipe into the joint until it hits the internal stop, then do the same with the second pipe. Make sure both pipes are fully seated—if one is sticking out more than the other, the joint will be uneven.
Step 5.3: Tighten the bolts (finger-tight first). Hold the joint steady with one hand (or use an aluminum pipe clamp to secure the joint to a workbench if you're alone). With your hex key, tighten each bolt clockwise until you feel resistance—this is "finger-tight." Don't overdo it yet—you'll fully tighten after checking alignment.
Step 5.4: Check for rotation. Gently twist the pipes back and forth—they shouldn't rotate inside the joint. If they do, the bolts are too loose; tighten them a little more until the pipes feel secure but still allow for minor adjustments.
6
Check Alignment with a Level
Even if your dry fit looked straight, tightening the bolts can sometimes pull the pipes slightly out of alignment. Now's the time to confirm that your assembled section is perfectly straight—this is especially important for horizontal beams (like workbench tops) or vertical supports (like rack legs).
Place your level along the top of the assembled pipes. The bubble in the level should sit exactly between the two lines—if it's off to one side, the pipes are slanting. To fix this, loosen the bolts slightly, adjust the pipes until the bubble is centered, then retighten the bolts finger-tight.
For vertical structures (like the legs of a workbench), hold the level vertically against the pipe. Again, the bubble should be centered. If the pipe leans left or right, gently bend it (aluminum is flexible enough for small adjustments) or loosen the joint, reposition, and retighten.
Pro tip: For long sections (over 6 feet), check alignment in the middle as well as the ends. Pipes can sag slightly in the middle, even if the ends are straight—use a second level or a straightedge to ensure the entire length is flat.
Place your level along the top of the assembled pipes. The bubble in the level should sit exactly between the two lines—if it's off to one side, the pipes are slanting. To fix this, loosen the bolts slightly, adjust the pipes until the bubble is centered, then retighten the bolts finger-tight.
For vertical structures (like the legs of a workbench), hold the level vertically against the pipe. Again, the bubble should be centered. If the pipe leans left or right, gently bend it (aluminum is flexible enough for small adjustments) or loosen the joint, reposition, and retighten.
Pro tip: For long sections (over 6 feet), check alignment in the middle as well as the ends. Pipes can sag slightly in the middle, even if the ends are straight—use a second level or a straightedge to ensure the entire length is flat.
7
Fully Tighten the Bolts (Final Torque)
With alignment confirmed, it's time to fully tighten the bolts. This step ensures the joint can handle the weight and stress of your structure. But be careful—over-tightening can strip the threads in the joint or even crush the aluminum pipe (especially thin-walled varieties).
Use your hex key to tighten each bolt in a "cross" pattern—tighten one bolt a quarter-turn, then the other bolt a quarter-turn, repeating until both are snug. This prevents uneven pressure, which can warp the joint. How tight is "snug"? You should feel resistance, and the bolt shouldn't turn with gentle pressure on the hex key. If you hear a "creaking" sound from the aluminum, you've tightened too much—back off slightly.
After tightening, give the pipes a firm shake. They shouldn't move or wiggle inside the joint. If they do, the bolts might be loose, or the pipe might not be fully seated—check both and retighten if needed.
Use your hex key to tighten each bolt in a "cross" pattern—tighten one bolt a quarter-turn, then the other bolt a quarter-turn, repeating until both are snug. This prevents uneven pressure, which can warp the joint. How tight is "snug"? You should feel resistance, and the bolt shouldn't turn with gentle pressure on the hex key. If you hear a "creaking" sound from the aluminum, you've tightened too much—back off slightly.
After tightening, give the pipes a firm shake. They shouldn't move or wiggle inside the joint. If they do, the bolts might be loose, or the pipe might not be fully seated—check both and retighten if needed.
8
Test the Structure's Stability
You've installed the external straight aluminum joint—now it's time to test the entire structure (or the section you've built so far). Stability testing ensures that the joint can handle real-world use, whether that's supporting tools on a workbench or holding boxes on a material rack.
For horizontal sections (e.g., workbench tops): Apply downward pressure in the middle of the section. Push firmly with both hands—if the section bends or the joint shifts, it's not tight enough. Check the bolts and retighten.
For vertical sections (e.g., rack legs): Push sideways on the top of the structure. It should sway slightly (all structures have minor flex) but return to vertical immediately. If it leans or the joint moves, check alignment and bolt tightness.
For load-bearing structures: Add weight gradually. Start with a light load (e.g., a few boxes on a rack) and gradually increase to the maximum expected weight. Watch for signs of stress: bending pipes, creaking joints, or shifting bolts. If anything seems off, disassemble and recheck your installation.
Remember: A structure is only as strong as its weakest joint. Take the time to test thoroughly—you'll avoid costly repairs or accidents later.
For horizontal sections (e.g., workbench tops): Apply downward pressure in the middle of the section. Push firmly with both hands—if the section bends or the joint shifts, it's not tight enough. Check the bolts and retighten.
For vertical sections (e.g., rack legs): Push sideways on the top of the structure. It should sway slightly (all structures have minor flex) but return to vertical immediately. If it leans or the joint moves, check alignment and bolt tightness.
For load-bearing structures: Add weight gradually. Start with a light load (e.g., a few boxes on a rack) and gradually increase to the maximum expected weight. Watch for signs of stress: bending pipes, creaking joints, or shifting bolts. If anything seems off, disassemble and recheck your installation.
Remember: A structure is only as strong as its weakest joint. Take the time to test thoroughly—you'll avoid costly repairs or accidents later.
9
Add Accessories (If Needed)
Once your external straight aluminum joint is secure and the structure is stable, you might want to add accessories to complete your project. Common aluminum profile accessories include end caps (to cover sharp pipe ends), pipe clamps (to attach shelves or tools), or caster wheels (for mobile trolleys).
For example, if you're building a workbench, you might attach a shelf using aluminum pipe clamps—these clamp onto the aluminum pipe and provide a mounting point for the shelf. Make sure to position accessories at least 2-3 inches away from the external straight aluminum joint—this avoids putting extra stress on the joint itself.
When adding accessories, tighten their bolts to the same "snug" standard as the joint bolts—over-tightening can damage the pipe or the accessory.
For example, if you're building a workbench, you might attach a shelf using aluminum pipe clamps—these clamp onto the aluminum pipe and provide a mounting point for the shelf. Make sure to position accessories at least 2-3 inches away from the external straight aluminum joint—this avoids putting extra stress on the joint itself.
When adding accessories, tighten their bolts to the same "snug" standard as the joint bolts—over-tightening can damage the pipe or the accessory.

Troubleshooting Common Issues
Even with careful installation, things can go wrong. Here are the most common problems you might encounter when installing external straight aluminum joints—and how to fix them:
| Issue | Cause | Solution |
|---|---|---|
| Pipe won't slide into the joint | Burrs on the pipe end, bolts too tight, or debris inside the joint | Deburr the pipe again with sandpaper; loosen the joint bolts; use a cloth to wipe debris from inside the joint. |
| Joint feels loose after tightening | Pipes not fully seated in the joint, bolts stripped, or pipe diameter too small for the joint | Ensure pipes hit the internal stop; replace stripped bolts; check that the joint size matches the pipe diameter (e.g., 28mm joint for 28mm pipe). |
| Structure wobbles side-to-side | Joints misaligned, bolts under-tightened, or uneven pipe lengths | Use a level to realign pipes; retighten bolts; measure pipe lengths to ensure they're equal. |
| Hex key slips when tightening bolts | Wrong hex key size, dirt in the bolt head, or stripped bolt | Use the correct size hex key; clean the bolt head with a toothpick; replace stripped bolts. |
| Aluminum pipe bends when tightening | Bolts over-tightened or pipe wall too thin for the joint | Loosen bolts slightly; use thicker-walled aluminum pipe for heavy-load applications. |

Maintaining Your External Straight Aluminum Joints
Installing your joints correctly is the first step—but regular maintenance will keep your structure strong and reliable for years. Here's how to care for your external straight aluminum joints:
- Inspect bolts monthly. Over time, vibration (from machinery, foot traffic, or moving parts) can loosen bolts. Once a month, check each joint with a hex key—tighten any bolts that feel loose. This is quick and prevents major issues.
- Clean joints quarterly. Dust, grease, and workshop grime can build up in the joint's crevices, making it harder to adjust bolts later. Wipe joints with a damp cloth and mild soap, then dry thoroughly to prevent corrosion (especially if you're in a humid environment).
- Lubricate bolts annually. A tiny drop of machine oil on the hex bolt threads will make them easier to tighten or loosen later. Avoid over-lubricating—excess oil attracts dust.
- replace worn joints immediately. If a joint cracks, the plastic components degrade, or the bolts strip beyond repair, replace it right away. A damaged joint is a weak link that can compromise the entire structure.
- Protect from extreme conditions. Aluminum resists rust, but prolonged exposure to saltwater (e.g., coastal workshops) or harsh chemicals can corrode it. If your structure is outdoors or in a corrosive environment, consider using stainless steel bolts or applying a protective coating to the joints.
Remember, the key is patience and attention to detail. Rushing through measurements or skipping the dry fit step can lead to headaches later. But with the right tools, a little practice, and this guide in hand, you'll be assembling aluminum structures like a pro in no time. Whether you're building a simple workbench or a complex material handling system, the external straight aluminum joint is your ally—treat it with care, and it will serve you well.
Now go out there and build something great!