- Company Articles
- Products and Technology
- Installation And Maintenance
- How to Install Internal Straight Aluminum Joints: Step-by-Step Installation Guide

How to Install Internal Straight Aluminum Joints: Step-by-Step Installation Guide
Related Product
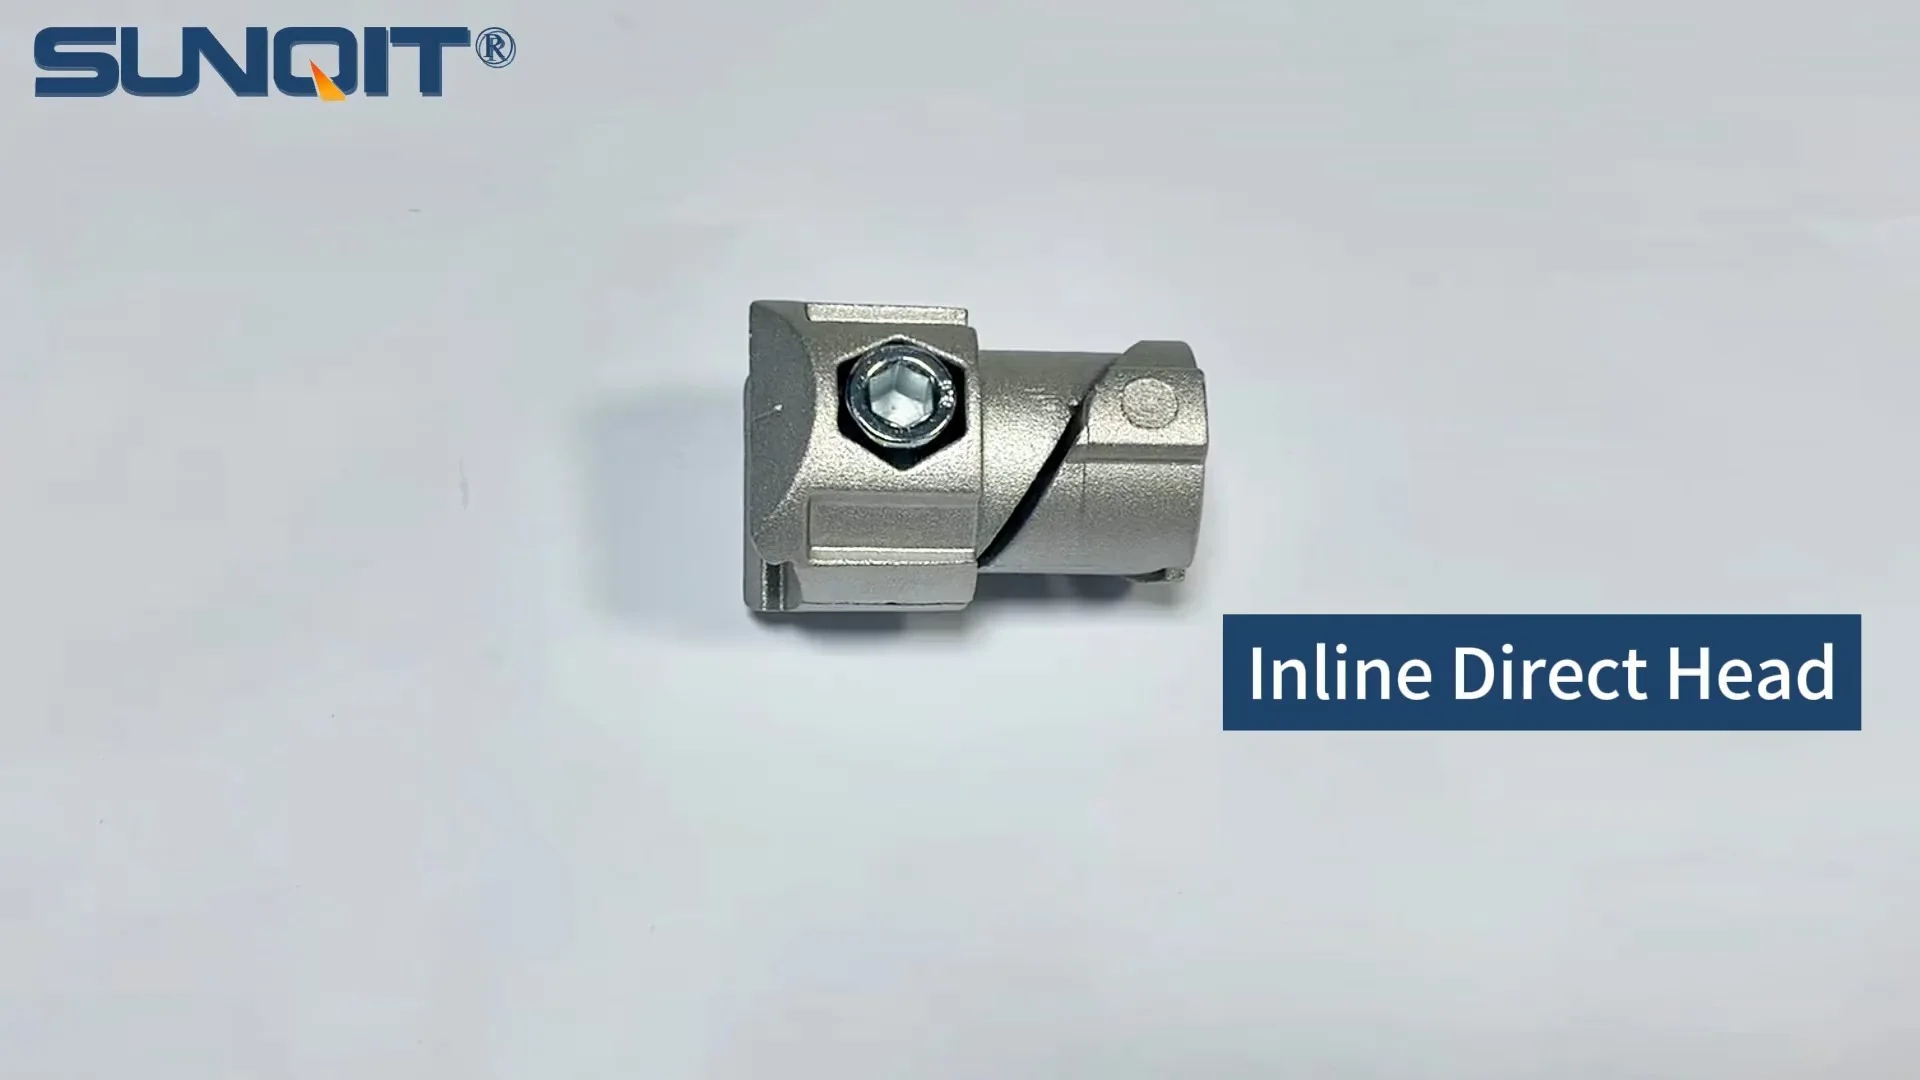
Internal straight aluminum joint
Aluminum pipe joint inside connection used for two pcs 28pcs aluminum pipe connection in straight angle,it connects two pcs pipe from inside.
If you've ever worked with aluminum lean pipe systems—whether building a workshop workbench, a material rack for your warehouse, or a custom production line—you know that the strength and flexibility of these setups depend entirely on the quality of their connections. At the heart of many of these connections are internal straight aluminum joints: unassuming but critical components that hold aluminum pipes together, ensuring stability, alignment, and durability. Whether you're a seasoned facility manager, a DIY enthusiast, or a small business owner setting up your first production area, mastering the installation of these joints is key to building reliable, long-lasting structures. In this guide, we'll walk you through the entire process, from gathering tools to troubleshooting common issues, with a focus on making the task feel approachable and actionable. Along the way, we'll touch on essential elements like aluminum pipe, aluminum lean pipe, and the aluminum pipe accessories that make these systems so versatile. Let's dive in.
Understanding Internal Straight Aluminum Joints: What Are They, and Why Do They Matter?
Before we pick up any tools, let's start with the basics: What exactly is an internal straight aluminum joint? Simply put, it's a cylindrical or tube-shaped connector designed to fit
inside
the ends of two aluminum pipes, joining them in a straight line. Unlike external joints that clamp around the outside of pipes, internal straight joints sit flush within the pipe's inner diameter, creating a sleek, low-profile connection that minimizes bulk and maximizes space efficiency. This makes them ideal for applications where clean lines or tight clearances are important—think conveyor systems, shelving units, or workbenches where every inch of surface area counts.
But their value goes beyond aesthetics. Internal straight aluminum joints are engineered to distribute weight evenly across connected pipes, reducing stress on individual components and preventing bending or warping over time. They're typically made from high-grade aluminum alloy, which offers a winning combination of lightweight design and impressive strength—perfect for supporting heavy loads without adding unnecessary heft to your structure. Plus, aluminum's natural resistance to corrosion means these joints hold up well in humid workshops, warehouses, or even outdoor settings (with proper maintenance), outlasting plastic or steel alternatives in many environments.
To work effectively, these joints rely on a precise fit with the aluminum pipes they connect. Most internal straight joints are designed for specific pipe diameters—common sizes include 28mm, 30mm, or 40mm—so it's crucial to match the joint size to your aluminum lean pipe. Mismatched sizes can lead to loose connections (which compromise stability) or overly tight fits (which risk damaging pipes or joints during installation). This is where attention to detail matters: taking the time to confirm your pipe's inner diameter and the joint's outer diameter before starting will save you headaches later.
Pro Tip:
Not sure if you have the right joint for your pipe? Grab a digital caliper (or a ruler, if you don't have one) and measure the inner diameter of your aluminum pipe. Then compare it to the outer diameter of the joint—there should be a snug but not forced fit. A gap of 0.5mm to 1mm is normal (this allows for easy insertion while still ensuring a tight bond once installed).
Tools and Materials You'll Need
Installing internal straight aluminum joints doesn't require a fully equipped machine shop, but having the right tools on hand will make the process smoother and more efficient. Below is a breakdown of what you'll need, organized by category to help you gather everything before you start.
Essential Tools
- Allen Wrench Set (Hex Keys): Many internal straight joints use set screws or grub screws to secure the joint to the pipe. These are almost always tightened with Allen wrenches, so having a set with sizes ranging from 2mm to 6mm (common for aluminum pipe accessories) is a must.
- Measuring Tape or Ruler: Precision is key when aligning pipes. A 25-foot measuring tape works for longer spans, while a 12-inch ruler is handy for fine-tuning joint placement.
- Level (Bubble or Digital): To ensure your connected pipes are perfectly straight (no one wants a wobbly workbench!), a level will help confirm horizontal and vertical alignment.
- Rubber Mallet: For gently tapping joints into place without damaging the aluminum (never use a steel hammer—aluminum is soft and can dent easily).
- Deburring Tool or Sandpaper (80–120 Grit): Aluminum pipe ends often have sharp burrs or rough edges from cutting. Deburring removes these, preventing scratches and ensuring the joint seats properly.
- Cleaning Cloth or Paper Towels: Aluminum oxidizes over time, forming a thin layer of aluminum oxide on the surface. Wiping down pipes and joints with a clean cloth removes this layer, improving grip and ensuring a tight fit.
- Pencil or Marker: For marking pipe ends and joint positions—opt for a pencil if you need to erase marks later, or a permanent marker for darker aluminum finishes.
Materials You'll Need
Beyond tools, you'll need the components that make up your connection. Here's what to gather:
- Internal Straight Aluminum Joints: Ensure you have enough for your project—always grab a few extras, just in case of damage during installation.
- Aluminum Lean Pipe: The pipes themselves! Most internal joints are designed for round aluminum lean pipe, but double-check that your pipe's inner diameter matches the joint's specifications.
- Aluminum Pipe Accessories (Optional): Depending on your project, you might need end caps (to cover sharp pipe ends), pipe cleaners (for deep cleaning), or anti-corrosion spray (to protect joints in humid environments).
- Isopropyl Alcohol or Mild Detergent: For cleaning pipes and joints—avoid harsh chemicals like bleach, which can damage aluminum's protective oxide layer.
Safety First:
Don't forget personal protective equipment! Aluminum burrs can be sharp, so wear work gloves to protect your hands. Safety glasses are also a good idea when tapping joints into place—tiny metal shavings can fly unexpectedly.

Pre-Installation Preparation: Setting Yourself Up for Success
Installation day isn't the time to realize your pipes are dirty, your joint is cracked, or your workspace is too cramped. A little prep work goes a long way toward a smooth process. Let's walk through the key steps to take before you start connecting pipes.
Step 1: Inspect Your Components for Damage
Start by laying out all your internal straight aluminum joints, aluminum lean pipes, and aluminum pipe accessories on a clean, flat surface—a workbench or even a large sheet of cardboard works well. Examine each joint closely for signs of damage: cracks, dents, or bent edges can weaken the connection or prevent a proper fit. Check the inner and outer surfaces for rough spots or manufacturing defects (like uneven molding), which might make insertion difficult.
Next, inspect your aluminum pipes. Look for dents, kinks, or (flattened sections) at the ends—these can prevent the joint from seating fully. If a pipe is slightly bent, you may be able to straighten it gently with your hands (for small bends) or a pipe straightener (for larger ones), but severely damaged pipes should be replaced. Finally, check that the pipe ends are square (perpendicular to the pipe's length). A crooked cut will make alignment nearly impossible, so if you notice this, you may need to recut the pipe with a hacksaw or pipe cutter (use a miter box to ensure a straight edge).
Step 2: Clean Pipes and Joints Thoroughly
Aluminum is prone to forming a thin layer of aluminum oxide when exposed to air—a white, powdery substance that can act as a barrier between the joint and pipe, preventing a tight bond. To remove this, wipe each pipe end and joint with a cloth dampened in isopropyl alcohol or mild detergent. For stubborn oxide buildup, use a soft-bristled brush (like an old toothbrush) to scrub the inner surface of the pipe and the outer surface of the joint. Dry everything thoroughly with a clean towel—moisture can lead to new oxide formation, so you want all surfaces to be completely dry before installation.
While you're cleaning, take a moment to deburr the pipe ends. Even if your pipes came pre-cut, factory edges can have tiny burrs that catch on the joint during insertion. Use a deburring tool (run it around the inner and outer edges of the pipe end) or fold a piece of 120-grit sandpaper into a small pad and gently sand the edges until they're smooth to the touch. This step might seem minor, but it prevents scratches on the joint and ensures the pipe slides into place without resistance.
Step 3: Measure and Mark Your Pipe Ends
Now it's time to plan where the joint will sit. For most projects, you'll want the joint to be centered between the two pipes it connects, but the exact placement depends on your design. For example, if you're building a 4-foot-long shelf, you might connect two 2-foot pipes with a joint in the middle. If you're adding a branch (though internal straight joints are for straight lines—for angles, you'd use other joint types), you'll need to mark where the straight section ends and the branch begins.
To mark the pipe, measure the length of the joint (most internal straight joints are 2–4 inches long) and divide that by two—this gives you the distance each pipe should overlap with the joint. For example, a 3-inch joint would require 1.5 inches of overlap from each pipe. Use your pencil to mark this overlap length on the end of each pipe. This ensures the joint sits evenly between the two pipes, distributing weight evenly and preventing one side from bearing more stress than the other.
Step 4: Set Up Your Workspace
Finally, clear a workspace large enough to lay out your pipes and joints flat. A level surface is critical—if your workbench or floor is uneven, it will throw off your alignment. If you're working on the floor, lay down a sheet of plywood or a rubber mat to protect the pipes from scratches. Gather all your tools and materials within arm's reach—nothing slows down a project like hunting for a missing Allen wrench mid-installation.

Step-by-Step Installation: Putting It All Together
With prep work done, you're ready to start installing the internal straight aluminum joint. Follow these steps carefully, and don't rush—taking your time here ensures a strong, stable connection that will last for years.
Step 1: Prepare the Pipe Ends for Insertion
Grab one of your aluminum lean pipes and the internal straight joint. Double-check that the pipe end is clean, deburred, and marked with your overlap line. If the joint has set screws (small screws that tighten against the pipe to secure the joint), ensure they're fully loosened before insertion—you'll tighten them later. Some joints have a smooth outer surface (press-fit design), while others have threads or knurling to improve grip; either way, the goal is to get the joint into the pipe without forcing it.
If the joint feels tight when you first try to slide it into the pipe, don't panic—this is normal. Aluminum pipes can have slight variations in inner diameter, and a snug fit is better than a loose one. To help the joint slide in, try rubbing a small amount of dish soap (or a specialized pipe lubricant, if you have it) on the joint's outer surface—this acts as a temporary lubricant that won't damage the aluminum. Avoid oil-based lubricants, though, as they can attract dust and grime over time, weakening the connection.
Step 2: insert the Joint into the First Pipe
Hold the pipe firmly in one hand (or clamp it gently to your workbench, if you have a vice) and align the joint with the pipe's open end. Slowly push the joint into the pipe, using your marked overlap line as a guide—stop when the joint is inserted up to the line. If it's a press-fit joint, you may need to tap it lightly with a rubber mallet to seat it fully. To do this, place a scrap piece of wood or a rubber block against the end of the joint (to protect it from dents) and tap gently until the joint reaches the mark.
For joints with set screws: Once the joint is inserted to the overlap line, use your Allen wrench to tighten the set screws
slightly
—just enough to hold the joint in place, but not so tight that you can't adjust it later. This "temporary tightness" prevents the joint from sliding out while you connect the second pipe.
Step 3: Align and insert the Second Pipe
Now it's time to connect the second pipe. Lay the first pipe (with the joint partially inserted) flat on your workspace. Take the second pipe, align its marked end with the exposed part of the joint, and slide it onto the joint. Again, use your overlap line as a guide—both pipes should meet at the center of the joint, with equal overlap on each side. If the second pipe feels tight, apply a little more dish soap to the joint's exposed end and wiggle it gently as you push—this helps it slide into place without binding.
Once both pipes are on the joint, check that the entire assembly is straight. Lay a level along the top of the connected pipes—if the bubble is off-center, gently twist or adjust the pipes until they're aligned. Even a small misalignment can cause stress on the joint over time, leading to loosening or failure, so take the time to get this right.
Step 4: Secure the Joint (For Set Screw Designs)
If your internal straight aluminum joint has set screws, now is the time to tighten them fully. Using your Allen wrench, turn each screw clockwise until it's snug against the pipe. Be careful not to overtighten—aluminum is soft, and stripping the screw or denting the pipe is easy. A good rule of thumb: tighten until you feel resistance, then give the wrench a
very
slight extra turn (about 1/8 of a rotation). This ensures a secure grip without damaging the pipe.
If your joint has multiple set screws (common on larger diameters), tighten them in a crisscross pattern—like tightening lug nuts on a car wheel. This distributes pressure evenly around the pipe, preventing warping or uneven stress. For example, if there are four screws, tighten the top one, then the bottom, then the left, then the right.
Step 5: Finalize the Connection (For Press-Fit Designs)
Press-fit internal joints (those without set screws) rely on friction to stay in place. Once both pipes are on the joint and aligned, you'll need to "seat" the joint fully. Place a rubber mallet against the end of one pipe and tap gently—this drives the pipe further onto the joint, increasing the friction between the joint's outer surface and the pipe's inner wall. Alternate tapping both ends of the connected pipes to ensure even insertion. Stop when you can't push the joint any further, or when the overlap marks on both pipes meet at the center of the joint.
To test if the press-fit is secure, grab both pipes and try to twist them back and forth. There should be no movement—if they wiggle, tap them a bit more. If they still move, the joint may be too loose for your pipe's diameter (in which case you may need a different size joint) or the pipe may be damaged (check for dents or sections).
Step 6: Verify Alignment and Stability
With the joint secured, it's time to double-check your work. Lay the connected pipes flat and place your level along the top—again, the bubble should be centered. Then, lift the assembly at both ends and check for sagging in the middle (a sign of misalignment or uneven overlap). If everything looks good, give the pipes a gentle shake—there should be no rattling or movement at the joint.
For extra peace of mind, apply a small amount of pressure to the joint area (push down gently with your hand). The connection should feel solid, with no flexing or bending. If you notice any weakness, revisit your overlap marks—you may have inserted the joint too far into one pipe, leaving the other side under-supported. Loosen the set screws (or tap the pipes apart slightly for press-fit joints) and readjust the overlap, then re-secure.
Step 7: Repeat for Additional Joints (If Needed)
If your project requires multiple straight connections (e.g., a long conveyor track or a shelving unit with multiple sections), repeat steps 1–6 for each internal straight aluminum joint. Take care to align all connected pipes with each other—use a string line or a long straightedge to ensure the entire structure stays straight, not just individual sections. This is especially important for load-bearing structures like material racks, where uneven alignment can lead to collapse under heavy weight.
Step 8: Add Aluminum Profile Accessories (Optional)
Once your straight connections are secure, you can enhance your structure with aluminum profile accessories. For example, if you're building a workbench, you might add end caps to the pipe ends to prevent snags, or attach a plywood top using brackets. If it's a material rack, you could add roller tracks (using roller track connectors) to create a sliding shelf. These accessories are designed to work seamlessly with aluminum lean pipe systems, so installation is usually as simple as clamping or screwing them into place—just follow the manufacturer's instructions for your specific accessory.
Troubleshooting Common Issues: What to Do When Things Go Wrong
Even with careful preparation, installation hiccups happen. Here are the most common problems you might encounter and how to fix them.
Issue 1: The Joint Won't Slide Into the Pipe
If the joint feels stuck when you try to insert it, first check for burrs or debris inside the pipe—even a tiny metal shard can block insertion. Use a deburring tool or a pipe cleaner to clear the pipe's inner diameter. If the pipe is clean, the joint may be too large for the pipe (a common issue if you're mixing brands or using non-standard sizes). Measure the joint's outer diameter and the pipe's inner diameter with a caliper—if the joint is more than 0.5mm larger than the pipe, it's not the right fit. replace it with a smaller joint.
Issue 2: The Joint Is Loose After Installation
A loose joint is usually caused by one of two things: under-tightened set screws (for screw-type joints) or insufficient overlap (for press-fit joints). For set screws, try tightening them a bit more (but stop if you feel resistance—stripping is worse than looseness). For press-fit joints, check your overlap marks—if the pipes aren't inserted up to the marks, tap them further onto the joint with a rubber mallet. If the joint still wiggles, the pipe may be too large for the joint (inner diameter too big), in which case you'll need a larger joint.
Issue 3: The Connected Pipes Are Crooked
Crooked pipes often stem from uneven overlap or a tilted workspace. Loosen the joint (or tap the pipes apart) and recheck your overlap marks—ensure both pipes are inserted to the same depth. Then, use a level to realign the pipes before re-securing the joint. If your workspace is uneven, shim one end of the pipe with a small block of wood to level it out during installation.
Issue 4: The Set Screws Strip or Break
Stripped screws are almost always due to overtightening. If a screw strips, try using a larger Allen wrench (sometimes a slightly bigger size can grip the stripped edges) or a screw extractor tool. If the screw breaks off inside the joint, you may need to drill it out (this is tricky—if you're not comfortable, replace the joint entirely). To avoid this, always use the correct size Allen wrench and stop tightening when you feel resistance.
Maintenance Tips: Keeping Your Joints in Top Shape
Installing internal straight aluminum joints is just the first step—proper maintenance ensures they stay strong and reliable for years. Here's how to care for your connections:
- Inspect Regularly: Every few months, check the joints for looseness, especially in high-vibration areas (like near conveyor motors). Tighten set screws if they've worked loose—vibration can cause them to back out over time.
- Clean Annually: Wipe down joints and pipes with a damp cloth to remove dust and grime. For outdoor or humid environments, spray the joint area with a light coat of anti-corrosion spray (avoid oil-based sprays, which attract dirt).
- replace Damaged Joints: If a joint cracks, bends, or shows signs of corrosion, replace it immediately. A damaged joint is a weak link that can compromise the entire structure.
- Lubricate Set Screws (If Needed): If set screws become hard to turn, apply a tiny drop of graphite lubricant (not oil) to the threads—this makes tightening and loosening easier without attracting dust.
Conclusion: You're Ready to Build Stronger, Smarter Structures
Installing internal straight aluminum joints might seem intimidating at first, but with the right tools, preparation, and a little patience, it's a skill anyone can master. These small but mighty components are the backbone of aluminum lean pipe systems, enabling everything from simple workbenches to complex production lines. By following the steps in this guide—from cleaning and measuring to aligning and securing—you'll create connections that are strong, stable, and built to last.
Remember, the key to success is attention to detail: deburring pipe ends, verifying alignment with a level, and avoiding overtightening. And don't forget to pair your joints with quality aluminum pipe, aluminum lean pipe, and aluminum pipe accessories—investing in good materials pays off in durability and performance. Whether you're upgrading your workshop, optimizing your warehouse, or building something entirely new, you now have the knowledge to tackle the job with confidence. Happy building!