- Company Articles
- Products and Technology
- Installation And Maintenance
- How to Install Lean Pipe Clamps Correctly: Step-by-Step Tutorial

How to Install Lean Pipe Clamps Correctly: Step-by-Step Tutorial
Related Product
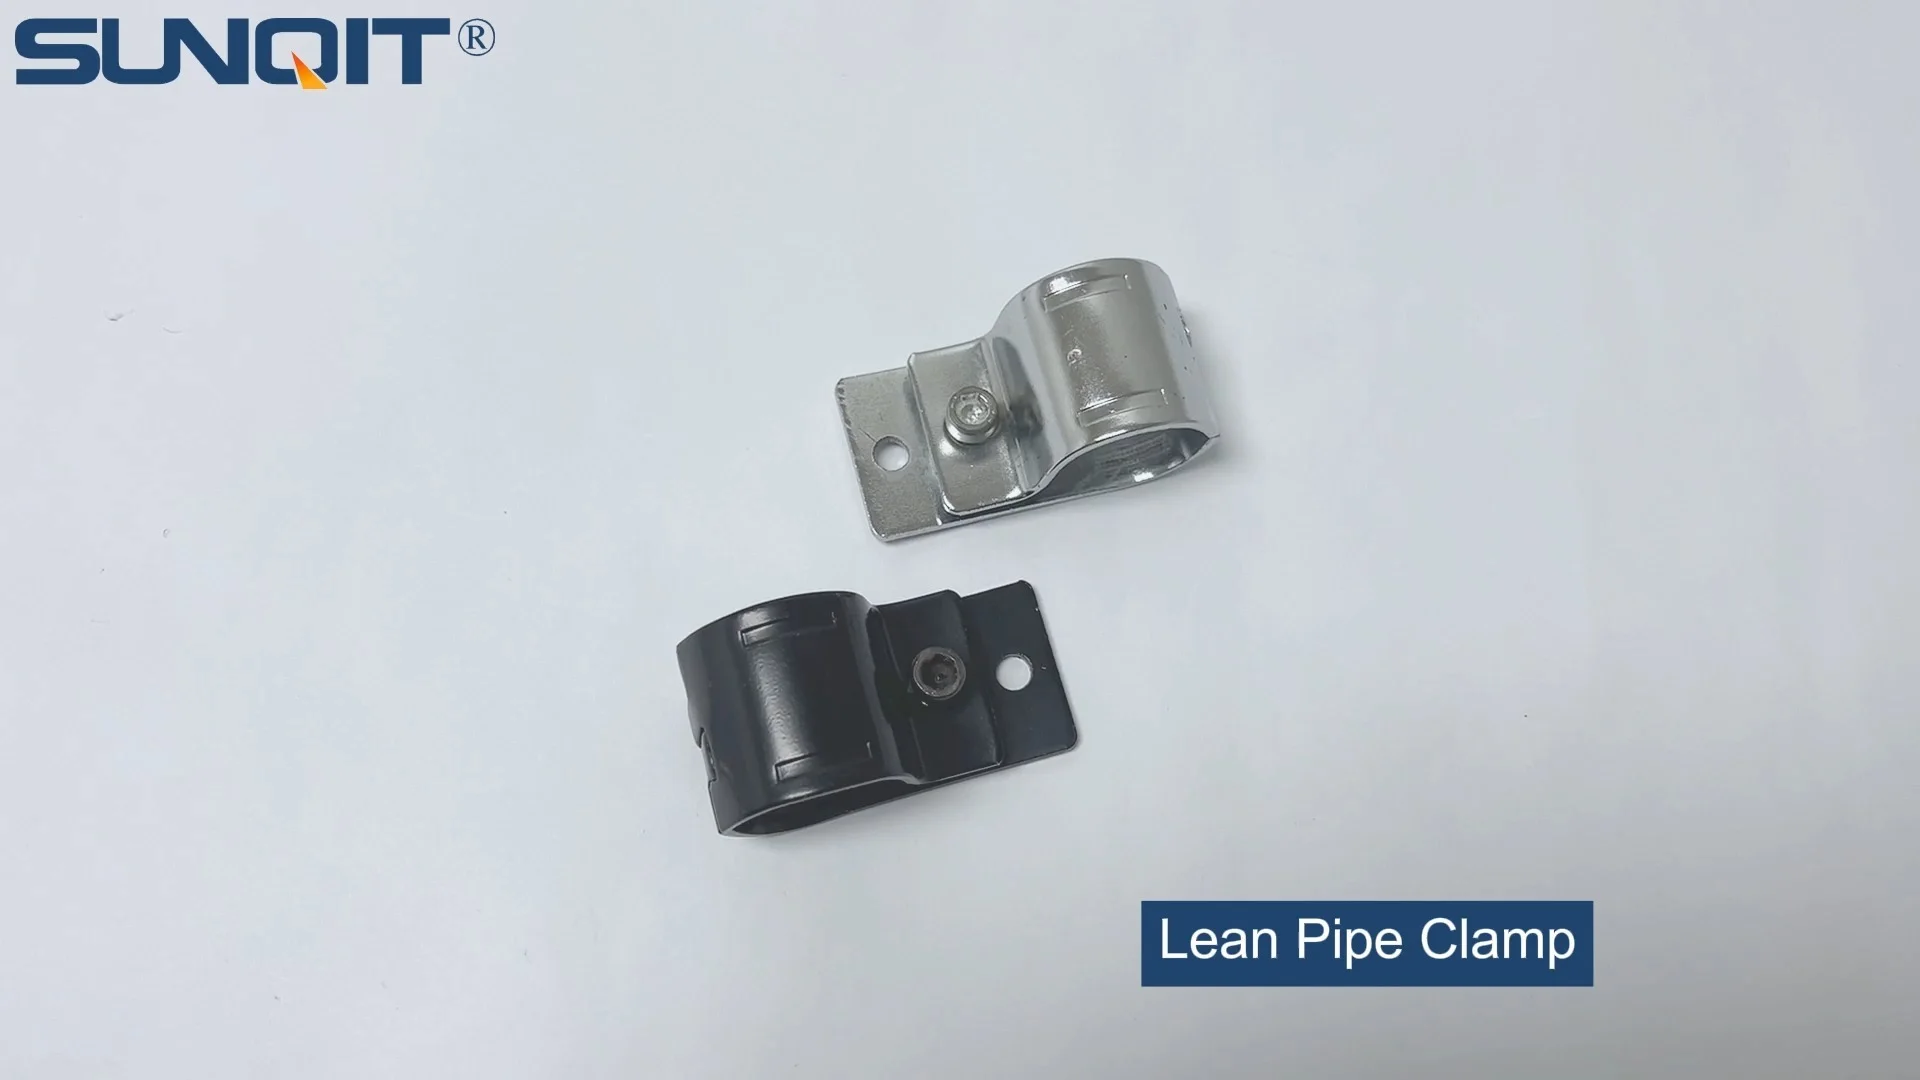
Lean Pipe Clamp
Lean pipe clamp is used for rack system hang monitor or other panel for workbenck, flowrack in production daily use.
Imagine walking into a busy manufacturing workshop: workers move efficiently between stations, parts glide smoothly along flow racks, and every tool has its place. What makes this seamless workflow possible? Often, it's the unsung heroes of lean systems—lean pipe clamps. These small but mighty components hold together the backbone of your workspace, from workbenches to material racks. But here's the thing: if they're installed incorrectly, that efficiency can quickly turn into frustration. Wobbly workbenches, loose pipes, and even safety hazards can creep in, slowing down production and risking accidents. That's why getting lean pipe clamp installation right isn't just a "nice-to-have"—it's the foundation of a reliable, productive lean system.
Whether you're setting up a new workspace or upgrading an existing one, this guide will walk you through installing lean pipe clamps like a pro. We'll cover everything from understanding what these clamps do to avoiding common mistakes, with plenty of tips to ensure your lean structure stays sturdy for years. Let's dive in.
What Are Lean Pipe Clamps, and Why Do They Matter?
First, let's clarify: lean pipe clamps are the connectors that bind lean pipes (also called "lean tubes") together. Think of them as the glue of your lean system—without them, you'd just have a pile of pipes and joints. These clamps come in various designs (like 90° joints, straight connectors, or swivel types) and materials (often aluminum or steel), but their core job is simple: create a tight, secure bond between pipes to build stable structures like workbenches, turnover trolleys, or flow racks.
Why does proper installation matter so much? For starters, a loose clamp can turn a solid workbench into a (wobbly) hazard. If you're assembling a material rack to hold heavy parts, a weak connection could lead to collapse, damaging inventory or injuring someone. Even small misalignments from poorly installed clamps can throw off the entire flow of your workspace—imagine a roller track that's slightly crooked, causing parts to get stuck mid-transport. Over time, these issues add up: wasted time fixing jams, increased maintenance costs, and even lost productivity. In short, getting clamps right saves you headaches (and money) down the line.
Pro Tip: Not all clamps are created equal! Always match your clamp type to the lean pipe size and material. For example, aluminum lean pipes work best with aluminum clamps, while steel pipes may require heavier-duty steel clamps. Check the manufacturer's specs to avoid compatibility issues.
Tools You'll Need: Gather These Before You Start
You wouldn't build a house without a hammer, and you shouldn't install lean pipe clamps without the right tools. Having everything on hand before you start will save you trips to the toolbox and keep the process smooth. Here's what you'll need:
| Tool | Why You Need It | Pro Tip |
|---|---|---|
| Hex Key (Allen Wrench) | Most lean pipe clamps use hex screws to tighten—this is your go-to for adjusting tension. | Get a set with multiple sizes; clamps often use 4mm, 5mm, or 6mm keys. |
| Level (Bubble or Digital) | Ensures your structure is straight (no leaning workbenches here!) | A 2-foot level works for small projects; use a 4-foot level for longer racks. |
| Rubber Mallet | Gently taps pipes into joints without damaging them (metal hammers can scratch or dent). | Opt for a mallet with a soft rubber head to avoid marring aluminum pipes. |
| Measuring Tape | Precisely marks where pipes and clamps should go—no guesswork! | Use a tape with metric measurements (most lean pipes are sized in millimeters). |
| Torque Wrench (Optional but Recommended) | Ensures you tighten clamps to the exact torque (prevents overtightening or under-tightening). | Look for a small torque wrench with a range of 5-15 Nm (common for lean clamps). |
| Work Gloves | Protects hands from sharp edges on pipes or metal clamps. | Choose nitrile or leather gloves for a better grip on slippery parts. |

Pre-Installation Prep: Set Yourself Up for Success
Before you start twisting clamps, take 10 minutes to prep—this step is easy to skip, but it's the secret to avoiding mistakes. Here's how:
1. Inspect Your Parts
Lay out all your components: lean pipes, clamps, joints, and any accessories (like end caps or foot bases). Check for damage: Are the clamp threads stripped? Do the pipes have dents or bends? Is the joint's inner diameter clean (no debris blocking the pipe)? Even a tiny nick in a clamp can weaken the connection, so toss any damaged parts—better to replace them now than deal with a collapse later.
Pro tip: If you're using new parts, some clamps might have factory-applied lubricant (to prevent rust). Wipe off excess with a clean cloth—too much lube can make tightening slippery.
2. Plan Your Structure
Sketch a quick diagram of your project (even a rough doodle works!) or refer to the manufacturer's blueprint. Note where each clamp goes: For a workbench, you'll need clamps at the corners (90° joints) and possibly mid-pipe supports for longer spans. For a flow rack, clamps will secure the vertical legs to horizontal roller tracks. Marking pipe lengths and clamp positions on paper first prevents "measure twice, cut once" regrets.
3. Clear Your Workspace
Find a flat, clean area to assemble—preferably a worktable or the floor (lay down a cardboard sheet to protect pipes from scratches). Make sure there's enough space to move around the structure as you build. If you're assembling something large (like a 6-foot rack), recruit a helper to hold pipes steady while you clamp—two hands are better than one for alignment!

Step-by-Step Installation: How to Install Lean Pipe Clamps
Now for the main event: installing the clamps. Follow these steps, and you'll have a rock-solid structure in no time.
Step 1: Measure and Mark Pipe Positions
Grab your measuring tape and mark where each clamp will go on the pipes. For example, if you're building a workbench with 40-inch vertical legs and 60-inch horizontal rails, mark the legs 40 inches from the bottom (where the horizontal rail will attach). Use a pencil or masking tape—avoid permanent markers, as they can rub off on products later.
Pro tip: For straight runs (like a horizontal beam), mark both ends of the pipe to ensure the clamp sits centered. For 90° joints, measure equal distances from the pipe end to keep corners square.
Step 2: Align Pipes and Joints
Slide the joint (the part that connects two pipes) onto one pipe first. For example, if you're using a 90° lean pipe joint, push one pipe into the joint's vertical socket until it hits the stop (most joints have an internal lip to prevent over-insertion). Then, take the second pipe (horizontal, in this case) and align its marked position with the joint's horizontal socket.
Hold the pipes steady—if they slip, your alignment will be off. A helper can hold one pipe while you position the other, or prop the vertical pipe against a wall (gently!) to free up your hands.
Step 3: insert the Clamp into the Joint
Most lean pipe joints have a dedicated slot or hole for the clamp. For example, a standard 90° joint might have a threaded hole on the side where the clamp screw fits. Take your clamp (it will look like a small metal bracket or a threaded bolt with a washer) and insert it into this hole, making sure it touches the pipe inside the joint.
Here's a key detail: The clamp should press firmly against the pipe's surface, but not so hard that it deforms the pipe. For aluminum pipes, which are softer than steel, be extra gentle here—you don't want to leave indentations.
Step 4: Tighten the Clamp with a Hex Key
Now, grab your hex key and start turning. Begin with a "hand-tight" twist—just enough to hold the pipe in place. Then, use the key to tighten gradually, turning ¼ turn at a time. Stop when you feel resistance—this is called "snug" tightness. If you're using a torque wrench, aim for 8-10 Nm (check the clamp's specs; some heavy-duty models need up to 12 Nm).
Avoid the urge to overtighten! Stripping the threads is a common mistake—once the clamp starts to "give" or spin without getting tighter, you've gone too far. If that happens, stop immediately and replace the clamp (stripped threads can't be fixed).
Step 5: Check Alignment with a Level
Now, set your level on top of the horizontal pipe (or along the vertical leg). If the bubble is off-center, gently loosen the clamp (½ turn) and adjust the pipe until the level reads straight. Retighten the clamp, then check again—sometimes tightening shifts the pipe slightly. Repeat until the structure is perfectly plumb (vertical) and level (horizontal).
Pro tip: For larger structures, check alignment after every 2-3 clamps. Fixing a small misalignment early is easier than correcting a whole rack that's leaning to one side.
Step 6: Secure Secondary Clamps (If Needed)
For long spans (like a horizontal pipe over 4 feet), add mid-pipe clamps or supports. For example, a workbench top might have a 6-foot horizontal rail—adding a clamp at the 3-foot mark (connected to a vertical support) prevents sagging under weight. These secondary clamps follow the same steps: align, insert, tighten, level.
Step 7: Test for Stability
Once all clamps are installed, give your structure a gentle shake. Does it wobble? If yes, check for loose clamps (retighten) or misaligned pipes (loosen and realign). Stand back and eye it from different angles—does it look straight? If you're building a workbench, place a heavy object (like a toolbox) on top and see if it sags—no movement means you're good to go!

Common Mistakes to Avoid (and How to Fix Them)
Even pros make mistakes—here are the ones to watch for, and how to course-correct:
Mistake 1: Overtightening the Clamp
Problem: Twisting the hex key until the clamp is "as tight as possible" can strip threads, crack the joint, or dent the pipe. Solution: Stop at "snug" tightness. If you hear a "creaking" sound from the plastic or metal, back off—you're overdoing it. replace stripped clamps immediately.
Mistake 2: Under-Tightening (The "That's Good Enough" Trap)
Problem: A clamp that's too loose will let the pipe rotate or slide, leading to a wobbly structure. Solution: After hand-tightening, give the hex key a ¼-turn more—this ensures a secure grip without overdoing it. Test by trying to twist the pipe by hand; if it moves, tighten another ⅛-turn.
Mistake 3: Misaligned Pipes
Problem: Pipes that aren't straight or at the right angle (e.g., a 90° joint that's actually 85°) create uneven weight distribution. Solution: Use the level after every clamp, and measure diagonally across square structures (like a workbench top). The diagonal distances should be equal—if not, adjust the corners until they are.
Mistake 4: Using the Wrong Clamp Type
Problem: Using a straight clamp for a 90° corner, or a light-duty clamp for heavy loads. Solution: Check the clamp's load rating! Most manufacturers list maximum weight (e.g., "supports 50kg per joint"). For vertical legs holding a heavy rack, use reinforced clamps with extra bolts.
Troubleshooting: Fixing Common Clamp Issues
Even with careful installation, you might run into snags. Here's how to fix them:
Issue: Clamp Keeps Loosening
Cause: Vibration from daily use (e.g., a workbench where tools are set down heavily) can loosen clamps over time. Fix: Apply a small drop of thread locker (like Loctite Blue) to the clamp screw before tightening—this prevents loosening but allows for future adjustments. Avoid red thread locker (it's permanent!).
Issue: Pipe Won't Fit into the Joint
Cause: Debris in the joint, or the pipe is slightly bent. Fix: Use a pipe cleaner or compressed air to clear the joint. If the pipe is bent, replace it—forcing a bent pipe into a joint will misalign the entire structure.
Issue: Clamp Slipping on the Pipe
Cause: The pipe's surface is too smooth (common with new aluminum pipes) or the clamp's gripping teeth are worn. Fix: Lightly sand the pipe's surface (where the clamp touches) with fine-grit sandpaper (200-grit) to create friction. If the clamp teeth are worn, replace the clamp—those teeth are critical for grip.
Maintenance: Keep Your Clamps (and Structure) Strong
Installing clamps isn't a "set it and forget it" job—regular maintenance keeps them tight and your structure safe. Here's what to do:
- Monthly Checks: Walk around your lean structure and give each clamp a gentle tug. Retighten any that feel loose (a ¼-turn with the hex key usually does it).
- Clean Clamps: Wipe clamps with a damp cloth to remove dust, oil, or grease—buildup can weaken grip over time. For outdoor structures, use a mild detergent to prevent rust.
- replace Worn Parts: If a clamp's teeth are dull, threads are stripped, or the joint is cracked, swap it out immediately. It's cheaper to replace one clamp than rebuild an entire structure.
- Adjust for Seasonal Changes: Extreme temperature shifts (e.g., a hot warehouse in summer) can cause pipes to expand/contract. Retighten clamps after major temperature changes to maintain stability.
Final Thoughts: Your Lean System Deserves Strong Clamps
Installing lean pipe clamps might seem like a small step, but it's the backbone of a functional, efficient workspace. When done right, these clamps create structures that support your team, streamline workflows, and stand up to daily use. Remember: measure carefully, align thoroughly, tighten gently, and test always. With these steps, you'll build lean systems that not only look professional but work harder for you—so you can focus on what matters most: keeping production moving, safely and smoothly.
Now go grab your tools, and start clamping—your future self (and your team) will thank you.