- Company Articles
- Products and Technology
- Installation And Maintenance
- How to Install Lean Pipe Fixed Clamps: Step-by-Step Installation Guide

How to Install Lean Pipe Fixed Clamps: Step-by-Step Installation Guide
Related Product
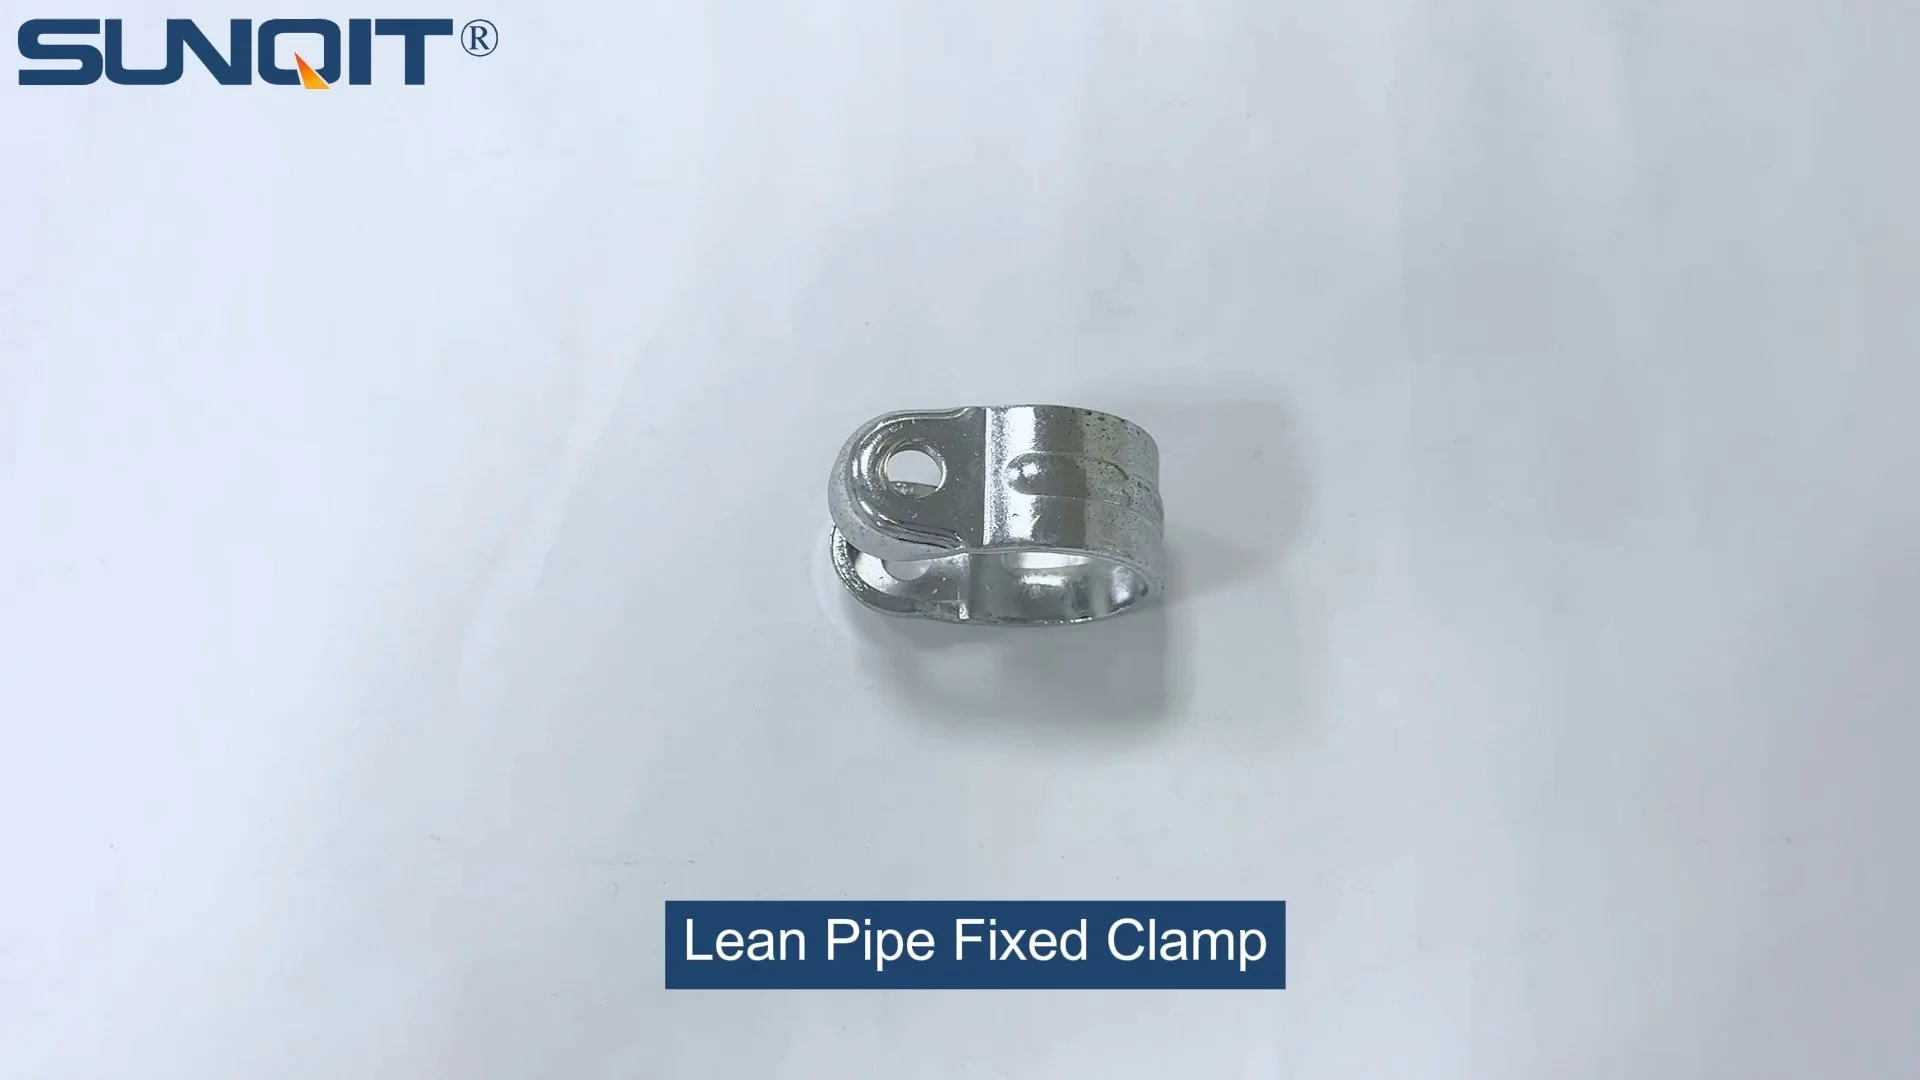
Lean Pipe Fixed Clamp
Lean pipe fixed clamp is used for pipe connector fixing the correct position during workbench flow rack hand trolley assemble work.
Let's start with a scenario we've all lived (or worked) through: You're in the middle of assembling a product on your workbench, and with a slight nudge, the entire setup wobbles. A tool rolls off the edge, and you mutter under your breath, "Why can't this thing just stay put?" If you've ever felt that frustration, you're not alone. Loose frames, shifting pipes, and unstable work surfaces are common headaches in workshops, factories, and even home garages. But here's the good news: The solution might be simpler than you think. Enter the lean pipe fixed clamp —a small but mighty component that can transform wobbly chaos into rock-solid stability.
Whether you're building a lean pipe workbench, constructing a flow rack for material handling, or putting together a turnover trolley, the fixed clamp is the unsung hero that holds everything together. It's not just about "tightening a bolt"; it's about creating a foundation that can withstand daily wear, heavy loads, and the inevitable bumps of a busy workspace. In this guide, I'll walk you through everything you need to know to install lean pipe fixed clamps like a pro—no fancy tools or engineering degree required. We'll cover why these clamps matter, the tools you'll need, step-by-step installation, troubleshooting common issues, and even pro tips to make your setup last for years. Let's dive in.
Why Lean Pipe Fixed Clamps Deserve Your Attention
Before we get our hands dirty, let's talk about why lean pipe fixed clamps are worth caring about. You might be thinking, "A clamp is a clamp, right?" Wrong. In the world of lean manufacturing and modular setups, not all clamps are created equal. Fixed clamps are designed specifically for one job: securing two lean pipes (or a pipe and a joint) in a rigid, non-movable position. Unlike swivel joints or adjustable connectors, which allow for flexibility, fixed clamps lock everything in place—no wiggle room, no gradual shifting, no unexpected surprises.
I've been in the industry long enough to see countless setups fail because of skimping on the right clamps. A flimsy clamp might hold for a week, but after repeated use—sliding materials, leaning on the workbench, or moving a trolley—the joint loosens. Suddenly, what was supposed to be a "lean" workflow becomes a series of stops to readjust, tighten, or even rebuild. That's wasted time, wasted energy, and unnecessary stress. A quality fixed clamp, installed correctly, eliminates that. It turns your modular setup from a "temporary fix" into a permanent, reliable asset.
Another reason to love fixed clamps? They're versatile. They work with standard lean pipes (often called "lean tubes"), aluminum pipes (which are lightweight but strong), and even stainless steel pipes for corrosive environments. Pair them with lean pipe joints, and you've got a system that can adapt to almost any project—from a small workbench in your garage to a full-scale production line in a factory. And here's a little secret: Most professionals don't just use them for "fixed" structures. They'll mix fixed clamps with adjustable joints to create setups that are both stable and flexible. For example, the legs of a workbench might use fixed clamps for stability, while the upper shelf uses swivel joints to adjust height as needed. It's the best of both worlds.
Pro Insight: The Cost of Cutting Corners
I once consulted with a small manufacturer that was using zip ties instead of fixed clamps to secure their flow rack pipes. "It's cheaper," they said. Six months later, they called me back—after a rack collapsed, damaging hundreds of dollars in parts. The moral? Saving $5 on a clamp isn't worth the risk of a $500 repair (or worse, an injury). Invest in quality fixed clamps upfront, and you'll save time, money, and headaches down the line.
Tools You'll Need: Gather These Before You Start
You wouldn't bake a cake without preheating the oven, and you shouldn't install fixed clamps without gathering the right tools first. The good news is, you probably already have most of these in your toolbox. Here's a breakdown of what you'll need, along with why each item matters. (Pro tip: Lay everything out on a clean work surface before you start—you'll thank me later.)
| Tool | Purpose | Pro Tip |
|---|---|---|
| Hex Key (Allen Wrench) | Tightening the clamp's set screws (most fixed clamps use metric sizes like M5 or M6). | Invest in a "ball-end" hex key—it allows you to tighten screws at an angle, which is a lifesaver when pipes are close together. |
| Measuring Tape | Ensuring pipes are aligned correctly before clamping (even 1/4 inch off can throw off your entire setup). | Use a tape with both metric and imperial markings—lean pipes often come in standard metric lengths (e.g., 1m, 2m). |
| Level (Bubble or Digital) | Checking that pipes are straight (horizontal or vertical) to prevent uneven weight distribution. | A 2-foot level is perfect for most jobs; longer levels work better for larger frames (like workbench legs). |
| Rubber Mallet | Gently tapping pipes or clamps into place without damaging the material (especially important for aluminum pipe). | Avoid steel hammers—they can dent or scratch pipes, weakening them over time. |
| Thread Locker (Optional) | Preventing set screws from loosening due to vibration (great for high-use setups like conveyor systems). | Use "medium strength" thread locker (blue) so you can still disassemble later if needed—avoid "permanent" (red) unless you're sure you'll never adjust the setup. |
| Wire Brush or Sandpaper | Cleaning dirt, rust, or debris from pipe surfaces before clamping (ensures a tight, secure fit). | Fine-grit sandpaper (220-grit) works best—you just need to remove surface grime, not scratch the pipe. |
| Work Gloves | Protecting your hands from sharp edges on pipes or metal burrs on clamps. | Choose nitrile gloves for grip—they'll help you hold pipes steady without slipping. |
| Marker or Pencil | Marking pipe positions before clamping (so you don't have to guess if they're aligned). | A grease pencil works on metal pipes; a fine-tip marker works on aluminum (it wipes off with rubbing alcohol later). |
Pre-Installation Prep: Set Yourself Up for Success
You've got your tools, you're excited to start clamping—stop. Before you even touch a clamp, there's prep work to do. Skipping this step is the #1 reason installations fail. Think of it like baking: You wouldn't throw all the ingredients in a bowl without preheating the oven or measuring first. Prep ensures that when you start clamping, everything goes smoothly, and your finished setup is stable and safe. Let's walk through the key steps.
1. Inspect Your Parts (Yes, All of Them)
First, lay out all your components: lean pipes, fixed clamps, lean pipe joints (if using), and any accessories. Now, inspect each part like you're a detective looking for clues. What are you checking for?
- Damaged Clamps: Look for cracks in the clamp body, stripped threads in the set screws, or bent "jaws" (the part that grips the pipe). A cracked clamp might hold initially, but it will fail under load.
- Warped Pipes: Roll the lean pipe on a flat surface—if it wobbles, it's bent. Even a slight bend will make clamping uneven, leading to stress points.
- Rusty or Corroded Joints: If you're reusing old lean pipe joints, check for rust on the threads or inside the joint. Rust can prevent pipes from seating properly in the joint, which means your clamp will have to work harder to hold everything together.
- Missing Parts: Fixed clamps usually come with set screws included, but double-check—there's nothing worse than getting halfway through installation and realizing you're short a screw.
I once installed a clamp on a pipe that looked "fine" at first glance, only to realize later it had a tiny crack near the jaw. A week later, the clamp snapped under the weight of a toolbox. Lesson learned: Always inspect first.
2. Prep Your Workspace
Your workspace matters more than you think. A cluttered area increases the risk of misplacing tools, tripping, or rushing through steps. Clear a flat surface (a workbench, plywood sheet on sawhorses, or even the floor) large enough to lay out your entire frame or section. If you're working on the floor, put down a drop cloth or cardboard to protect both the pipes and your floor from scratches.
Safety first: Wear work gloves to protect against sharp edges, and safety glasses if you're cutting pipes (though we're not cutting in this guide, accidents happen!). If you're working in a factory, make sure the area is marked off to prevent others from bumping into your setup while you're working.
3. Plan Your Layout (Measure Twice, Clamp Once)
This is where the measuring tape and marker come in. Before clamping anything, sketch a rough diagram of your setup (even a napkin drawing works) and mark the positions of each pipe and clamp. For example, if you're building a simple workbench frame with four vertical legs and two horizontal rails per side, measure and mark where the rails will attach to the legs (e.g., 30 inches from the bottom for the lower rail, 36 inches for the upper rail).
Pro tip: Use masking tape to mark positions on the floor or workbench—this creates a "template" you can follow as you assemble. For example, if your workbench legs need to be 4 feet apart, place tape marks 4 feet apart to ensure the legs don't shift while you attach the rails.
Common Mistake to Avoid
Rushing the layout! I've seen people skip measuring and just "eyeball" pipe positions. The result? One side of the workbench is 2 inches shorter than the other, or the flow rack tilts to one side. Take 5 extra minutes to measure and mark—your back (and your sanity) will thank you when you're not hunched over a lopsided setup.

Step-by-Step Installation: Let's Get Clamping
Now that we've covered the prep work, it's time to install the lean pipe fixed clamp. I'll break this down into 12 simple steps—follow them in order, and you'll have a rock-solid joint in no time. For this example, we'll assume you're attaching a horizontal rail to a vertical leg (a common setup for workbenches or racks), but the same principles apply to any two pipes you want to fix together.
1
Assemble the Lean Pipe Joint (If Needed)
If your setup uses a lean pipe joint (e.g., a T-joint, L-joint, or straight joint) to connect the two pipes, start by inserting the pipes into the joint. For example, if you're using a T-joint to attach a horizontal rail to a vertical leg, slide the vertical pipe into the "stem" of the T and the horizontal pipe into the "crossbar." Push them in until they hit the stop inside the joint (most joints have a small ridge that prevents pipes from sliding through).
Pro tip: If the pipes are tight, apply a tiny amount of dish soap to the end of the pipe—it acts as a lubricant and helps them slide into the joint more easily. Wipe off excess soap with a rag to prevent slipping later.
2
Position the Fixed Clamp
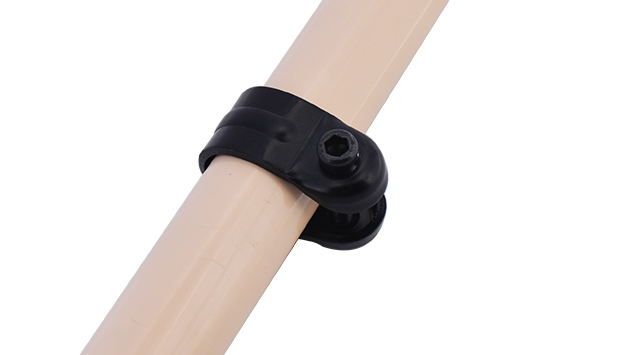
Slide the lean pipe fixed clamp over the joint where the two pipes meet. Most fixed clamps have a "split" design—one side wraps around the joint, and the other side clamps down. Align the clamp so that its jaws are centered over the joint and the pipes. You want the clamp to grip both the joint and the pipes for maximum stability.
If you're not using a joint (e.g., clamping two pipes directly at a 90-degree angle), position the clamp where the pipes cross, making sure they're perpendicular (use the corner of a square or a level to check). The clamp should straddle both pipes evenly—imagine it's giving them a "hug" to hold them together.
3
Hand-Tighten the Set Screws
Take your hex key and start hand-tightening the clamp's set screws. Most fixed clamps have 2-4 screws—start with the top screw, then the bottom, then the sides (if present). The goal here is to "snug" the clamp into place, not fully tighten it. You want the clamp to hold the pipes without shifting, but still be able to adjust alignment if needed.
Feel for resistance: The screws should turn smoothly at first, then start to feel tight. Stop when you can't turn them with just your fingers—this is "hand tight."
4
Check Alignment with a Level
Now it's time to ensure everything is straight. Place your level on top of the horizontal pipe—if the bubble is centered, you're good. If not, gently push or pull the pipe until the bubble is in the middle. For vertical pipes, hold the level against the side of the pipe and adjust until the bubble centers.
This step is critical. A pipe that's even slightly off-level will cause weight to shift over time, loosening the clamp and weakening the joint. Take your time here—even 30 seconds of adjustment can make a huge difference.
5
Tighten the Set Screws (But Don't Overdo It)
With the pipes aligned, it's time to fully tighten the set screws. Using your hex key, turn each screw 1/4 to 1/2 turn at a time, alternating between screws (e.g., top, bottom, top, bottom). This ensures even pressure, preventing the clamp from warping or the pipes from bending.
How tight is "too tight"? If the hex key starts to bend, or you hear a "creaking" sound from the pipe, you've gone too far. Over-tightening can strip the screw threads, crack the clamp, or even dent the pipe—especially if you're using aluminum pipe, which is softer than steel. A good rule of thumb: Tighten until the screw stops turning, then give it a tiny "nudge" for extra security.
6
Test for Movement
Grab the pipes on either side of the clamp and try to twist or pull them. They should feel solid—no movement, no creaking, no "give." If the pipes shift, the clamp is too loose. Loosen the screws slightly, realign, and retighten. If they still move, check if the clamp is damaged (e.g., stripped threads) or if the pipes are warped (remember that inspection step? This is why it matters!).
I like to give the joint a gentle shake with both hands—if it feels like part of the pipe itself, you've done it right. If it wobbles, backtrack and adjust.
7
Repeat for Additional Clamps
If your setup has multiple clamps (e.g., a workbench with four corners, each needing a clamp), repeat steps 1-6 for each one. But here's a crucial point: Don't fully tighten all clamps at once. Tighten the first clamp, then loosely attach the second, check alignment across both, then tighten. This prevents "tension" in the frame—if you fully tighten one clamp and the next is misaligned, you'll warp the pipes trying to force them into place.
Think of it like building a puzzle: You don't force the last piece in if the others aren't aligned—you adjust the surrounding pieces first. Same with clamps.
8
Add Thread Locker (Optional)
If you're installing clamps in a high-vibration environment (like near a conveyor or heavy machinery), now's the time to apply thread locker. Put a tiny drop (about the size of a pinhead) on the tip of each set screw, then retighten them. The thread locker will dry and form a bond that prevents the screws from loosening due to shaking or movement.
Pro tip: Let the thread locker cure for at least 30 minutes before putting weight on the setup—check the product label for exact curing times.
9
Inspect the Clamp for Even Pressure
Take a close look at the clamp where it meets the pipe. You should see a uniform "grip" mark around the pipe—no gaps, no uneven indentations. If one side of the clamp is digging into the pipe more than the other, loosen the screws, realign the clamp, and retighten. Uneven pressure will cause the pipe to wear unevenly over time, leading to cracks or weak spots.
For aluminum pipe, this is especially important—aluminum is softer than steel, so uneven pressure can leave permanent dents that weaken the pipe.
10
Test the Setup with Weight
Now it's time for the "stress test." Place a heavy object on the setup (e.g., a toolbox on the workbench, a box of parts on the flow rack) and let it sit for 10-15 minutes. Then, check the clamp and pipes again. Did the level bubble stay centered? Is the clamp still tight? If everything looks good, remove the weight and give the setup a gentle shake—no movement means you're golden.
Why wait 15 minutes? Some materials (like aluminum) can "creep" slightly under weight, meaning the pipe might shift a tiny bit after the initial tightening. Testing with weight ensures the clamp holds even after this minor adjustment.
11
Make Final Adjustments
If the setup shifted during the weight test, don't panic. Loosen the clamp screws slightly, realign the pipes with the level, and retighten. This might take 2-3 tries—patience is key. Remember, it's better to spend an extra 10 minutes now than to have to rebuild the entire setup later.
If the clamp itself feels loose (even after tightening), check if the set screws are stripped. A stripped screw will spin freely without tightening—if that's the case, replace the screw (most hardware stores carry metric set screws) or the entire clamp if the threads in the clamp are damaged.
12
Clean Up and Document
You're almost done! Remove any tape marks, wipe down the pipes with a clean rag to remove fingerprints or grease, and put away your tools. If you're building a larger setup (like a production line with multiple clamps), take a photo of the finished joint—this will help if you need to replicate the setup later or troubleshoot issues down the line.
Finally, step back and admire your handiwork. That rock-solid joint? You did that. Now go enjoy a setup that stays put—no more wobbles, no more tools rolling off, just smooth, efficient work.

Troubleshooting: When Things Don't Go as Planned
Even with careful prep, things can go wrong. Here are the most common issues I've seen, and how to fix them.
Issue: The clamp won't tighten—screws spin freely.
Solution: This is usually a stripped screw or stripped threads in the clamp. If the screw is stripped, replace it with a new one of the same size. If the clamp's threads are stripped (you'll feel the screw wiggle as you turn it), you'll need to replace the clamp. Pro tip: To avoid stripped threads, always use the correct size hex key—using a too-small key can round off the screw head.
Solution: This is usually a stripped screw or stripped threads in the clamp. If the screw is stripped, replace it with a new one of the same size. If the clamp's threads are stripped (you'll feel the screw wiggle as you turn it), you'll need to replace the clamp. Pro tip: To avoid stripped threads, always use the correct size hex key—using a too-small key can round off the screw head.
Issue: Pipes are misaligned even after clamping.
Solution: You probably tightened the clamp too early. Loosen the screws, realign the pipes with the level, and retighten slowly, alternating screws. If the pipes keep shifting, use a temporary brace (e.g., a scrap piece of wood clamped to the pipes) to hold them in place while you attach the fixed clamp.
Solution: You probably tightened the clamp too early. Loosen the screws, realign the pipes with the level, and retighten slowly, alternating screws. If the pipes keep shifting, use a temporary brace (e.g., a scrap piece of wood clamped to the pipes) to hold them in place while you attach the fixed clamp.
Issue: The joint feels stable at first, but loosens after a week.
Solution: Vibration is likely the culprit. Apply medium-strength thread locker to the set screws, let it cure, and retighten. If the setup is in a very high-vibration area (like near a punch press), consider adding a second fixed clamp to the joint for extra security.
Solution: Vibration is likely the culprit. Apply medium-strength thread locker to the set screws, let it cure, and retighten. If the setup is in a very high-vibration area (like near a punch press), consider adding a second fixed clamp to the joint for extra security.
Issue: Aluminum pipe is dented after clamping.
Solution: You over-tightened the screws. Aluminum is softer than steel, so it deforms under too much pressure. replace the dented section of pipe (dents weaken the pipe) and retighten the new clamp more gently—stop when you feel resistance, not when the screw won't turn anymore.
Solution: You over-tightened the screws. Aluminum is softer than steel, so it deforms under too much pressure. replace the dented section of pipe (dents weaken the pipe) and retighten the new clamp more gently—stop when you feel resistance, not when the screw won't turn anymore.
Issue: The clamp slips when weight is applied.
Solution: Check if the pipe is dirty or greasy—clean it with a wire brush or sandpaper, then reattach the clamp. If the pipe is clean, the clamp might be the wrong size for your pipe (e.g., using a 28mm clamp on 30mm pipe). Always check the clamp's specifications to ensure it matches your pipe diameter.
Solution: Check if the pipe is dirty or greasy—clean it with a wire brush or sandpaper, then reattach the clamp. If the pipe is clean, the clamp might be the wrong size for your pipe (e.g., using a 28mm clamp on 30mm pipe). Always check the clamp's specifications to ensure it matches your pipe diameter.
Pro Tips for a Setup That Lasts
Now that you've installed your clamps, here are some extra tips to keep your setup in top shape for years.
Pair Fixed Clamps with Lean Pipe Joints for Flexibility
Fixed clamps are great for rigidity, but lean pipe systems are all about adaptability. Use fixed clamps for critical joints (like workbench legs) and adjustable joints (swivel, hinge) for parts that need to move (like a folding shelf). This way, you get stability where you need it and flexibility where you want it.
Regular Maintenance Checks
Set a calendar reminder to inspect clamps every 3-6 months (more often for high-use setups). Tighten any loose screws, clean off rust or debris, and replace damaged clamps. A 5-minute check can prevent a major failure later.
Upgrade to Aluminum Pipe for Lightweight Strength
If you're building a setup that needs to be moved (like a turnover trolley), consider aluminum pipe instead of steel. It's lighter, resistant to rust, and pairs perfectly with fixed clamps—just be gentler when tightening to avoid dents.
Label Your Clamps (Yes, Really)
If you're building a complex setup with multiple clamps, label each clamp with a number (e.g., "A1," "B3") and note its position in a notebook or phone. This makes it easy to reference later if you need to disassemble, repair, or expand the system.
Real-World Applications: Where Fixed Clamps Shine
To wrap things up, let's look at a few real-world examples of how lean pipe fixed clamps make a difference. These are setups I've helped build or seen in action—proof that the right clamp can transform workflow.
Example 1: The Rock-Solid Lean Pipe Workbench
A local electronics manufacturer came to me with a problem: Their assembly workbenches were wobbling so badly that workers were slowing down to avoid knocking over components. We rebuilt the frames using 28mm steel lean pipes and added fixed clamps at every joint (four corners, two rails per side). The result? Workbenches that withstood workers leaning on them, tools being set down heavily, and even the occasional bump from a forklift. Productivity increased by 15% simply because workers no longer had to "baby" the setup.
Example 2: The No-Slip Flow Rack
A warehouse was struggling with boxes sliding off their flow rack during peak hours. The issue? The rack's frame was made with adjustable joints that had loosened over time, causing the rollers to tilt. We replaced the adjustable joints with fixed clamps at the base and mid-frame, ensuring the rollers stayed level. Now, boxes glide smoothly from top to bottom without tipping—no more lost products, no more frustrated workers.
Example 3: The Mobile Workstation That Stays Put
A mechanic wanted a mobile workstation to roll between cars, but his old trolley wobbled so much that tools fell off when moving. We built a new trolley using aluminum pipe (lightweight for rolling) and fixed clamps at the corners and shelf supports. Even over rough garage floors, the trolley stays stable—tools stay on the shelf, and the mechanic can focus on the job, not chasing wrenches.
Final Thoughts: Stability Starts with the Right Clamp
Installing lean pipe fixed clamps might seem like a small task, but it's the foundation of a stable, efficient workspace. By taking the time to prep properly, follow the steps, and troubleshoot issues, you're not just tightening a clamp—you're building a setup that works for you, not against you. Remember: A wobbly frame isn't just annoying; it's a productivity killer. With the right tools, a little patience, and the tips in this guide, you can say goodbye to instability and hello to a workspace that stays put, day in and day out.
Now go grab your hex key, gather your pipes, and start clamping. Your future self (and your back) will thank you.