- Company Articles
- Products and Technology
- Installation And Maintenance
- How to Install Parallel Fixation Aluminum Pipe Joints: Step-by-Step Guide

How to Install Parallel Fixation Aluminum Pipe Joints: Step-by-Step Guide
Related Product
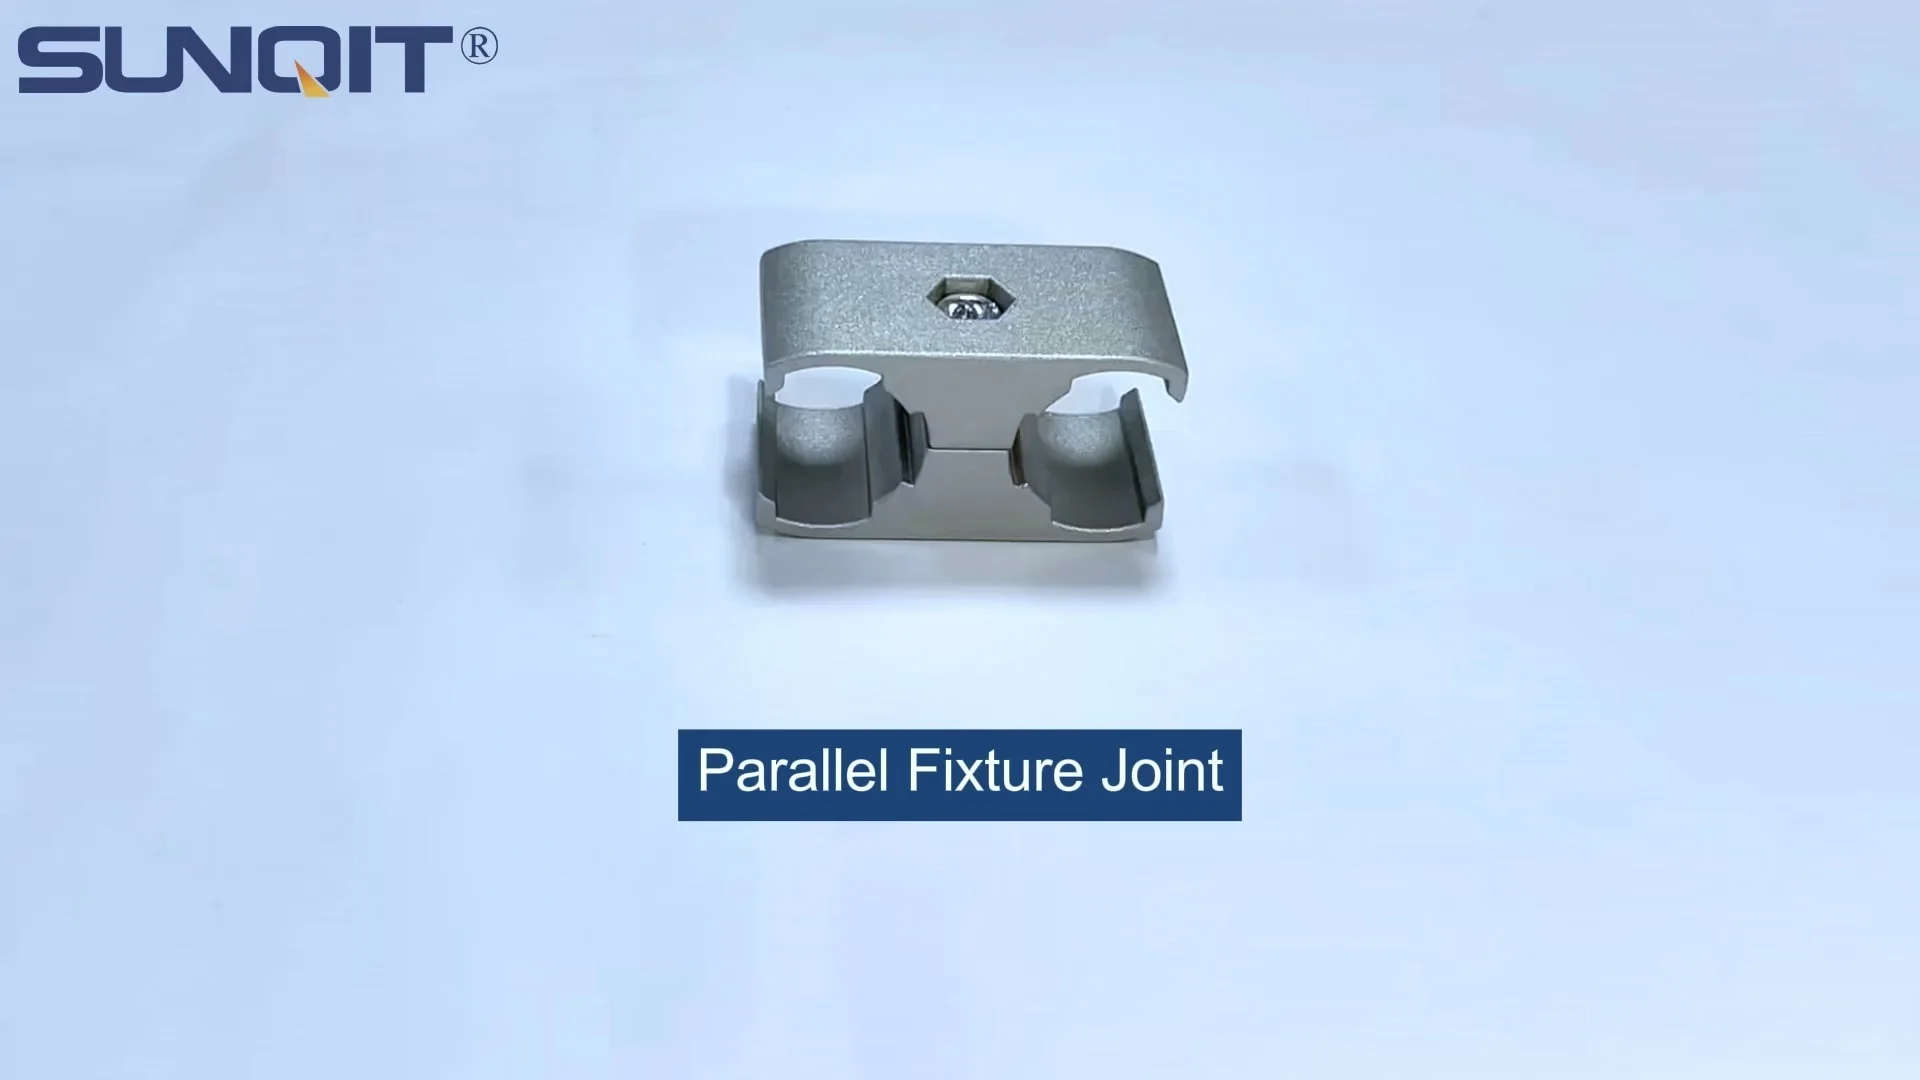
Parallel Fixation Aluminum Pipe Joint
Aluminum parallel joint for two pcs 28mm aluminum pipe connected by parallel direction.
Introduction: The Backbone of Sturdy Aluminum Structures
If you've ever assembled a workbench, a material rack, or even a simple storage shelf using aluminum pipes, you know that the strength of the entire structure depends on one crucial component: the joints that hold everything together. Among the various types of joints available, the parallel fixation aluminum pipe joint stands out for its ability to create stable, parallel connections between aluminum pipes. Whether you're a seasoned DIY enthusiast or a factory worker setting up production lines, understanding how to install these joints properly is key to building structures that are not only durable but also safe to use.
Aluminum pipes and profiles have become go-to materials in manufacturing, workshops, and even home projects thanks to their lightweight yet robust nature. They're resistant to corrosion, easy to maneuver, and highly customizable—attributes that make them ideal for everything from lean production systems to garage workbenches. But without the right joints, even the highest-quality aluminum pipe can result in a wobbly, unreliable structure. That's where the parallel fixation aluminum pipe joint comes in. Designed to lock two or more aluminum pipes in a parallel position, these joints ensure that your framework stays aligned, balanced, and ready to handle daily wear and tear.
In this guide, we'll walk you through everything you need to know to install parallel fixation aluminum pipe joints like a pro. From gathering the right tools and preparing your workspace to step-by-step installation, troubleshooting common issues, and maintaining your joints over time, we've got you covered. By the end, you'll have the confidence to build sturdy, professional-grade structures using aluminum pipes, aluminum profiles , and the essential accessories that bring them all together.
Understanding Parallel Fixation Aluminum Pipe Joints
Before diving into the installation process, let's take a moment to understand what makes parallel fixation aluminum pipe joints unique. Unlike some joints that allow for rotation or angled connections, these joints are specifically designed to keep pipes parallel to each other. Think of them as the "straighteners" of the aluminum pipe world—they prevent pipes from shifting out of alignment, which is critical for structures like workbenches (where a level surface is non-negotiable) or conveyor systems (where materials need to glide smoothly along parallel tracks).
Most parallel fixation aluminum pipe joints are made from high-grade aluminum alloy, matching the material of the pipes they connect. This ensures compatibility in terms of weight, expansion, and durability. They typically feature a sleek, low-profile design with built-in set screws or clamping mechanisms that grip the aluminum pipe securely. Some models also include additional holes or slots for attaching other components, such as brackets or panels, making them versatile for complex projects.
These joints are often sold alongside other aluminum pipe accessories like end caps, clamps, and mounting brackets, which means you can easily source everything you need for your project from a single supplier. Whether you're working with basic aluminum tubes or more specialized aluminum extrusion profiles , parallel fixation joints are engineered to fit standard pipe diameters, ensuring a snug, rattle-free connection.

Tools You'll Need: Gathering Your Installation Kit
Installing parallel fixation aluminum pipe joints doesn't require a garage full of industrial tools, but having the right equipment on hand will make the process much smoother. Here's a list of essentials to gather before you start:
- Hex Key (Allen Wrench): Most parallel fixation joints use hex-head set screws, so you'll need a set of hex keys in various sizes. Check the joint's packaging to find the exact size required—common sizes include 3mm, 4mm, and 5mm.
- Rubber Mallet: A soft-faced mallet helps tap pipes into place without damaging the aluminum surface. Avoid using a metal hammer, as it can dent or scratch the pipes.
- Measuring Tape and Pencil: Precision is key when aligning parallel pipes. A measuring tape will help you mark where joints should go, and a pencil (or a washable marker) will let you make temporary marks on the aluminum.
- Level (Bubble or Digital): To ensure your pipes are perfectly parallel and horizontal (or vertical, depending on the project), a level is non-negotiable. A 2-foot or 4-foot bubble level works well for most projects, but a digital level can provide more precise readings.
- Safety Gloves: Aluminum pipes can have sharp edges, especially if they're newly cut. Gloves will protect your hands while handling materials and tools.
- Vise (Optional but Helpful): If you're working with longer pipes, clamping one end in a vise can stabilize the pipe, making it easier to attach the joint. This is especially useful for solo projects.
- Clean Cloth: Dust, oil, or debris on the pipes or joints can interfere with the connection. A clean cloth will help wipe down surfaces before assembly.
- Spare Set Screws: It's always a good idea to have extra set screws on hand (you can find these in aluminum pipe accessories kits). Stripped or lost screws are a common hiccup, and having backups will save you a trip to the hardware store.
Pro Tip: If you're working on a large project (like a multi-shelf material rack), consider using a workbench or a flat, level surface as your assembly area. This will make it easier to align pipes and joints without them rolling away.

Preparation: Setting the Stage for Success
Before you start screwing joints onto pipes, take a few minutes to prepare your materials and workspace. Rushing through this step can lead to misaligned pipes, loose joints, or even damaged parts—mistakes that are frustrating to fix later. Here's how to get ready:
1. Inspect Your Parts: Lay out all your aluminum pipes, parallel fixation joints, and any other accessories (like end caps or brackets) on a clean surface. Check each piece for defects: Are the pipes bent or dented? Do the joints have cracks or stripped threads? Are the set screws included and in good condition? If you spot any issues, replace the damaged parts before proceeding—using faulty components is a recipe for a weak structure.
2. Clean the Surfaces: Aluminum pipes and joints can accumulate dust, fingerprints, or residue from manufacturing. Wipe each pipe and joint with a clean cloth to remove any debris. This ensures a tight fit between the pipe and the joint, as dirt can create gaps that weaken the connection.
3. Measure and Mark: Decide where each joint will go on the pipes. For parallel connections, the distance between joints on each pipe should be identical. For example, if you're building a workbench with two parallel horizontal pipes (the "rails"), measure 24 inches from the end of each pipe and mark that spot—that's where the vertical support pipes will attach via the parallel fixation joints. Use a pencil to make light marks; they'll rub off easily after assembly.
4. Test-Fit the Joints: Before tightening any screws, slide the joints onto the pipes to ensure they fit properly. Most parallel fixation joints have a socket that the pipe slides into—there should be little to no play between the pipe and the joint. If the joint is too loose, it may be the wrong size for your pipe; if it's too tight, check if the pipe is bent or if the joint's socket is deformed.

Step-by-Step Installation: Building Your Parallel Structure
Now that you're prepared, let's walk through the installation process step by step. We'll use a simple example: attaching two parallel aluminum pipes to a vertical support pipe using parallel fixation joints. This is a common setup for workbench legs or material rack frames.
-
Step 1: Position the Joint on the First Pipe
Take one of your horizontal aluminum pipes and slide the parallel fixation joint onto it, aligning the joint with the pencil mark you made earlier. Push the joint firmly until it sits flush against the mark. If it's tight, gently tap the joint with your rubber mallet to seat it in place—be careful not to hit too hard, as this can shift the mark.
-
Step 2: Attach the Vertical Support Pipe
Most parallel fixation joints have a second socket (perpendicular or parallel, depending on the design) for attaching a support pipe. Slide the vertical pipe into this socket. For parallel connections, the vertical pipe should be at a 90-degree angle to the horizontal pipe (if building a frame) or parallel (if creating a multi-pipe rail). Use your level to check that the vertical pipe is straight—hold the level against the side of the pipe to ensure the bubble is centered.
-
Step 3: Tighten the Set Screws (First Pass)
Now it's time to secure the joint. Locate the set screws on the joint—there are usually two: one for the horizontal pipe and one for the vertical pipe. insert the hex key into the first screw (on the horizontal pipe) and turn it clockwise until it's snug. Don't overtighten yet—this is just a "pre-tightening" to hold the joint in place while you align the second pipe.
Repeat the process for the vertical pipe's set screw. The joint should now hold both pipes loosely, allowing for minor adjustments.
-
Step 4: Align the Second Parallel Pipe
Take the second horizontal pipe and attach another parallel fixation joint to it, using the same method as Step 1. Then, slide the free end of the vertical pipe into the second joint's socket. Now you have two horizontal pipes connected by a vertical pipe, with a joint on each end.
This is where the level becomes critical. Place the level across both horizontal pipes to check if they're parallel. If one pipe is higher than the other, gently push or pull on it to adjust. You can also loosen the set screws slightly to allow more movement, then retighten them once the pipes are level.
-
Step 5: Final Tightening
Once the pipes are perfectly parallel, go back to each set screw and tighten them fully. Turn the hex key clockwise until you feel resistance, then give it a quarter-turn more—this ensures the screw is tight enough to prevent slipping but not so tight that it strips the threads. A good rule of thumb: if the joint starts to deform or the pipe bends, you've tightened too much.
-
Step 6: Test the Stability
With all screws tightened, it's time to test the structure. Gently push on the horizontal pipes—they should feel solid, with no wobbling or shifting. If the joint moves, check if the set screws are loose or if the pipes are misaligned. For extra stability, try placing a small weight (like a toolbox) on the horizontal pipes to simulate real-world use. If the structure holds, you're good to go!
-
Step 7: Repeat for Additional Joints
If your project requires multiple vertical supports (e.g., a workbench with four legs), repeat Steps 1–6 for each set of joints. Remember to measure and mark each pipe carefully to ensure all joints are spaced evenly—this will keep the entire structure balanced.
Pro Tip: For long spans (over 4 feet), add a third vertical support in the middle to prevent sagging. This is especially important if the structure will hold heavy loads, like a workbench used for machining or assembly.
Troubleshooting Common Issues: Fixing Wobbles, Misalignment, and More
Even with careful preparation, you might run into a few hiccups during installation. Here's how to troubleshoot the most common problems:
Issue 1: Joints Feel Loose After Tightening
If the joint slips or rotates after tightening, the set screws might not be gripping the pipe properly. Check if the pipe has a smooth, polished surface—sometimes, overly smooth aluminum can prevent the screw from biting. To fix this, try roughing up the pipe's surface slightly with fine-grit sandpaper (be gentle to avoid damaging the aluminum). Then retighten the set screw. If the problem persists, the screw may be stripped; replace it with a new one from your
aluminum pipe accessories
kit.
Issue 2: Pipes Won't Stay Parallel
Misaligned pipes are usually caused by inaccurate measurements or loose joints during the alignment phase. Double-check the distance between marks on both pipes—they should be identical. If one pipe is longer than the other, trim it to size (using a pipe cutter) or adjust the joint positions. For stubborn misalignment, use a string line: tie a string between the ends of the pipes and adjust until both pipes align with the string.
Issue 3: Joints Don't Fit Over the Pipes
If the joint's socket is too small for the pipe, you may have purchased the wrong size. Check the pipe's diameter (common sizes are 20mm, 30mm, and 40mm) and compare it to the joint's specifications. If the pipe is bent, straighten it using a pipe straightener or replace it. For minor bends, gently tap the pipe with a rubber mallet while rolling it on a flat surface.
Issue 4: Stripped Set Screws
Stripped screws are often the result of using the wrong hex key size or overtightening. If a screw is stripped, remove it using a screw extractor (a tool designed to grip and remove damaged screws). Once removed, replace it with a new screw of the same size—you can find these at hardware stores or through your
aluminum pipe supplier
.
Maintenance Tips: Keeping Your Joints Strong for Years
Proper installation is just the first step—maintaining your parallel fixation aluminum pipe joints will ensure your structure lasts for years. Here's how to care for them:
Regular Inspections: Every 3–6 months, give your structure a once-over. Check all set screws for tightness and tighten any that have loosened due to vibration. Look for signs of wear on the joints, like cracks, corrosion, or bent sockets. If a joint is damaged, replace it immediately—don't wait for the structure to fail.
Cleaning: Dust and debris can build up in the joints over time, making them harder to adjust. Wipe the joints and pipes with a damp cloth (or a cloth lightly sprayed with rubbing alcohol) to remove grime. Avoid using harsh chemicals, as they can damage the aluminum's finish.
Lubrication (If Needed): Most parallel fixation joints don't require lubrication, but if you notice the set screws are hard to turn, apply a tiny drop of machine oil to the hex socket. Wipe away excess oil to prevent attracting dust.
Protect Against Corrosion: While aluminum is naturally corrosion-resistant, exposure to saltwater, chemicals, or high humidity can still cause issues. If your structure is outdoors or in a damp environment, consider applying a clear aluminum sealant to the joints and pipes. This adds an extra layer of protection against rust and oxidation.
Conclusion: Building with Confidence
Installing parallel fixation aluminum pipe joints might seem intimidating at first, but with the right tools, a little patience, and this step-by-step guide, you'll be building sturdy, professional-grade structures in no time. Remember: the key to success is precision—taking the time to measure, align, and tighten properly will result in a structure that's not only strong but also safe to use for years to come.
Whether you're assembling a workbench for your garage, a material rack for your workshop, or a production line for your factory, the parallel fixation aluminum pipe joint is your ally in creating stable, parallel connections. Paired with high-quality aluminum pipes, aluminum profiles , and the right accessories, these joints unlock endless possibilities for customization and durability.
So grab your hex key, measure twice, and start building—your next sturdy aluminum structure is just a few screws away!