- Company Articles
- Products and Technology
- Installation And Maintenance
- How to Lubricate Parallel Rotatory Lean Pipe Joints for Smooth Rotation

How to Lubricate Parallel Rotatory Lean Pipe Joints for Smooth Rotation
Related Product
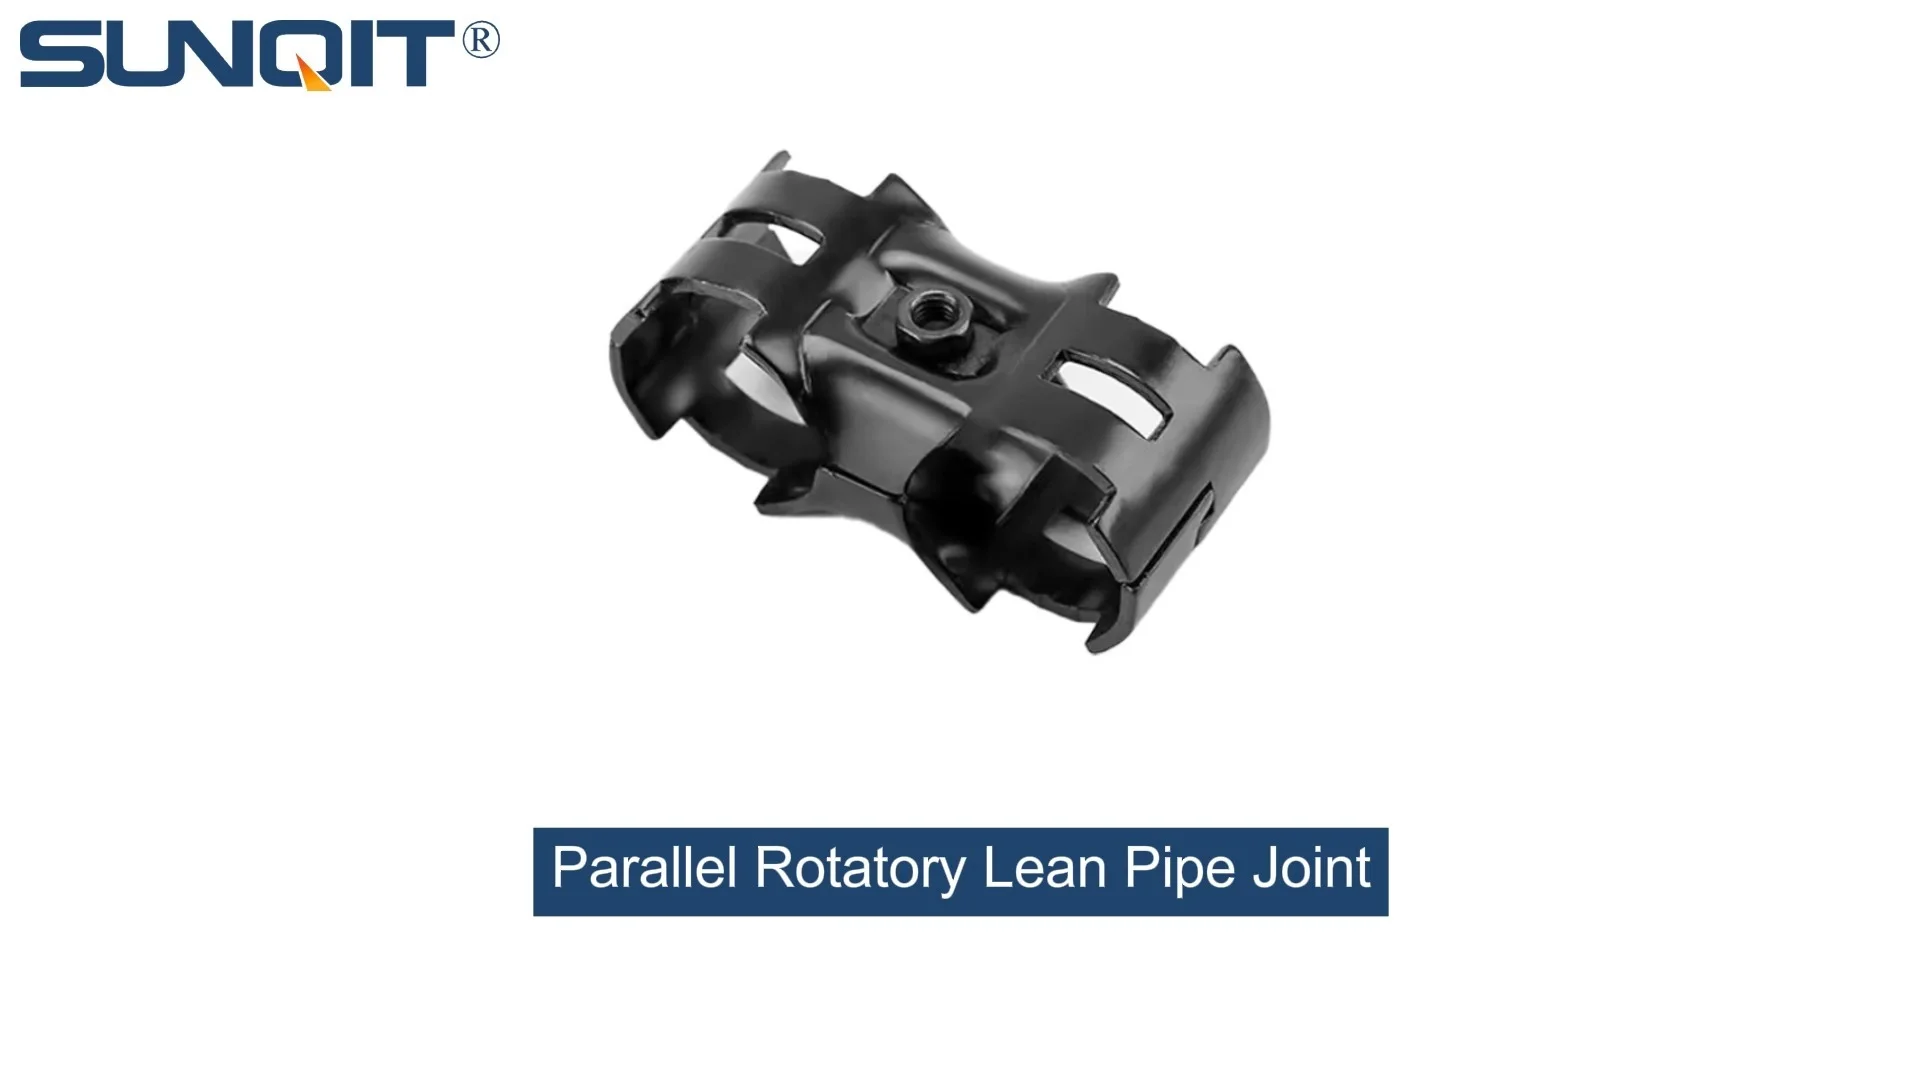
Parallel Rotatory Lean Pipe Joint
Parallel rotatory lean pipe joint, for 2 pcs pipe conenction in parallel direction with rotatory function.
In the bustling rhythm of a manufacturing floor, every second counts. Imagine a production line where parts glide seamlessly from one station to the next, workers moving with purpose, and deadlines met with ease. Now, picture that same line grinding to a halt—not because of a broken machine, but because of a single stiff joint. The parallel rotatory lean pipe joint, a unsung hero of lean systems, often hides in plain sight, but its performance can make or break your workflow. In this guide, we'll walk through why these joints matter, how to keep them rotating smoothly, and the small but impactful habits that turn frustrating delays into seamless productivity.
Understanding the Role of Parallel Rotatory Lean Pipe Joints in Your Workspace
Before we dive into lubrication, let's take a moment to appreciate what these joints do. If you've ever worked with a flow rack, a turnover trolley, or a custom workbench, you've likely interacted with a lean pipe system. These systems are built from modular components—pipes, joints, and accessories—that snap together to create everything from material racks to assembly stations. At the heart of many of these setups are parallel rotatory lean pipe joints, the flexible connectors that allow sections of pipe to rotate, pivot, and adjust to your team's needs.
Unlike fixed lean pipe joints, which lock pipes into rigid angles, parallel rotatory joints are designed for movement. Think of them as the "elbows" of your lean system: they let you reposition a workbench shelf, adjust the angle of a flow rack, or pivot a material trolley without disassembling the entire structure. In high-traffic areas—like a busy assembly line where workers are constantly reaching for tools or moving parts—these joints are put to the test daily. Over time, dust, debris, and the natural wear of metal-on-metal contact can slow them down, turning smooth rotation into a struggle.
The impact of a sticky joint goes beyond annoyance. When a worker has to force a joint to rotate, they waste time. Over weeks and months, those seconds add up to hours of lost productivity. Worse, the extra force can strain muscles, leading to fatigue or even injury. And if the joint seizes up completely? You might find yourself rushing to replace it, halting production and dipping into your budget for emergency repairs. The good news? Most of these issues are preventable with regular lubrication—a simple, low-cost maintenance task that pays off in spades.
Signs Your Parallel Rotatory Lean Pipe Joints Need Attention
How do you know when it's time to lubricate? These joints don't come with warning lights, but they do send subtle (and sometimes not-so-subtle) signals. Here are the red flags to watch for:
- Squeaking or Grinding Noises: That high-pitched squeak when you rotate the joint isn't just annoying—it's a cry for help. It means metal parts are rubbing together without proper lubrication, creating friction that wears down the joint over time.
- Resistance When Rotating: If you have to push or pull harder than usual to move the joint, or if it "sticks" halfway through a rotation, it's a clear sign the lubricant has dried up or collected debris.
- Visible Rust or Corrosion: Check the joint for reddish-brown spots, especially if your workspace is humid or exposed to moisture. Rust not only stiffens the joint but can also eat away at the metal, leading to permanent damage.
- Uneven Movement: Does the joint rotate smoothly one day and jerkily the next? Inconsistent movement often points to uneven lubrication or debris buildup inside the joint.
- Worker Complaints: Your team is your best sensor. If a line operator mentions, "This shelf is getting harder to move," or "I had to struggle with that trolley again," take it seriously. They're the ones feeling the impact firsthand.
Pro Tip: Make a habit of inspecting joints during your daily or weekly walkthroughs. A quick 30-second check—rotating the joint, listening for noises, and checking for rust—can catch issues before they escalate. Keep a small notebook or digital log to track which joints were lubricated and when; this helps you spot patterns, like joints in high-moisture areas needing more frequent care.
The Anatomy of a Parallel Rotatory Lean Pipe Joint: What You're Lubricating
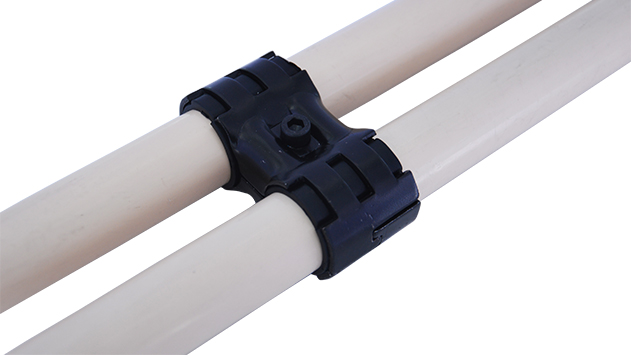
To lubricate effectively, it helps to know what's inside these joints. While designs can vary slightly by manufacturer, most parallel rotatory lean pipe joints share a few key parts:
The Outer Housing: The tough, often metal shell that connects to the lean pipe. It's the part you see and grip when rotating the joint.
The Inner Rotor: The moving component that sits inside the housing. It's attached to the other pipe segment and rotates when you adjust the joint.
Ball Bearings or Bushings: These small, smooth components reduce friction between the housing and rotor. They're usually made of steel or plastic and are the primary area that needs lubrication.
Seals or Gaskets: Some joints have rubber or plastic seals to keep dust and moisture out. Over time, these can wear down, letting debris in and lubricant out—another reason regular checks matter.
When you lubricate a parallel rotatory joint, you're targeting the space between the rotor and housing, specifically the bearings or bushings. The goal is to coat these moving parts with a thin, protective layer of lubricant that reduces friction, repels dust, and prevents rust. Think of it like adding oil to a door hinge: a little goes a long way in keeping things moving smoothly.

Choosing the Right Lubricant: Not All Oils Are Created Equal
Now, let's talk about lubricants. Walk into any hardware store, and you'll see shelves of options: motor oil, WD-40, silicone spray, lithium grease… the list goes on. But which one is best for your parallel rotatory lean pipe joints? The answer depends on three factors: your workspace environment, the joint material, and how often the joint moves.
Key Considerations for Lubricant Selection
Environment: If your workspace is dusty (like a woodworking shop) or humid (like a food processing plant), you need a lubricant that resists debris and water. Silicone-based sprays or lithium grease work well here—they repel moisture and don't attract dust as much as oil-based lubricants.
Material: Most lean pipe joints are made of steel, but some (especially in cleanroom or medical settings) use aluminum or stainless steel. For metal joints, avoid lubricants with acids or solvents that can corrode the metal. Check the manufacturer's guidelines—many lean pipe suppliers recommend specific lubricants for their joints.
Usage Frequency: Joints that rotate multiple times an hour (like on a busy assembly line) need a lubricant that stays put and doesn't dry out quickly. Grease is thicker and lasts longer than oil, making it ideal for high-use joints. For joints that move less often, a light machine oil or silicone spray might be sufficient.
Avoid the temptation to use whatever's in the maintenance closet. WD-40, for example, is a great solvent for cleaning, but it's not a long-term lubricant—it dries out quickly, leaving the joint unprotected. Similarly, heavy motor oil can gum up the works, attracting dust and making the joint stiffer over time. When in doubt, stick to lubricants labeled "multi-purpose" or "for industrial hinges/joints," and always test a small amount on an inconspicuous part of the joint first to ensure compatibility.

Step-by-Step Guide: Lubricating Parallel Rotatory Lean Pipe Joints
Now, let's get hands-on. Lubricating a joint is a simple process, but doing it right ensures maximum effectiveness. Grab your tools, clear a little space, and let's get started.
Tools You'll Need
| Tool/Item | Purpose | Pro Tip |
|---|---|---|
| Your chosen lubricant (grease, spray, or oil) | To coat moving parts and reduce friction | Use a lubricant with a precision nozzle for hard-to-reach areas. |
| Clean rags or paper towels | To wipe away old lubricant, dust, and debris | Use lint-free rags to avoid leaving fibers on the joint. |
| Small brush (toothbrush or parts brush) | To scrub away stubborn dirt in crevices | An old toothbrush works great for getting into tight spaces. |
| Degreaser (optional, for heavy buildup) | To dissolve thick, gummy old lubricant | Choose a water-based degreaser to avoid damaging seals. |
| Disposable gloves | To protect your hands from lubricant and debris | Nitrile gloves are chemical-resistant and durable. |
| Flashlight (optional) | To inspect the joint for hidden rust or damage | A phone flashlight works in a pinch! |
Step 1: Prepare the Work Area
Start by making sure the joint is accessible. If it's on a workbench or flow rack, clear any tools, parts, or materials from the area to avoid spills. If the joint is part of a trolley or mobile unit, lock the caster wheels (if equipped) to prevent it from rolling away while you work. Safety first: if the joint is near moving machinery, power down the equipment and follow your facility's lockout/tagout procedures to avoid accidents.
Step 2: Clean the Joint Thoroughly
Lubricant works best on clean surfaces. Use a dry rag to wipe away loose dust and debris from the outside of the joint. Then, rotate the joint back and forth a few times to loosen any dirt trapped inside. For joints with visible grime or old, sticky lubricant, dip your brush in degreaser (if using) and gently scrub the crevices where the rotor meets the housing. Wipe away the degreaser and loosened dirt with a clean rag—you want the joint to be dry before applying new lubricant.
Pay extra attention to the seal or gasket (if your joint has one). If it's cracked or brittle, this is a good time to note it for replacement—even the best lubricant can't compensate for a damaged seal that lets debris in.
Step 3: Apply the Lubricant
Now, it's time to lubricate. The method depends on the type of lubricant you're using:
- Grease: Apply a small amount (about the size of a pea) to the gap between the rotor and housing. Use your finger (with gloves!) or a grease gun to work it into the joint. Rotate the joint back and forth to distribute the grease evenly.
- Spray Lubricant: Hold the can 3–4 inches from the joint and spray a short burst into the gap. Rotate the joint immediately to spread the lubricant—don't overspray, as excess can drip onto work surfaces or attract dust.
- Oil: Use a dropper or precision nozzle to apply 2–3 drops of oil into the joint. Rotate the joint slowly to let the oil seep into the bearings. Wipe away any excess to prevent dripping.
Remember: more isn't better. Over-lubricating can create a messy buildup that traps dust and debris, defeating the purpose. A thin, even layer is all you need.
Step 4: Rotate and Test
After applying lubricant, rotate the joint fully back and forth 5–10 times. This helps distribute the lubricant to all moving parts, including the ball bearings or bushings inside. You should feel the joint loosen up immediately—if it still feels stiff, check for hidden debris or apply a tiny bit more lubricant (but don't overdo it!).
Once the joint moves smoothly, wipe away any excess lubricant with a clean rag. This prevents drips, dust buildup, and accidental contact with parts or workers' hands.
Step 5: Inspect and Document
Take a final look at the joint. Are there any signs of damage, like cracks in the housing or rust that won't come off? Note these in your maintenance log—they might need repair or replacement soon. If everything looks good, record the date, the joint's location (e.g., "Flow Rack B, third shelf joint"), and the type of lubricant used. This log becomes invaluable for tracking maintenance schedules and spotting recurring issues.
Common Mistakes to Avoid (and How to Fix Them)
Even simple tasks can go wrong with a few missteps. Here are the most common lubrication mistakes and how to steer clear of them:
Mistake 1: Skipping the Cleaning Step
It's tempting to spray lubricant directly onto a dirty joint and call it a day, but this is a short-term fix. Old lubricant, dust, and debris mix with the new lubricant, creating a gritty paste that actually increases friction. Always clean first—your future self (and your joints) will thank you.
Mistake 2: Using the Wrong Lubricant
As we mentioned earlier, not all lubricants are created equal. Using a dry lubricant in a humid area, or a heavy grease in a joint that needs to rotate quickly, can do more harm than good. When in doubt, check the joint's manual or ask your lean pipe supplier for recommendations—they know their products best.
Mistake 3: Over-Lubricating
Grease oozing out of the joint might seem like a sign of "good coverage," but it's actually a waste. Excess lubricant drips onto work surfaces, stains parts, and attracts dust, which can clog the joint later. Stick to the "less is more" rule—you can always add a little extra if needed.
Mistake 4: Ignoring Underlying Damage
Lubricant can't fix a cracked housing or a seized bearing. If a joint is still stiff after cleaning and lubricating, or if you notice rust that won't budge, it's time to replace it. Continuing to use a damaged joint risks sudden failure, which could lead to injury or costly downtime.
Mistake 5: Forgetting to Train Your Team
Lubrication shouldn't fall solely on the maintenance team. Train line operators and supervisors to spot signs of stiff joints and report them early. Even a 5-minute demo on "how to rotate and listen for squeaks" can empower your team to catch issues before they slow down production.
Creating a Maintenance Schedule That Sticks
The key to keeping joints smooth isn't just knowing how to lubricate—it's doing it consistently. A maintenance schedule ensures lubrication doesn't fall through the cracks, even during busy periods. Here's how to build one that works for your facility:
Step 1: Map Your Joints
Walk through your workspace and list all parallel rotatory lean pipe joints. Note their locations (e.g., "Workbench E, left shelf," "Material Rack B, top row") and how often they're used. High-use joints (rotated multiple times per hour) need more frequent care than low-use ones (rotated once a day or less).
Step 2: Set a Frequency
Use this general guideline to start, then adjust based on your observations:
| Usage Level | Lubrication Frequency | Example Locations |
|---|---|---|
| High (multiple rotations/hour) | Every 1–2 weeks | Assembly line flow racks, workbench tool holders |
| Medium (1–5 rotations/hour) | Every 3–4 weeks | Turnover trolleys, adjustable material racks |
| Low (1–2 rotations/day or less) | Every 2–3 months | Storage racks, rarely adjusted workbench shelves |
Environmental factors also play a role: joints in dusty, humid, or cold areas may need more frequent lubrication. For example, a joint near a cooling fan (which blows dust) might need weekly checks, even if it's "medium use."
Step 3: Assign Responsibility
Maintenance works best when someone owns it. Assign a team member (or rotate responsibilities) to handle lubrication, and give them the tools and time needed to do the job right. Make the maintenance log easy to access—whether it's a shared digital spreadsheet or a physical notebook hanging near the tools.
Step 4: Review and Adjust
After a month or two, review your log. Are joints still stiff between lubrications? Increase the frequency. Are you lubricating a low-use joint every week with no issues? Stretch it to every month. Your schedule should evolve with your workspace's needs.
Real-World Impact: How One Factory Cut Downtime by 30%
Let's put this all into perspective with a story from the field. A mid-sized electronics manufacturer in Ohio was struggling with frequent delays on their assembly line. Parts would get stuck on the flow rack, workers were complaining about stiff joints, and the maintenance team was spending hours replacing seized components. The root cause? A lack of regular lubrication for their parallel rotatory lean pipe joints.
The plant manager decided to implement a weekly lubrication schedule, training line operators to clean and lubricate joints during their morning setup. They started small: focusing first on the most problematic areas, like the flow racks feeding the soldering station. Within two weeks, the operators noticed a difference—parts glided smoothly, and the line rarely had to stop for stuck joints. After a month, the maintenance team reported a 30% drop in unplanned downtime, and worker surveys showed a 25% increase in satisfaction ("No more wrestling with that shelf!" one operator wrote).
The best part? The cost was minimal: a few cans of lubricant, some rags, and a little training. The return? Thousands of dollars saved in lost productivity and replacement parts. This is the power of proactive maintenance—it turns small, consistent actions into big results.
Final Thoughts: Small Habits, Big Results
Lubricating parallel rotatory lean pipe joints might seem like a tiny task in the grand scheme of running a facility, but it's a perfect example of lean thinking in action: focus on the details, eliminate waste, and empower your team to succeed. A smoothly rotating joint isn't just about speed—it's about creating a workspace where your team can do their best work, free from frustration and delays.
So, the next time you walk through your production floor, take a moment to check those joints. Give them a spin, listen for squeaks, and grab your lubricant. Your future self, your team, and your bottom line will thank you. After all, in lean manufacturing, the smallest improvements often lead to the biggest wins.