- Company Articles
- Products and Technology
- Installation And Maintenance
- How to Maintain Flat Adjustable Swivel Castor Wheels: Lubrication & Inspection Tips

How to Maintain Flat Adjustable Swivel Castor Wheels: Lubrication & Inspection Tips
Related Product
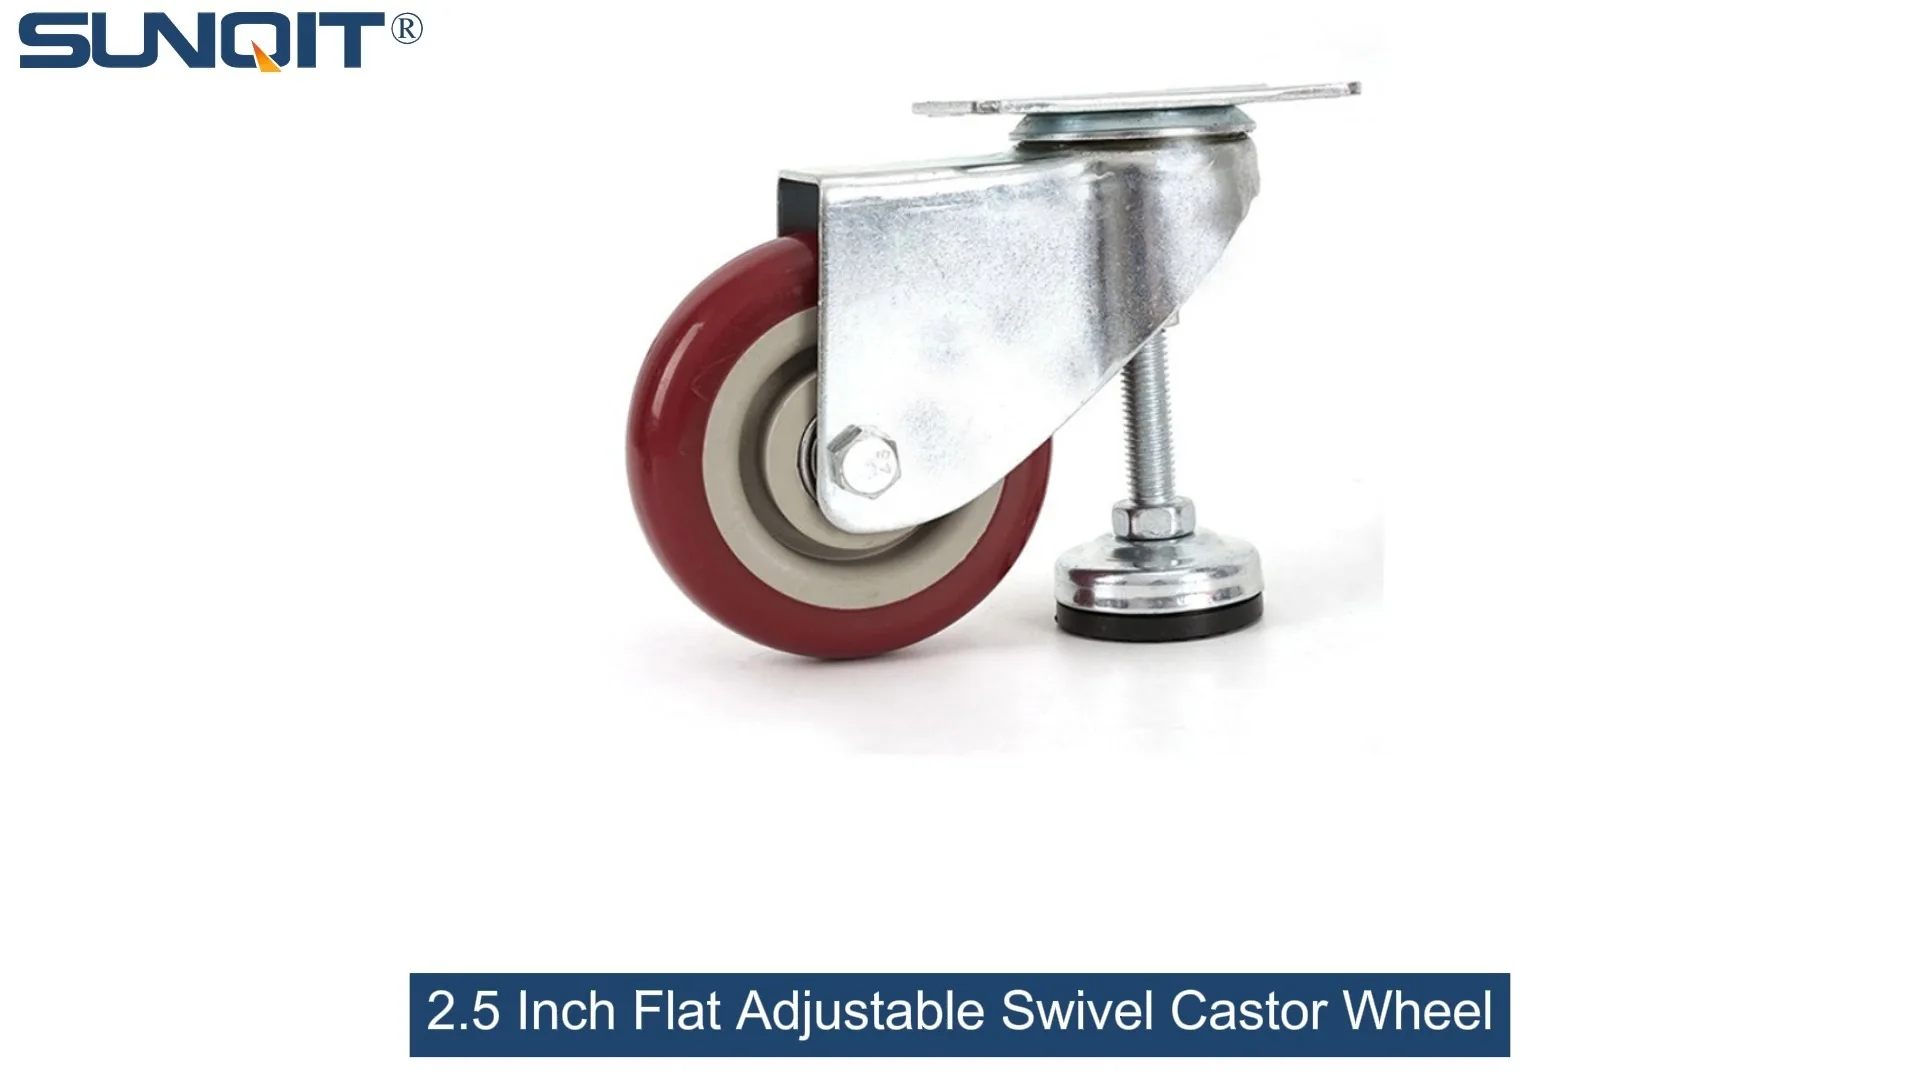
Flat Adjustable Swivel Castor Wheel
Swivel Chair Casters Ball Bearing Wheels Rubber Base with adjustable height function. Resistant to abrasion, impact and corrosion. Heavy payload can hold 80Kgs per pcs,which can make it works at a stable and smooth status.
Picture this: It's a busy Tuesday morning on the factory floor. You're rushing to move a loaded workbench from one assembly station to another, but instead of gliding smoothly, it feels like dragging a boulder through mud. You push harder, and suddenly there's a squeak that makes everyone nearby wince. Sound familiar? If you've ever dealt with a stubborn, noisy, or wobbly castor wheel, you know how much it can slow down your day—maybe even throw a wrench in your entire production timeline. Flat adjustable swivel castor wheels are the unsung heroes of countless workplaces, from warehouses and workshops to hospitals and retail stores. They keep our workbenches mobile, our trolleys rolling, and our operations flowing. But like any hardworking tool, they need a little TLC to stay in top shape. In this guide, we'll walk through everything you need to know about maintaining these essential components—from lubrication hacks to inspection checklists—so you can keep your castors (and your workflow) running smoother than ever.
Why Castor Wheel Maintenance Matters More Than You Think
Let's start with the basics: Why bother with castor maintenance? After all, aren't they just "wheels on a stick"? Think again. A well-maintained castor wheel isn't just a convenience—it's a cornerstone of safety, efficiency, and cost-saving. Here's why it deserves a spot on your to-do list:
Safety first. A faulty castor wheel isn't just annoying—it can be dangerous. If a wheel locks up unexpectedly, a loaded trolley might tip over, putting workers at risk of injury or damaging valuable materials. Worn-out wheels or loose swivel mechanisms can also cause instability, especially when moving heavy loads. In fact, OSHA reports that "unstable equipment" is a leading cause of workplace accidents, and poorly maintained castors are often a hidden culprit.
Efficiency equals productivity. Time is money, and a stiff or squeaky castor eats into both. When your workbench or turnover trolley glides smoothly, you can move materials in seconds instead of minutes. Multiply that by 50 moves a day, and suddenly you're looking at hours of wasted time over a week. A 2023 survey by the Material Handling Equipment Distributors Association (MHEDA) found that companies with regular castor maintenance reported 22% higher productivity than those that neglected it. That's a huge gap for such a simple task.
Longevity saves you cash. Castor wheels aren't cheap—especially high-quality, heavy-duty ones like the flat adjustable swivel type. Replacing a set of four castors can cost anywhere from $50 to $200, depending on the load capacity and material. But with proper care, a good set can last 5–7 years instead of 1–2. That's a 300% increase in lifespan—and a lot of saved dollars over time. Plus, regular maintenance catches small issues (like a loose axle or dry bearing) before they turn into big, expensive problems (like a broken swivel joint or seized wheel).
Anatomy of a Flat Adjustable Swivel Castor Wheel: Know Your Parts
Before we dive into maintenance, let's get familiar with the star of the show: the flat adjustable swivel castor wheel. Understanding its components will make it easier to spot issues and apply the right fixes. Here's a breakdown of the key parts:
The caster wheel itself. This is the part that touches the ground, and its material matters. Most flat adjustable castors use wheels made of rubber, polyurethane, or steel. Rubber is great for indoor use (quiet, non-marking), polyurethane handles heavier loads and rough surfaces, and steel is ideal for industrial settings with extreme weights. Check the wheel for cracks, chunks missing, or uneven wear—these are red flags.
The swivel mechanism. This is what allows the wheel to rotate 360 degrees, making your workbench or trolley easy to maneuver. It includes a "raceway" (the circular track the swivel moves along) and bearings (small metal balls or rollers that reduce friction). If the swivel feels stiff or makes a grinding noise, the bearings or raceway are likely dirty or dry.
The adjustable feature. What sets "flat adjustable" castors apart is their ability to tweak height or leveling. Most use a threaded stem or a screw mechanism: twist it clockwise to lower the castor, counterclockwise to raise it. This is crucial for keeping workbenches stable on uneven floors—imagine assembling delicate electronics on a wobbly surface! If the adjustment gets stuck, it's often due to debris in the threads or rust.
Caster accessories that count. Don't overlook the small stuff! Brakes (to lock the wheel in place), axle caps (to keep dirt out of the wheel bearings), and washers (to reduce friction between moving parts) are all part of the castor's ecosystem. A missing brake pad or a bent axle cap might seem minor, but they can lead to bigger issues down the line.

Lubrication 101: Keeping the Swivel Smooth (No More Squeaks!)
Squeaky castors are like a cry for help—they're literally telling you, "I need oil!" Lubrication is the single most important maintenance task for castor wheels, as it reduces friction in the swivel mechanism and wheel bearings. Let's break down how to do it right.
Step 1: Choose the Right Lubricant
Not all lubricants are created equal. The type you use depends on your environment and the castor's material. Here are the top options:
- Lithium-based grease: The workhorse of lubricants. It's water-resistant, temperature-stable (works in -20°C to 140°C), and great for heavy loads. Perfect for industrial settings, garages, or outdoor use.
- Silicone spray: Ideal for rubber or plastic wheels, as it won't degrade the material. It's lightweight, dries quickly, and leaves a clean finish—good for medical equipment or food-grade environments where grease might attract dirt.
- PTFE (Teflon) oil: Super slippery and long-lasting, with low friction. Great for precision swivel mechanisms (like those on lab equipment or electronics workbenches) where smooth movement is critical.
Pro tip: Avoid WD-40 as a long-term lubricant! It's a solvent, not a lubricant, and will dry out over time, leaving your castors worse off than before. Save it for loosening rusted parts, then follow up with a proper grease or oil.
Step 2: When to Lubricate
Don't wait for the squeak—be proactive! Aim to lubricate your castors:
- Every 3 months for regular use (5–10 moves per day).
- Every 1 month for heavy use (20+ moves per day, or moving loads near the castor's weight limit).
- After exposure to water, dust, or debris (like a rainy day in the warehouse or a dusty construction site).
- Immediately if you notice stiffness, grinding, or squeaking—those are emergency signals!
Step 3: The Lubrication Process (It's Easier Than You Think)
You don't need to be a mechanic to lubricate a castor. Grab your chosen lubricant, a rag, and a small brush (an old toothbrush works great), and follow these steps:
- Clean the castor first. Dirt and debris are the enemy of lubrication—they'll mix with the oil/grease and turn into gritty sludge. Wipe the wheel, swivel joint, and axle with a dry rag to remove loose dirt. For stuck-on grime, use a brush to scrub the swivel raceway and wheel bearings. If it's really dirty, a mild soap and water solution (rinsed and dried thoroughly!) can help.
- Lubricate the swivel mechanism. Tilt the castor so you can see the swivel joint (where the wheel assembly connects to the mounting plate). Apply a small amount of lubricant directly into the raceway—about a pea-sized dollop of grease or a 2-second spray of oil. Then, rotate the wheel 360 degrees a few times to spread the lubricant evenly. You should feel it loosen up immediately.
- Lubricate the wheel bearings. Flip the castor over to expose the wheel axle. If the wheel has a removable cap (common on steel or polyurethane wheels), pop it off to access the bearings. Apply a drop of oil or a thin layer of grease to the bearings, then spin the wheel to work it in. If there's no cap, don't worry—just apply lubricant around the axle where the wheel meets the housing, and spin the wheel to pull the lubricant into the bearings.
- Wipe off excess. More isn't better! Too much lubricant will attract dirt and dust. Use a clean rag to wipe away any drips or buildup on the wheel, axle, or mounting plate.
- Test it out. Give the wheel a spin and swivel it back and forth. It should move smoothly, with no squeaks or resistance. If it still feels stiff, repeat the process—you might have missed a spot.

The Ultimate Inspection Checklist (With a Handy Table!)
Lubrication is half the battle—regular inspections are the other. Even if your castors aren't squeaking, a quick check can catch issues before they escalate. Below is a detailed inspection guide, plus a table to help you stay organized.
What to Inspect (And How)
Visual check: Look for wear and tear. Start with a close-up look at the entire castor assembly. Check the wheel for cracks, splits, or uneven tread—if the wheel is worn down more on one side, it might be misaligned or overloaded. Inspect the swivel joint for rust, bent metal, or missing parts (like a broken cotter pin on the axle). Check the mounting plate (the part that attaches the castor to your workbench or trolley) for cracks or loose bolts—if it's wobbly, the castor could detach mid-move.
Functional check: Test the movement. Spin the wheel by hand—it should rotate freely without wobbling. Swivel the wheel 360 degrees; it should turn smoothly, with no "sticking" points. If it catches or jerks, the raceway might be dirty or the bearings could be worn. Next, test the brake (if your castor has one). Engage it and try to move the wheel— it should lock solidly. If it slips, the brake pad might be worn or misaligned.
Adjustable feature check: Ensure it still adjusts. For flat adjustable castors, twist the height adjustment stem (or turn the leveling screw) to see if it moves easily. If it's stuck, spray a little penetrating oil (like PB Blaster) and let it sit for 10 minutes, then try again. If it still won't budge, there might be debris in the threads—use a small brush to clean them out.
Caster accessories check: Don't forget the extras. Brakes, axle caps, and washers might seem minor, but they're critical. Check that brake levers aren't bent, axle caps are intact (to keep dirt out), and washers are in place (to reduce friction between the wheel and housing). If any accessory is missing or damaged, replace it ASAP—most caster accessories are cheap and easy to find online or at your local hardware store.
| Inspection Component | How to Check | Recommended Frequency | Warning Signs to Watch For |
|---|---|---|---|
| Wheel tread/condition | Visually inspect for cracks, uneven wear, or chunks missing; run finger along tread to feel for bumps | Weekly | Cracks deeper than 1mm, tread worn down to "smooth" (no grip), wobbling when spun |
| Swivel mechanism | Rotate 360 degrees by hand; feel for stiffness or grinding | Bi-weekly | Sticking at certain angles, grinding noise, resistance when swiveling |
| Brake function | Engage brake and try to move wheel; check pad for wear | Weekly | Wheel rolls when brake is engaged, brake pad thinner than 2mm, lever won't lock |
| Adjustable stem/screw | Twist to raise/lower; check for smooth movement | Monthly | Stuck in one position, stripped threads, wobbles when adjusted |
| Mounting plate bolts | Use a wrench to check tightness; inspect for rust or bending | Monthly | Bolts are loose (can be turned by hand), rusted threads, bent mounting plate |

Troubleshooting Common Castor Issues (Fixes You Can Do Today)
Even with regular maintenance, castors can act up. Here are the most common problems and how to fix them—no professional help needed!
Problem: Squeaky Wheels
Cause: Dry swivel bearings or wheel bearings (the #1 culprit!), or debris in the raceway.
Fix: Lubricate immediately (follow the steps above). If that doesn't work, clean the swivel raceway with a brush and soapy water, dry thoroughly, and re-lubricate. For persistent squeaks, check if the wheel is misaligned—loosen the axle nut, realign the wheel, and tighten it back up.
Problem: Wheel Wobbles or Tilts
Cause: Bent axle, worn wheel bearings, or uneven tread wear (from overloading or misalignment).
Fix: First, check the axle—if it's bent, replace it (axles are cheap and easy to swap). If the axle is straight, inspect the wheel bearings; if they're gritty or don't spin smoothly, replace them. For uneven wear, rotate the wheels (like you would on a car!) to distribute wear evenly, or replace the wheel if it's too far gone.
Problem: Swivel Mechanism Sticks
Cause: Dirt in the raceway, rust, or dried-out lubricant.
Fix: Clean the raceway with a brush and compressed air (or a can of air duster) to remove debris. If there's rust, apply a rust dissolver (like Naval Jelly) and let it sit for 10 minutes, then scrub with a wire brush and re-lubricate. For stubborn cases, disassemble the swivel joint (if possible) and clean each part individually before reassembling with fresh lubricant.
Problem: Adjustable Feature Won't Move
Cause: Debris in the threads, rust, or over-tightening.
Fix: Spray the adjustment stem with penetrating oil and let it sit for 15 minutes. Use a wrench to gently twist back and forth (don't force it!) to break up rust or debris. If there's visible dirt, use a toothpick or small screwdriver to pick it out of the threads, then apply a light coat of oil to keep it moving smoothly.
Creating a Maintenance Schedule That Sticks (Yes, You Can Do It!)
Let's be real: Between meetings, deadlines, and unexpected fires to put out, "maintain castor wheels" can easily fall to the bottom of your priority list. That's why a simple, consistent schedule is key. Here's how to build one that works for your team:
Assign ownership. You don't need a dedicated "castor czar," but someone should be responsible—whether it's the shop foreman, the warehouse manager, or a rotating weekly "equipment check" role. Make it clear who's in charge so nothing slips through the cracks.
Start small. If you're new to maintenance, don't aim for daily checks—you'll burn out. Start with weekly visual inspections and monthly lubrication. As your team gets comfortable, you can tweak the frequency based on how heavily your castors are used.
Use reminders. Set calendar alerts, sticky notes on the workbench, or even a whiteboard checklist in the break room. For example: "Monday: Inspect castors on Trolley A and Workbench B" or "Last Friday of the month: Lubricate all adjustable castors."
Keep records. A simple log (digital or paper) noting when castors were inspected, lubricated, or repaired can help you spot patterns—like "Trolley C always needs lubrication sooner" (maybe it's used more!) or "Workbench D's left castor wears out fast" (could be overloaded). Over time, these records will help you optimize your maintenance routine.
Final Thoughts: Your Castors Deserve a Little Love
Flat adjustable swivel castor wheels might not be the flashiest part of your equipment, but they're the backbone of a smooth-running operation. By taking 10–15 minutes a month to lubricate, inspect, and tweak them, you'll avoid costly downtime, reduce safety risks, and extend the life of your castors (and the workbenches, trolleys, and carts they're attached to). Remember: maintenance isn't just about fixing problems—it's about preventing them. The next time you glide a workbench across the floor with zero effort, or load a trolley without a single squeak, you'll know that little bit of time invested was worth it.
So grab your lubricant, your rag, and your checklist—and give those hardworking castors the care they deserve. Your team, your timeline, and your budget will thank you.