- Company Articles
- Products and Technology
- Installation And Maintenance
- How to Maintain Parallel Rotatory Lean Pipe Joints for Longevity

How to Maintain Parallel Rotatory Lean Pipe Joints for Longevity
Related Product
Parallel Rotatory Lean Pipe Joint
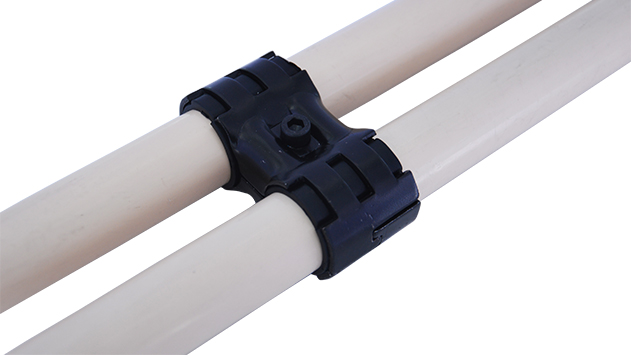
Parallel rotatory lean pipe joint, for 2 pcs pipe conenction in parallel direction with rotatory function.
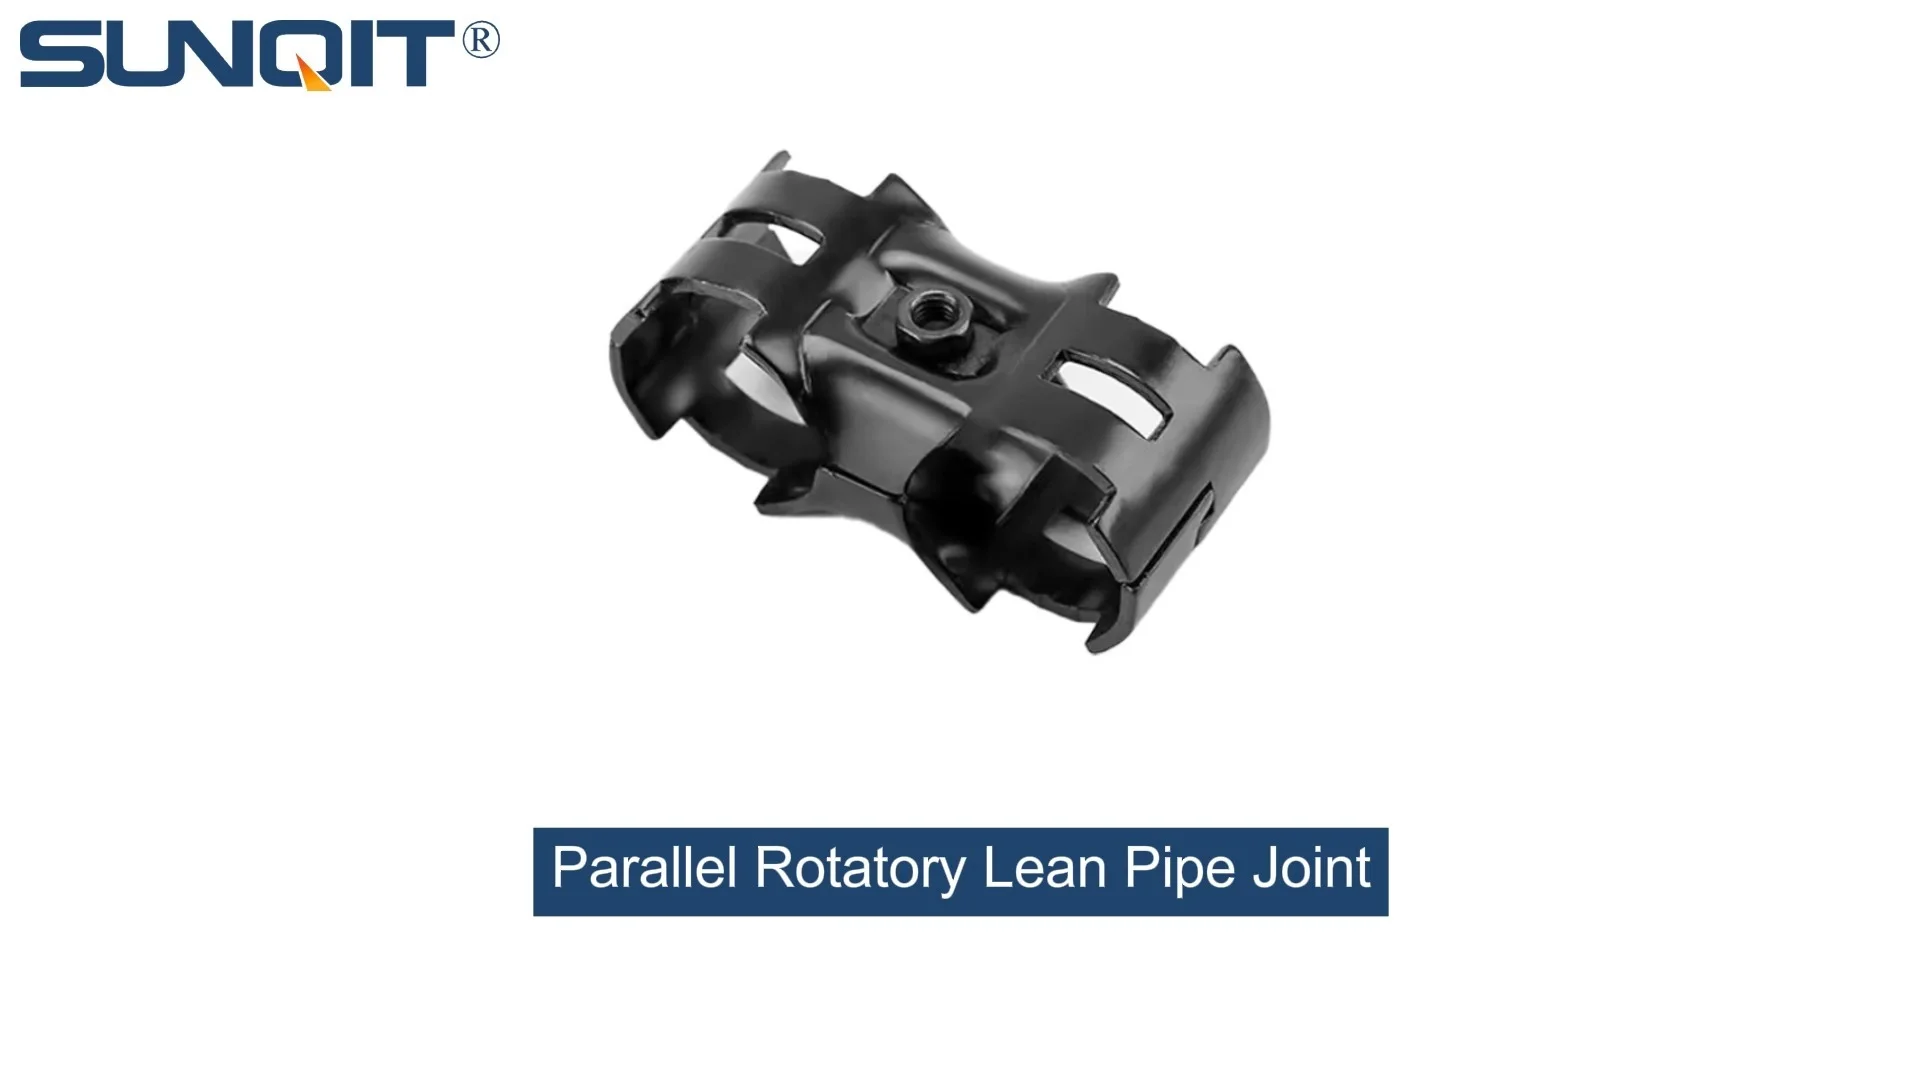
In the fast-paced world of manufacturing and production, every component of your workflow matters. From the largest conveyor belts to the smallest connectors, each part plays a role in keeping operations running smoothly. One such unsung hero is the parallel rotatory lean pipe joint —a critical piece in lean systems that enables flexibility, adaptability, and efficient material flow. Whether you're managing a bustling factory floor or a precision-focused assembly line, ensuring these joints stay in top shape isn't just about avoiding downtime; it's about preserving the heart of your lean system's functionality.
Imagine a scenario: your production line suddenly grinds to a halt because a joint that once rotated smoothly is now stuck, causing a bottleneck in material handling. The cost of such a delay—lost time, missed deadlines, frustrated teams—adds up quickly. But here's the good news: with proactive maintenance, most of these issues are entirely preventable. In this guide, we'll walk through the ins and outs of maintaining parallel rotatory lean pipe joints , from daily checks to long-term care, so you can keep your lean system operating at peak efficiency for years to come.
Understanding Parallel Rotatory Lean Pipe Joints: Why They Matter
Before diving into maintenance, let's take a moment to appreciate what makes these joints so vital. Parallel rotatory lean pipe joints are designed to connect lean pipes (often aluminum or steel) while allowing controlled rotation, making them ideal for adjustable workbenches, material racks, and flow systems. Unlike fixed joints, their ability to swivel and pivot means your setup can evolve with changing production needs—no need to rebuild entire structures from scratch. This flexibility is the cornerstone of lean system philosophy: minimizing waste (including time and resources spent on reconfigurations) and maximizing value.
Many of these joints, especially high-quality ones, come with a chrome finish (think parallel rotatory lean pipe joint chrome variants). Chrome isn't just for aesthetics; it adds a layer of protection against corrosion, wear, and tarnish, extending the joint's lifespan. But even the sturdiest chrome-plated joints need care. Dust, debris, friction, and environmental factors can take a toll over time, turning a smooth rotation into a stiff, unreliable movement. That's where maintenance comes in—not as a chore, but as an investment in your system's longevity.
Step 1: Regular Inspection—Catching Issues Before They Escalate
The first rule of maintenance? Don't wait for something to break. Regular inspections are your first line of defense against unexpected failures. How often should you inspect? It depends on your environment—we'll break that down in a table later—but as a general rule, aim for weekly visual checks and monthly deep dives. Here's what to look for:
Looseness or "Play" in the Joint
Gently grasp the connected pipes and try to wiggle them. A small amount of movement is normal, but if there's noticeable "play" (excess movement) or if the joint feels loose, it's a red flag. Looseness can stem from worn internal components, stripped threads, or bolts that have worked their way free over time. Left unaddressed, this can lead to misalignment in your structure, putting extra stress on other joints and pipes.
Corrosion or Tarnish on Chrome Surfaces
Chrome finishes are resistant to rust, but they're not impervious. Check for spots of discoloration, pitting, or flaking chrome. These are signs that moisture or chemicals have breached the protective layer, exposing the underlying metal to corrosion. In humid environments or areas with high chemical exposure (like near cleaning stations), this is especially common. Even small patches of corrosion can spread, weakening the joint's structural integrity.
Cracks, Chips, or Deformation
Inspect the joint's body, especially around the connection points and the rotating mechanism. Look for hairline cracks, chips in the material, or signs of bending/deformation. These can occur from overloading (e.g., placing too much weight on a rack supported by the joint), accidental impacts (like a forklift bumping into the structure), or metal fatigue from repeated rotation. A cracked joint isn't just a maintenance issue—it's a safety hazard.
Wear on Moving Parts
The rotating mechanism is the heart of a parallel rotatory joint. Check the pivot points, bearings (if present), and any moving components for signs of wear. Does the joint rotate smoothly, or does it feel gritty, jerky, or stiff? Are there metal shavings or debris around the rotation point? These are indicators that parts are rubbing together improperly, which can accelerate wear and lead to seizing.
| Environment Type | Visual Inspection Frequency | Deep Dive Inspection Frequency | Key Focus Areas |
|---|---|---|---|
| Clean room / Low dust | Every 2 weeks | Every 3 months | Chrome tarnish, bearing smoothness |
| Standard factory floor (moderate dust) | Weekly | Monthly | Looseness, debris buildup, corrosion |
| High-dust / Humid environment (e.g., food processing, outdoor storage) | 3–4 times weekly | Bi-weekly | Corrosion, debris in rotation points, bolt tightness |
Step 2: Cleaning—Keeping Debris and Grime at Bay
Dust, oil, grease, and even tiny metal shavings can find their way into the crevices of your parallel rotatory joint, acting like sandpaper on moving parts. Over time, this buildup can slow rotation, cause friction, and accelerate wear. Cleaning isn't just about making the joint look good—it's about preserving its functionality. Here's how to do it right:
Tools You'll Need
- Soft-bristled brush (toothbrush or small parts brush works well)
- Lint-free microfiber cloths
- Mild detergent (dish soap diluted in water works) or isopropyl alcohol (for tougher grime)
- Compressed air can (for hard-to-reach areas)
- Non-abrasive sponge (avoid steel wool or scouring pads—they'll scratch chrome!)
The Cleaning Process
1. Remove Loose Debris First: Use the soft brush to gently sweep away dust and loose particles from the joint's surface, especially around the rotation points and bolt heads. For tight spaces (like between the joint and the pipe), use compressed air to blow out debris—hold the can 6–8 inches away to avoid damaging sensitive components.
2. Wipe Down with Mild Cleaner: Dampen a microfiber cloth with diluted dish soap (1–2 drops per cup of water) and wipe the entire joint, paying extra attention to chrome surfaces. The goal is to remove oils, fingerprints, and light grime without stripping the chrome. For sticky residues (like dried grease), lightly dampen the cloth with isopropyl alcohol and rub gently—alcohol evaporates quickly, so it won't leave moisture behind.
3. Dry Thoroughly: Use a clean, dry microfiber cloth to wipe the joint dry. Moisture is the enemy of chrome and metal, so don't skip this step! In humid environments, you can even use a hair dryer on the cool setting to ensure no water remains in crevices.
4. Inspect Again Post-Cleaning: Now that the joint is clean, take another look. Grime can hide cracks or corrosion, so a post-cleaning inspection often reveals issues you might have missed earlier.
Pro Tip: Avoid harsh chemicals like bleach, ammonia, or acidic cleaners (e.g., vinegar) on chrome surfaces. These can eat away at the protective layer, leaving the joint vulnerable to corrosion.

Step 3: Lubrication—Ensuring Smooth Rotation for Years
Even the cleanest joint will struggle to rotate smoothly without proper lubrication. Friction between moving parts can cause wear, heat buildup, and eventually, seizing. The key is to choose the right lubricant and apply it correctly. Let's break this down:
Choosing the Right Lubricant
Not all lubricants are created equal. For parallel rotatory lean pipe joints, you'll want a lubricant that:
- Resists dust and debris (so it doesn't turn into a gritty paste)
- Works well with metal surfaces (especially chrome)
- Provides long-lasting protection without dripping or becoming too thick in cold temperatures
Silicone-based lubricants are a top choice here. They're water-resistant, won't damage chrome, and repel dust better than petroleum-based greases. Look for a clear, lightweight silicone spray or gel (avoid heavy greases, which can attract more debris). If your joint is in a food-grade environment, opt for NSF H1-rated lubricants (food-safe) to comply with regulations.
How and When to Lubricate
Frequency depends on usage: joints that rotate multiple times per hour (e.g., on a busy assembly line) need lubrication every 2–4 weeks. For less frequently used joints (e.g., in a storage rack), monthly lubrication should suffice. Here's the step-by-step:
1. Clean First: Always lubricate a clean joint! Applying lube over dust or grime will trap debris, causing more harm than good. Refer back to the cleaning steps above before lubricating.
2. Apply Sparingly: Less is more here. For spray lubricants, hold the can 4–6 inches from the rotation point and spray for 1–2 seconds. For gels, use a toothpick or small brush to apply a tiny amount directly to the pivot area. Wipe away excess lube with a clean cloth—you want a thin, even layer, not a glob.
3. Work the Lubricant In: Rotate the joint back and forth several times to distribute the lubricant evenly across all moving parts. This ensures every nook and cranny gets coverage.
4. Wipe Again: After working in the lube, wipe away any excess that squeezes out. This prevents dust from sticking to the joint.

Step 4: Tightening and Adjustment—Preventing Misalignment
Over time, the bolts, nuts, or set screws that hold the joint together can loosen due to vibration, thermal expansion, or repeated rotation. Loose fasteners not only cause "play" in the joint but can also lead to misalignment in your entire structure. For example, a loose joint on a material rack might cause the rack to lean, putting stress on adjacent joints and increasing the risk of collapse.
Tools You'll Need
- Hex keys (Allen wrenches) in the correct size (most lean pipe joints use metric sizes like M5 or M6)
- Adjustable wrench (for larger nuts)
- Torque wrench (optional, but useful for ensuring consistent tightness)
- Thread locker (blue, removable type—avoid red, which is permanent)
Tightening Best Practices
1. Identify Fastener Types: Most parallel rotatory joints use hex bolts or set screws to secure the pipes. Check the joint's manual (or ask your lean pipe supplier if you're unsure) for the correct torque specifications—over-tightening can strip threads or crack the joint's plastic or metal components.
2. Tighten in a "Star" Pattern (For Multi-Bolt Joints): If the joint has multiple bolts (common in larger joints), tighten them in a star pattern (like tightening lug nuts on a car wheel). This ensures even pressure and prevents warping.
3. Use Thread Locker for Persistently Loose Fasteners: If a bolt keeps loosening despite regular tightening, apply a small drop of blue thread locker to the threads before reinserting. Let it dry for 10–15 minutes before tightening—it will hold the bolt in place without making future removal impossible.
4. Check Alignment Post-Tightening: After tightening, rotate the joint to ensure movement is still smooth. Over-tightening can restrict rotation, so if the joint feels stiff, loosen the bolts slightly and test again.
Step 5: Handling Wear and Tear—Repair or replace?
Even with perfect maintenance, all joints will wear out eventually. The question is: when should you repair, and when should you replace? Here's how to decide:
Signs It's Time to replace
- Cracks in the joint body: Structural cracks (not just surface scratches) compromise the joint's ability to hold weight. replace immediately.
- Seized rotation: If lubrication and cleaning don't restore smooth movement, the internal bearings or pivot points are likely worn beyond repair.
- Excessive corrosion: Pitting or widespread flaking chrome that can't be cleaned off—corrosion weakens the metal, making the joint unsafe.
- Stripped threads: If bolts no longer grip securely, even with thread locker, the threads are stripped. replace the joint (or the threaded insert, if available as a separate part from your lean pipe and accessories supplier).
When Repair Might Suffice
- Minor surface scratches on chrome: These are cosmetic and don't affect functionality. Polish with a chrome cleaner to reduce further tarnishing.
- Loose fasteners: As long as threads are intact, tightening or replacing the bolt/nut should fix the issue.
- Dull rotation due to dry lubricant: A thorough cleaning and re-lubrication often restore smoothness.
When replacing, always source parts from a reputable lean pipe supplier . Cheap, off-brand joints may not meet the same quality standards, leading to premature failure. Look for suppliers who offer warranties on their lean pipe and accessories —it's a sign they stand behind their products.
Step 6: Protecting Joints from Environmental Hazards
Your maintenance efforts can only go so far if the environment is working against you. Here's how to mitigate common environmental threats:
Humidity and Moisture
In damp areas (e.g., near washing stations or in coastal factories), moisture accelerates corrosion. Combat this by:
- Applying a thin coat of carnauba wax to chrome surfaces every 3 months (wax repels water and adds a protective barrier).
- Using dehumidifiers in enclosed spaces.
- Installing drip guards above joints if they're near water sources.
Dust and Debris
Dusty environments (e.g., woodworking shops, concrete manufacturing) can clog rotation points. Solutions include:
- Installing protective covers (clear plastic bellows or sleeves) over joints in high-dust zones.
- Increasing cleaning frequency (refer back to the inspection table for dusty environments).
- Using air curtains or fans to redirect dust away from critical joints.
Extreme Temperatures
High heat (e.g., near ovens or welding stations) can break down lubricants, while extreme cold can make them thick and ineffective. Adapt by:
- Using high-temperature lubricants (rated for 200°F+ if needed) in hot areas.
- Switching to low-temperature lubricants (e.g., silicone-based) in cold environments.
- Insulating joints near heat sources with heat-resistant sleeves.
Conclusion: Maintenance as a Mindset, Not a Task
Maintaining parallel rotatory lean pipe joints isn't just about checking boxes on a to-do list. It's about fostering a culture of care—one where every team member understands that small, consistent actions (a weekly wipe-down, a monthly lubrication) keep the entire lean system running smoothly. When your joints are well-maintained, your structure stays flexible, your workflow stays efficient, and your team stays focused on what matters: creating value.
Remember, the goal isn't perfection—it's progress. Start with the basics: inspect regularly, clean gently, lubricate properly, and tighten when needed. Over time, these habits will become second nature, and you'll reap the rewards: fewer breakdowns, lower replacement costs, and a lean system that stands the test of time.
So, the next time you walk past your assembly line or material rack, take a moment to check those joints. A little attention today can save you a lot of trouble tomorrow. After all, in the world of lean manufacturing, every detail counts—and that includes the humble parallel rotatory lean pipe joint.