- Company Articles
- Products and Technology
- Installation And Maintenance
- How to Maintain Vertical Lean Pipe Joints for Extended Lifespan

How to Maintain Vertical Lean Pipe Joints for Extended Lifespan
Related Product
Vertical Lean Pipe Joint
Vertical lean pipe joint is used for 28mm lean pipe fixed on ground and keep it stable.
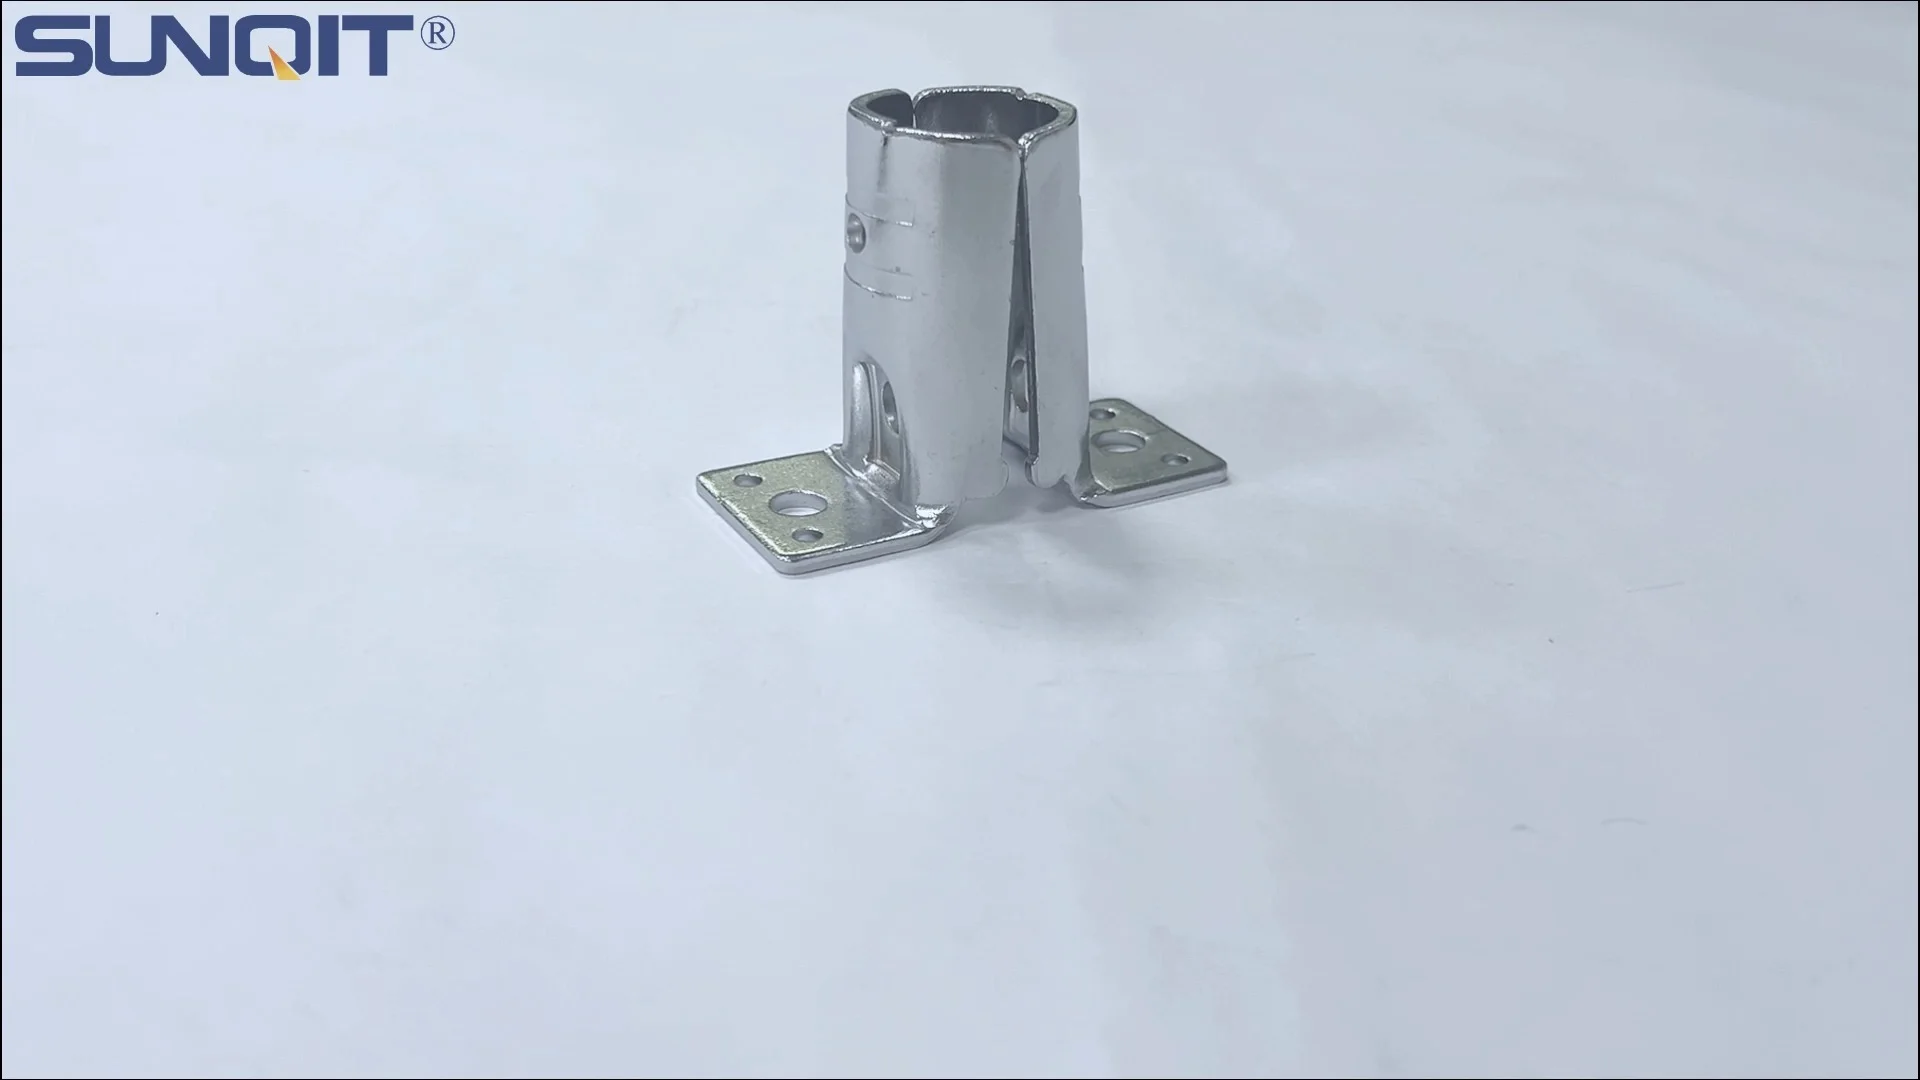
If you've ever walked through a busy factory or workshop, you've probably seen them: those unassuming metal or plastic connectors that hold together the framework of workbenches, flow racks, and turnover trolleys. They're called vertical lean pipe joints, and while they might not get the same attention as the flashy machinery on the production floor, they're the unsung heroes keeping your workspace organized, efficient, and safe. A single loose or worn joint can throw off an entire lean system, slowing down production, creating safety hazards, and even damaging valuable materials. The good news? With a little care and regular maintenance, you can extend the lifespan of these critical components and keep your operations running smoothly. In this guide, we'll break down everything you need to know about maintaining vertical lean pipe joints—from daily inspections to troubleshooting common issues—so you can get the most out of your lean pipe and accessories.
Why Vertical Lean Pipe Joints Deserve Your Attention
Before diving into maintenance steps, let's take a moment to appreciate just how hard these joints work. Vertical lean pipe joints are the backbone of countless industrial setups. They connect lean pipes (whether steel, aluminum, or stainless steel pipe series) to form sturdy structures like workbenches, material racks, and even mobile trolleys fitted with caster and accessories. Every time a worker leans on a workbench, loads a cart with heavy parts, or slides materials down a flow rack, the vertical joints absorb that stress. Over time, this constant pressure can lead to wear, loosening, or even breakage if left unchecked.
Consider a typical scenario: A material rack B (3 row and 3 floor) in your warehouse relies on vertical joints to support multiple levels of inventory. If one joint starts to weaken, the entire rack might sag, causing products to shift or fall. Or imagine a workbench E (single deck-without caster) in your assembly line—if the vertical joints holding its legs together loosen, the surface could wobble, making precise work nearly impossible. These aren't just minor inconveniences; they're productivity killers and potential safety risks. By prioritizing joint maintenance, you're not just saving money on replacements—you're investing in smoother workflows and a safer workplace.
The Basics: What Are Vertical Lean Pipe Joints?
For those new to lean systems, let's clarify: vertical lean pipe joints are specialized connectors designed to join lean pipes at 90-degree angles (though some can rotate or adjust for other configurations). They come in various materials—plastic, aluminum, or steel—and styles, including fixed joints, swivel joints, and internal rotatory aluminum joints for more flexible setups. The key feature? They clamp tightly around the ends of lean pipes, creating a rigid connection that can withstand the demands of daily use. Some joints use bolts to secure the pipe, while others rely on friction or compression. No matter the design, their job is simple: keep the structure stable.
Pro Tip:
Not all vertical joints are created equal! If your workspace deals with heavy loads or harsh conditions (like moisture or chemicals), consider upgrading to stainless steel pipe series joints. They're more corrosion-resistant than standard steel and require less frequent maintenance in tough environments.

Step-by-Step Maintenance for Vertical Lean Pipe Joints
1. Daily Visual Inspections: Catch Issues Early
The first line of defense against joint failure is a quick daily inspection. You don't need fancy tools—just a keen eye and a minute or two per structure. Here's what to look for:
- Cracks or Damage: Check the joint housing for hairline cracks, especially around the areas where the pipe inserts. Even small cracks can weaken the joint over time, so mark any suspect joints for closer inspection.
- Loose Bolts or Fasteners: Most joints use bolts or screws to secure the pipe. Give these a gentle wiggle with your fingers—if they move, they're loose and need tightening.
- Gaps Between Pipe and Joint: A tight joint should grip the pipe snugly. If you notice a gap (even a small one), it could mean the joint is worn or the pipe is bent, reducing stability.
- Rust or Corrosion: For metal joints, rust is a red flag. It eats away at the material, weakening the joint and making it harder to tighten. Pay extra attention to joints near water sources or in humid environments.
- Misalignment: Stand back and look at the structure—are the vertical pipes straight, or do they lean to one side? A leaning frame often points to a failed or loose vertical joint.
Make this a part of your team's daily routine. Assign workers to inspect the joints on their nearest workbench or trolley at the start of each shift. It takes just a minute, but it can prevent costly breakdowns later.
2. Weekly Cleaning: Keep Debris at Bay
Factories are dusty places, and that dust loves to settle in the nooks and crannies of vertical lean pipe joints. Over time, dirt, grease, and metal shavings can act like sandpaper, wearing down the joint's moving parts (if it's a rotatory joint) or corroding the surface. A weekly cleaning session will keep these contaminants in check.
Here's how to do it right:
- Blow Away Loose Debris: Use compressed air to blast dust out of the joint's crevices, especially around bolts and where the pipe meets the joint. Hold the air nozzle a few inches away to avoid damaging plastic components.
- Wipe Down with Mild Detergent: For stubborn grime (like oil or grease), dampen a soft cloth with warm, soapy water and gently wipe the joint. Avoid harsh chemicals like bleach or solvents—they can degrade plastic joints or strip protective coatings from metal ones.
- Dry Thoroughly: Moisture is the enemy of metal joints, so dry the joint completely with a clean towel after cleaning. For hard-to-reach areas, use a hairdryer on the cool setting to speed up drying.
- Check for Hidden Debris: If the joint has moving parts (like an internal rotatory aluminum joint), rotate it a few times while cleaning to dislodge any trapped dirt. You'd be surprised how much gunk can build up inside!
3. Monthly Tightening: Keep Joints Snug
Even the best-installed joints will loosen over time, thanks to vibration from machinery, repeated loading, and thermal expansion. That's why monthly tightening is non-negotiable. But here's the catch: overtightening can be just as bad as undertightening. Stripped threads or cracked joint housings are common mistakes when workers crank down bolts too hard. Instead, follow these guidelines:
- Use the Right Tools: A torque wrench is ideal for precision, but if you don't have one, a regular wrench or screwdriver will work—just go slow. Avoid using pliers, which can slip and damage the bolt head.
- Follow the "Snug + Quarter-Turn" Rule: Tighten the bolt until it's snug (you feel resistance), then give it a gentle quarter-turn more. This ensures a secure fit without overdoing it.
- Check All Fasteners: Don't just focus on the obvious bolts—some joints have hidden set screws or locking nuts. Refer to the manufacturer's specs if you're unsure how many fasteners to tighten.
- Mark Tightened Joints: Use a marker to put a small dot on the bolt and joint after tightening. This way, you'll know which joints have been serviced and can avoid double-checking.
4. Quarterly Lubrication: Keep Moving Parts Smooth
If your vertical lean pipe joints have moving components—like swivel joints or internal rotatory aluminum joints—lubrication is key to preventing friction and wear. Without it, these parts can seize up, making adjustments difficult or causing the joint to fail under stress. But not all lubricants are created equal; the wrong type can attract dust or degrade plastic.
Here's how to choose and apply lubricant:
- Stick to Silicone or PTFE-Based Lubricants: These are ideal for most joints because they repel water, resist high temperatures, and don't attract dust. Avoid petroleum-based greases, which can break down plastic over time.
- Apply Sparingly: A little goes a long way. Use a small brush or cloth to apply a thin layer of lubricant to the joint's moving surfaces (e.g., the pivot point of a swivel joint). Wipe away excess to prevent dripping onto work surfaces or products.
- Focus on High-Stress Areas: Joints that support heavy loads (like those on material racks) or are adjusted frequently (like those on adjustable workbenches) need extra attention. Reapply lubricant more often if you notice stiffness or squeaking.
5. Biannual Rust and Corrosion Checks
Even with regular cleaning, metal vertical lean pipe joints (especially those not in the stainless steel pipe series) can develop rust in humid or damp environments. Biannual deep checks will help you catch corrosion early, before it weakens the joint beyond repair.
What to look for:
- Surface Rust: Small, flaky patches on the joint's surface. This is usually cosmetic but can spread if ignored.
- Pitting: Tiny holes in the metal, caused by advanced corrosion. Pitted joints are weakened and should be replaced immediately.
- Stuck Bolts: If a bolt is seized due to rust, don't force it—you'll snap it off. Instead, apply a rust penetrant (like WD-40) and let it sit for 10–15 minutes before trying to loosen.
For surface rust, gently sand the area with fine-grit sandpaper, wipe away dust, and apply a rust-inhibiting primer. For pitted or severely corroded joints, replacement is the safest bet—keep a stock of spare lean pipe joints on hand to avoid downtime.

Maintenance Schedule: A Quick Reference Guide
| Task | Frequency | Tools Needed | Key Notes |
|---|---|---|---|
| Visual Inspection (cracks, looseness, gaps) | Daily | None (just your eyes!) | Assign to workers during shift start-up. |
| Cleaning (dust, debris removal) | Weekly | Compressed air, soft cloth, mild detergent | Avoid harsh chemicals; dry thoroughly. |
| Bolt Tightening | Monthly | Wrench, screwdriver, or torque wrench | "Snug + quarter-turn" rule to avoid over-tightening. |
| Lubrication (moving joints only) | Quarterly | Silicone/PTFE lubricant, small brush | Apply thin layer; wipe excess. |
| Rust/Corrosion Check | Biannual | Sandpaper, rust penetrant, primer (if needed) | replace pitted or severely corroded joints. |

Troubleshooting Common Vertical Lean Pipe Joint Issues
Even with regular maintenance, problems can pop up. Here's how to diagnose and fix the most common issues:
Issue 1: The Joint is Loose, Even After Tightening
If a joint keeps loosening shortly after tightening, there are a few possible causes: stripped threads on the bolt or joint housing, a worn-out clamping mechanism, or a mismatched pipe and joint size. Start by inspecting the bolt—if the threads are damaged, replace it with a new one of the same size. If the joint housing has stripped threads, you'll need to replace the entire joint. For worn clamping mechanisms (common in plastic joints), look for cracks or deformation in the part that grips the pipe—again, replacement is the fix.
Issue 2: The Joint is Bent or Misaligned
A bent joint is usually a sign of overloading. If the joint is made of metal, you might be tempted to bend it back into shape, but this weakens the material and makes it prone to breaking. It's safer to replace the joint. For misalignment, check if the pipe itself is bent—if so, straighten or replace the pipe before installing a new joint.
Issue 3: The Joint is Squeaking or Sticking
Squeaking is often a sign of dry moving parts. Try lubricating the joint with silicone or PTFE lubricant. If it still sticks, check for debris trapped in the mechanism—clean thoroughly and retry. If the problem persists, the joint may be worn and need replacement.
Pro Tip:
When replacing joints, always use genuine lean pipe and accessories from a reputable supplier. Off-brand or mismatched parts might be cheaper, but they often don't fit as snugly or withstand stress as well, leading to more frequent replacements down the line.
Going the Extra Mile: Pro Maintenance Tips
Want to take your vertical lean pipe joint maintenance to the next level? Try these expert tips:
- Train Your Team: Host a quick training session to teach workers how to spot loose joints, clean them properly, and report issues. The more eyes on the problem, the faster you'll catch issues.
- Keep Spare Parts Handy: Maintain a small inventory of vertical lean pipe joints, bolts, and lubricant. This way, you can replace a worn joint immediately instead of waiting for a supplier delivery.
- Pair Joint Maintenance with Caster Checks: If your structure has wheels (like a turnover trolley), inspect the caster and accessories at the same time as the joints. Wobbly casters can put extra stress on vertical joints, so keeping them in good shape reduces wear.
- Consider Environmental Upgrades: In humid or corrosive environments, switch to stainless steel pipe series joints or aluminum lean pipe, which resist rust better than standard steel. It's a bigger upfront cost but saves on maintenance long-term.
Final Thoughts: Invest in Maintenance, Reap the Rewards
Vertical lean pipe joints might not be the most glamorous part of your workshop, but they're essential to keeping your lean system running at peak efficiency. By incorporating daily inspections, weekly cleanings, and regular tightening and lubrication into your routine, you can extend their lifespan, reduce downtime, and create a safer workplace. Remember: maintenance isn't just about fixing problems—it's about preventing them. A little time spent caring for these joints today will save you hours of frustration (and money) tomorrow. So grab your wrench, gather your team, and start giving your vertical lean pipe joints the attention they deserve—your productivity (and your bottom line) will thank you.