- Company Articles
- Products and Technology
- Installation And Maintenance
- How to Measure for a Replacement Aluminum Foot Base on Your Workbench

How to Measure for a Replacement Aluminum Foot Base on Your Workbench
Related Product
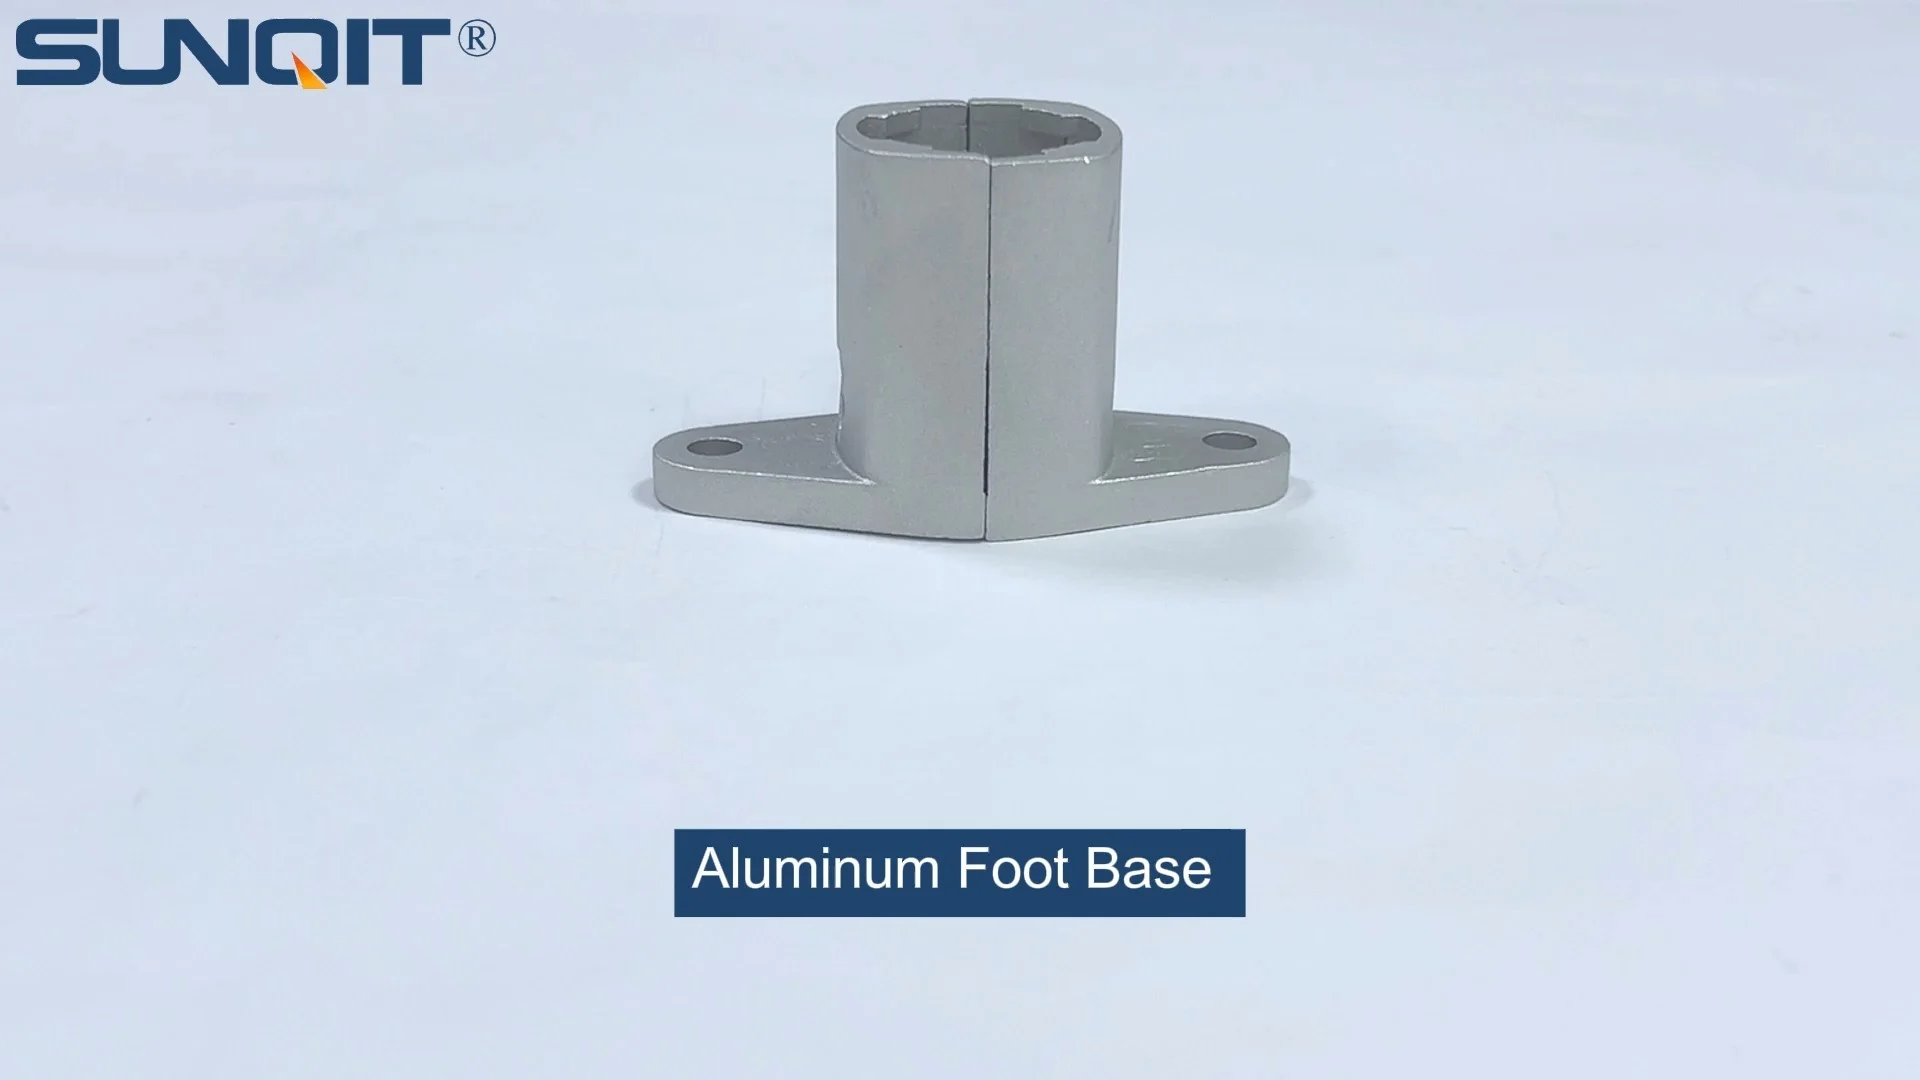
Aluminum Foot Base
Aluminum foot base to connect 28mm aluminum pipe and fixed it on the ground and prevent pipe fall and move.
If you've ever spent hours hunched over a wobbly workbench, you know how frustrating it can be. A stable workbench isn't just about comfort—it's about safety, precision, and getting the job done right. More often than not, that instability traces back to a small but critical component: the aluminum foot base. These unassuming parts bear the weight of your workspace, keep the bench level, and protect your floors from scratches. Over time, though, they can wear down, crack, or lose their grip, turning your reliable workbench into a liability.
Replacing an aluminum foot base might sound like a task for a pro, but with the right measurements, it's a DIY project anyone can tackle. The key? Taking accurate, detailed measurements of your old foot base (or the mounting area) to ensure the new one fits like a glove. In this guide, we'll walk you through every step of the process—from identifying when it's time for a replacement to recording the exact specs you need. By the end, you'll have the confidence to pick the perfect replacement and get your workbench back to its sturdy best.
Why the Aluminum Foot Base Matters
Before we dive into measurements, let's talk about why the aluminum foot base is so important. Think of it as the foundation of your workbench. Even if your bench has a solid frame and durable top, a faulty foot base can undermine everything. Aluminum is a popular choice here for good reason: it's lightweight, resistant to rust, and strong enough to support heavy loads—perfect for workshops, garages, or manufacturing floors.
Over time, though, wear and tear take their toll. Maybe the threads on the adjustable leveling feet are stripped, making it impossible to level the bench. Or perhaps the base itself has developed a crack from years of supporting heavy tools. Even small issues, like a worn rubber pad, can lead to slipping or unevenness. Ignoring these problems isn't just annoying—it can throw off your measurements when cutting materials, increase the risk of tools sliding off, or even damage your floor. Replacing the foot base is a small investment that pays off in stability and peace of mind.
Tools You'll Need to Get Started
You don't need a fully stocked workshop to measure for a replacement foot base, but having the right tools will make the process much smoother. Here's what you'll want to gather before you start:
| Tool | Purpose | Pro Tip |
|---|---|---|
| Tape Measure (12–25 ft) | Measures length, width, and height of the foot base and mounting area. | Opt for a retractable tape with clear markings—metric and imperial if possible, since some parts list specs in mm. |
| Digital Calipers | Measures small, precise dimensions like hole diameters or thread size. | Battery-powered calipers with a digital readout are easiest—no squinting at tiny lines! |
| Spirit Level | Checks if the workbench is level (helpful for diagnosing foot base issues). | A 24-inch level works best for checking the entire bench top. |
| Pencil and Notebook | Records measurements—always write them down immediately to avoid forgetting! | Sketch the foot base from different angles (top, side, bottom) and label measurements directly on the drawing. |
| Screwdriver or Wrench | Removes the old foot base (if needed for closer inspection). | Bring a set of hex keys, Phillips, and flathead screwdrivers—foot bases are often secured with different fasteners. |

Step 1: Confirm It's Time for a Replacement
Not sure if your foot base really needs replacing? Let's rule out other issues first. Sometimes, a wobbly workbench can be fixed with a quick adjustment, not a full replacement. Grab your spirit level and place it on the workbench top. If it's uneven, try adjusting the leveling feet (if your base has them). Turn the feet clockwise or counterclockwise to see if you can get the bubble centered. If the feet won't turn, or the bench still rocks even after adjusting, the problem is likely the foot base itself.
Other red flags: visible cracks in the aluminum, a loose connection between the base and the bench leg, or a rubber pad that's worn smooth (no traction). If any of these sound familiar, it's time to replace. If not, you might just need to clean and lubricate the adjustable parts. But for now, let's assume you're in replacement mode—on to measurements!

Step 2: Remove the Old Foot Base (If Possible)
To get the most accurate measurements, it's best to remove the old foot base entirely. This way, you can measure the base itself, not just the part visible from the outside. Start by clearing the workbench—remove tools, materials, and anything else on top to avoid accidents. Then, tip the bench gently onto its side (ask a friend for help if it's heavy!) so you can access the feet.
Use your screwdriver or wrench to remove the fasteners holding the foot base to the bench leg. Keep track of the screws or bolts—you might need them to install the new base. Once the old base is off, inspect it closely. Note any labels or part numbers (sometimes printed on the metal or rubber pad)—these can be goldmines if you want to buy an exact replacement. If there's no part number, don't worry—we'll measure everything ourselves.

Step 3: Measure the Foot Base Dimensions
Now, let's get to the nitty-gritty: measuring the foot base itself. Grab your tape measure, pencil, and notebook—you'll want to record every dimension. Let's break it down into key specs:
Height (Length from Top to Bottom)
The height of the foot base determines how high your workbench sits off the ground. Measure from the top (where it attaches to the bench leg) to the bottom (the part that touches the floor). If your base has adjustable leveling feet, measure both the minimum height (feet fully retracted) and maximum height (feet fully extended). This is crucial because some replacement bases have fixed heights, while others are adjustable. You don't want to end up with a bench that's suddenly 2 inches shorter (or taller!) than before.
Example: If your old base is 4 inches tall with adjustable feet that add another 1 inch, your new base should have a similar range (3–5 inches, say) to keep the bench at a comfortable working height.
Width and Depth (Footprint)
Next, measure the footprint of the base—the area that actually touches the floor. For a square or rectangular base, this is width x depth. For a round base, it's the diameter. Use your tape measure to get the length of each side (or across the circle). Why does this matter? A base that's too small might not distribute weight evenly, leading to sinking into soft floors (like concrete with cracks). Too large, and it might bump into other objects or take up extra space in your workshop.
Pro tip: If the base has a rubber pad, measure the pad itself, not just the aluminum frame. The pad is what grips the floor, so matching its size ensures the same level of traction.
Mounting Hole Pattern
This is where many DIYers go wrong: forgetting to measure the mounting holes. The new foot base needs to line up perfectly with the holes in your bench leg, or you'll be drilling new ones (which is a hassle). To get this right, you'll need two measurements: the distance between the holes (center to center) and the diameter of the holes themselves.
Let's start with hole spacing. If the base has two holes, measure from the center of one hole to the center of the other. For four holes (common in larger bases), measure both horizontally and vertically between opposite holes (e.g., top-left to top-right, and top-left to bottom-left). Write these down as "hole spacing: 3 inches (horizontal), 2 inches (vertical)."
For hole diameter, use your digital calipers. Gently insert the caliper jaws into the hole and expand them until they touch the sides. The readout will give you the exact diameter (e.g., 0.25 inches or 6mm). This ensures the screws or bolts you use will fit snugly—too small, and they'll wobble; too large, and you'll strip the threads.
Weight Capacity
Last but not least: weight capacity. Your new foot base needs to support the total weight of your workbench, plus whatever you put on it. To calculate this, estimate the weight of the bench itself, then add the heaviest tools or materials you typically place on top. For example, a metal workbench might weigh 100 lbs, and you might set a 50-lb drill press on it—so the foot base needs to handle at least 150 lbs (and preferably more, for safety).
Most foot bases list their weight capacity in the product specs, so keep this number handy when shopping. Aluminum foot bases are strong, but cheaper models might skimp on thickness, so don't assume all are created equal.
Common Measurement Mistakes to Avoid
Even seasoned DIYers can slip up when taking measurements. Here are the most common mistakes to watch for:
Mistake #1: Measuring the bench leg instead of the foot base.
The leg might be slightly larger or smaller than the base, so always measure the base itself.
Mistake #2: Forgetting adjustable features. If your old base has adjustable feet, measure both retracted and extended heights. A fixed-height base won't work if you need to level the bench on uneven ground.
Mistake #3: Rounding measurements. "Close enough" isn't good enough here. A 1/8-inch difference in hole spacing can mean the new base won't bolt on. Use precise tools (like calipers) and record measurements to the nearest 1/16 inch or mm.
Mistake #4: Ignoring the material. Aluminum foot bases come in different grades—some are thicker or more durable than others. If your bench is in a damp environment (like a garage), look for anodized aluminum to resist corrosion.
Mistake #2: Forgetting adjustable features. If your old base has adjustable feet, measure both retracted and extended heights. A fixed-height base won't work if you need to level the bench on uneven ground.
Mistake #3: Rounding measurements. "Close enough" isn't good enough here. A 1/8-inch difference in hole spacing can mean the new base won't bolt on. Use precise tools (like calipers) and record measurements to the nearest 1/16 inch or mm.
Mistake #4: Ignoring the material. Aluminum foot bases come in different grades—some are thicker or more durable than others. If your bench is in a damp environment (like a garage), look for anodized aluminum to resist corrosion.
Choosing the Right Replacement
With your measurements in hand, it's time to shop! Start by checking if the old base had a part number—if so, search for that first. Many manufacturers sell replacement parts directly, so you can get an exact match. If not, look for foot bases that match your key specs: height range, footprint, hole pattern, and weight capacity.
Don't forget to consider features that might make your life easier. Adjustable leveling feet are a must if your floor isn't perfectly flat. Rubber pads with good traction will prevent slipping. And if you move your workbench often, look for a base with built-in casters (though that's a separate part—we're focusing on fixed bases here).
When browsing, pay attention to compatibility with aluminum profile accessories. Many workbenches use standard aluminum profiles (like 2020 or 4040 series), and foot bases are designed to fit these. If your bench has a custom frame, double-check that the base's mounting holes align with the profile's T-slots or pre-drilled holes.
Installing Your New Aluminum Foot Base
Once your new foot base arrives, installation is a breeze—just reverse the removal process. Place the base against the bench leg, line up the holes, and secure it with the screws or bolts (use the old ones if they fit, or new ones if the kit includes them). Tighten the fasteners snugly, but don't overdo it—you don't want to strip the threads or warp the aluminum.
After installing all four bases (or however many your bench has), stand the bench upright and grab your spirit level again. Adjust the leveling feet (if applicable) until the bubble is centered. Give the bench a gentle shake to test stability—no wobbling means you're good to go!
Maintaining Your New Foot Base
To keep your new foot base in top shape, a little maintenance goes a long way. Wipe it down occasionally with a damp cloth to remove dust and debris. If it has adjustable feet, lubricate the threads with a few drops of oil every six months to keep them turning smoothly. Check the mounting screws quarterly—they can loosen over time with vibration. And if the rubber pad starts to wear, replace it before it becomes a slipping hazard.
Final Thoughts
Replacing an aluminum foot base might seem like a small task, but it's one that makes a big difference in how your workbench performs. By taking the time to measure carefully—height, footprint, hole pattern, and all—you'll ensure a perfect fit and a stable workspace for years to come. Remember, the key is in the details: a few millimeters here or there can mean the difference between a wobbly bench and a rock-solid one.
So grab your tools, record those measurements, and get ready to enjoy a workbench that's as sturdy as the day you bought it. Your back (and your projects) will thank you!