- Company Articles
- Products and Technology
- Installation And Maintenance
- How to Remove & Reuse Saddle Pipe Clamps in Modular Lean Systems

How to Remove & Reuse Saddle Pipe Clamps in Modular Lean Systems
Related Product
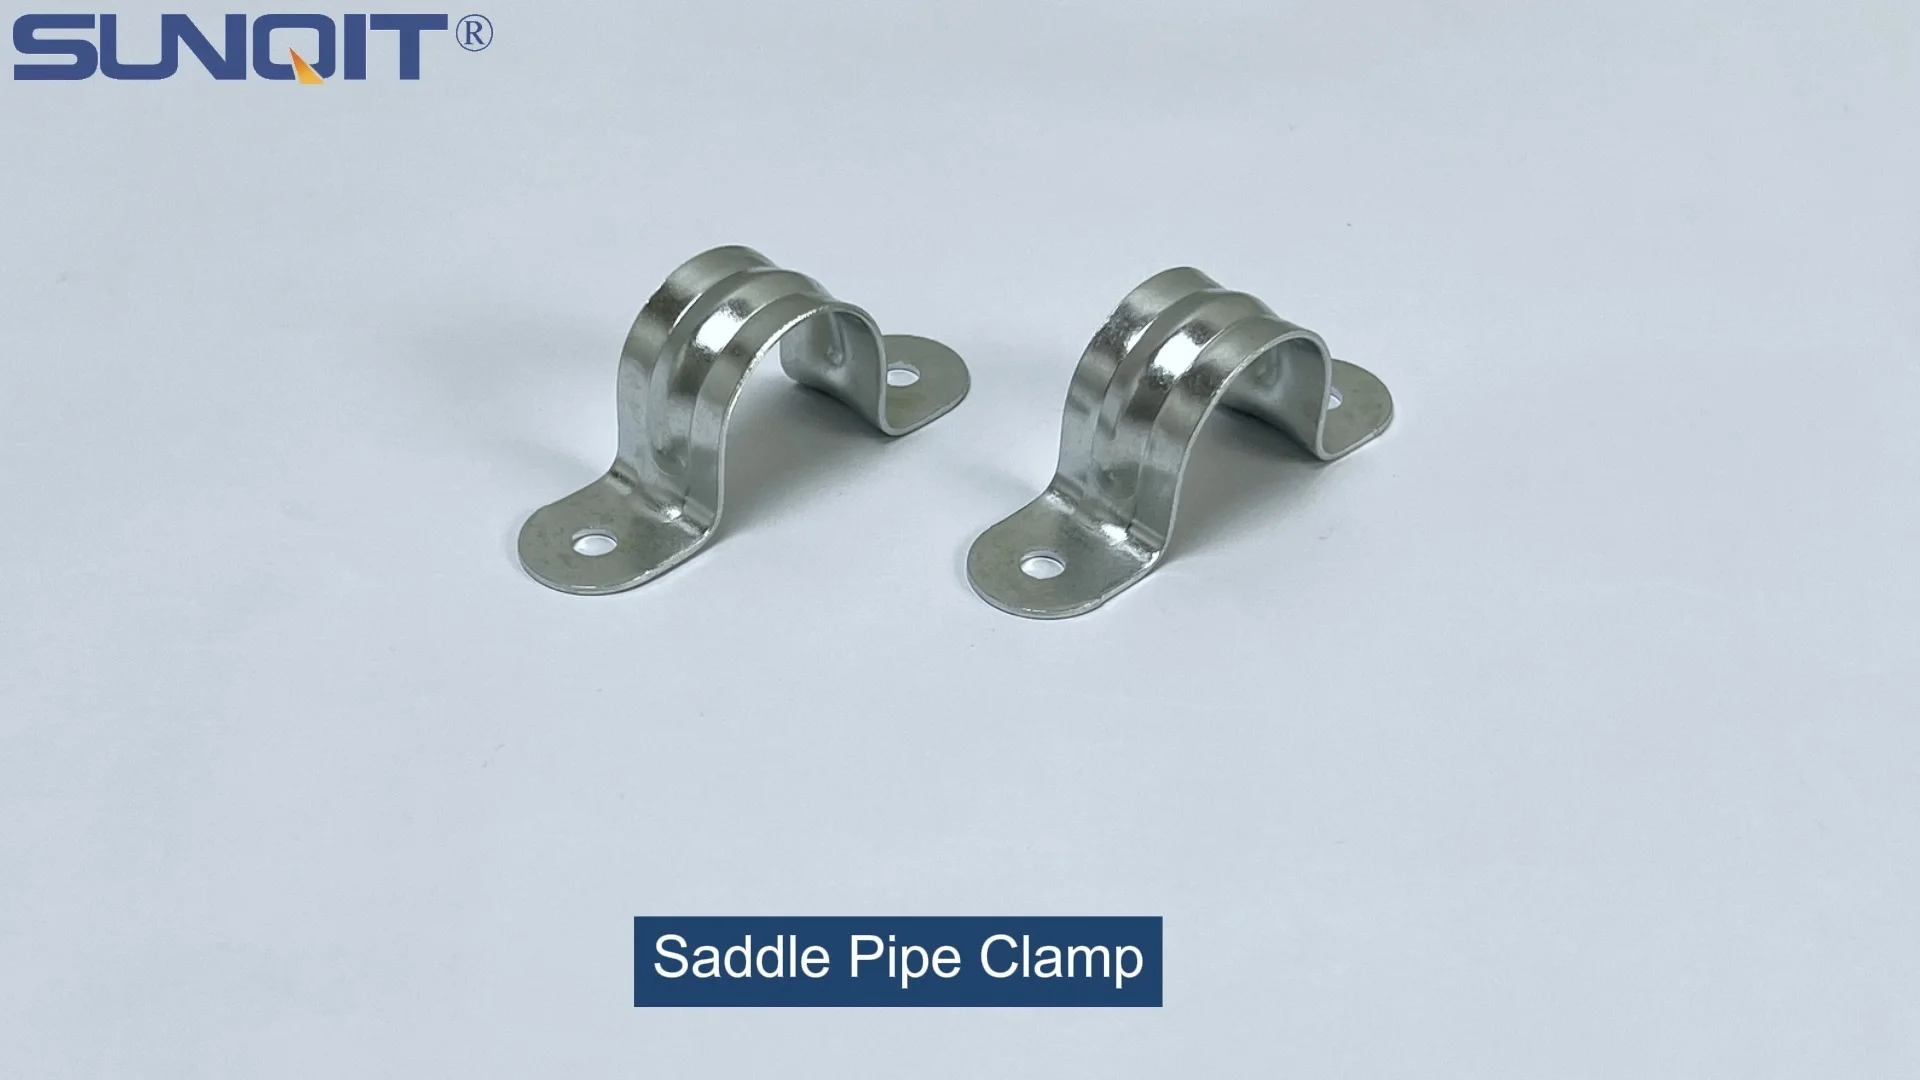
Saddle Pipe Clamp
Saddle pipe clamp, used for board connect with pipe, usually for table top installation.
In the world of manufacturing and assembly, change is the only constant. A production line that hums along perfectly on Monday might need a complete overhaul by Friday to accommodate a new product, a seasonal rush, or a process improvement. That's where modular lean systems shine—they're built for agility. But agility doesn't just happen; it depends on your ability to take apart, reconfigure, and reuse components. And few components are as critical to this flexibility as the humble saddle pipe clamp.
Saddle pipe clamps are the unsung heroes of modular lean systems. They're the quiet connectors that hold together lean pipes, aluminum profiles, and workbenches, turning simple tubes and joints into functional structures like flow racks, conveyor systems, and ESD workstations. But here's the thing: when you need to reconfigure your setup, these clamps often get overlooked. Many teams default to buying new ones, not realizing that with the right know-how, they can be removed, inspected, and reused—saving time, money, and reducing waste. That's the lean way, after all: maximize value, minimize waste.
In this guide, we'll walk through everything you need to know to safely remove and effectively reuse saddle pipe clamps. Whether you're a seasoned plant manager or a new technician setting up your first lean workbench, these steps will help you keep your modular systems adaptable, cost-effective, and sustainable. Let's dive in.
What Are Saddle Pipe Clamps, and Why Do They Matter?
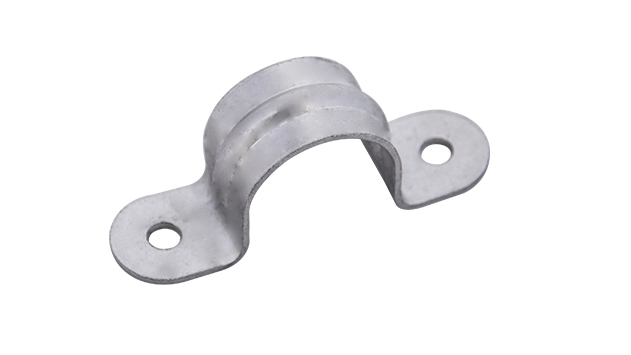
Before we get into the "how," let's make sure we're clear on the "what." Saddle pipe clamps—sometimes called pipe saddle clamps or just saddle clamps—are specialized fasteners designed to secure pipes, tubes, or profiles to one another or to a fixed surface. In modular lean systems, they're primarily used to connect lean pipes (like the 2.0mm PE coated lean pipe or 1.5mm stainless steel pipe) to aluminum profiles, workbench frames, or even roller track components. Think of them as the glue that holds your lean system together, but a glue you can undo and redo.
What makes saddle clamps unique is their design: they typically feature a curved "saddle" that conforms to the shape of the pipe, paired with a bolt or screw that tightens to hold everything in place. Some are made of plastic for lightweight applications, others of metal (like zinc-plated steel or aluminum) for heavier loads. Many even come with ESD-safe coatings, making them ideal for ESD workbench setups where static control is critical.
But why focus on reusing them? Let's break it down:
- Cost Savings: New saddle clamps might seem cheap individually, but multiply that by the dozens (or hundreds) used in a typical lean system, and the costs add up. Reusing just 10 clamps per month could save your team hundreds of dollars annually.
- Sustainability: Lean manufacturing isn't just about efficiency—it's about reducing waste. Reusing components cuts down on raw material use and keeps old clamps out of landfills. It's a small step, but every bit counts for your company's sustainability goals.
- Agility: When you can reuse clamps, you don't have to wait for new parts to arrive. Need to reconfigure a material rack B (3 row and 3 floor) for a rush order? Grab the clamps from last month's disused workbench, and you're ready to go in hours, not days.
- Consistency: Reusing clamps from your existing system ensures compatibility. No more guessing if the new clamp will fit your old lean pipe joint or aluminum guide rail—you already know it works.
In short, saddle pipe clamps are the unsung workhorses of modular lean systems. Treating them as reusable assets, not one-time-use parts, is key to unlocking the full potential of your lean setup.
Tools and Materials You'll Need
Removing and reusing saddle pipe clamps doesn't require a fully stocked industrial workshop, but having the right tools on hand will make the process safer, faster, and less likely to damage the clamps (or your pipes). Here's a breakdown of what you'll need, along with why each item matters:
| Tool/Material | Purpose | Tips for Use |
|---|---|---|
| Adjustable Wrench (6-10 inches) | Loosening and tightening clamp bolts | Use a wrench with a smooth jaw to avoid scratching clamp surfaces, especially on ESD-coated models. |
| Rubber Mallet | Gently tapping clamps loose if they're stuck (without damaging pipes/profiles) | Always tap on the clamp body, not the bolt head—tapping bolts can strip threads. |
| Anti-Slip Work Gloves | Protecting hands from sharp edges and improving grip | Opt for nitrile or latex-free gloves if working with ESD-sensitive components. |
| Wire Brush (Small, Stiff-Bristled) | Cleaning debris, rust, or old lubricant from clamp threads and saddle surfaces | Brush gently around threads to avoid bending or damaging them. |
| Degreaser or Mild Soap Solution | Removing oil, grease, or adhesive residue from clamps | Avoid harsh chemicals on plastic clamps—mild dish soap and water often work best. |
| Microfiber Cloth | Drying cleaned clamps and wiping down pipes/profiles | Lint-free to prevent leaving debris on ESD surfaces. |
| Thread Lubricant (e.g., Silicone Spray or Anti-Seize) | Preventing rust and ensuring smooth tightening when reusing clamps | Use sparingly—too much can attract dust and debris. |
| Torque Wrench (Optional but Recommended) | Ensuring proper tightening force when reinstalling clamps | Check your clamp manufacturer's specs—most lean system clamps require 15-25 in-lbs of torque. |
| Storage Bin with Dividers | Organizing cleaned, reusable clamps by size/type | Label dividers (e.g., "1.5mm PE Coated Clamps" or "ESD-Safe Aluminum Clamps") to avoid mix-ups. |
Pro tip: Before you start, lay out a clean work surface—like a spare aluminum honeycomb panel or a piece of cardboard—to place clamps and tools. This prevents small parts from rolling away and keeps your workspace organized.
Step-by-Step Guide to Removing Saddle Pipe Clamps
Removing saddle pipe clamps might seem straightforward, but rushing through the process can lead to damaged clamps, bent pipes, or even injuries. Follow these steps to ensure a smooth, safe removal:
1. Prepare the Workspace
First things first: make sure the area around the clamp is clear. If the clamp is part of a larger structure—like a workbench or flow rack—secure the structure to prevent it from shifting while you work. For example, if you're removing a clamp from a material rack B (3 row and 3 floor), lock the caster wheels (if it has them) or prop the rack with a wooden block to keep it stable. You don't want the whole thing tipping over mid-removal!
Also, check for any nearby components that might get in the way—like roller track guide rails (plastic yellow or grey) or swivel roller balls. Move loose items aside, and if the clamp is holding a heavy load (e.g., a shelf with materials), empty the load first. Safety first, always.
2. Assess the Clamp and Its Environment
Take a moment to look at the clamp before you start turning wrenches. Is it rusted? Are the bolts corroded? Is there debris (like dust, oil, or production residue) packed around the threads? These factors will determine how much force you need to use. A clamp that's been in place for months (or years) might be tighter than a newer one, and rust can make bolts stick.
Also, note the type of clamp you're dealing with. Is it a plastic saddle clamp (common on lightweight aluminum pipe setups) or a metal one? Plastic clamps are more prone to cracking if over-tightened or forced, so you'll need a gentler touch. Metal clamps (like those used with stainless steel pipe series) can handle more force but still require care to avoid bending.
3. Loosen the Clamp Bolt (Slow and Steady)
Now, it's time to start loosening. Fit your adjustable wrench over the bolt head, making sure the jaws are snug but not so tight that they dig into the metal. Turn the wrench counterclockwise slowly . If the bolt doesn't budge right away, don't panic—and don't force it. Forcing can strip the threads or round off the bolt head, rendering the clamp useless.
Instead, try these tricks for stuck bolts:
- Tap the wrench gently: While holding the wrench in place, tap the end of the handle with your rubber mallet. The vibration can help loosen rust or debris.
- Apply a drop of penetrating oil: If rust is the culprit, let a small amount of penetrating oil (like WD-40) seep into the threads. Wait 5-10 minutes, then try again.
- Wiggle the pipe slightly: Gently rocking the pipe back and forth (within reason) can break the seal between the clamp and the pipe, making the bolt easier to turn.
Once the bolt is loose enough to turn by hand, finish unscrewing it by hand—this gives you better control and reduces the risk of dropping the bolt (or the clamp) once it's fully removed.
4. Remove the Clamp Without Damaging Pipes or Profiles
With the bolt removed, the clamp should now be loose on the pipe or profile. But don't just yank it off! If the clamp has been in place for a while, friction (or even a tiny amount of corrosion) might make it stick. Instead, slide it back and forth gently to break the bond. If it's still stuck, use your rubber mallet to tap the saddle part of the clamp (the curved part that touches the pipe) to loosen it. Avoid tapping the edges, as this can bend the clamp out of shape.
Once the clamp is free, set it aside on your clean work surface. Take a quick look at the pipe or profile where the clamp was attached—are there any scratches, dents, or residue? Wipe the area with a microfiber cloth to remove any debris; this will make reinstalling (or reusing the pipe elsewhere) easier later.

Inspecting and Cleaning Clamps for Reuse
You've removed the clamp—great! But before you toss it into a bin to reuse later, you need to inspect it carefully. Not all clamps are reusable, and using a damaged one can compromise the safety and stability of your lean system. Here's how to tell if a clamp is fit for a second (or third, or fourth) life:
Key Inspection Points
Start by examining the clamp with your eyes—hold it up to the light if needed to spot small cracks or wear. Check these critical areas:
- The Saddle Surface: This is the part that touches the pipe. Look for cracks, deep scratches, or warping. A warped saddle won't grip the pipe properly, leading to instability. For ESD clamps, check that the coating is intact—no chips or peeling, as this can compromise static control.
- The Bolt and Threads: Are the threads on the bolt or in the clamp's nut worn, stripped, or bent? Try screwing the bolt back into the clamp by hand—if it feels "gritty" or skips threads, the threads are damaged. Also, check the bolt head for rounding; a rounded head won't grip a wrench, making future removal impossible.
- Metal Clamps Only: Look for rust or corrosion, especially in crevices. Light surface rust can often be cleaned, but deep pitting or rust that has eaten through the metal means the clamp is too weak to reuse.
- Plastic Clamps Only: Check for brittleness. Bend the clamp gently—if it feels stiff or cracks, it's degraded and should be replaced. Plastic can become brittle over time, especially if exposed to oils, chemicals, or extreme temperatures.
If the clamp passes these checks—no cracks, intact threads, minimal wear—it's a candidate for reuse. If not, set it aside for recycling (many metal clamps are recyclable, and some plastics can be too). Remember: reusing a damaged clamp is worse than buying a new one—it risks injury, downtime, and costly rework.
Cleaning the Clamp (So It Works Like New)
Even if a clamp looks good, it's probably covered in dust, oil, or grime from your production environment. Cleaning it ensures that when you reuse it, it grips properly and doesn't introduce debris into your new setup. Here's how:
- Brush Away Loose Debris: Use your wire brush to gently scrub the saddle surface and threads. Focus on the threads—debris here can make it hard to tighten the clamp later.
- Wash with Degreaser or Soap: For metal clamps, a small amount of degreaser on a microfiber cloth will cut through oil and grease. For plastic or ESD clamps, stick to mild soap and water to avoid damaging coatings. Wipe all surfaces, including the inside of the saddle and around the bolt hole.
- Dry Thoroughly: Moisture leads to rust (for metal) or mildew (for plastic). Pat the clamp dry with a clean microfiber cloth, then let it air-dry for 10-15 minutes before storing. For metal clamps, you can speed this up with a hair dryer on low heat (keep it 6-8 inches away to avoid overheating).
- Lubricate Threads (Optional but Recommended): A tiny drop of thread lubricant (like silicone spray or anti-seize) on the bolt threads will make future removal easier. Avoid overdoing it—too much lube attracts dust. For ESD clamps, use an ESD-safe lubricant to maintain static control properties.
Once clean and dry, your clamp is ready to be stored until its next job. Store clamps in a labeled bin (e.g., "Reusable Saddle Clamps – 1.5mm Lean Pipe") to keep them organized and easy to find when you need them.

Best Practices for Reusing Saddle Pipe Clamps
Now that you have a collection of clean, inspected saddle pipe clamps, it's time to put them back to work. But reusing clamps isn't just about slapping them on the nearest pipe—there's a right way to do it to ensure safety, stability, and longevity. Here's how to get the most out of your reused clamps:
Match Clamp Size to Pipe/Profile Diameter
This might seem obvious, but it's a common mistake: using a clamp that's too big or too small for the pipe or profile you're attaching. A clamp that's too large won't grip tightly, leading to wobbling or shifting. One that's too small will stretch or crack when tightened, especially plastic clamps.
Most clamps are labeled with the pipe diameter they fit (e.g., "1 inch" for standard lean pipe or "38mm" for aluminum roller track). If the label is worn off, measure the inside of the saddle with a ruler or caliper. For example, a clamp designed for 2.0mm PE coated lean pipe should have a saddle diameter of approximately 28mm (the outer diameter of most standard lean pipes). For aluminum profile systems, check if the clamp is designed for T-slot aluminum pipe or basic aluminum tube—some clamps are shaped to fit the grooves of T-slot profiles, while others are for smooth tubes.
Pro tip: Keep a small diameter gauge in your toolbox for quick checks. It'll save you from frustrating trial-and-error when reconfiguring.
Tighten to the Right Torque (Not Too Loose, Not Too Tight)
When reinstalling a reused clamp, the goal is to tighten it enough to hold the pipe securely, but not so much that you damage the clamp, pipe, or threads. Over-tightening is the biggest culprit here—especially with metal clamps, where it's easy to crank the bolt until it strips or the clamp bends.
So, how tight is "tight enough"? A good rule of thumb is to tighten until the clamp grips the pipe firmly, then give the wrench a quarter-turn more. For more precision, use a torque wrench set to the manufacturer's recommended torque (usually 15-25 in-lbs for most lean system clamps). If you don't have a torque wrench, test by trying to twist the pipe gently—if it moves, tighten a bit more; if the clamp deforms, loosen slightly.
For plastic clamps, err on the side of under-tightening at first. Plastic has more give than metal, so you can always tighten a bit more if needed. And never use a pipe wrench on plastic clamps—they'll crush the bolt head.
Common Reuse Applications (Where to Put Those Clamps)
Reused saddle pipe clamps are versatile—here are some of the best ways to put them to work in your lean system:
- Workbench Reconfiguration: Need to add a shelf to your workbench E (single deck-without caster)? Use reused clamps to attach aluminum guide rail A or B to the frame. They're perfect for securing cross-braces or tool holders too.
- Turnover Trolley Upgrades: Turnover trolleys often need extra rails or dividers to organize parts. Reused clamps can attach roller track placon mount brackets or side guides (like plastic roller track guide rail yellow) to the trolley frame.
- Flow Rack Adjustments: If you're modifying a material rack B (3 row and 3 floor) to hold taller boxes, use clamps to raise or reposition the roller tracks. They'll hold the tracks securely even under the weight of moving materials.
- ESD Workstation Modifications: ESD workstations require stable, static-safe connections. Reused ESD-coated clamps are ideal for adding grounding straps or securing anti-slip matting to the bench surface.
Check for Compatibility with Other Components
Saddle pipe clamps rarely work alone—they're part of a system that includes lean pipe joints, roller track connectors, and aluminum profile accessories. Before reusing a clamp, make sure it's compatible with the other components you're using.
For example, if you're attaching a roller track to an aluminum profile, you'll need a clamp that works with both the track's diameter and the profile's T-slot design. The roller track placon mount for aluminum profile flat, for instance, is designed to fit into the T-slot of flat aluminum profiles—so your clamp needs to secure the placon mount to the profile without blocking the slot.
When in doubt, do a dry fit: attach the clamp loosely to the pipe/profile and the component, then check if everything lines up and moves freely (if it's supposed to). If parts rub or bind, the clamp might not be the right fit, even if it's the correct size.
Label and Track Reused Clamps (Yes, Really)
Finally, to keep your lean system running smoothly, keep track of your reused clamps. A simple spreadsheet or even a handwritten log noting how many times a clamp has been reused, its size, and any special features (like ESD coating) can save you time later. For example, if a clamp starts to show wear after 5 reuses, you'll know to retire it before it fails.
You can also color-code clamps with small labels or paint dots: red for ESD-safe, blue for aluminum pipe use, green for stainless steel, etc. This makes grabbing the right clamp in a hurry a breeze—no more digging through bins to find the one you need.
Common Mistakes to Avoid (So You Don't Waste Time or Clamps)
Even with the best intentions, reusing saddle pipe clamps can go wrong if you're not careful. Here are the most common mistakes we've seen, and how to steer clear of them:
Mistake #1: Over-Tightening (The #1 Cause of Clamp Failure)
We mentioned this earlier, but it's worth repeating: over-tightening is the fastest way to ruin a perfectly good reused clamp. When you crank the bolt past the point of firm grip, you risk stripping the threads, bending the clamp body, or even cracking the pipe or profile. For plastic clamps, over-tightening can cause the saddle to warp, making it useless for future use.
Fix: Use a torque wrench if you have one, or stick to the "quarter-turn after firm grip" rule. If you hear a creaking sound when tightening, stop—you've gone too far.
Mistake #2: Ignoring Minor Damage ("It'll Probably Be Fine")
We get it—when you're in a hurry to reconfigure a workbench, a tiny crack in a clamp's saddle might seem insignificant. But "probably fine" is not a lean principle. A cracked clamp can fail under load, leading to dropped tools, damaged products, or even injury.
Fix: Be ruthless during inspection. If a clamp has any sign of structural damage (cracks, deep rust, stripped threads), recycle it. It's better to spend $5 on a new clamp than $500 on fixing a mistake.
Mistake #3: Mixing and Matching Clamp Types
Not all saddle clamps are created equal. A clamp designed for a 1.2mm PE coated lean pipe might look similar to one for a 1.5mm stainless steel pipe, but they're not interchangeable. Mixing sizes or materials can lead to loose connections or broken clamps.
Fix: Label your clamp bins clearly, and double-check sizes before installation. If you're unsure, measure the clamp's saddle diameter and compare it to the pipe's outer diameter.
Mistake #4: Forgetting to Clean Threads Before Reuse
Dust, oil, and rust in the threads might seem harmless, but they can prevent the clamp from tightening properly. Over time, debris in the threads can also wear them down, making the clamp harder to remove next time.
Fix: Make cleaning part of your routine. Even a quick brush with a wire brush and a wipe with a dry cloth can make a big difference in how well the clamp performs.
Real-World Example: How One Manufacturer Saved $2,000 in 3 Months by Reusing Clamps
To put this all in perspective, let's look at a real example. A small electronics manufacturer in Ohio—let's call them "TechFlow"—specializes in assembling circuit boards for medical devices. Their production floor relies heavily on modular lean systems, including ESD workstations, flow racks, and turnover trolleys. Like many small manufacturers, they were on a tight budget and looking for ways to cut costs without sacrificing quality.
Last year, their production team needed to reconfigure three ESD workstations to accommodate a new, larger circuit board model. The original plan was to order new aluminum profiles, lean pipe joints, and—you guessed it—new saddle pipe clamps. The quote from their supplier? $3,200 for parts alone, plus installation time.
But the team's lead technician, Maria, remembered reading about reusing components in lean systems. She suggested they try removing and reusing the existing saddle pipe clamps from the old workstation setups. At first, the team was skeptical—"Won't that take too long?" "What if the clamps break?"—but Maria persisted. They set aside a morning to test the process.
Following the steps we outlined, Maria's team removed 42 saddle pipe clamps from the old workstations. They inspected each one, cleaned off solder residue and dust, and set aside 38 that were still in good shape (the other 4 had stripped threads and were recycled). Then, they used those 38 clamps to build the new workstation configurations, supplementing with just 12 new clamps (for parts that needed extra strength).
The result? They cut the parts cost to $1,200—a savings of $2,000. Plus, the installation took half the time they'd planned, since they didn't have to wait for new clamps to arrive. "We were blown away," Maria told us later. "We'd been throwing away perfectly good clamps for years without realizing it. Now, reusing clamps is standard practice for us whenever we reconfigure."
TechFlow's story isn't unique. Whether you're a small shop or a large plant, reusing saddle pipe clamps is a simple, actionable way to live the lean principles of waste reduction and continuous improvement.
Conclusion: Embracing Agility Through Smart Reuse
Modular lean systems are all about agility—adapting quickly to changing needs, minimizing waste, and maximizing value. And at the heart of that agility are the small, often overlooked components like saddle pipe clamps. By learning to remove, inspect, clean, and reuse these clamps, you're not just saving money—you're building a more sustainable, responsive, and resilient operation.
Remember, the steps we've covered here aren't just technical—they're a mindset shift. Instead of seeing clamps as disposable, you're seeing them as assets. Instead of defaulting to "buy new," you're asking, "Can we make this work again?" That's the lean way, and it's a mindset that will serve you well in every corner of your production process.
So, the next time you need to reconfigure a workbench, adjust a flow rack, or set up a new ESD workstation, grab your wrench, your rubber mallet, and that bin of cleaned, inspected saddle pipe clamps. You've got this—and your bottom line (and the planet) will thank you.