- Company Articles
- Products and Technology
- Installation And Maintenance
- How to Repair Damaged Plastic Pipe Sleeves: Quick Fixes for Lean Pipe System Downtime

How to Repair Damaged Plastic Pipe Sleeves: Quick Fixes for Lean Pipe System Downtime
Related Product
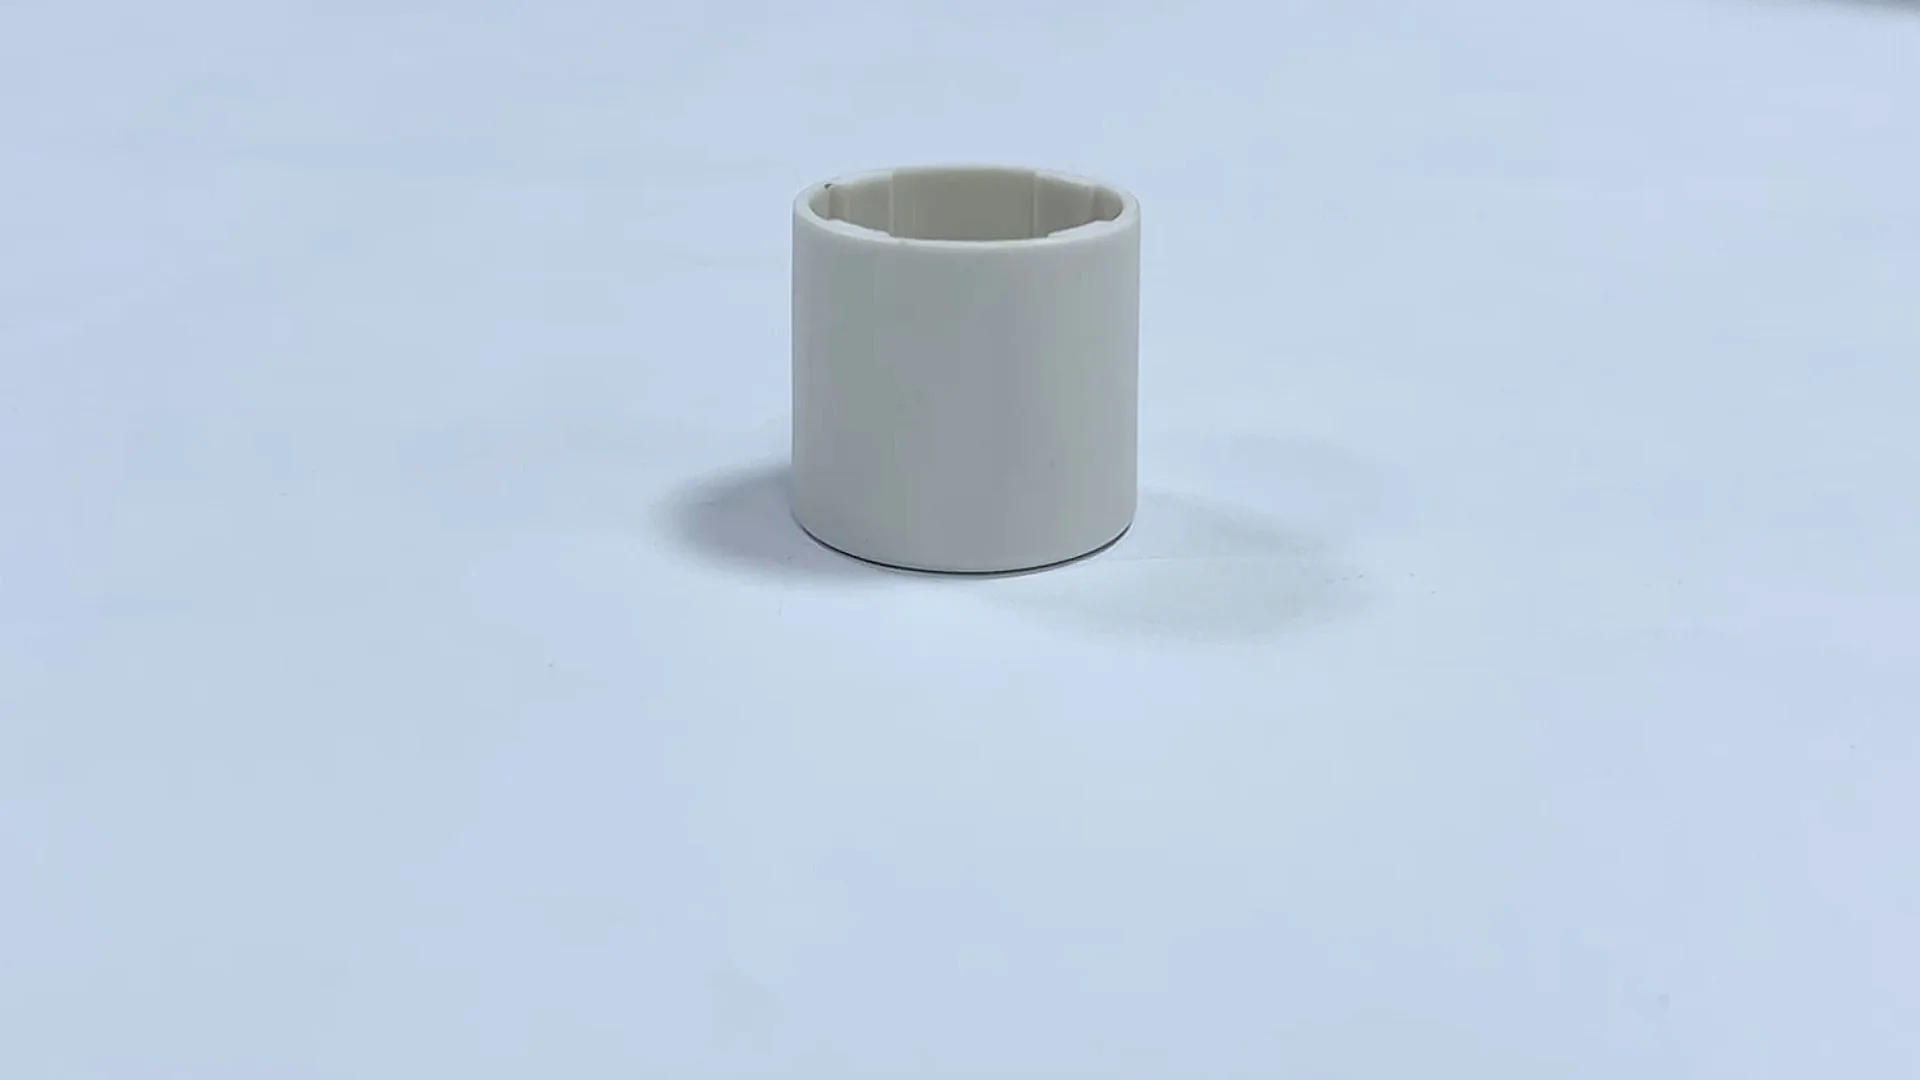
Plastic Pipe Sleeve
Plastic pipe sleeve to cover dia 28MM aluminum pipe end to contact with ground.
If you've ever walked through a busy production floor, you've probably seen them: the sleek, modular structures holding workbenches, roller tracks, and material racks together. These are lean pipe systems—flexible, cost-effective setups that keep assembly lines moving, tools organized, and workflows efficient. But here's the thing about even the most reliable systems: they're only as strong as their smallest parts. And one tiny component that can bring the whole line to a halt? The plastic pipe sleeve.
You might not think much about these sleeves at first glance. They're the thin, protective covers that slide over lean pipes, sitting between the pipe itself and the lean pipe joints that connect everything. But their job is crucial: they cushion the pipe from abrasion, prevent metal-on-metal contact that causes wear, and keep joints tight so structures like workbenches and roller tracks don't wobble or shift. When a plastic pipe sleeve cracks, splits, or wears out, it's not just a minor annoyance—it's a ticking clock for downtime. Loose joints lead to unstable workbenches, misaligned roller tracks slow down material flow, and before you know it, your team is scrambling to fix a problem that could've been avoided with a little know-how.
In this guide, we're diving deep into plastic pipe sleeves: why they fail, how to spot damage early, the tools you'll need to fix them, and step-by-step repairs that can save you hours of downtime. Whether you're a production manager, a maintenance tech, or just someone who wants to keep their lean pipe system running smoothly, this is your go-to resource for keeping those sleeves (and your workflow) in top shape.
Understanding Plastic Pipe Sleeves: The Unsung Heroes of Lean Pipe Systems
First, let's get clear on what a plastic pipe sleeve actually is. These are typically made of durable plastics like PVC or polyethylene, designed to fit snugly over lean pipes—those metal (or sometimes aluminum) tubes that form the skeleton of your system. They come in various lengths and diameters to match different pipe sizes, and their primary job is to act as a buffer. Think of them as the "shock absorbers" of your lean pipe setup.
Why does this matter? Lean pipe systems rely on lean pipe joints to connect pipes at angles, build frames, and support weight. Without a sleeve, the metal joint would rub directly against the metal pipe every time the structure vibrates (and trust us, production floors vibrate—a lot). Over time, that friction wears down both the pipe and the joint, leading to loose connections and instability. The plastic sleeve creates a barrier, reducing wear and tear and extending the life of both components.
But sleeves do more than just protect metal. They also help with grip. Many sleeves have a slightly textured surface that makes it easier to tighten joints without slipping, ensuring connections stay secure even under heavy loads. And in environments where static electricity is a concern (like electronics manufacturing), some sleeves are even made with ESD (electrostatic discharge) materials to prevent damage to sensitive components. For example, an ESD workstation might use specialized sleeves to keep static at bay while workers assemble circuit boards.
So, when a sleeve fails, the problems start small but escalate quickly. A tiny crack might seem harmless, but it lets moisture seep in, leading to rust on the pipe. A split sleeve means the joint isn't gripping properly, so a workbench might start to wobble mid-assembly. And a completely worn-through sleeve? That's a recipe for a joint that slips, a pipe that bends, or even a collapse if the structure is supporting heavy materials. The good news? Most sleeve issues are easy to fix—if you know what to look for.
Signs of Plastic Pipe Sleeve Damage: What to Watch For
The first step in preventing downtime is catching sleeve damage early. But how do you spot a problem before it causes a breakdown? Here are the most common signs to keep an eye on during your regular inspections:
1. Visual Cracks or Splits
This is the most obvious red flag. Take a close look at the sleeves near lean pipe joints—these are the high-stress areas where cracks usually start. Cracks might be hairline at first, running along the length of the sleeve, or they could be radial, spreading out from the joint. Splits are more severe: a clean break that leaves a gap in the sleeve, often caused by over-tightening the joint or impact (like a heavy tool being dropped on the structure).
Pro tip: Check sleeves on lower parts of the structure first—they're more likely to get bumped by trolleys or hit by falling items. A flashlight can help you spot tiny cracks in shadowed areas, like under workbenches or behind material racks.
2. Wobbling or Loose Joints
If a workbench, roller track, or shelf feels wobbly when you push it gently, don't just tighten the joint and call it a day—check the sleeve first. A loose joint is often a sign that the sleeve has worn thin, so the joint can't grip the pipe properly. Try this test: hold the pipe with one hand and the joint with the other, then twist gently. If there's movement between the pipe and joint, the sleeve is probably to blame.
3. Discoloration or Brittle Texture
Plastic sleeves can degrade over time, especially if they're exposed to sunlight, chemicals, or extreme temperatures. If a sleeve looks faded, yellowed, or feels brittle (it cracks when you bend it slightly), it's losing its elasticity and protective properties. This is common in older systems or those near windows, heaters, or areas where cleaning chemicals are used.
4. Metal-on-Metal Squeaking
Your ears can be a great tool for spotting sleeve issues. If you hear a squeaking or grinding noise when a roller track moves, or when someone leans on a workbench, it might mean the sleeve has worn through, and metal is rubbing against metal. Don't ignore this—squeaking is a sign of active friction, which will only get worse without repair.

Tools and Materials: What You'll Need for Repairs
Before you start repairing a damaged sleeve, gather these tools and materials. Most of them are standard in any maintenance kit, but it's better to have everything on hand to avoid stopping mid-repair:
- Replacement plastic pipe sleeves: Always keep a few spares in different sizes (match them to your pipe diameter—common sizes are 28mm or 30mm for standard lean pipes). Check if you need ESD sleeves for sensitive areas.
- Adjustable wrench or hex key set: To loosen and tighten lean pipe joints. Most joints use hex screws, so a set with metric sizes (like 4mm, 5mm, 6mm) is essential.
- Utility knife or scissors: For trimming sleeves to length or cutting away damaged sections.
- Cleaning supplies: Rubbing alcohol or degreaser, and a clean cloth to wipe down pipes before installing new sleeves (dirt or oil can prevent the sleeve from fitting snugly).
- Temporary fix materials (for emergencies): Electrical tape (waterproof, if possible) or heat-shrink tubing. These aren't permanent, but they can hold things together until you get a replacement sleeve.
- Marker or tape: To mark where the old sleeve was positioned, so the new one goes on straight.
- Work gloves: To protect your hands from sharp edges on damaged sleeves or pipes.
Pro Tip:
If you're not sure what size sleeve you need, measure the outer diameter of your lean pipe with a caliper. Sleeves should fit tightly—if there's a gap, the joint won't grip properly. Most suppliers list sleeve sizes by pipe diameter, so a 28mm pipe needs a 28mm sleeve.

Step-by-Step Repairs: Fixing Common Sleeve Issues
Now, let's get to the repairs. We'll cover three common scenarios: minor cracks, split sleeves, and worn sleeves on high-movement parts like roller tracks. Each one has a slightly different approach, but all are manageable with basic tools.
Scenario 1: Minor Cracks or Chips (Temporary Fix)
If the sleeve has a small crack (less than 1 inch long) or a chip, and you can't replace it right away, a temporary fix with epoxy can buy you time until a new sleeve arrives. Here's how:
- Clean the area: Wipe the sleeve and pipe with rubbing alcohol to remove dirt, oil, or grease. Let it dry completely.
- Apply epoxy: Squeeze a small amount of two-part epoxy (like JB Weld) onto a disposable surface. Mix it according to the package directions, then spread it over the crack with a toothpick or small brush. Make sure the epoxy fills the crack and covers about 1/4 inch around it for strength.
- Let it cure: Leave the epoxy to dry for at least 30 minutes (check the package for exact curing time). Avoid putting weight on the joint during this time.
- Test: Once cured, gently twist the joint to ensure the fix holds. Remember, this is temporary—replace the sleeve as soon as you can.
Scenario 2: Split or Severely Damaged Sleeves (Permanent Replacement)
For splits, large cracks, or brittle sleeves, replacement is the only permanent solution. Follow these steps:
- Loosen the lean pipe joint: Use your wrench or hex key to loosen the screws on the joint holding the damaged sleeve. Don't remove the screws completely—just loosen them enough to slide the joint away from the pipe.
- Remove the old sleeve: Slide the joint along the pipe to expose the damaged sleeve. If the sleeve is stuck (common with old, brittle plastic), use a utility knife to carefully cut it lengthwise and peel it off. Be gentle—you don't want to scratch the pipe.
- Clean the pipe: Wipe the pipe with alcohol to remove any adhesive or residue from the old sleeve. Dry it thoroughly.
- Install the new sleeve: Slide the new sleeve onto the pipe, aligning it with the marks you made earlier (or positioning it where the old sleeve was). Make sure it's centered under where the joint will sit—this ensures even protection.
- Re-tighten the joint: Slide the joint back over the new sleeve, then tighten the screws until the joint is snug. Don't over-tighten—this can crack the new sleeve. A good rule: tighten until you feel resistance, then give it a 1/4 turn more.
- Test for stability: Push or twist the structure gently to ensure the joint is secure and there's no movement. If it wobbles, check that the sleeve is seated correctly and the joint is tight.
Scenario 3: Damaged Sleeves on Roller Tracks
Roller tracks are a special case because they have moving parts—sleeves here need to handle vibration and constant motion. If a sleeve on a roller track is damaged, follow the replacement steps above, but with these extra tips:
- Lock the track first: Use a block of wood or a clamp to keep the roller track from moving while you work—safety first!
- Check adjacent sleeves: Roller track joints are often close together, so if one sleeve is damaged, others might be worn too. Inspect them all and replace any that show signs of wear.
- Lubricate after repair: Once the new sleeve is in place, add a drop of light machine oil to the roller bearings (not the sleeve itself) to reduce friction and keep the track rolling smoothly.

Preventive Maintenance: Keeping Sleeves (and Your System) in Shape
The best way to avoid sleeve-related downtime is to prevent damage in the first place. Here's a simple maintenance routine you can follow weekly or monthly, depending on how heavily your system is used:
1. Regular Inspections
Set a calendar reminder to walk through your lean pipe system and check sleeves. Focus on high-stress areas: workbenches that hold heavy tools, roller tracks with constant material flow, and structures near doorways or high-traffic paths. Make a checklist of problem spots and note when sleeves were last replaced—this helps you spot patterns (e.g., "sleeves near the packaging area wear out faster").
2. Clean Sleeves and Pipes
Dirt and oil can weaken plastic over time, so wipe down sleeves with a damp cloth (and mild soap, if needed) every month. Avoid harsh chemicals like bleach or acetone—they can degrade the plastic. For ESD sleeves, use specialized ESD-safe cleaners to maintain their static-protective properties.
3. Tighten Joints (But Don't Overdo It)
Loose joints cause extra friction on sleeves, so check and tighten lean pipe joints quarterly. Use a torque wrench if you have one—most joints need about 15-20 Nm of torque (check the manufacturer's specs). Over-tightening is just as bad as under-tightening, as it can crack sleeves or strip screws.
4. Protect Sleeves from Environmental Damage
If your system is near windows, install UV film to block sunlight (UV rays degrade plastic). Keep heaters or AC vents directed away from lean pipe structures, and store cleaning chemicals away from sleeves. For areas with heavy impact (like near loading docks), add corner guards or bumpers to protect the pipes and sleeves from accidental hits.
5. Stock Spare Sleeves
The biggest downtime risk is waiting for replacement parts. Keep a stock of plastic pipe sleeves in your maintenance closet, along with a few extra lean pipe joints (they can wear out too). Label them by size so you can grab the right one quickly when needed.
Troubleshooting: Common Post-Repair Issues (and How to Fix Them)
Even with careful repairs, things can sometimes go wrong. Here are the most common post-repair problems and solutions:
Issue: New Sleeve Slips on the Pipe
Why it happens:
The pipe wasn't clean enough, or the sleeve is the wrong size (too loose).
Fix:
Remove the sleeve, clean the pipe again with alcohol (or a degreaser if there's oil), and try a new sleeve in the correct size. If you're in a pinch, wrap a small strip of electrical tape around the pipe (under the sleeve) to add friction.
Issue: Joint Still Wobbles After Replacement
Why it happens:
The sleeve isn't centered under the joint, or the joint itself is worn out.
Fix:
Loosen the joint, reposition the sleeve so it's directly under the joint's clamping area, then retighten. If the joint still wobbles, inspect it for cracks or stripped threads—you may need to replace the joint.
Issue: Sleeve Cracks Again Shortly After Repair
Why it happens:
Over-tightening the joint, or the structure is carrying more weight than it should.
Fix:
Loosen the joint slightly (remember the 1/4 turn after resistance rule). If the structure is overloaded, redistribute the weight or add additional support pipes. For heavy loads, consider upgrading to thicker-walled sleeves or aluminum lean pipes (which are more durable than standard steel pipes).
Issue: Roller Track Is Noisy After Sleeve Replacement
Why it happens:
The sleeve is misaligned, or the roller bearings need lubrication.
Fix:
Check that the sleeve is centered under the track joint. If it is, add a drop of oil to each roller bearing. If the noise persists, inspect the roller track guide rail (the plastic or aluminum rail the rollers run on)—it might be worn and need replacement too.
Repair Method Comparison: Temporary vs. Permanent Fixes
| Repair Method | Tools Needed | Time Required | Best For | Pros | Cons |
|---|---|---|---|---|---|
| Epoxy for Minor Cracks | Epoxy, alcohol, cloth, toothpick | 30-60 minutes (including curing) | Small cracks/chips; emergency fixes | Quick, uses common materials, buys time for parts | Temporary (lasts 1-2 weeks), not for heavy loads |
| Full Sleeve Replacement | Wrench/hex key, utility knife, alcohol, replacement sleeve | 15-30 minutes per sleeve | Splits, large cracks, brittle sleeves | Permanent, restores full strength, prevents future wear | Requires spare sleeves, needs basic tool skills |
| Electrical Tape (Emergency Only) | Electrical tape, scissors | 5-10 minutes | Urgent situations, no other tools available | Fastest fix, no tools needed | Very temporary (hours/days), not for high-stress joints |
| Joint Replacement + Sleeve | Wrench/hex key, utility knife, alcohol, new joint and sleeve | 30-45 minutes | Damaged sleeve + worn joint | Restores joint and sleeve, longer system life | More parts needed, higher cost than sleeve alone |
When to Call a Professional: Knowing Your Limits
Most plastic pipe sleeve repairs are DIY-friendly, but there are times when it's better to call in a lean pipe supplier or professional technician. Here's when to step back:
- Multiple damaged components: If 3+ sleeves are damaged, or if sleeves and joints are failing across the system, there might be an underlying issue (e.g., overloading, poor initial installation, or a design flaw). A pro can assess the system and recommend upgrades.
- Bent or rusted pipes: If the lean pipe itself is bent, rusted, or pitted, replacing the sleeve won't fix the problem. Damaged pipes need to be replaced, and a pro can ensure the new pipes are properly aligned and supported.
- ESD system issues: ESD workstations require specialized sleeves and grounding. If you're not sure how to maintain ESD properties during repairs, a pro with ESD certification can ensure compliance and prevent static damage to products.
- Repairs keep failing: If you've replaced a sleeve twice in a month and it's still cracking, the joint or pipe is likely damaged, or the load is too heavy. A pro can identify the root cause and suggest solutions like stronger materials or structural reinforcements.
Remember, there's no shame in calling for help. The goal is to keep your lean pipe system running smoothly, and sometimes that means trusting the experts with specialized knowledge.
Final Thoughts: Sleeves Small, Impact Big
Plastic pipe sleeves might be small, but their role in your lean pipe system is huge. A single damaged sleeve can disrupt production, slow down workflows, and even create safety risks. But with the right knowledge—how to spot damage, the tools to fix it, and a little preventive maintenance—you can keep those sleeves (and your system) in top shape.
The next time you walk past your lean pipe workbench or roller track, take a second to glance at the sleeves. A quick inspection could save you hours of downtime later. And when you do need to make a repair, remember: it's not just about fixing a sleeve—it's about keeping your team productive, your workflow efficient, and your business moving forward.
So stock those spare sleeves, tighten those joints, and keep that lean pipe system humming. Your production floor (and your bottom line) will thank you.