- Company Articles
- Products and Technology
- Installation And Maintenance
- How to Secure 4080 Aluminum Profile End Caps on Heavy-Duty Racks

How to Secure 4080 Aluminum Profile End Caps on Heavy-Duty Racks
Related Product
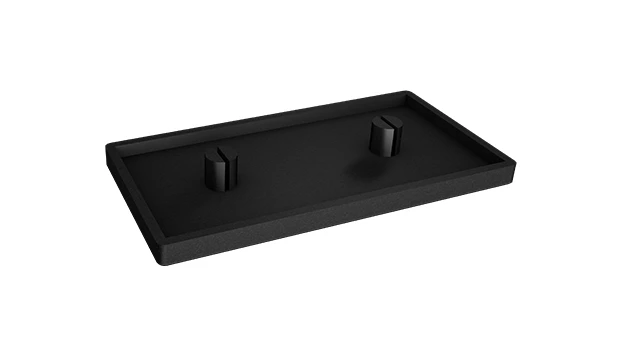
4080 Aluminum Profile End Cap
The aluminum profile end cap adds a finishing touch to your project and closes off profile ends to limit dust and debris buildup, also it can avaid some scratch for material and labor during the assemble work.
If you've spent any time around industrial workspaces, warehouses, or manufacturing floors, you've probably seen them: those sleek, silver frames holding up shelves, supporting workbenches, or forming the backbone of material racks. Chances are, those frames are made of aluminum extrusion profiles—and if they're handling heavy loads, there's a good chance they're 4080 aluminum profiles. These sturdy, versatile components are the unsung heroes of efficient, durable industrial setups, from simple workbenches to complex material rack systems like the three-row, three-floor material rack B. But here's the thing about aluminum extrusion profiles: even the toughest ones need a little TLC to stay in top shape. And that's where end caps come in.
You might be thinking, "End caps? Those tiny plastic or rubber pieces? How important can they be?" Trust me, I've seen what happens when end caps are overlooked. A few years back, a friend who manages a warehouse mentioned a recurring issue: employees kept getting small cuts on their hands when reaching into the lower shelves of their heavy-duty racks. After inspecting the setup, we realized the problem was simple: the ends of the 4080 aluminum profiles were exposed, with sharp burrs from manufacturing. No end caps meant no protection—just raw, jagged metal waiting to snag a glove or a finger. Once we installed the right 4080 aluminum profile end caps, those injuries stopped. Overnight. That's the power of a small component done right.
In this article, we're diving deep into the world of 4080 aluminum profile end caps—why they matter, how to choose the right ones, and, most importantly, how to secure them properly on heavy-duty racks. Whether you're setting up a new material rack, maintaining an existing system, or just want to make your workspace safer, this guide will walk you through every step. We'll even cover common pitfalls to avoid and pro tips to ensure your end caps stay put for years. Let's get started.
Why 4080 Aluminum Profiles Are the Backbone of Heavy-Duty Racks
Before we talk about end caps, let's take a second to appreciate the star of the show: the 4080 aluminum extrusion profile. If you're not familiar with aluminum extrusion, it's a manufacturing process where aluminum is pushed through a die to create long, uniform shapes—like the T-slotted profiles you see in industrial setups. The "4080" in its name refers to its dimensions: 40mm in width and 80mm in height. That might not sound like much, but those proportions make it incredibly strong for its weight. Aluminum itself is lightweight, corrosion-resistant, and easy to work with, but when extruded into a 4080 profile, it becomes a workhorse capable of supporting hundreds of pounds—perfect for heavy-duty racks that hold everything from raw materials to finished products.
What makes 4080 profiles so versatile? Their T-slots. Those grooves running along the length of the profile let you attach accessories—like brackets, shelves, and yes, end caps—without welding or drilling new holes. Just slide a bolt into the slot, tighten it, and you're good to go. This flexibility is why you'll find 4080 profiles in everything from workbenches to conveyor systems, and especially in material racks. Take material rack B, for example—a three-row, three-floor system designed to maximize vertical storage. Each upright and crossbeam is likely a 4080 profile, connected by aluminum profile accessories like brackets and connectors. Without the strength of 4080 profiles, that rack couldn't safely hold the weight of stacked boxes, tools, or components.
But here's the catch: aluminum extrusion profiles, for all their strength, have one vulnerable spot: their ends. When a profile is cut to length (which is almost always necessary when building a rack), the cut end can be rough. Even with precision cutting tools, there are often tiny burrs, sharp edges, or uneven surfaces left behind. Over time, these rough ends can catch on gloves, scratch products, or even corrode if moisture seeps in. And if the rack is moved or jostled (which happens more often than you'd think in busy warehouses), those exposed ends can become even more damaged, increasing the risk of injury or equipment wear. That's where end caps step in.
The Unsung Role of 4080 Aluminum Profile End Caps
Let's be honest: end caps aren't the most glamorous part of an industrial setup. They're small, often made of plastic or rubber, and easy to overlook. But that doesn't mean they're unimportant. In fact, 4080 aluminum profile end caps play four critical roles in keeping your heavy-duty racks safe, functional, and long-lasting.
1. Safety First: Preventing Injuries
We touched on this earlier, but it's worth repeating: exposed aluminum ends are a safety hazard. Even a small burr can slice through a glove or skin, leading to cuts, scrapes, or infections. In a busy warehouse where employees are constantly reaching into racks, moving products, or adjusting shelves, those sharp edges are accidents waiting to happen. End caps cover those rough ends, creating a smooth, rounded surface that's safe to touch. Think of them as the "band-aid" for your rack—small, but essential for keeping everyone unharmed.
2. Protecting the Profile Itself
Aluminum is corrosion-resistant, but it's not invincible. Moisture, dust, and debris can get trapped in the hollow end of a 4080 profile, leading to oxidation over time. Even small amounts of rust or corrosion can weaken the profile, especially at the cut end where the material is most exposed. End caps act as a barrier, sealing off the inside of the profile from the elements. This isn't just about aesthetics—corroded profiles lose structural integrity, which is a big deal when you're talking about racks that hold thousands of pounds of inventory.
3. Maintaining Aesthetics (Yes, It Matters)
You might not care if your rack looks "pretty," but a clean, well-maintained workspace has real benefits. Studies show that organized, visually consistent environments boost employee morale and productivity. Exposed, rough profile ends make a rack look unfinished or neglected, which can trickle down to how employees treat the space. End caps give your rack a polished, professional look—like adding a finishing touch to a DIY project. Plus, they come in different colors (black, gray, white, even custom hues), so you can match them to your company's branding or workspace color scheme if you want.
4. Preserving Accessory Compatibility
Remember those T-slots we talked about? They're designed to work with aluminum profile accessories like brackets, shelves, and connectors. But if the end of a profile is damaged or bent, it can throw off the alignment of those accessories. For example, if a crossbeam's end is dented, it might not sit flush against an upright, creating a wobbly shelf. End caps help protect the profile's structural integrity, ensuring that T-slots stay aligned and accessories fit as they should. In short, they keep your rack's "joints" healthy, so everything works together smoothly.

Choosing the Right 4080 Aluminum Profile End Cap
Not all end caps are created equal. To secure them properly, you first need to choose the right ones for your 4080 aluminum profiles and heavy-duty rack. Here's what to look for:
Material: Plastic, Rubber, or Metal?
End caps come in three main materials: plastic, rubber, and metal. Each has its pros and cons:
- Plastic: The most common option. Lightweight, affordable, and available in a range of colors. Good for indoor racks in dry environments. Look for high-density polyethylene (HDPE) or polypropylene (PP) plastic—they're more durable than cheap PVC.
- Rubber: Flexible and shock-absorbent. Ideal for racks that get bumped or moved often (like mobile material racks). Rubber end caps also provide a better grip, so they're less likely to fall off if the rack vibrates. Great for workshops or warehouses with heavy foot traffic.
- Metal: The toughest option. Usually aluminum or stainless steel, metal end caps are corrosion-resistant and perfect for outdoor racks or environments with moisture, chemicals, or extreme temperatures. They're pricier, but worth it for long-term durability.
Fit: Push-On vs. Screw-On
End caps attach to profiles in two ways: push-on ( friction fit) or screw-on (mechanical fasteners). Push-on end caps are easy to install—just press them onto the profile end. They work well for light to medium-duty racks where the profile ends don't experience much stress. Screw-on end caps, on the other hand, have small screws that drill into the profile, creating a permanent hold. They're better for heavy-duty racks, mobile systems, or environments with vibration (like near machinery). For most stationary heavy-duty racks, push-on end caps are sufficient, but if you're unsure, go with screw-on for extra security.
Size: Measure Twice, Buy Once
This might seem obvious, but it's easy to mix up sizes. 4080 profiles have specific inner dimensions—you need an end cap that fits snugly inside or over the end. Most end caps are labeled by the profile they're designed for (e.g., "4080 aluminum profile end cap"), but always double-check. Measure the inner width and height of your profile's end (the opening where the end cap will go) and compare it to the end cap's dimensions. A loose end cap will fall off; a too-tight one might crack when you try to install it. When in doubt, ask your aluminum profile supplier for recommendations—they'll know which end caps pair best with their 4080 profiles.
Special Features: Ventilation, Color, or Customization
Some end caps come with extra features. For example, vented end caps have small holes to allow air circulation, which can help prevent moisture buildup inside the profile (useful in humid environments). Colored end caps can help with organization—use red for "danger" zones or blue for "picking" shelves. If you have unique needs (like a profile with a non-standard cut), some suppliers offer custom end caps. Just keep in mind that custom options cost more and take longer to produce.

Tools and Materials You'll Need
Securing end caps isn't complicated, but having the right tools on hand will make the job faster and easier. Here's a checklist of what you'll need:
| Tool/Material | Purpose | Pro Tips |
|---|---|---|
| 4080 Aluminum Profile End Caps | The main component—ensure they're the right size and material for your rack. | Buy 10-15% extra in case of mistakes or future replacements. |
| Deburring Tool or File | To smooth rough edges or burrs on the profile end. | Use a fine-grit file for aluminum to avoid scratching the surface. |
| Clean Cloth or Rag | To wipe away dust, oil, or debris from the profile end. | Use a lint-free cloth for best results—lint can get trapped under the end cap. |
| Rubber Mallet | To gently tap push-on end caps into place (avoids cracking). | Wrap the mallet head in a cloth to prevent marring the end cap's surface. |
| Screwdriver or Drill (for screw-on end caps) | To drive screws into the profile. | Use a Phillips-head or flat-head driver that matches the screw size—stripped screws are a hassle. |
| Measuring Tape or Ruler | To confirm the profile's inner dimensions and end cap fit. | Measure twice before installing—ill-fitting end caps will fall off. |
| Work Gloves | To protect your hands from sharp edges during prep work. | Nitrile gloves are best—they're puncture-resistant and won't slip. |
| Marker or Pencil | To mark alignment points if needed. | Use a pencil with a light touch—aluminum scratches easily. |
Step-by-Step: How to Secure 4080 Aluminum Profile End Caps
Now that you have your tools and end caps, let's walk through the installation process. We'll cover both push-on and screw-on end caps, since the steps differ slightly. Follow these steps, and your end caps will stay secure for years.
Step 1: Inspect the Profile End
Start by examining the end of the 4080 aluminum profile where you'll install the end cap. Look for burrs, dents, or sharp edges—these are common after cutting. Run your finger (wearing gloves!) along the edge to feel for roughness. Even small burrs can prevent the end cap from seating properly, so it's crucial to fix them now. If you find burrs, use a deburring tool or fine-grit file to smooth them out. Hold the file at a 45-degree angle to the edge and make light, even strokes. Be careful not to file too much—you don't want to alter the profile's dimensions, just remove the rough spots. Once the edge feels smooth, move on to the next step.
Step 2: Clean the Profile Surface
Dust, oil, and debris on the profile end can create a barrier between the end cap and the aluminum, preventing a tight seal. Grab a clean cloth (lint-free is best) and wipe the end of the profile thoroughly. If there's oil or grease (common in manufacturing environments), dampen the cloth with a mild solvent like isopropyl alcohol and wipe again. Let the alcohol evaporate completely before moving on—you don't want any liquid trapped under the end cap, as it can cause corrosion over time. A clean surface ensures the end cap adheres properly, whether it's push-on or screw-on.
Step 3: Test-Fit the End Cap
Before securing the end cap permanently, do a test-fit. Align the end cap with the profile end—make sure it's centered and straight. Gently press it into place (don't force it!). For push-on end caps, it should slide on partway but resist being fully seated—that means it's the right size. If it slides on too easily, it's too loose and will fall off. If it won't go on at all, it's too tight and may crack when you try to install it. For screw-on end caps, check that the screw holes align with the T-slots or pre-drilled holes in the profile. If they don't, you may need to drill new holes (use a drill bit designed for aluminum) or return the end caps for a better-fitting model. It's better to catch a bad fit now than after you've tried to secure it.
Step 4: Secure Push-On End Caps
If you're using push-on end caps, here's how to secure them:
- Align the end cap: Hold it straight against the profile end. If it has tabs or notches (some do, to lock into T-slots), make sure they're aligned with the profile's grooves.
- Apply even pressure: Use the palms of your hands to push the end cap onto the profile. Start at one corner and work your way around, or press directly in the center—whatever feels most stable. The goal is to seat it evenly, not crooked.
- Tap gently with a rubber mallet: If the end cap is tight, use a rubber mallet to tap it into place. Wrap the mallet head in a cloth to avoid damaging the end cap. Tap lightly and evenly around the edges—don't hit one spot too hard, as this can crack the end cap or bend the profile.
- Check for gaps: Once seated, inspect the edges of the end cap. There should be no gaps between the end cap and the profile. If you see a gap, gently wiggle the end cap or tap the opposite side to realign it.
Step 5: Secure Screw-On End Caps
For screw-on end caps, the process is a bit different:
- Align the end cap and mark holes: Place the end cap on the profile end and mark the positions of the screw holes with a pencil. This ensures you drill in the right spot if the profile doesn't have pre-drilled holes.
- Drill pilot holes (if needed): If the profile doesn't have T-slots or pre-drilled holes, use a drill bit slightly smaller than the screws to drill pilot holes. Drill slowly and straight—aluminum is soft, so it's easy to go off course.
- Attach the end cap: Place the end cap back on the profile, aligning the holes. insert the screws into the holes and tighten them with a screwdriver or drill (set to low torque to avoid stripping). Tighten until the end cap is snug, but don't overdo it—over-tightening can crack the end cap or strip the screws.
- Test the fit: Give the end cap a gentle tug to make sure it's secure. If it wobbles, check the screws—they may need to be tightened slightly, or the holes may be misaligned.
Step 6: Repeat and Inspect
Repeat steps 1–5 for every profile end on your heavy-duty rack. Once all end caps are installed, do a final inspection. Walk around the rack and check each end cap: is it seated evenly? Is there any gap? Does it feel loose when you tug it? If you find any issues, fix them now—don't wait until an end cap falls off or someone gets hurt. A few extra minutes of inspection can save hours of maintenance later.
Troubleshooting Common End Cap Issues
Even with careful installation, things can go wrong. Here are some common issues you might run into and how to fix them:
Problem: End Cap Falls Off
Cause: The most likely culprit is a loose fit. Maybe the end cap is too small, or the profile end is damaged (dented or bent), creating a gap. Push-on end caps can also loosen over time if the rack vibrates or is bumped often.
Solution: If the end cap is too small, replace it with a larger size. If the profile is damaged, use a rubber mallet to gently tap the end back into shape (be careful not to bend it further). For push-on end caps that keep loosening, try adding a small amount of industrial-strength adhesive (like epoxy) to the inside of the end cap before installing it. Just make sure the adhesive is compatible with aluminum and the end cap material—some adhesives can eat through plastic.
Problem: End Cap Cracks or Breaks
Cause: Cracking usually happens because the end cap was too tight, or you used too much force during installation (like hitting it with a metal hammer instead of a rubber one). Brittle plastic end caps are also prone to cracking in cold temperatures.
Solution: replace the cracked end cap with a new one—never try to "fix" a cracked end cap, as it will only get worse. To prevent future cracks, use a rubber mallet for installation, choose flexible rubber or HDPE end caps, and avoid installing end caps in extreme cold (plastic becomes brittle when frozen).
Problem: End Cap Doesn't Sit Flush
Cause: The profile end is bent or uneven, or the end cap is warped. This can happen if the profile was cut at an angle or the end cap was stored improperly (e.g., stacked under heavy objects).
Solution: If the profile end is bent, use a file or deburring tool to straighten it out as much as possible. If the end cap is warped, replace it—warped end caps won't seal properly. When storing end caps, keep them in a flat, dry place to avoid warping.
Maintaining Your End Caps for Long-Term Durability
Installing end caps is just the first step—you need to maintain them to keep your rack safe and functional. Here's how:
Inspect Regularly
Make end cap inspections part of your regular warehouse or workspace maintenance routine. Aim for once a month, or more often if the rack is in a high-traffic area or used frequently (like a material rack B that's loaded and unloaded daily). During inspections, check for loose, cracked, or missing end caps. Tighten screws if needed, and replace any damaged end caps immediately.
Clean End Caps When You Clean the Rack
Dust and grime can build up on end caps over time, making them look worn and potentially hiding damage. When you clean your heavy-duty rack (which you should do every few months), wipe down the end caps with a damp cloth and mild detergent. Avoid harsh chemicals, as they can degrade plastic or rubber end caps. For metal end caps, a quick polish with aluminum cleaner will keep them shiny and corrosion-free.
replace End Caps Proactively
Even the best end caps wear out eventually. If you notice an end cap is cracked, faded, or loose despite tightening, replace it. Don't wait for it to fall off or cause an issue. Keep a stock of spare end caps on hand so you can replace them quickly—this is especially important for critical racks that can't be taken out of service for long.
Adjust for Environmental Changes
Temperature and humidity can affect end caps. In hot weather, plastic end caps may expand; in cold weather, they may shrink or become brittle. In humid environments, metal end caps may corrode if not properly maintained. Keep an eye on end caps during seasonal changes and adjust as needed—tighten loose ones in winter, replace cracked ones in summer, and clean metal ones more often in humid climates.
Final Thoughts: Small Parts, Big Impact
At the end of the day, 4080 aluminum profile end caps are small components—but their impact on safety, durability, and functionality is huge. By taking the time to choose the right end caps, install them properly, and maintain them regularly, you're not just protecting your heavy-duty racks—you're protecting the people who use them, the products they hold, and the efficiency of your workspace.
Whether you're setting up a new material rack B, upgrading an existing system, or just doing routine maintenance, remember: the little things matter. A well-secured end cap might not make headlines, but it will prevent headaches, injuries, and costly repairs down the line. So grab your rubber mallet, your end caps, and get to work—your rack (and your team) will thank you.
And if you ever doubt the importance of end caps, just think back to that warehouse I mentioned earlier. One small change—adding end caps—turned a frustrating safety issue into a non-problem. That's the power of attention to detail. Now go make your racks safer, stronger, and more professional—one end cap at a time.