- Company Articles
- Products and Technology
- Installation And Maintenance
- How to replace Swivel Stem Caster Wheels on Aging Turnover Carts

How to replace Swivel Stem Caster Wheels on Aging Turnover Carts
Related Product
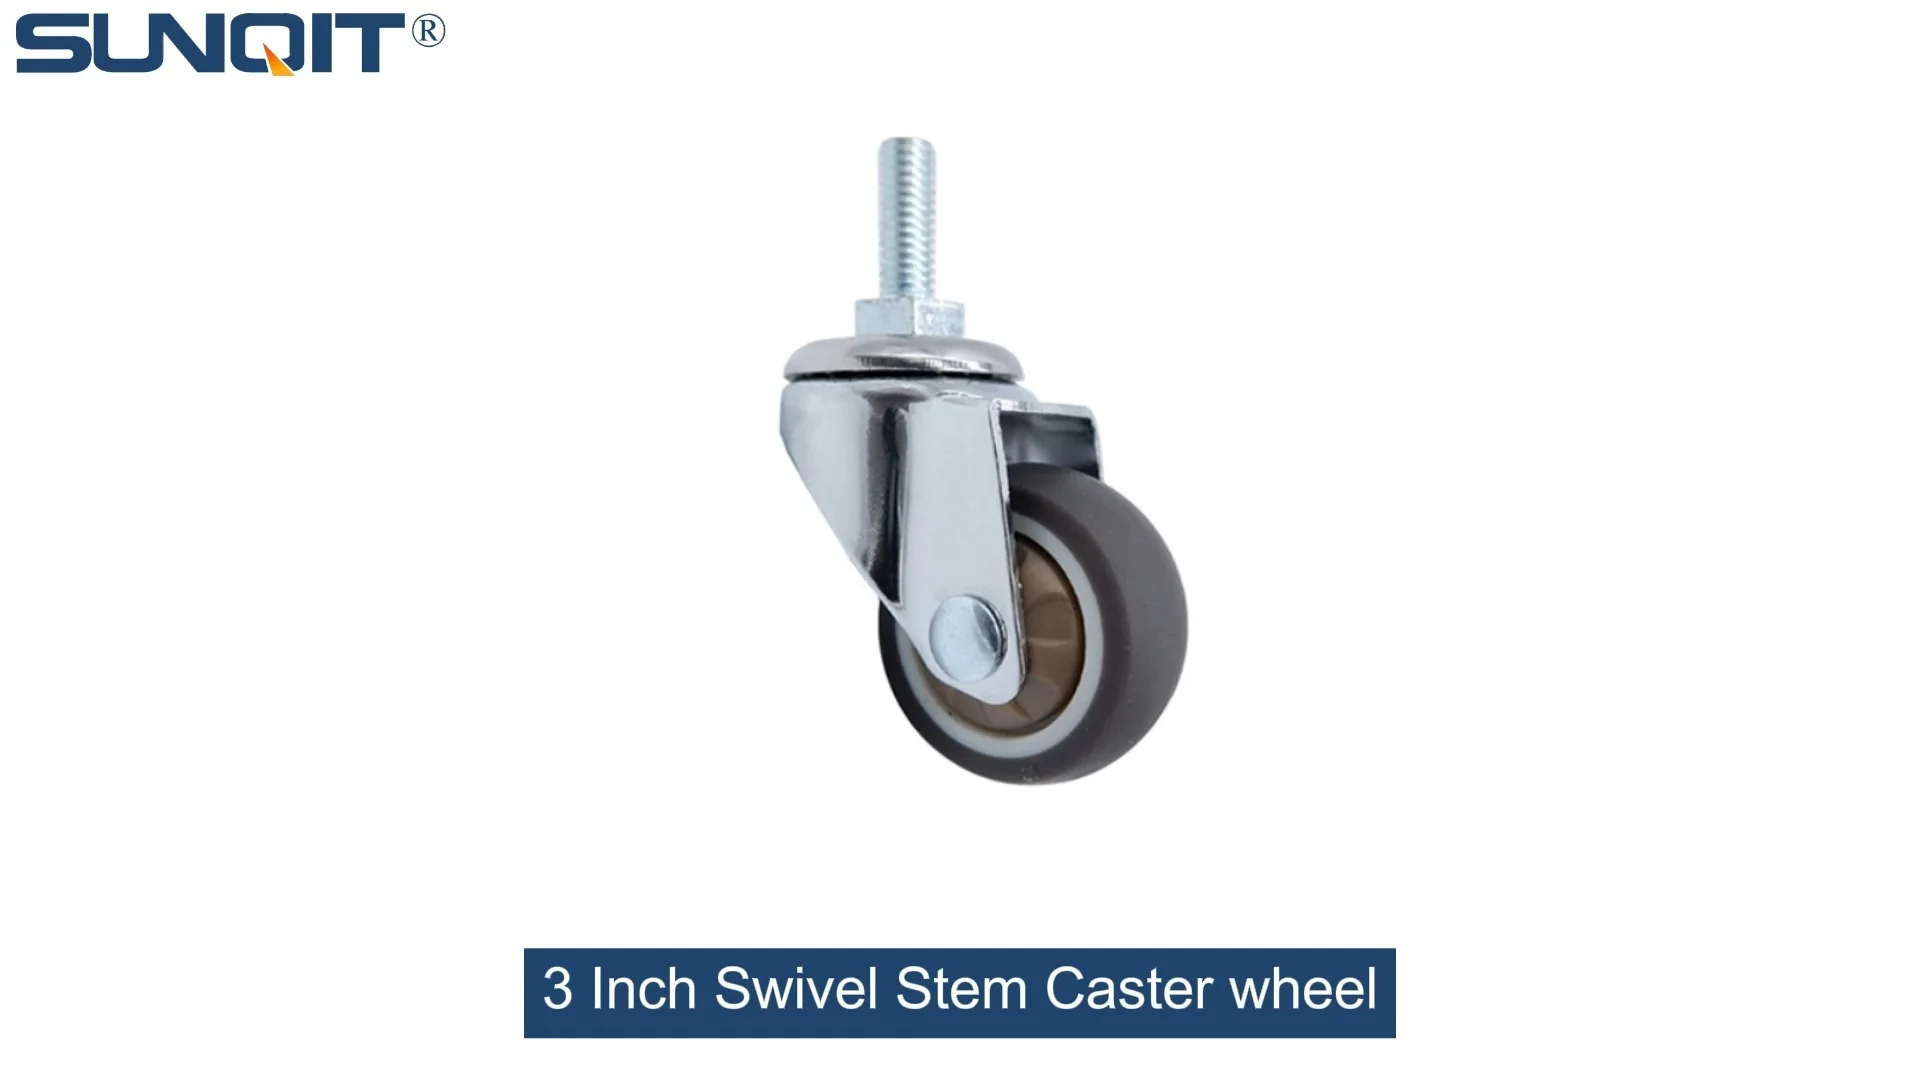
Swivel Stem Caster wheel
360 Degree Swivel Stem Caster. Threaded-post mount design, castors diameter 3 inch.Each swivel caster wheels loading 70KGS. Heavy enough and widely suit for carts, chairs, cabinet, flow rack, workbench, turnover rolley.
Introduction: The Unsung Heroes of Your Workshop
If you've spent any time in a warehouse, factory, or even a busy home garage, you know the value of a reliable turnover cart. These unassuming workhorses glide across floors, carrying tools, materials, and finished products with ease—turning tedious trips back and forth into a smooth, efficient process. But here's the thing: none of that happens without their most critical component: the caster wheels. Specifically, swivel stem caster wheels, which allow the cart to pivot, maneuver around tight corners, and navigate crowded spaces without breaking a sweat.
Over time, though, even the best caster wheels wear down. The constant weight, friction from uneven floors, and exposure to dust, oil, or moisture can take a toll. What was once a silent, agile helper starts to squeak, wobble, or get stuck—slowing you down, increasing frustration, and even putting you at risk of injury. If your turnover cart has seen better days, chances are the culprit is a set of worn-out swivel stem caster wheels. The good news? Replacing them isn't just doable—it's a simple DIY project that can breathe new life into your cart and save you from buying a brand-new one.
In this guide, we'll walk you through everything you need to know to replace those stubborn casters. From spotting the signs that replacement is overdue to gathering the right tools (including the all-important replacement swivel stem caster wheel and caster accessories), we'll break down the process step by step. Whether you're a seasoned maintenance pro or a weekend DIYer, you'll finish with a cart that rolls like it's fresh off the assembly line. Let's get started.
Signs Your Swivel Stem Caster Wheels Need Replacing
Before you grab a wrench, it's important to confirm that your caster wheels are actually the problem. Sometimes, a little lubrication or cleaning can fix a squeaky wheel, but other times, replacement is the only solution. Here are the key signs that your swivel stem caster wheels have reached the end of their lifespan:
- Squeaking or Grinding Noises: If your cart sounds like a rusty gate every time you move it, that's a red flag. Squeaking usually means the bearings are dry or worn, while grinding could indicate that the wheel itself is damaged or debris is stuck in the swivel mechanism.
- Uneven Rolling: Does the cart pull to one side, or feel like it's "catching" on the floor? This often happens when one or more wheels are worn unevenly, or the swivel joint is stiff. Over time, this can strain your arms and shoulders, not to mention damage the cart's frame.
- Wobbling or Shaking: A little movement is normal, but if the cart wobbles excessively—especially when turning—it's a sign the wheel's stem or mounting hardware is loose, bent, or damaged. Wobbling can cause items to fall off, or even tip the cart over if the load is unbalanced.
- Stuck Swivel Function: Swivel stem caster wheels are designed to rotate 360 degrees smoothly. If yours feels "sticky" or won't pivot freely, the swivel joint is likely clogged with dirt or rust, or the internal bearings are shot. Without a working swivel, maneuvering around corners becomes a frustrating battle.
- Visible Damage: Take a close look at the wheels themselves. Cracks, chips, or flat spots on the wheel tread are obvious signs of wear. Also, check the stem (the metal rod that attaches the wheel to the cart)—if it's bent, rusted through, or stripped, it won't hold the wheel securely.
If you notice any of these issues, don't wait to address them. Worn casters don't just slow you down—they can lead to bigger problems, like damaged floors, strained muscles, or even accidents. Replacing them now is a small investment of time that pays off in smoother workflows and safer operations.

Gathering Your Tools and Materials
Before you dive into the replacement process, you'll need to round up a few tools and supplies. The good news is you probably already have most of these in your toolbox. Here's what you'll need:
| Item | Purpose |
|---|---|
| Replacement Swivel Stem Caster Wheels | The star of the show! Make sure to get the right size (stem diameter and length) and weight capacity for your cart. Check the old caster's label or measure the stem to avoid mismatches. |
| Wrench Set (or Adjustable Wrench) | To loosen and tighten the nuts or bolts holding the caster stem in place. |
| Screwdriver (Flathead or Phillips, depending on hardware) | For removing any screws securing the caster plate (if your cart uses a plate-mounted design, though swivel stem casters typically use a stem instead). |
| Pliers | Helpful for gripping stuck nuts or bending stubborn cotter pins (if present). |
| Lubricant (WD-40 or Silicone Spray) | To clean and lubricate the swivel joint of the new casters, and to loosen rusted old hardware. |
| Clean Cloth or Brush | To wipe away dirt, grease, or rust from the cart's mounting brackets and the new caster stems. |
| Caster Accessories (Optional) | Washers, lock nuts, or cotter pins—these may come with your new casters, but it's good to have extras on hand in case the old ones are damaged. |
| Level (Optional) | To ensure the cart sits evenly after installing new casters. |
Pro tip: When buying replacement swivel stem caster wheels, match the style to your needs. If your cart is used in a warehouse with concrete floors, opt for heavy-duty wheels with polyurethane tread (they're durable and quiet). For smooth office floors, rubber wheels are gentler and won't scratch. Also, check the weight capacity—most casters list a "per wheel" rating, so multiply by the number of wheels on your cart to ensure it can handle your typical load.

Step-by-Step: Replacing Your Swivel Stem Caster Wheels
Now that you have your tools and replacement casters, let's walk through the process. We'll break it down into simple steps, so even if you're new to DIY, you'll feel confident.
Step 1: Safety First—Prepare the Cart
Before you start, empty the cart completely. Even a light load can make the cart unstable when you lift it, and you don't want tools or materials falling on your feet. Next, find a flat, stable surface to work on—a workbench or even the floor in a clear area will do. If your cart has a brake (some do, especially larger models), engage it to prevent rolling. If not, place a block of wood behind one of the wheels to keep it from moving.
Step 2: Remove the Old Caster Wheels
Most swivel stem caster wheels attach to the cart via a stem that fits into a mounting hole or bracket on the cart's frame. Here's how to remove them:
- Locate the mounting hardware: Look under the cart—you'll see the stem of each caster sticking up into the cart's frame. At the top of the stem, there's usually a nut or bolt securing it in place. Some stems may have a cotter pin (a small metal pin with a split end) instead of a nut.
- Loosen the hardware: Use your wrench to turn the nut counterclockwise until it's loose. If the nut is rusted or stuck, spray a little lubricant (like WD-40) on it and let it sit for 5-10 minutes. For cotter pins, use pliers to bend back the split ends and pull the pin out.
- Pull the caster free: Once the hardware is removed, grip the wheel firmly and pull downward. The stem should slide out of the mounting hole. If it's stuck (thanks to rust or debris), wiggle it gently while pulling, or tap the top of the stem (from inside the cart frame) with a hammer (use a soft cloth to avoid damaging the frame).
Repeat this process for all the casters you're replacing. If you're only replacing one or two (e.g., if only a few are damaged), mark the position of the old casters (front vs. back, left vs. right) to ensure you install the new ones in the same spots—some carts have fixed and swivel casters, and mixing them up can affect maneuverability.
Step 3: Clean and Inspect the Mounting Area
With the old casters removed, take a minute to clean the mounting holes or brackets on the cart. Use a brush or cloth to wipe away dirt, rust, or old grease. This ensures the new caster stem fits snugly and prevents debris from causing issues later. While you're at it, inspect the mounting area for damage—cracks in the frame, bent brackets, or stripped threads can make it hard to secure the new casters. If you spot damage, you may need to repair the frame (e.g., with a metal patch) before proceeding.
Step 4: Prep the New Swivel Stem Casters
Unbox your new swivel stem caster wheels and give them a quick once-over. Check for any defects, like cracked wheels or bent stems. If everything looks good, apply a small amount of lubricant to the swivel joint (the part that allows the wheel to rotate). This will help it glide smoothly from day one. You can also add a drop of lubricant to the wheel bearings if they're accessible—this reduces friction and extends the wheel's life.
Step 5: Install the New Casters
Now it's time to attach the new swivel stem caster wheels. Here's how:
- Align the stem with the mounting hole: Hold the caster so the stem is pointing upward, and slide it into the mounting hole on the cart frame. Make sure it's straight—if the stem is bent, the wheel won't swivel properly.
- Secure the stem: Thread the nut (or bolt) onto the stem and tighten it clockwise with your wrench. Don't overtighten—you could strip the threads or damage the frame. A good rule of thumb: tighten until it's snug, then give it a quarter-turn more. If your casters use cotter pins, insert the pin through the hole in the stem, then bend the ends to lock it in place.
- Test the swivel: Once the caster is secured, give the wheel a gentle push to see if it swivels freely. If it's stiff, check that the stem is straight and the nut isn't too tight—loosen it slightly if needed.
Repeat this for all new casters, making sure each one is tight and swivels smoothly. If your cart has a mix of swivel and fixed casters, double-check that you've installed them in the right positions—fixed casters (which don't swivel) usually go on one end to provide stability, while swivel casters go on the other for maneuverability.
Step 6: Test the Cart
With all new casters installed, it's time for the moment of truth: testing the cart. Remove any blocks or brakes, and give the cart a gentle push. It should roll smoothly, with no wobbling or squeaking. Try turning it in a tight circle—the swivel casters should pivot easily without getting stuck. If you notice any issues, like uneven rolling or a stiff swivel, double-check the installation: Are the nuts tight? Is the stem aligned properly? Did you lubricate the swivel joint?
For a final test, load the cart with a typical load (e.g., tools, boxes) and roll it around your workspace. This mimics real-world use and helps you spot any problems you might have missed with an empty cart. If everything feels good, you're done!

Pro Tips for Long-Lasting Caster Wheels
Now that your turnover cart is rolling like new, you'll want to keep it that way. Here are some simple maintenance tips to extend the life of your new swivel stem caster wheels:
- Clean them regularly: Wipe the wheels and swivel joints with a damp cloth to remove dirt, dust, and debris. This prevents buildup that can gum up the swivel mechanism.
- Lubricate monthly: A drop of lubricant (silicone spray or lithium grease) on the swivel joint and wheel bearings every month keeps things moving smoothly. Avoid oil-based lubricants, which can attract dust.
- Check for loose hardware: Every few weeks, give the nuts or bolts on the caster stems a quick tighten. Vibration from rolling can loosen them over time.
- Don't overload the cart: Stick to the weight capacity listed on the casters. Overloading puts extra strain on the wheels and stems, leading to premature wear.
- Avoid rough terrain: While swivel stem casters are durable, they're not designed for gravel, potholes, or extremely uneven floors. If you must roll over rough surfaces, go slowly to reduce impact.
- Store properly: If you're not using the cart for a while, park it on a flat surface and engage the brake (if it has one). This prevents the casters from bearing weight in one position for too long, which can flatten the wheels.
By following these tips, you can keep your caster wheels (and your turnover cart) in top shape for years to come.
Troubleshooting Common Issues
Even with careful installation, you might run into a few hiccups. Here's how to fix the most common problems:
- New casters are squeaking: This is usually due to dry swivel joints. Apply more lubricant and work the wheel back and forth to distribute it evenly.
- Cart leans to one side: Check if all casters are the same height. If one is shorter, it may be a defective caster—contact the supplier for a replacement. Also, ensure the mounting nuts are tightened evenly; loose nuts can cause a caster to sit lower.
- Swivel joint is stuck: Debris might be trapped in the joint. Remove the caster, clean the joint with a brush and lubricant, then reinstall.
- Wheel won't roll straight: The wheel tread might be uneven (a defect in the new caster) or the stem is bent. If it's a defect, return the caster for a replacement.
Conclusion: A Small Fix for Big Results
Replacing swivel stem caster wheels on your turnover cart might seem like a minor task, but it's one that has a huge impact. A cart with fresh, smooth-rolling casters isn't just more pleasant to use—it's more productive. You'll spend less time struggling with a stubborn cart and more time focusing on the work that matters. Plus, you'll avoid the cost of buying a new cart, which can run hundreds of dollars, by investing in a set of replacement casters that cost a fraction of that.
So the next time your turnover cart starts to squeak or wobble, don't dread the repair—embrace it. With the right tools, a little patience, and this guide, you'll have it rolling like new in no time. And who knows? You might even find yourself looking forward to using that cart again—because when something works well, it makes every task feel a little easier.
Remember: The key to a long-lasting cart is regular maintenance. Keep those casters clean, lubricated, and tight, and they'll keep serving you faithfully for years. Happy rolling!