- Company Articles
- Products and Technology
- Installation And Maintenance
- How to Test Castor Installation Base Strength: Load Testing for Material Rack B

How to Test Castor Installation Base Strength: Load Testing for Material Rack B
Related Product
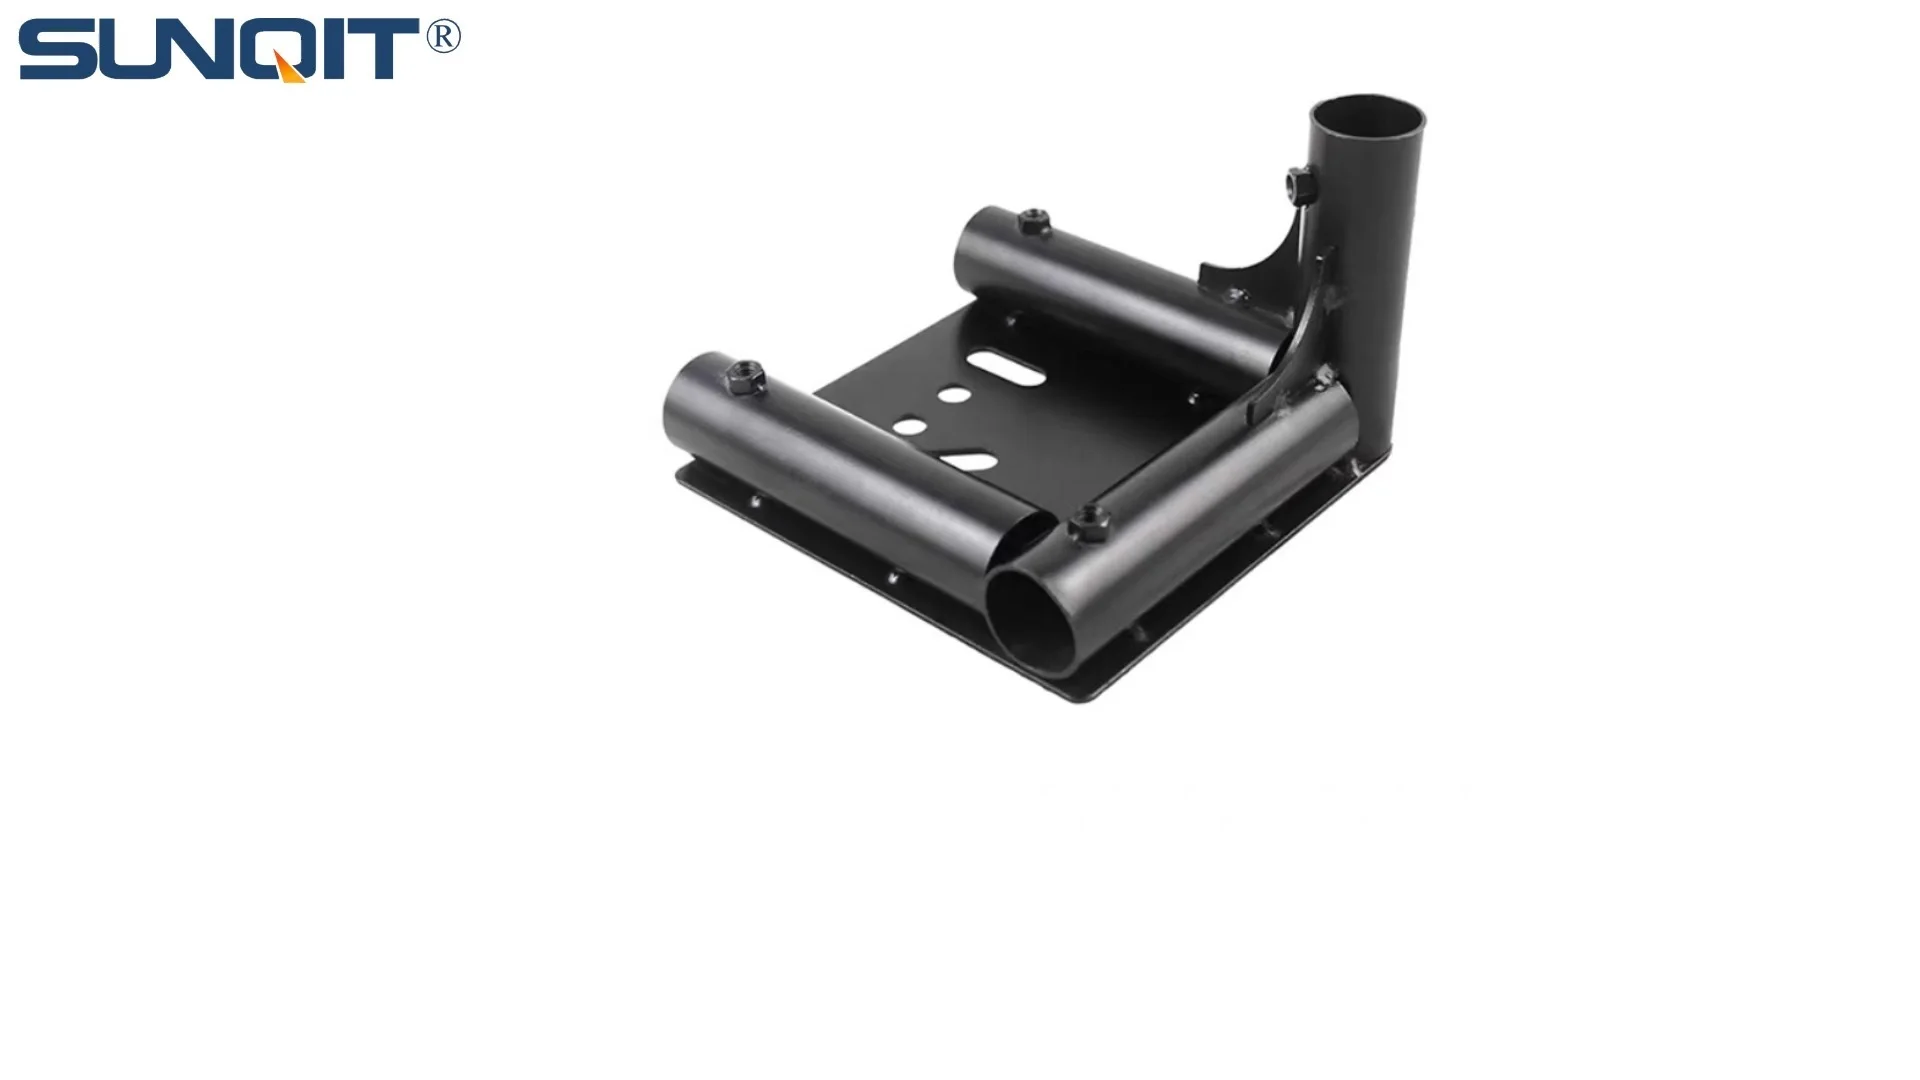
Castor Installation Base
Pipe fitting castor installation base,Well made, precise and strong. Made of high quality of steel,black painting surface treatment for greater resistance to corrosion. It is used for castor or foot lever connection with lean pipe.
Introduction: Why Castor Installation Base Strength Matters
On a busy production floor, Material Rack B is more than just a storage unit—it's the circulatory system of material flow. Designed with 3 rows and 3 floors, it carries everything from small electronic components to heavy mechanical parts, moving seamlessly between workstations to keep assembly lines running. But for all its utility, this workhorse relies on a yet critical component: the castor installation base. This unassuming metal plate or bracket is the bridge between the rack's frame and its casters, bearing the full weight of the loaded rack and transferring it safely to the wheels below.
A weak castor installation base isn't just a minor flaw; it's a ticking time bomb. Imagine a fully loaded Material Rack B (3 row and 3 floor) navigating a tight corner, only for the base to crack under pressure. The result? Spilled materials, damaged inventory, halted production, and even risk of injury to nearby workers. In lean systems, where efficiency and safety are paramount, such failures are simply unacceptable. That's why load testing the castor installation base isn't an optional step—it's a core practice for maintaining a reliable, productive workspace.
In this guide, we'll walk through the ins and outs of load testing for Material Rack B's castor installation base. From pre-test preparation to interpreting results, we'll cover everything you need to ensure your racks can handle the demands of daily operation. Whether you're a facility manager, maintenance technician, or lean system coordinator, mastering this process will help you protect your team, your equipment, and your bottom line.
Understanding Material Rack B and Its Castor Installation Base
Before diving into testing, let's start with the basics: what makes Material Rack B (3 row and 3 floor) unique, and how does the castor installation base fit into its design? This rack is a staple in lean manufacturing and warehousing, prized for its modularity and adaptability. With three horizontal rows and three vertical floors, it maximizes vertical storage space while keeping materials accessible. Its lightweight yet durable frame—often made from aluminum or steel—allows it to hold up to 500kg of load, depending on configuration.
The castor installation base is the unsung hero of this design. Typically made from reinforced steel or heavy-duty aluminum, it's bolted or welded to the rack's legs, providing a stable platform to mount casters. Without a secure base, even high-quality casters (and their accessories, like locking mechanisms or shock-absorbing wheels) can fail. For example, if the base bends under load, the casters may tilt, causing the rack to wobble or tip. If it detaches entirely, the rack could collapse. In short, the base's strength directly determines the rack's load capacity and safety.
Material Rack B's castor installation base also faces unique stressors. Unlike fixed shelving, it's constantly in motion—rolling over uneven floors, stopping suddenly, and navigating obstacles. This dynamic movement adds lateral forces to the base, testing its tensile and shear strength. Over time, vibrations from daily use can loosen bolts or weaken welds, making regular testing even more critical.

Pre-Test Preparation: Setting the Stage for Accurate Results
Load testing isn't something you rush into. Proper preparation ensures safety, accuracy, and repeatability—three pillars of reliable testing. Here's what you'll need to do before applying a single pound of pressure to the castor installation base:
Safety First: Always prioritize personal protective equipment (PPE). This includes steel-toed boots to protect against falling debris, cut-resistant gloves for handling sharp edges, safety glasses to shield eyes from metal shavings, and a hard hat if working in areas with overhead hazards. Clear the test area of bystanders and mark it with caution tape to prevent accidental entry.
Inspect the Rack: Before testing, give Material Rack B a thorough visual inspection. Look for signs of pre-existing damage: cracks in the frame, rust on the castor installation base, loose bolts, or bent casters. If you spot any of these, address them first—testing a damaged rack could lead to unpredictable results or further harm. For example, a rusted bolt might snap during testing, making it impossible to tell if the base itself failed or the fastener did.
Clean the Installation Base: Dirt, grease, or debris on the castor installation base can interfere with measurements. Use a wire brush to remove rust, a degreaser to clean oil or lubricant, and a dry cloth to wipe the surface. This ensures your testing equipment (like load sensors) makes direct contact with the base, giving accurate readings.
Gather Your Tools: You'll need a mix of measuring, loading, and documentation tools. Refer to the table below for a complete checklist:
| Equipment | Purpose | Notes |
|---|---|---|
| Load cell or hydraulic jack with pressure gauge | Apply controlled, measurable loads to the base | Choose a load cell rated for at least 150% of the rack's maximum capacity |
| Digital force gauge | Measure the force applied during testing | Calibrate annually to ensure accuracy |
| Dial indicator or laser level | Detect deflection (bending) in the installation base | Position the indicator perpendicular to the base surface |
| Torque wrench | Check bolt tightness before and after testing | Use the manufacturer's recommended torque specs (typically 30-50 Nm for M10 bolts) |
| Measuring tape and straightedge | Verify rack alignment and base flatness | Ensure the base is level to avoid uneven load distribution |
| Stopwatch | Time how long the base holds maximum load | Standard duration is 10-15 minutes for static load testing |
| Documentation forms or digital log | Record load levels, deflections, and observations | Include photos of the base before and after testing for reference |
Set Up the Test Environment: Choose a flat, stable surface for testing—ideally a concrete floor, as wooden or uneven surfaces can absorb load and skew results. Secure the rack so it can't tip during testing: use tie-down straps to anchor it to a fixed structure (like a wall or heavy machine) or place sandbags on the opposite side of the load application point. If testing outdoors, avoid windy days, as gusts can add unintended lateral forces.

Step-by-Step Load Testing Procedure
Now that you're prepared, it's time to start testing. Follow these steps to systematically evaluate the castor installation base's strength:
Step 1: Zero the Equipment Before applying any load, calibrate your tools. Turn on the load cell and digital force gauge, and set them to zero. Place the dial indicator against the castor installation base (near the caster mounting bolts, where stress is highest) and adjust it to read 0.00mm. This ensures your measurements start from a baseline.
Step 2: Apply Incremental Static Loads Load testing works best when done gradually. Start with 25% of Material Rack B's rated maximum load (e.g., 125kg for a 500kg rack). Apply the load slowly using the hydraulic jack or load cell, making sure it's centered over the castor installation base to mimic real-world conditions (where weight is distributed across the rack). Hold this load for 2 minutes, then record the deflection (how much the base bends) using the dial indicator. Repeat this process for 50%, 75%, and 100% of the rated load, recording deflection at each step.
Step 3: Test Beyond Rated Capacity (Overload Test) To ensure the base can handle unexpected stress (like a momentary overload when loading materials), test at 125% of the rated load. This is the "safety margin" test—if the base fails here, it's a sign it may not hold up in daily use. Apply the overload slowly, hold it for 5 minutes, and monitor for signs of failure: cracking sounds, sudden increases in deflection, or bolts popping loose.
Step 4: Dynamic Load Simulation (Optional but Recommended) Material Rack B rarely sits still, so static testing alone isn't enough. To simulate movement, apply 75% of the rated load and gently push the rack back and forth (as you would during normal use). Observe how the castor installation base responds—does it flex more under lateral force? Do the casters wobble, indicating uneven load distribution? Use the force gauge to measure the lateral force required to move the rack; if it's significantly higher than expected, the base may be binding or misaligned.
Step 5: Unload and Inspect for Permanent Deformation After the overload test, slowly release the load. Check the dial indicator—if it doesn't return to 0.00mm, the base has suffered permanent deformation. This is a critical red flag: even small permanent bends weaken the base, making it prone to failure under future loads. Also, recheck the bolts with a torque wrench—vibrations from testing can loosen them, and loose fasteners reduce the base's strength.
Step 6: Repeat for All Castor Installation Bases Material Rack B typically has 4 casters (one at each corner), each with its own installation base. Don't assume one base's performance reflects the others—test all four individually. This catches inconsistencies, like a base that was welded poorly or a bolt that wasn't tightened to spec during manufacturing.

Interpreting Test Results: What's Acceptable?
Numbers on a spreadsheet don't mean much without context. Here's how to interpret your test data to decide if the castor installation base is fit for use:
Key Metrics to Evaluate:
- Deflection at Rated Load: Most industry standards (like ISO 10525 for material handling equipment) allow up to 0.2mm of deflection per 100kg of load. For a 500kg rack, that's 1.0mm total deflection at 100% load. If your base deflects more than this, it may be too flexible.
- Permanent Deformation: Any permanent bend (even 0.1mm) is unacceptable. This means the base has been stretched beyond its elastic limit and will only get weaker over time.
- Failure During Overload: If the base cracks, bends permanently, or separates from the rack at 125% load, it's unsafe for use. replace it immediately.
- Bolt Integrity: After testing, bolts should still meet torque specs. If they loosen by more than 5% (e.g., from 40 Nm to 38 Nm), the threads may be stripped or the base may be warped, causing uneven stress.
For example, let's say you test a castor installation base on a 500kg Material Rack B. At 100% load (500kg), deflection is 0.8mm (within the 1.0mm limit). At 125% load (625kg), deflection increases to 1.2mm, but returns to 0.00mm when unloaded—no permanent deformation. Bolts remain tight at 40 Nm. This base passes with flying colors.
On the flip side, if a base deflects 2.5mm at 100% load and doesn't return to zero, it's a failure. Even if it holds the weight, the excessive flex will strain the casters and frame over time, leading to premature wear.
Common Issues and Troubleshooting
Load testing often reveals hidden problems. Here are the most common issues and how to fix them:
Excessive Deflection: If the base bends too much under load, check for loose bolts first—tightening them to the correct torque can reduce flex by up to 30%. If bolts are tight, the base may be made from thin or low-grade metal. replace it with a heavy-duty steel or aluminum base (look for suppliers specializing in lean pipe and accessories, as they often carry reinforced options).
Permanent Deformation: This is irreversible. The only fix is to replace the castor installation base. When ordering a new one, opt for a thicker gauge (e.g., 6mm steel instead of 4mm) or one with gussets (triangular reinforcement plates) at the corners, which add rigidity.
Bolt Failure: If bolts snap or strip during testing, they're likely undersized. Upgrade to higher-strength bolts (e.g., grade 8.8 instead of grade 4.6) and use lock washers or thread-locking adhesive (like Loctite) to prevent loosening. Also, ensure the bolt holes in the base are properly tapped—stripped threads can't hold torque.
Uneven Load Distribution: If one castor installation base deflects significantly more than others, the rack may be out of level. Use shims under the base or adjust the caster height (if using adjustable casters) to balance the load. This prevents overstressing individual bases.
Best Practices for Long-Term Durability
Load testing is just one part of maintaining strong castor installation bases. To keep Material Rack B reliable for years, follow these habits:
Schedule Regular Inspections: Test the castor installation base every 6 months, or more often if the rack is used heavily (e.g., multiple moves per day). Pair this with monthly visual checks for rust, cracks, or loose bolts.
Train Staff on Proper Loading: Even the strongest base can fail if overloaded. Post Material Rack B's weight limit clearly on the rack, and train employees to distribute weight evenly (avoid piling all heavy items on one floor). This reduces stress on individual castor installation bases.
Invest in Quality Components: When replacing bases or casters, choose reputable suppliers. Look for castor installation bases with certifications (like ISO 9001) and casters designed for industrial use (not light-duty office casters). Skimping on quality here leads to frequent replacements and higher long-term costs.
Clean and Lubricate: Keep the castor installation base free of debris, and lubricate caster axles regularly. This reduces friction during movement, which in turn lowers stress on the base.
Conclusion: Building a Stronger Lean System
Testing the castor installation base of Material Rack B (3 row and 3 floor) isn't just about checking a box—it's about building a lean system that's safe, efficient, and resilient. By following the steps outlined here, you'll catch weaknesses before they become failures, protect your team and inventory, and keep your production floor running smoothly.
Remember: in lean manufacturing, every component matters. From the aluminum pipe of the rack frame to the caster accessories that keep it moving, each part plays a role in overall performance. The castor installation base may be small, but its strength is the foundation of Material Rack B's reliability. Invest the time in testing it, and you'll reap the rewards of fewer breakdowns, lower costs, and a workspace where everyone can focus on what they do best—creating great products.