- Company Articles
- Products and Technology
- Product knowledge
- How to Test ESD Performance of 40 Steel Roller Track Black Wheels

How to Test ESD Performance of 40 Steel Roller Track Black Wheels
Related Product
40 Steel Roller Track Black Wheel
The roller track can be installed with multiple accessories to create different slopes and configurations of flow racks.All steel conveyor 40 roller track accessories are engineered to perfectly fit the sliding rail.
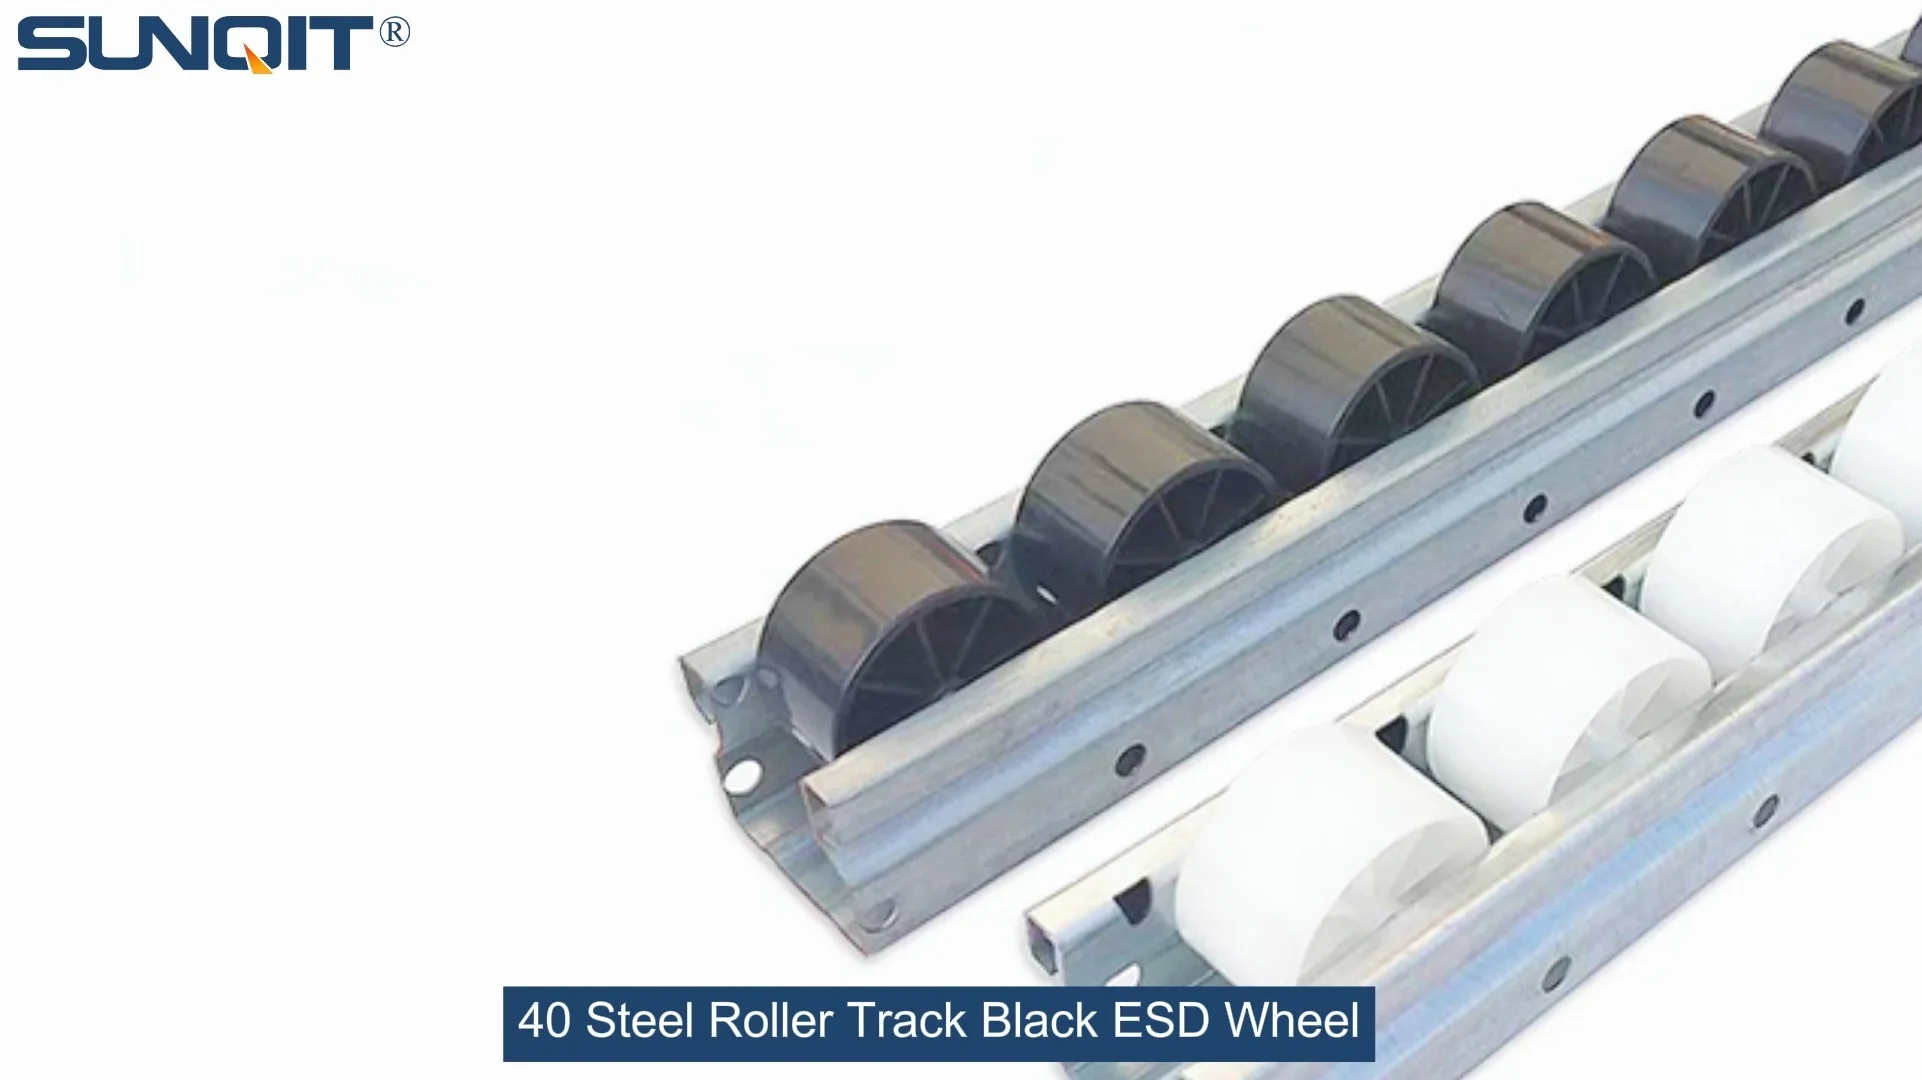
In the fast-paced world of manufacturing—where every component, every second, and every detail counts—static electricity is often the silent enemy. Imagine a 3C assembly line where delicate circuit boards glide along conveyor systems, or a medical device production floor where precision parts move through flow racks. A single electrostatic discharge (ESD) here could damage sensitive electronics, delay production, or even compromise product safety. That's where components like the 40 steel roller track black wheels come in. Designed to combine durability with ESD protection, these wheels are critical for maintaining lean, efficient, and safe production environments. But how do you ensure they actually deliver on that promise? This guide will walk you through the step-by-step process of testing their ESD performance, so you can trust your equipment to protect what matters most.
Why ESD Testing Matters in Modern Manufacturing
Before diving into the testing process, let's start with the basics: why does ESD performance matter for roller track wheels? In industries like consumer electronics, medical devices, and automotive manufacturing, even tiny electrostatic charges (as low as 100 volts) can damage semiconductors, integrated circuits, or other sensitive components. These damages might not show up immediately—some are "latent," causing products to fail weeks or months after leaving the factory. The cost? Recalls, warranty claims, and lost customer trust.
For lean manufacturers, ESD control is also a cornerstone of lean solution principles. A single ESD-related defect disrupts workflow, wastes materials, and undermines the "sustainable improvement" goal of lean systems. That's why components like ESD workstations, ESD-safe conveyor systems, and yes, roller track wheels with reliable ESD properties, are non-negotiable. The 40 steel roller track black wheels, with their conductive black coating and robust steel construction, are engineered to channel static charges away from products—but only if their ESD performance is verified through rigorous testing.
Fun Fact: A typical human can't feel static discharges below 3,000 volts, but many electronic components are damaged by charges as low as 10 volts. That means by the time you feel a static shock, your products might already be compromised!
Understanding 40 Steel Roller Track Black Wheels: Design & ESD Basics
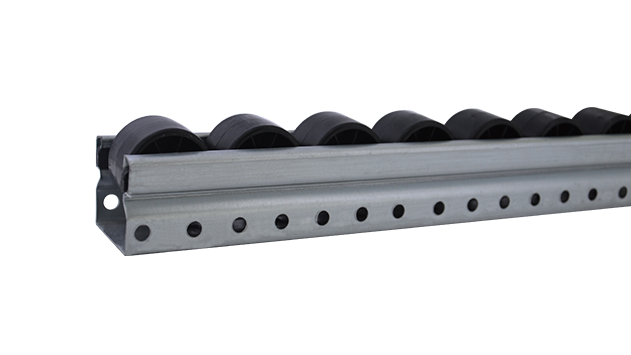
To test these wheels effectively, you first need to understand what makes them ESD-safe. The 40 steel roller track black wheels are built for heavy-duty use in conveyor systems and flow racks, common in high-volume production lines. Their key features include:
- Steel Core: Provides strength and load-bearing capacity, ideal for transporting heavy parts in automotive or industrial settings.
- Black Conductive Coating: Formulated with carbon additives or conductive polymers to create a path for static charge dissipation. This coating is what differentiates "regular" roller wheels from ESD-safe ones.
- Precision Bearings: Ensure smooth rotation, reducing friction (and thus static generation) during operation.
- Compatibility: Designed to fit standard roller tracks, making them easy to integrate into existing lean systems or custom lean solutions.
The goal of ESD testing is to verify that this conductive coating works as intended: to prevent static buildup on the wheel surface and safely redirect any charges to ground. If the coating is cracked, uneven, or has too high resistance, it won't protect your products—making testing a critical step before installation.
Pre-Test Preparation: Setting the Stage for Accurate Results
Testing ESD performance isn't as simple as "plugging in a meter and reading a number." Environmental conditions, equipment calibration, and sample preparation all affect accuracy. Here's what you need to do before you start:
1. Control the Environment
Humidity and temperature have a huge impact on static conductivity. High humidity (above 60%) can make materials more conductive (lower resistance), while low humidity (below 30%) increases resistance—both can skew results. For reliable testing, set up your workspace to meet industry standards:
- Temperature: 23°C ± 3°C (73°F ± 5°F)
- Relative Humidity: 30%–60%
- Airflow: Minimize drafts (use a fume hood or closed testing area if possible) to avoid static interference from moving air.
2. Gather Your Tools
You'll need specialized equipment to measure ESD properties. Here's a checklist:
| Equipment | Purpose | Calibration Requirement |
|---|---|---|
| Surface Resistance Tester (e.g., Megohmmeter) | Measures resistance between two points on the wheel surface | Calibrated within the last 12 months (per ISO 9001 standards) |
| Ground Continuity Tester | Checks electrical connection between wheel, track, and ground | Calibrated to measure resistance up to 1Ω with ±1% accuracy |
| Charge Decay Test Chamber | Measures how quickly static charge dissipates from the wheel | Compliant with IEC 61340-2-3 standards |
| Electrodes (Conductive Rubber or Metal) | Apply voltage and measure current during resistance tests | Clean and free of debris to ensure good contact |
| Digital Thermo-Hygrometer | Monitor temperature and humidity during testing | Calibrated to ±1°C and ±5% RH accuracy |
3. Prepare the Samples
Not all wheels are created equal—even from the same batch. To ensure reliability, test a representative sample set:
- Sample Size: Test at least 5 wheels per batch (more if the batch size exceeds 100 units). This accounts for potential manufacturing variations.
- Conditioning: Let the wheels "rest" in the test environment for at least 24 hours before testing. This allows them to adjust to temperature and humidity, ensuring results reflect real-world use.
- Visual Inspection: Check for defects like cracks in the coating, dents, or loose bearings. Damaged wheels should be excluded from testing (and reported to your supplier!)
Pro Tip: If you're testing wheels that have been in use (not just new ones), clean them first! Dust, oil, or debris on the surface can insulate the coating, leading to false high-resistance readings.

Step-by-Step Testing Process
Now, let's get to the heart of the matter: actually testing the ESD performance. We'll cover four key tests, each targeting a different aspect of ESD protection. Follow these steps carefully to get accurate, actionable data.
Test 1: Surface Resistance Measurement
Surface resistance measures how well the wheel's coating conducts electricity—the lower the resistance, the better it dissipates static. For ESD-safe materials, the target range is typically 10⁶ Ω to 10⁹ Ω (ANSI/ESD S20.20 standard). Here's how to measure it:
- Set Up the Tester: Turn on your surface resistance meter and set it to the appropriate voltage (10V for materials expected to be in the 10⁶–10⁹ Ω range; 100V for higher resistance materials). Connect the meter to the electrodes (use concentric ring electrodes for flat surfaces, or parallel plate electrodes for curved surfaces like wheel treads).
- Position the Electrodes: Place the electrodes on the wheel's tread (the part that contacts products) and sidewall (the vertical surface). For the tread, test at 3 different points (top, front, back) to check for coating uniformity. Apply gentle pressure (about 1kg) to ensure good contact—too much pressure can damage the coating; too little gives poor readings.
- Take Readings: Press the "measure" button and record the resistance after 60 seconds (this allows the voltage to stabilize). Repeat for all test points on all sample wheels.
- Analyze Results: If all readings fall between 10⁶ and 10⁹ Ω, the coating is effective. Readings below 10⁶ Ω mean the wheel is too conductive (could cause electrical interference); above 10⁹ Ω means it's not conductive enough (static will build up).
Test 2: Ground Continuity Testing
A wheel with great surface resistance is useless if it can't channel static to ground. Ground continuity ensures that any charge on the wheel flows through the roller track, into the frame, and safely to earth. Here's how to test it:
- Assemble the Test Setup: Mount the wheel onto a section of roller track (use the same track it will be installed on in production). Connect one lead of the ground continuity tester to the wheel's axle (use a crocodile clip for metal-to-metal contact). Connect the other lead to the track's grounding point (where the track is bolted to the floor or connected to an earth ground).
- Measure Resistance: Turn on the tester and apply a current (typically 1A DC). The resistance between the wheel and ground should be ≤ 1 Ω . If it's higher, check for loose connections, rust on the axle, or paint/coating blocking the metal-to-metal contact between the wheel and track.
- Test Rotation: Rotate the wheel 360° while testing—sometimes continuity fails only at certain angles (e.g., if the axle bearing is corroded). If resistance spikes during rotation, the bearing may need lubrication or replacement.
Test 3: Charge Decay Testing
Even if a wheel conducts electricity, how quickly does it dissipate static? Charge decay testing measures the time it takes for a static charge on the wheel to drop from 1000V to 100V—a key indicator of real-world performance. Here's the process:
- Use a Charge Decay Chamber: These specialized chambers simulate static buildup and measure dissipation. Place the wheel inside, ensuring the tread is exposed to the chamber's electrodes.
- Apply Charge: Use a high-voltage power supply to charge the wheel to 1000V (positive or negative—test both polarities, as some materials behave differently).
- Measure Decay Time: Start the timer as soon as the charge is applied. Stop when the voltage drops to 100V. Record the time.
- Check Compliance: For ESD protective materials, decay time should be ≤ 2 seconds (per ANSI/ESD S20.20). If it takes longer, the coating may not react quickly enough to prevent ESD during fast-moving production.
Test 4: Friction Electrification Voltage (FEV) Testing
In real use, wheels rub against products—this friction generates static. FEV testing measures how much voltage builds up during this process, ensuring it stays below dangerous levels. Here's how to do it:
- Simulate Real-World Contact: Use a test rig to rub the wheel against a sample product (e.g., a PCB, plastic part, or metal component typical of your production line). Set the speed to match your conveyor's operating speed (e.g., 0.5–2 m/s).
- Measure Voltage: Attach an electrostatic voltmeter probe near the contact point (about 1cm away). Rub the wheel against the product for 1 minute, then record the maximum voltage generated.
- Compare to Limits: For most electronics manufacturing, the maximum allowable FEV is 100V . If your wheel generates more than that, it could still damage sensitive components—even if surface resistance and decay time are good!

Interpreting Results: What's "Good Enough"?
After testing, you'll have a pile of numbers—but what do they mean? Here's a quick guide to interpreting results against industry standards:
| Test | Acceptable Range | What It Means If It Fails |
|---|---|---|
| Surface Resistance | 10⁶–10⁹ Ω | Coating is too conductive (interference risk) or not conductive enough (static buildup) |
| Ground Continuity | ≤ 1 Ω | Charge can't flow to ground—static will stay on the wheel |
| Charge Decay Time | ≤ 2 seconds | Static lingers too long, increasing discharge risk |
| Friction Electrification Voltage | ≤ 100V | Wheel generates dangerous static during use |
If any wheel fails one or more tests, don't panic—but don't ignore it either. First, double-check your setup (e.g., was the meter calibrated? Was the sample clean?). If the failure persists, contact your supplier. A reputable lean solution provider will work with you to identify the issue—whether it's a coating problem, manufacturing defect, or incorrect material specification.
Real-World Applications: Why This Matters for Your Lean System
Let's put this all into context with a real example. A major 3C manufacturer was experiencing intermittent failures in their smartphone assembly line. Defective units were traced back to ESD damage on camera modules—but the line already had ESD workstations and grounded conveyors. After testing, they discovered the culprit: their roller track wheels had surface resistance readings of 10¹¹ Ω (way too high), meaning static was building up as modules moved through flow racks. By switching to 40 steel roller track black wheels (and testing them to ensure compliance), they reduced ESD-related defects by 92%—saving over $200,000 in annual rework costs.
In medical device manufacturing, compliance is even stricter. A supplier of surgical monitors was audited by the FDA and failed ESD testing on their conveyor wheels. The result? A production shutdown until they could source compliant wheels and retest. By proactively testing 40 steel roller track black wheels before installation, they could have avoided the shutdown and maintained their lean production schedule.
Conclusion: Protect Your Production, Protect Your Profits
Testing the ESD performance of 40 steel roller track black wheels isn't just a "box-ticking" exercise—it's a critical part of maintaining a lean, reliable, and safe manufacturing process. From surface resistance to ground continuity, each test ensures that these small but vital components do their job: keeping static at bay and your products protected. By following the steps outlined here, you can avoid costly defects, maintain compliance with industry standards, and keep your production line running smoothly.
Remember: in manufacturing, the best defense against ESD is a good offense. Test rigorously, partner with suppliers who prioritize quality, and never underestimate the power of a well-tested wheel. After all, in the world of lean systems, every detail—even the ones rolling under your products—counts.