- Company Articles
- Products and Technology
- Product knowledge
- How to Test the Adhesion Strength of Aluminum Profile Rubber Strips

How to Test the Adhesion Strength of Aluminum Profile Rubber Strips
Related Product
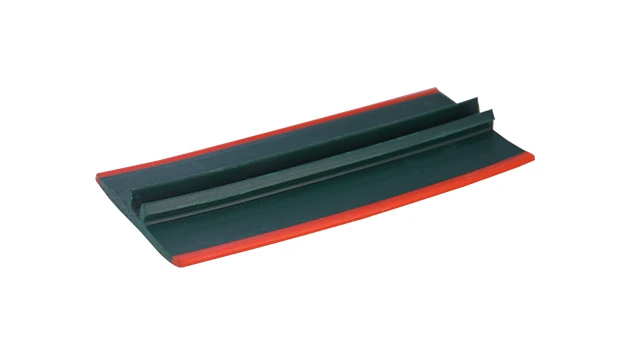
Aluminum Profile Rubber Strip
The tread strip fits into a T-slot channel and provides an anti-slip ribbed surface. It has a key pad that presses into a T-slot and is commonly used for adding traction on steps or as padding for doors. Tread strip can be ordered by rolls. The high quali
Introduction: The Critical Role of Adhesion Strength in Manufacturing
In the fast-paced world of manufacturing, where precision and reliability are non-negotiable, even the smallest components can make a huge difference. Take, for example, the aluminum profile rubber strip—a seemingly simple accessory that plays a pivotal role in everything from workbench surfaces to conveyor systems. These strips seal gaps, dampen vibrations, protect workers from sharp edges, and ensure materials glide smoothly across aluminum profile structures. But none of these functions matter if the strip peels off after a few weeks of use.
That's where adhesion strength testing comes in. Adhesion strength measures how well the rubber strip bonds to the aluminum profile substrate. A weak bond can lead to production delays, safety hazards, and costly rework—issues that directly contradict the principles of lean system management, where efficiency and waste reduction are paramount. In this guide, we'll walk through everything you need to know to test adhesion strength effectively, from pre-test preparation to interpreting results and implementing best practices.
Understanding Adhesion Strength in Aluminum Profile Rubber Strips
Before diving into testing methods, let's clarify what adhesion strength means in this context. Adhesion is the molecular attraction between two dissimilar materials—in this case, the rubber strip and the aluminum profile. It's distinct from cohesion, which is the attraction between molecules within the same material (e.g., the rubber itself). A strong adhesive bond ensures the rubber strip stays firmly attached to the aluminum, even under stress from temperature changes, mechanical pressure, or repeated use.
Why Adhesion Strength Matters
Imagine a workbench E (single deck-without caster) used in an electronics assembly line. The aluminum profile frame is fitted with rubber strips along its edges to prevent static buildup and protect delicate components. If those strips peel off, not only does the workbench lose its anti-static properties, but exposed aluminum edges could scratch parts or injure workers. In a lean system , such failures disrupt workflow, increase downtime, and waste resources—exactly what manufacturers strive to avoid.
Adhesion strength is also critical in dynamic applications, like roller tracks or conveyor systems. Rubber strips here might guide products along the track or reduce noise from moving parts. A weak bond could cause the strip to detach, jamming the conveyor and halting production. For suppliers and wholesalers, ensuring strong adhesion isn't just about quality—it's about maintaining trust with clients who rely on these components to keep their operations running smoothly.
Key Factors Affecting Adhesion
Several variables influence how well a rubber strip adheres to an aluminum profile. Understanding these helps in both testing and prevention:
Surface Preparation: Aluminum profiles often have oils, oxides, or contaminants from manufacturing. A dirty surface creates a barrier between the rubber and aluminum, weakening adhesion.
Rubber Compound: Different rubber formulations (e.g., EPDM, silicone, neoprene) have varying adhesive properties. Some may require primers to bond effectively with aluminum.
Application Method: How the strip is applied—whether via pressure-sensitive adhesive (PSA), heat curing, or mechanical fastening—directly impacts bond strength.
Environmental Conditions: Temperature, humidity, and UV exposure can degrade adhesives over time. Testing should account for the conditions the final product will face.

Pre-Test Preparation: Setting the Stage for Accurate Results
Testing adhesion strength isn't as simple as peeling a strip off with your hands. To get reliable, repeatable results, you need to control variables and prepare carefully. Here's how:
Sample Selection
Start by selecting representative samples. If you're testing strips for a specific product—say, material rack b (3 row and 3 floor) —use strips cut from the same batch and applied to the same aluminum profile type as in production. Samples should be at least 25mm wide and 150mm long to ensure the test captures the full bond area. Avoid samples with visible defects like bubbles, wrinkles, or cuts, as these can skew results.
Age matters too. Test samples at different stages: freshly applied (to check initial bond), cured for 24 hours (standard for most adhesives), and aged (e.g., after 30 days) to simulate long-term performance. This helps identify if adhesion weakens over time.
Environmental Controls
Adhesives are sensitive to temperature and humidity. Test in a controlled environment—ideally 23°C ± 2°C and 50% ± 5% relative humidity (RH). Extreme temperatures can make rubber brittle (cold) or soft (hot), affecting how it peels. If the final product will be used in a factory with high humidity, for example, conduct additional tests under those conditions to mimic real-world use.
Tools and Equipment
You'll need specific tools to measure force accurately. The core piece is a tensile testing machine (also called a universal testing machine), which pulls the strip at a constant rate and records the force required to break the bond. For peel tests, you'll also need clamps to secure the sample and alignment tools to ensure the pull direction is consistent. Other useful items include:
A razor blade or utility knife to cut test specimens.
A ruler or caliper for measuring sample dimensions.
A humidity/temperature monitor to record test conditions.
Gloves to handle samples without transferring oils from your hands.

Common Testing Methods: Step-by-Step Guides
Several standardized methods exist for testing adhesion strength. Below are the most widely used in the industry, each suited to different scenarios.
1. 180-Degree Peel Test
The 180-degree peel test is the most common method for rubber strips. It measures the force needed to peel the strip away from the aluminum profile at a 180-degree angle, simulating real-world peeling forces (e.g., when a worker accidentally catches the edge of the strip).
Steps:
Prepare the Sample: Cut the rubber strip to 25mm width and 150mm length. If the strip is already applied to the aluminum profile, use a knife to separate the first 25mm of the strip from the aluminum—this "tab" will be clamped in the testing machine.
Mount the Sample: Secure the aluminum profile to the lower jaw of the tensile tester. Clamp the free tab of the rubber strip in the upper jaw, ensuring the strip is aligned so that when pulled, it peels back at exactly 180 degrees relative to the aluminum surface.
Set Test Parameters: Adjust the testing speed to 300mm/min (standard for peel tests). This speed is fast enough to simulate dynamic stress but slow enough to record accurate force readings.
Run the Test: Start the machine and let it pull the strip until it's fully peeled or the force drops to zero. The machine will output a force-displacement curve, showing peak force and average force over the peel distance.
Interpretation: A strong bond will show consistent, high force throughout the peel. A sudden drop in force indicates the adhesive failed (adhesive failure), while tearing within the rubber itself (cohesive failure) suggests the rubber is weaker than the bond—a good sign for adhesion.
2. Shear Adhesion Test
While peel tests measure resistance to peeling, shear tests evaluate how well the bond withstands forces parallel to the surface—common in applications like roller track systems, where materials push against the rubber strip. This test is especially useful for strips under constant pressure.
Steps:
Prepare the Sample: Use a 25mm x 25mm square of rubber strip applied to the aluminum profile. Ensure the bond area is exactly 25mm x 25mm (use a template to cut the strip).
Mount the Sample: Attach the aluminum profile to the lower jaw of the tester. Clamp a rigid plate (e.g., steel) to the top of the rubber square, ensuring the plate is aligned parallel to the aluminum surface.
Set Test Parameters: Use a crosshead speed of 50mm/min for shear tests. This slower speed accounts for the fact that shear forces act over time in real applications.
Run the Test: Pull the upper jaw upward, causing the rubber to shear against the aluminum. Record the maximum force required to break the bond.
Interpretation: Shear strength is calculated by dividing the maximum force by the bond area (25mm x 25mm = 625mm²). Results are reported in megapascals (MPa). A higher MPa indicates better resistance to shear forces.
| Test Method | Best For | Speed | Key Outcome |
|---|---|---|---|
| 180-Degree Peel | Dynamic peeling forces (e.g., edge strips on workbenches) | 300mm/min | Average peel force (N/mm) |
| Shear Adhesion | Constant parallel forces (e.g., roller track guides) | 50mm/min | Shear strength (MPa) |
| Tensile Adhesion | Vertical pull forces (e.g., hanging racks) | 10mm/min | Maximum tensile force (N) |
Interpreting Results: What Do the Numbers Mean?
Testing generates data, but numbers alone aren't enough—you need to interpret them in the context of your application. Here's how to make sense of the results:
Pass/Fail Criteria
Start by defining acceptable thresholds. For most industrial applications, a minimum peel force of 5 N/mm is standard for rubber strips on aluminum profiles. Shear strength should typically exceed 1 MPa. These values can vary, though—consult industry standards (e.g., ASTM D3330 for peel tests) or your customer's specifications. For example, a lean pipe workbench used in a low-stress environment might have lower requirements than a conveyor in a heavy manufacturing plant.
Failure Modes
The type of failure is as important as the force required. There are three common modes:
Adhesive Failure: The rubber strip separates cleanly from the aluminum, leaving no residue. This means the bond between rubber and aluminum is weak—often due to poor surface preparation or a mismatched adhesive.
Cohesive Failure: The rubber tears internally, with some rubber remaining on the aluminum. This indicates the bond is stronger than the rubber itself—a good result, as it shows adhesion isn't the weak link.
Mixed Failure: A combination of adhesive and cohesive failure. This is common and acceptable if the majority (e.g., >70%) is cohesive failure.
Troubleshooting Weak Adhesion
If results are below the threshold, investigate the root cause:
Contamination: Use a solvent (e.g., isopropyl alcohol) to clean the aluminum surface before retesting. Oils or oxides could be the culprit.
Adhesive Issues: Check if the adhesive was expired or applied too thinly. Some rubber strips require primers—verify if yours does.
Curing Problems: If the adhesive wasn't cured long enough, bond strength may improve with additional curing time. Test samples after 48 hours to see if results improve.
Best Practices for Ensuring Strong Adhesion
Testing is reactive—preventing weak adhesion is proactive. Here are best practices to integrate into your production process, aligned with lean system principles of waste reduction and continuous improvement:
1. Surface Cleaning: Start with a Clean Slate
Aluminum profiles often arrive with mill scale, oils, or fingerprints. Use a two-step cleaning process: first, wipe with a degreaser to remove oils, then etch the surface with a mild acid (e.g., chromic acid) to create micro-roughness, which helps the adhesive grip. Rinse thoroughly and dry completely before applying the rubber strip—even a small amount of moisture can ruin the bond.
2. Adhesive Selection: Match the Material
Not all adhesives work with all rubbers and aluminum. For example, silicone rubber may require a silicone-based adhesive, while EPDM often bonds well with acrylic adhesives. Consult your aluminum profile accessories supplier for recommendations, and test new adhesives thoroughly before full-scale production.
3. Quality Control in Application
Apply the rubber strip with consistent pressure and speed. Use roller tools to ensure full contact between the adhesive and aluminum—air bubbles create weak spots. For heat-cured adhesives, monitor oven temperature and curing time closely. In a lean system , standardizing application parameters (pressure, speed, temperature) reduces variability and defects.
4. Regular Testing as Part of Quality Assurance
Don't wait for customer complaints to test adhesion. Implement a regular testing schedule—e.g., testing one sample per batch or weekly—to catch issues early. Track results over time to identify trends, like seasonal changes in adhesion due to humidity. This data-driven approach aligns with lean principles, turning quality control into a proactive rather than reactive process.
Real-World Application: Testing Rubber Strips on a Workbench E
To tie this all together, let's walk through a hypothetical case study. A manufacturer produces workbench E (single deck-without caster) , an aluminum profile workbench used in electronics assembly. The workbench edges are fitted with rubber strips to protect components from scratches. Recently, several customers reported strips peeling off after a month of use. The manufacturer decides to test adhesion strength to identify the problem.
Testing Setup
Samples: 5 strips from the problematic batch, cut to 25mm x 150mm, applied to the same aluminum profile used in Workbench E.
Method: 180-degree peel test at 300mm/min, in a lab at 23°C and 50% RH.
Results
Average peel force: 2.5 N/mm (well below the 5 N/mm threshold). Failure mode: 100% adhesive failure—no rubber residue left on the aluminum.
Root Cause Investigation
The team checks surface preparation records and discovers the aluminum profiles were only wiped with a dry cloth, not degreased. A quick test with a clean, degreased sample shows peel force jumps to 6 N/mm, with cohesive failure. The issue was contamination from manufacturing oils.
Solution
The manufacturer implements a mandatory degreasing step using isopropyl alcohol before applying rubber strips. They also add a weekly adhesion test to their quality control checklist. Within a month, customer complaints stop, and rework costs drop by 40%—a win for both quality and lean system efficiency.
Conclusion: Adhesion Strength as a Cornerstone of Quality
Testing the adhesion strength of aluminum profile rubber strips isn't just a technicality—it's a critical step in ensuring product reliability, worker safety, and operational efficiency. By understanding the factors that affect adhesion, following rigorous testing protocols, and implementing proactive quality control measures, manufacturers can avoid costly failures and build trust with customers.
In the end, strong adhesion is about more than keeping a strip in place. It's about upholding the standards of a lean system , where every component works as intended, waste is minimized, and production flows smoothly. Whether you're a supplier, manufacturer, or quality engineer, mastering these testing methods will help you deliver products that stand the test of time—and keep operations running without a hitch.