- Company Articles
- Products and Technology
- Installation And Maintenance
- How to Test the Load Capacity of Your Castor Install Base: Safety First

How to Test the Load Capacity of Your Castor Install Base: Safety First
Related Product
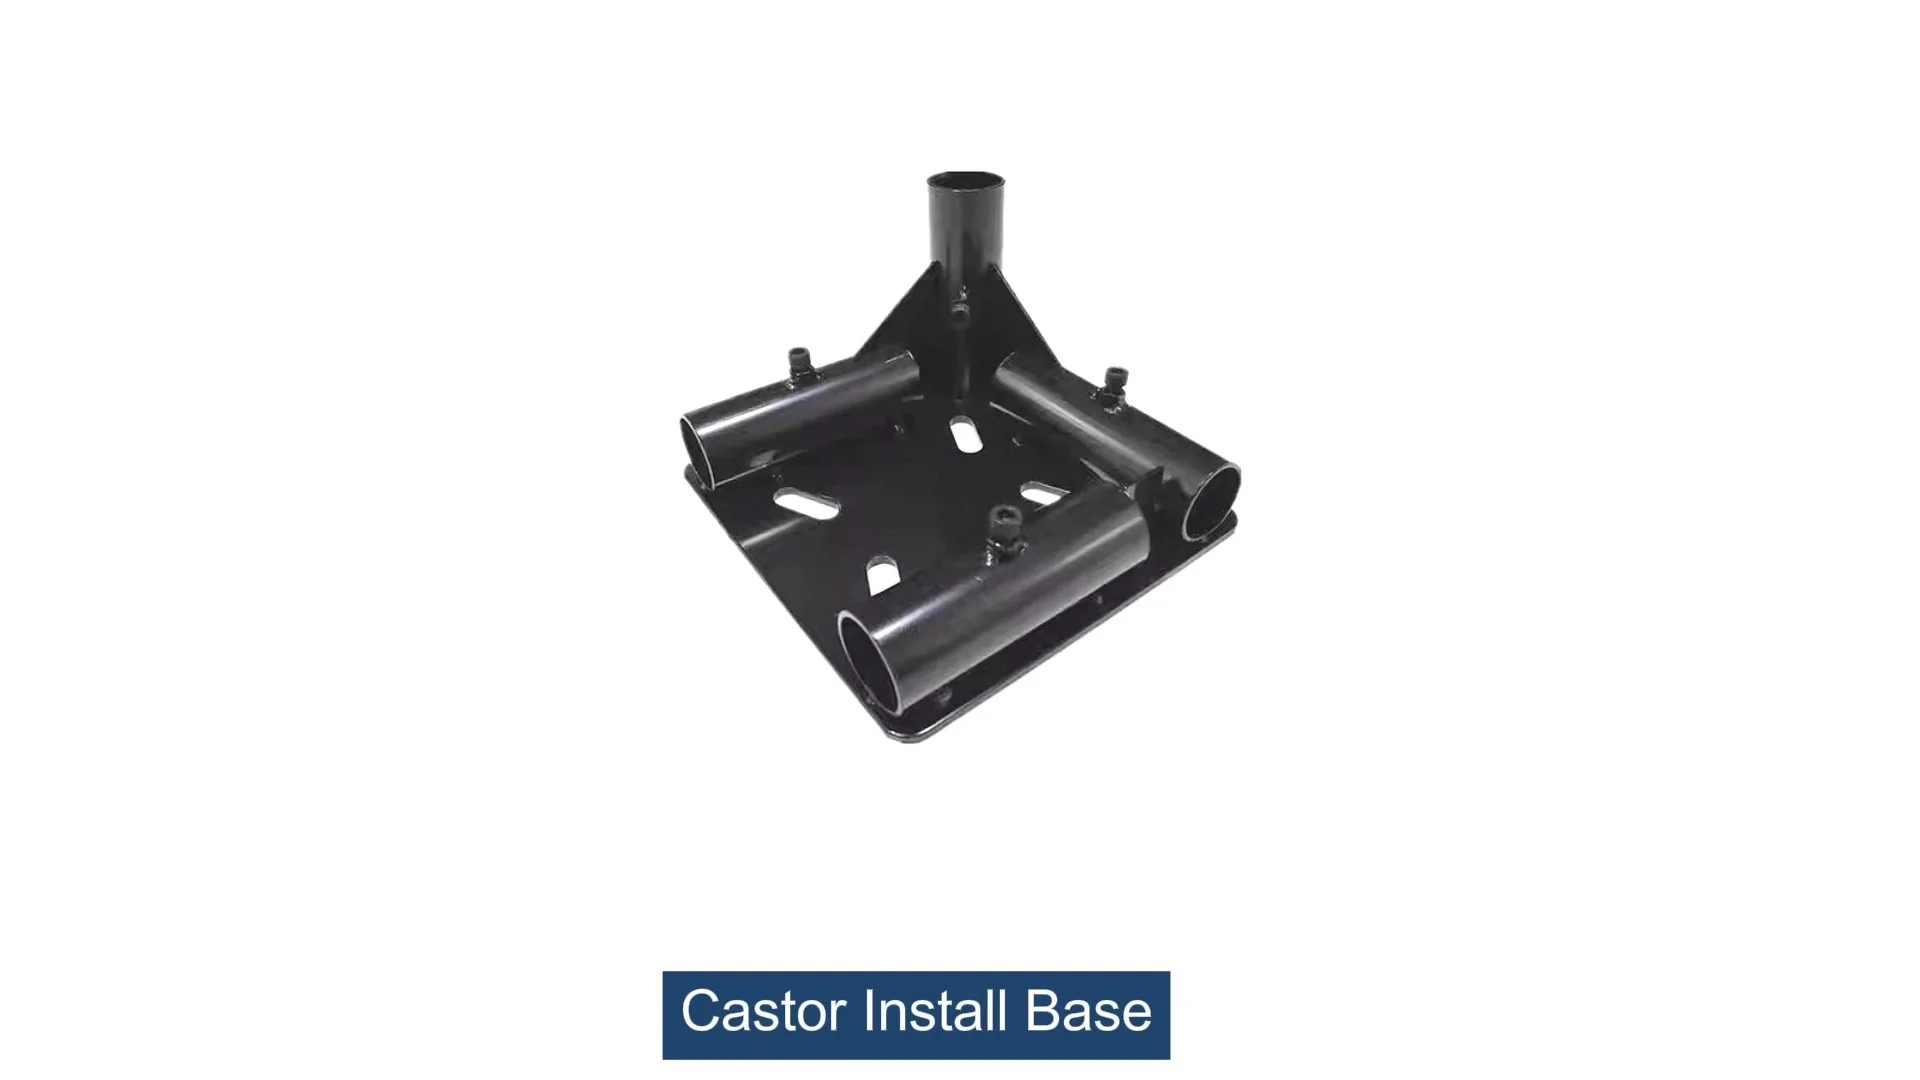
Castor Install Base
Castor install base, used for connection between pipe and castor, it can connect 4 pcs pipe by 1 pcs castor base, to make the structure strong and stable.
Why Load Capacity Testing Isn't Just Another Task—It's a Lifesaver
If you've ever walked through a busy warehouse, watched a assembly line in action, or even helped move heavy equipment in a workshop, you've probably seen them: those small but mighty components that keep everything rolling. I'm talking about casters—those wheeled wonders that make pushing, pulling, and maneuvering heavy loads feel almost effortless. But here's the thing: behind every smooth-rolling caster is a critical unsung hero that often gets overlooked: the castor install base. It's the quiet connector that links the caster wheel to the equipment, and its ability to bear weight safely is the difference between a productive day and a potential disaster.
Think about it: A collapsed castor install base isn't just an inconvenience. It could mean a pallet of fragile electronics crashing to the floor, a medical cart tipping over in a hospital hallway, or a worker straining their back trying to a suddenly unsteady machine. In 2023, the Bureau of Labor Statistics reported over 25,000 workplace injuries related to "overturned or unstable equipment"—many of which trace back to failed load-bearing components like castor install bases. That's why testing their load capacity isn't just "good practice"; it's a non-negotiable step in keeping people safe and operations running smoothly.
In this guide, we're going to walk through exactly how to test the load capacity of your castor install base, step by step. We'll cover why it matters, what tools you'll need, common mistakes to avoid, and even dive into the key components that affect performance—like the castor install base itself, the caster wheel, and the often-overlooked caster accessories that play a role in stability. Whether you're a warehouse manager, a small business owner, or someone who just wants to make sure their workshop equipment is safe, this is information you can't afford to skip.
First Things First: What Even Is a Castor Install Base?
Before we jump into testing, let's make sure we're all on the same page about what a castor install base actually does. Picture this: You have a heavy workbench on wheels. The wheels (caster wheels) are what touch the ground, but how do they attach to the bench? That's where the castor install base comes in. It's the mounting plate or bracket that bolts, screws, or welds to the bottom of the equipment, providing a stable platform to attach the caster wheel. Think of it as the "middleman"—it takes the weight of the equipment and whatever's on it, transfers that load to the caster wheel, and ensures everything stays connected, even when rolling over uneven floors or hitting small bumps.
But not all castor install bases are created equal. Some are made of thick steel for industrial use, others of lightweight aluminum for medical carts that need to be easy to maneuver. Some are designed with holes for bolts, others with slots for quick adjustments. And they're not just for heavy equipment—you'll find them on everything from office chairs (yes, your desk chair has a small castor install base under each wheel!) to restaurant food carts and airport luggage trolleys. The common thread? They all have a maximum load they can handle, and exceeding that limit is when trouble starts.

The Star Players: Key Components That Affect Load Bearing
To test a castor install base properly, you need to understand the team it works with. It's not just about the base itself—its performance depends on how well it interacts with other parts. Let's break down the main players:
1. The Castor Install Base: The Foundation of Strength
This is our main focus. Made from materials like steel, aluminum, or reinforced plastic, the castor install base's design—its thickness, shape, and mounting points—determines how much weight it can distribute evenly. A base with weak welds, thin metal, or poorly placed bolt holes is a ticking time bomb, even if the caster wheel itself is heavy-duty.
2. The Caster Wheel: More Than Just a Rolling Part
You might think the wheel's job is just to roll, but it plays a big role in load capacity too. A wheel with a soft rubber tread might absorb shocks well, but it can deform under extreme weight, putting extra stress on the castor install base. On the flip side, a hard plastic or metal wheel might handle weight better but could damage floors if overloaded. The wheel's diameter and width also matter—wider wheels spread weight out, reducing pressure on the base.
3. Caster Accessories: The Unsung Supporters
These are the small parts that add stability or functionality, and they can indirectly affect load capacity. Take caster brakes, for example: When engaged, they lock the wheel in place, but if the brake mechanism is loose or misaligned, it can create uneven pressure on the castor install base. Similarly, swivel locks (which keep the caster from turning) or even simple washers and bolts (part of caster accessories) ensure the base stays securely attached to the equipment. Skimping on quality here? It's like using duct tape to hold together a bridge—eventually, it will fail.
4. Adjustable Leveling Feet: A Related Sidekick
Okay, adjustable leveling feet aren't technically part of the caster system, but they're worth mentioning because they often work alongside casters. In setups where equipment is sometimes stationary (like a workbench that's rolled into place and then "locked" with leveling feet), these feet take some weight off the casters. But if the leveling feet are worn or uneven, the castor install base might end up bearing more weight than it should when the equipment is moved. So while we're testing the base, it's smart to check these too—they're part of the bigger stability picture.

Step-by-Step: How to Test Load Capacity Like a Pro
Now that we know the "why" and "what," let's get to the "how." Testing the load capacity of a castor install base isn't complicated, but it does require patience, the right tools, and a methodical approach. Here's a step-by-step guide that even someone new to the process can follow:
Step 1: Gather Your Tools (You Don't Need a Lab, Just the Basics)
You don't need fancy equipment to do this right. Most of what you'll need is probably already in your toolbox or can be rented cheaply. Here's a quick checklist:
| Tool/Item | Purpose | Pro Tip |
|---|---|---|
| Calibrated Weight Bags or Plates | To simulate the load the base will bear | Start with smaller weights (25-50 lbs) and gradually add more |
| Measuring Tape or Ruler | To check for bending, warping, or gaps in the base | Use a straightedge to spot subtle warping |
| Torque Wrench | To ensure mounting bolts are tightened to the manufacturer's specs | Over-tightening can crack the base; under-tightening causes slipping |
| Safety Gear (Gloves, Goggles, Steel-Toe Boots) | To protect yourself if weights shift or the base fails | Never skip this—accidents happen fast with heavy loads |
| Notebook or Digital Log | To record results, including weight levels and any observations | Date each test—this helps track wear over time |
Step 2: Prep the Equipment and Workspace
Before you start stacking weights, set the stage for safety and accuracy. Find a flat, level surface—uneven floors can throw off results, as the base might bear weight unevenly. If you're testing a caster on a piece of equipment (like a cart), empty it completely first. Remove any tools, supplies, or debris that could get in the way. Then, inspect the castor install base visually: Look for rust, cracks, bent metal, or loose bolts. If you see obvious damage already, don't bother testing—replace the base immediately. Small cracks or rust spots can grow under pressure, so better safe than sorry.
Step 3: Understand the "Rated Capacity"—Don't Guess!
Every castor install base (and caster system as a whole) comes with a "rated load capacity" from the manufacturer. This is the maximum weight it's designed to handle under ideal conditions. You can usually find this on a sticker, in the product manual, or by checking the supplier's website. Important: This rating is often per caster, not per set. So if a cart has four casters, each rated for 500 lbs, the total capacity is 2000 lbs (but always check if the manufacturer specifies a "total" vs "per caster" rating). For testing, aim to hit 125% of the rated capacity—this gives a safety buffer, as real-world use often includes bumps, sudden stops, or uneven loads that add stress.
Step 4: Apply the Load Gradually (Sudden Weight = Disaster)
Now, it's time to add weight. Start with 50% of the rated capacity and let it sit for 5-10 minutes. This "soak time" lets the materials settle—you'd be surprised how much a metal base can flex initially, then stabilize. Check for any immediate issues: Is the base bending noticeably? Are the mounting bolts starting to loosen? Is there a gap between the base and the equipment? If everything looks good, add another 25% (now at 75% of rated capacity) and repeat the soak and inspection. Continue this until you reach 125% of the rated load.
Step 5: Check for Failure Points (What to Watch For)
At each weight level, keep an eye out for these red flags:
- Bending or Warping: Place a straightedge along the top of the castor install base. If it no longer lies flat, the base is deforming.
- Cracking or Splitting: Listen for creaking or snapping sounds, and check for visible cracks in the metal or plastic.
- Loose Mounting: Wiggle the base gently—if it moves independently of the equipment, the bolts or welds are failing.
- Caster Wheel Issues: If the wheel starts to tilt, lock up, or show uneven wear, the base might be transferring weight incorrectly.
If any of these happen before reaching 125% of the rated capacity, stop immediately. The base isn't safe for use, and you'll need to replace it.
Step 6: Test Dynamic Loads (Because Equipment Rarely Stays Still)
So far, we've tested "static" load capacity—how the base holds up when the equipment is stationary. But in real life, casters roll, which adds "dynamic" stress (think bumps, turns, and sudden stops). To test this, once the base passes the static test at 125% capacity, carefully push or pull the loaded equipment (with help—don't do this alone!) across a rough surface (like a concrete floor with small cracks) for 50-100 feet. Then re-inspect for the same failure points. If the base holds up here, you're good to go.

Common Mistakes That Sabotage Tests (And How to Avoid Them)
Even with the best intentions, it's easy to cut corners or overlook details that make your test results unreliable. Here are the most common mistakes I've seen over the years—and how to steer clear of them:
Mistake 1: Skipping the "Soak Time"
It's tempting to pile on all the weight at once to "get it over with," but materials need time to respond. A castor install base might look fine under 1000 lbs for 30 seconds, but after 10 minutes, the metal could start to creep (slowly deform) or bolts could loosen as the load settles. Always give each weight level time to "settle in."
Mistake 2: Ignoring the Environment
Testing a castor install base in a climate-controlled office won't tell you how it'll perform in a humid warehouse or a freezing cold garage. Extreme temperatures, moisture, and even chemical exposure can weaken materials. If your equipment lives in a harsh environment, do the test there—or simulate those conditions (e.g., spray the base with water to mimic rain if it's used outdoors).
Mistake 3: Forgetting to Retighten Bolts First
Loose bolts are a common cause of failure, but they're easy to fix. Before testing, use a torque wrench to tighten all mounting bolts to the manufacturer's specifications. If the base fails because of loose bolts, you'll mistakenly think it's the base's fault when it's just a simple maintenance issue.
A Real-World Example: When Testing Caught a Disaster in Time
Let me share a quick story to drive this home. A friend of mine runs a small brewery, and last year, they invested in new stainless steel fermentation tanks on casters to make cleaning easier. The tanks weighed about 800 lbs when full, and the caster manufacturer claimed the castor install bases could handle 300 lbs each (four casters total, so 1200 lbs—plenty of buffer, right?). But during testing, my friend noticed something off: at 900 lbs (still under the total rated capacity), one of the bases started to bend slightly, and the mounting bolts began to strip. They stopped the test, contacted the supplier, and discovered the bases were counterfeit—made with thinner steel than advertised. The supplier replaced them with genuine parts, and the new bases passed the 125% test with no issues.
Imagine if they hadn't tested? A full tank of beer (and 800 lbs of liquid) crashing to the floor could have injured someone, ruined thousands of dollars in product, and shut down production for weeks. That's the power of 30 minutes of testing.
Final Thoughts: Make Testing a Habit, Not a One-Time Chore
Testing the load capacity of your castor install base isn't a "set it and forget it" task. Over time, even the strongest bases wear down—bolts loosen, metal fatigues, and caster accessories like brakes or locks put extra stress on the connection. I recommend testing every 6 months for equipment used daily, and annually for items used less frequently. Keep a log of your results, and compare them over time—if you notice the base starts to fail at lower weights than before, it's time for a replacement.
At the end of the day, safety isn't about checking boxes. It's about protecting the people who use this equipment every day, the products that keep your business running, and the peace of mind that comes with knowing you've done everything to prevent accidents. So grab your tools, round up those weight plates, and give your castor install base the attention it deserves. Your team, your bottom line, and your conscience will thank you.