- Company Articles
- Products and Technology
- Product knowledge
- How to Test the Quality of Two Way Lean Pipe Joint Chrome: Inspection Tips

How to Test the Quality of Two Way Lean Pipe Joint Chrome: Inspection Tips
Related Product
Two Way Lean Pipe Joint Chrome
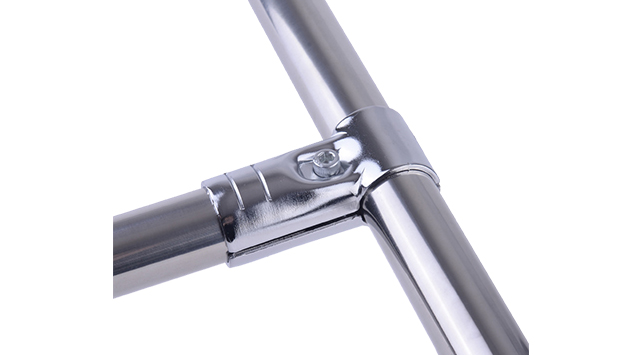
Two way lean pipe joint for 2 pcs 28MM lean pipe connection in straight angle, which used widely in workbench, flow rack, hand trolley frame connection.
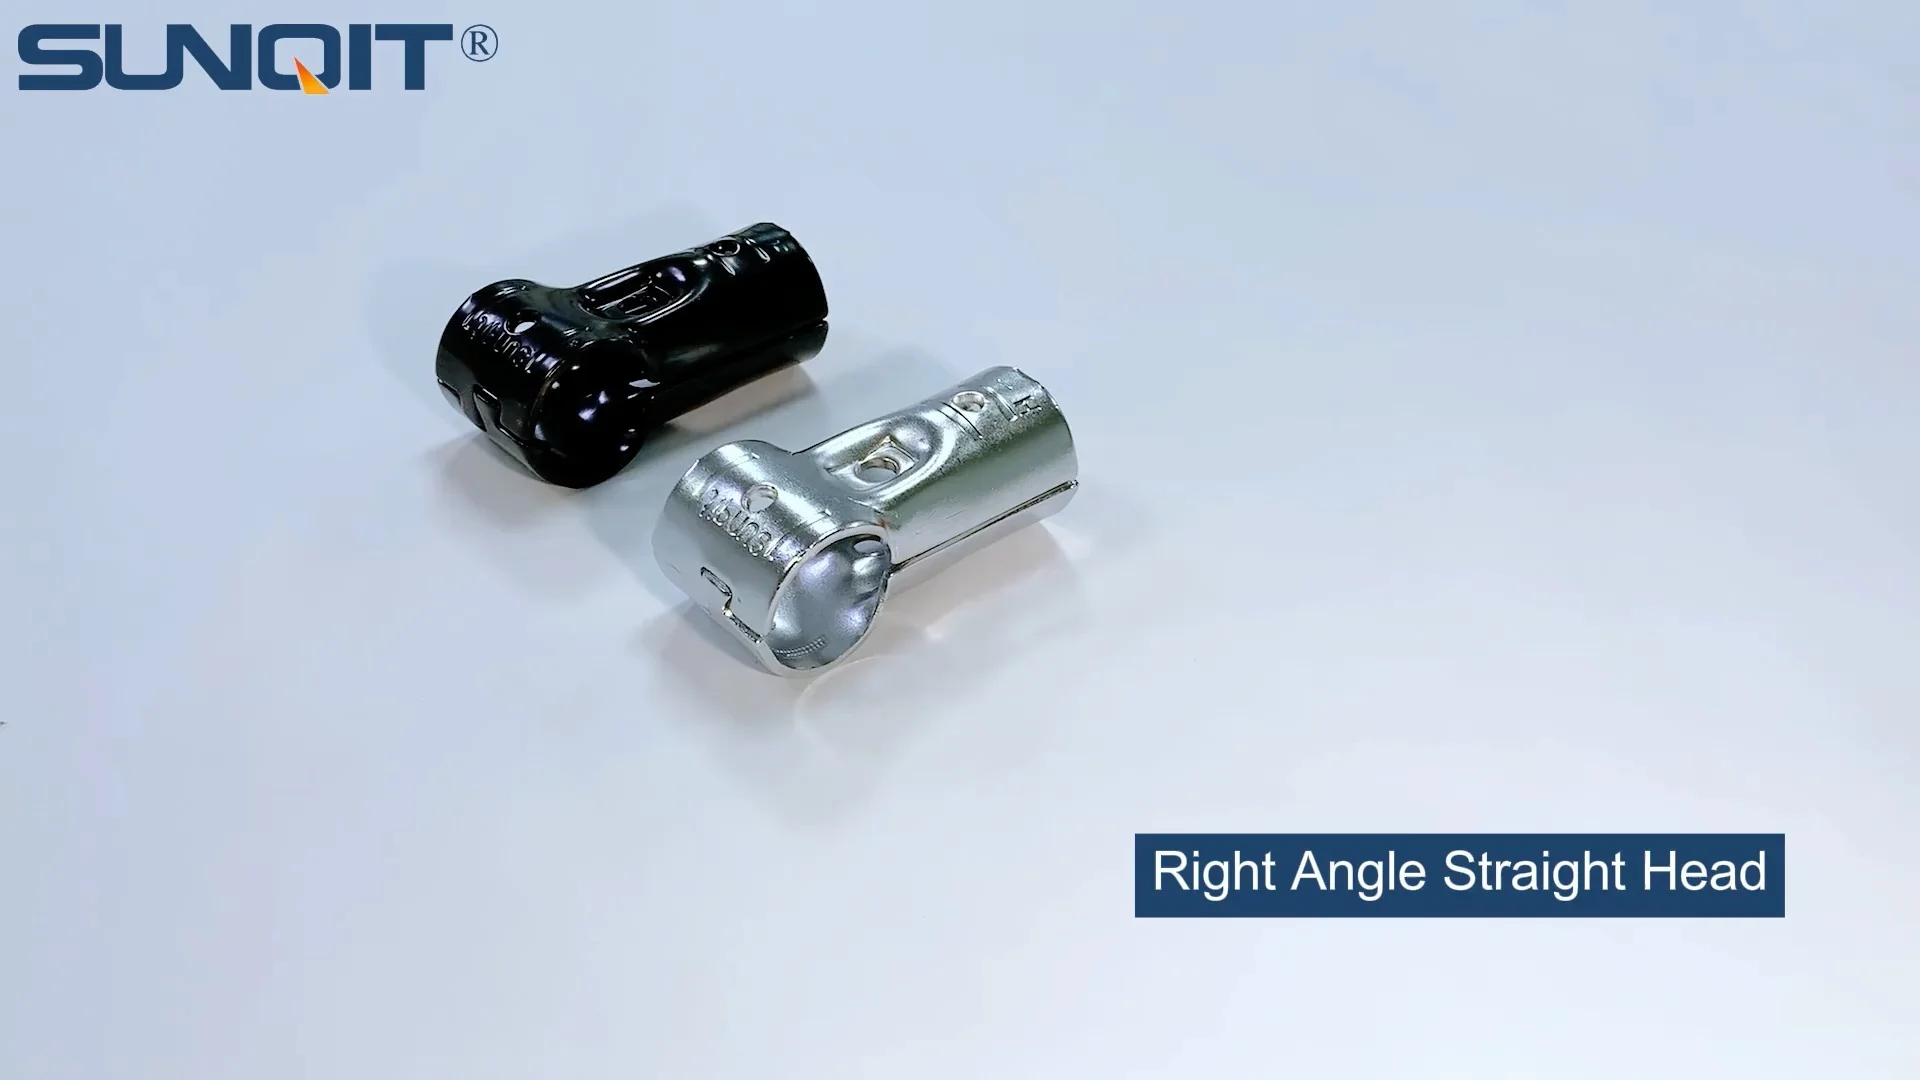
Walk into any modern manufacturing facility, and you'll likely spot a network of lean pipes and joints holding together workbenches, material racks, and assembly lines. These systems are the backbone of efficient production—quietly supporting the flow of materials, tools, and products that keep operations running smoothly. At the heart of this network? Components like the two way lean pipe joint chrome. Small in size but massive in impact, these joints are the unsung heroes that ensure stability, flexibility, and durability in lean manufacturing setups.
But here's the thing: not all two way lean pipe joints are created equal. A subpar joint can compromise an entire system—leading to wobbly workbenches, misaligned material flows, or even safety hazards. For procurement managers, production supervisors, or anyone tasked with building or maintaining lean systems, knowing how to test the quality of these chrome-plated joints isn't just a skill—it's a necessity. In this guide, we'll break down the step-by-step process to inspect two way lean pipe joint chrome, from visual checks to load-bearing tests, so you can avoid costly mistakes and build systems that stand the test of time.
Why Two Way Lean Pipe Joints Matter in Lean Systems
Before diving into inspection techniques, let's take a moment to understand why these joints are so critical. Lean manufacturing thrives on efficiency—eliminating waste, streamlining workflows, and adapting quickly to changes. Two way lean pipe joints are the connectors that make this adaptability possible. They link lean pipes (often made of steel, aluminum, or stainless steel) to form structures like workstations, flow racks, and turnover trolleys. A well-made joint ensures these structures stay rigid under load, resist wear from constant use, and remain easy to reconfigure when production needs shift.
Chrome plating adds another layer of value: it enhances corrosion resistance, improves aesthetics, and reduces friction during assembly. But chrome plating can also hide flaws if not applied properly. A joint with uneven plating might rust prematurely in humid factory environments; one with cracks in the chrome could weaken the entire connection over time. That's why thorough inspection isn't just about checking if a joint "looks okay"—it's about verifying that it will perform reliably for years, even in the tough conditions of a busy production floor.
Step 1: Visual Inspection – The First Line of Defense
Visual inspection is where every quality check should start. It's quick, non-destructive, and can reveal obvious red flags that might otherwise slip through the cracks. Grab a well-lit workspace, a magnifying glass (for small details), and a notepad—let's get started.
Surface Finish and Chrome Plating Uniformity
Chrome plating on a two way lean pipe joint should look smooth, consistent, and free of blemishes. Run your finger gently over the surface—there should be no rough spots, bumps, or areas where the plating feels thin. Uneven plating often indicates shoddy manufacturing practices, like rushed electroplating processes or poor pre-plating cleaning. These weak spots are where corrosion will first take hold, especially in factories with high humidity or exposure to oils and chemicals.
Check for "pitting" – tiny holes in the chrome layer. These are often caused by contaminants on the base metal before plating, and they're a surefire sign that the joint won't stand up to long-term use. Similarly, look for "blisters" – raised bubbles in the chrome. These mean the plating hasn't adhered properly to the base metal and will eventually peel off, exposing the underlying material to rust.
Cracks, Chips, and Burrs
Next, inspect the joint's edges and connection points for cracks or chips. Even a small crack in the base metal (visible through the chrome) can grow under stress, leading to joint failure. Pay extra attention to the areas where the joint bends or connects to pipes—these are high-stress points during assembly and use. Use a magnifying glass to check for hairline fractures; they might be hard to spot with the naked eye but can compromise the joint's structural integrity.
Burrs—rough, raised edges left from machining—are another red flag. They not only make assembly harder (you might cut yourself or damage the lean pipe) but also indicate poor quality control. A reputable manufacturer will deburr all edges before plating, ensuring a clean, safe product.
Joint Alignment and Symmetry
Two way lean pipe joints are designed to connect two pipes at a specific angle (usually 90 degrees, though some are adjustable). Hold the joint up to a straight edge or use a protractor to check if the connection ports are aligned correctly. If they're off by even a few degrees, the entire structure you build will be crooked, leading to uneven weight distribution and potential instability.
Symmetry matters too. The joint should look balanced, with both connection ports identical in size and shape. If one port is slightly larger or misaligned, it won't grip the lean pipe securely, creating a loose connection that could wobble or fail under load.
Visual Inspection Checklist
| Check Item | What to Look For | Pass/Fail Criteria |
|---|---|---|
| Chrome Plating | Smooth, uniform finish; no pits, blisters, or thin spots | Pass: Consistent shine, no visible flaws. Fail: Rough patches, bubbles, or discoloration. |
| Surface Cracks | Hairline fractures on edges or connection points | Pass: No cracks visible under magnification. Fail: Any visible cracks, even small ones. |
| Burrs | Rough edges on ports or joint body | Pass: Smooth, deburred edges. Fail: Sharp or raised burrs. |
| Alignment | Connection ports at correct angle (e.g., 90 degrees) | Pass: Angle within ±1 degree of specification. Fail: Misalignment beyond 1 degree. |
Step 2: Material Quality – Beyond the Chrome Layer
Chrome plating is just the outer layer. The real strength of a two way lean pipe joint lies in the base material—usually steel, though some manufacturers use stainless steel or aluminum alloys. Even the best chrome plating can't save a joint made from low-quality metal. Here's how to dig deeper into material quality.
Base Material Identification
Start by confirming the base material. Most two way lean pipe joints are made from carbon steel, which is strong and cost-effective, but some applications (like cleanrooms or food processing) require stainless steel pipe series for corrosion resistance. If the supplier claims stainless steel, perform a simple magnet test: carbon steel is magnetic, while most stainless steels (like 304 or 316) are not. This isn't foolproof (some stainless steels are slightly magnetic), but it's a quick way to spot obvious substitutions.
For critical applications, ask the supplier for a material certification (like a mill test report) that confirms the metal's composition. This document should list elements like carbon, manganese, and chromium content—key indicators of strength and corrosion resistance. For example, a joint with high carbon content will be stronger but more prone to rust without proper plating; stainless steel should have at least 10.5% chromium to resist corrosion.
Hardness Testing
Hardness is a measure of how well the material resists deformation—critical for a joint that will be tightened, adjusted, and loaded repeatedly. While professional testing requires a hardness tester (like a Rockwell or Brinell device), you can do a basic scratch test with a known hard object, like a stainless steel key or a file. A high-quality joint should resist scratches; if the key leaves a deep mark, the metal is too soft and may bend or wear prematurely.
Keep in mind: hardness isn't everything. A joint that's too hard may be brittle, cracking under impact. The ideal is a balance—hard enough to resist wear, but ductile enough to handle minor stresses without breaking. Reputable suppliers will specify hardness ranges (e.g., 80-90 HRB on the Rockwell scale) for their joints; ask for this data before purchasing.
Tensile Strength (For Critical Applications)
Tensile strength measures how much force a material can withstand before breaking. While you won't test this on every joint, it's worth verifying for high-load setups (like heavy-duty material racks). Ask the supplier for tensile strength data—carbon steel joints typically have a tensile strength of 400-500 MPa, while stainless steel can reach 600 MPa or higher. A joint with low tensile strength may stretch or snap under heavy loads, putting workers and products at risk.

Step 3: Dimensional Accuracy – Precision Matters
Lean manufacturing is all about precision, and that starts with the components themselves. A two way lean pipe joint that's even slightly off in size can throw off an entire assembly line, leading to misaligned workbenches, jamming conveyors, or unstable racks. Here's how to check for dimensional accuracy.
Port Diameter and Thread Fit
The connection ports (where the lean pipe inserts) must match the pipe's diameter exactly. Most lean pipes are 28mm or 30mm in diameter; use a caliper to measure the inner diameter of the joint's ports. It should be within ±0.1mm of the pipe's outer diameter—tight enough to grip securely, but not so tight that assembly requires excessive force (which can damage the pipe or joint).
If the joint uses threaded connections (common in heavier-duty models), check the thread pitch with a thread gauge. Mismatched threads will either strip during assembly or fail to tighten properly, creating a loose connection. For example, a joint with M8x1.25 threads should pair with an M8x1.25 bolt or pipe end—even a small difference (like M8x1.0) will cause issues.
Joint Body Dimensions
Measure the overall length, width, and height of the joint with a ruler or caliper. Compare these to the supplier's specifications—any deviation beyond 0.5mm may indicate poor manufacturing tolerances. For example, a joint listed as 50mm long that measures 51mm could interfere with adjacent components, while one that's 49mm may not provide enough support for the connected pipes.
Pay special attention to the thickness of the joint walls. Thinner walls save material costs but reduce strength; a wall that's too thin may collapse under load. Aim for walls at least 1.5mm thick for standard applications, 2mm or more for heavy loads.
Fit with Lean Pipes
The best dimensional test is a practical one: assemble the joint with a sample lean pipe. The pipe should slide into the port smoothly, with no gaps or wobbling. When tightened (using set screws or clamps), the joint should grip the pipe firmly—twisting the pipe shouldn't cause the joint to rotate. If the fit is loose, the joint will fail under vibration or load; if it's too tight, you may damage the pipe's coating (like the PE coating on some lean pipes) during assembly.
Step 4: Load-Bearing Capacity – Test Before Trusting
At the end of the day, a two way lean pipe joint's job is to hold weight—whether it's a workbench loaded with tools, a flow rack stacked with components, or a conveyor carrying products. Underestimating load capacity is a recipe for disaster; overestimating leads to overspending. Here's how to test if a joint can handle the load it's designed for.
Static Load Testing
Static load is the weight applied to the joint when the system is stationary. To test this, build a simple structure: attach the joint to two fixed lean pipes (secured to a sturdy frame or wall) and hang weights from the joint. Start with the maximum load the supplier claims (e.g., 50kg per joint) and leave it for 24-48 hours. Afterward, check for signs of deformation: Did the joint bend? Did the pipe slip in the port? If the joint holds without visible damage, it passes the static test.
For extra rigor, test beyond the claimed load (e.g., 120% of the rated capacity) to see where it fails. This "safety margin" is crucial—production environments are unpredictable, and unexpected loads (like a worker leaning on a rack) can push joints beyond their limits. A joint that fails at 110% of the rated load has little margin for error; aim for those that handle 150% or more before deforming.
Dynamic Load Testing
Dynamic load is the weight applied while the system is moving—think of a turnover trolley being pushed across a factory floor or a conveyor vibrating as products pass through. To simulate this, attach the joint to a movable structure (like a small trolley) and apply the rated load while moving or shaking the structure. Listen for creaking or shifting, and check if the joint loosens over time.
Dynamic testing is especially important for joints in automated systems, where constant vibration can loosen connections. A joint that holds static load but fails dynamically is just as dangerous—it may work initially but come apart after weeks of use.
Fatigue Testing (For High-Cycle Use)
Fatigue is the weakening of a material due to repeated stress—like a joint that's adjusted, repositioned, or loaded/unloaded multiple times a day. While professional fatigue testing uses machines to apply cyclic loads, you can simulate it by repeatedly tightening/loosening the joint (if it has adjustable clamps) or applying and removing the load 50-100 times. A quality joint should maintain its grip and shape; if it starts to slip or deform after a few cycles, it's not built for long-term use.
Step 5: Corrosion Resistance – Protect Against the Elements
Factory floors are harsh environments: humidity, oils, coolants, and even cleaning chemicals can eat away at metal joints over time. Chrome plating helps, but it's not invincible. Testing corrosion resistance ensures your joints won't rust or degrade, even in tough conditions.
Salt Spray Test (For Chrome Plating)
The salt spray test is the gold standard for evaluating corrosion resistance. While professional labs use specialized chambers, you can do a DIY version with a spray bottle filled with saltwater (5% sodium chloride solution). Spray the joint thoroughly, place it in a sealed container with a damp sponge (to maintain humidity), and check it daily for 7-14 days. A high-quality chrome plating should show no rust or pitting; if rust appears within a week, the plating is thin or flawed.
Look for "white rust" (a powdery film) or "red rust" (actual iron oxide). White rust is often a sign of incomplete chrome plating, exposing the underlying zinc layer (used in some plating processes); red rust means the steel itself is corroding, a clear failure.
Humidity Test
For indoor environments with high humidity (like tropical factories or cleanrooms), a humidity test is more relevant. Place the joint in a humid chamber (or a sealed container with a wet cloth) at 95% relative humidity and 40°C (104°F) for 14 days. Afterward, inspect for rust, blistering, or peeling of the chrome. A joint that passes will look as good as new; any signs of degradation mean it's not suited for humid conditions.
Chemical Resistance (For Specialized Environments)
If your factory uses oils, coolants, or cleaning agents, test the joint's resistance to these chemicals. Apply a small amount of the chemical to a cloth, rub it on the joint, and let it sit for 24 hours. Wipe it off and check for discoloration, softening, or peeling of the chrome. For example, joints in automotive factories (exposed to motor oil) should resist degradation from mineral oils; those in electronics plants (exposed to isopropyl alcohol) should handle solvents without damage.
Step 6: Choosing a Reliable Supplier – Quality Starts at the Source
Even the most thorough inspection can't fix a fundamentally flawed product. The best way to ensure quality two way lean pipe joint chrome is to choose a reputable supplier. Here's what to look for when vetting suppliers:
Certifications and Standards
Look for suppliers who adhere to international standards like ISO 9001 (quality management) or ISO 14001 (environmental management). These certifications indicate a commitment to consistent quality and process control. For specialized applications, check for industry-specific certifications—e.g., RoHS compliance for electronics manufacturing, or NSF certification for food-grade environments.
Transparent Testing and Documentation
A good supplier will provide detailed testing data for their joints, including material certifications, load-bearing test results, and corrosion resistance reports. If a supplier hesitates to share this information, it's a red flag—they may be cutting corners on testing. Ask for samples and test reports before placing a bulk order; reputable suppliers will happily provide them.
Customer Feedback and Track Record
Check online reviews, case studies, or references from other customers in your industry. A supplier with a history of positive feedback (especially about durability and consistency) is more likely to deliver quality joints. Avoid suppliers with frequent complaints about fit issues, premature failure, or poor customer service—these are signs of unreliable quality control.
Final Thoughts: Invest Time in Inspection, Save Money in the Long Run
Testing the quality of two way lean pipe joint chrome may seem like extra work, but it's an investment that pays off. A single failed joint can disrupt production, damage products, or even cause injuries—costing far more than the price of a few high-quality joints. By following these steps—visual inspection, material checks, dimensional testing, load-bearing trials, and corrosion resistance evaluation—you can ensure your lean system is built on a foundation of reliability.
Remember: quality isn't just about the joint itself—it's about how it integrates with your entire lean system, from lean pipes and aluminum profiles to workbenches and conveyors. A well-chosen, thoroughly tested two way lean pipe joint chrome isn't just a component; it's a partner in keeping your production line efficient, safe, and ready for whatever the factory floor throws at it.