- Company Articles
- Products and Technology
- Product knowledge
- How to Test Vertical Lean Pipe Joint Strength Before Full Workbench Assembly

How to Test Vertical Lean Pipe Joint Strength Before Full Workbench Assembly
Related Product
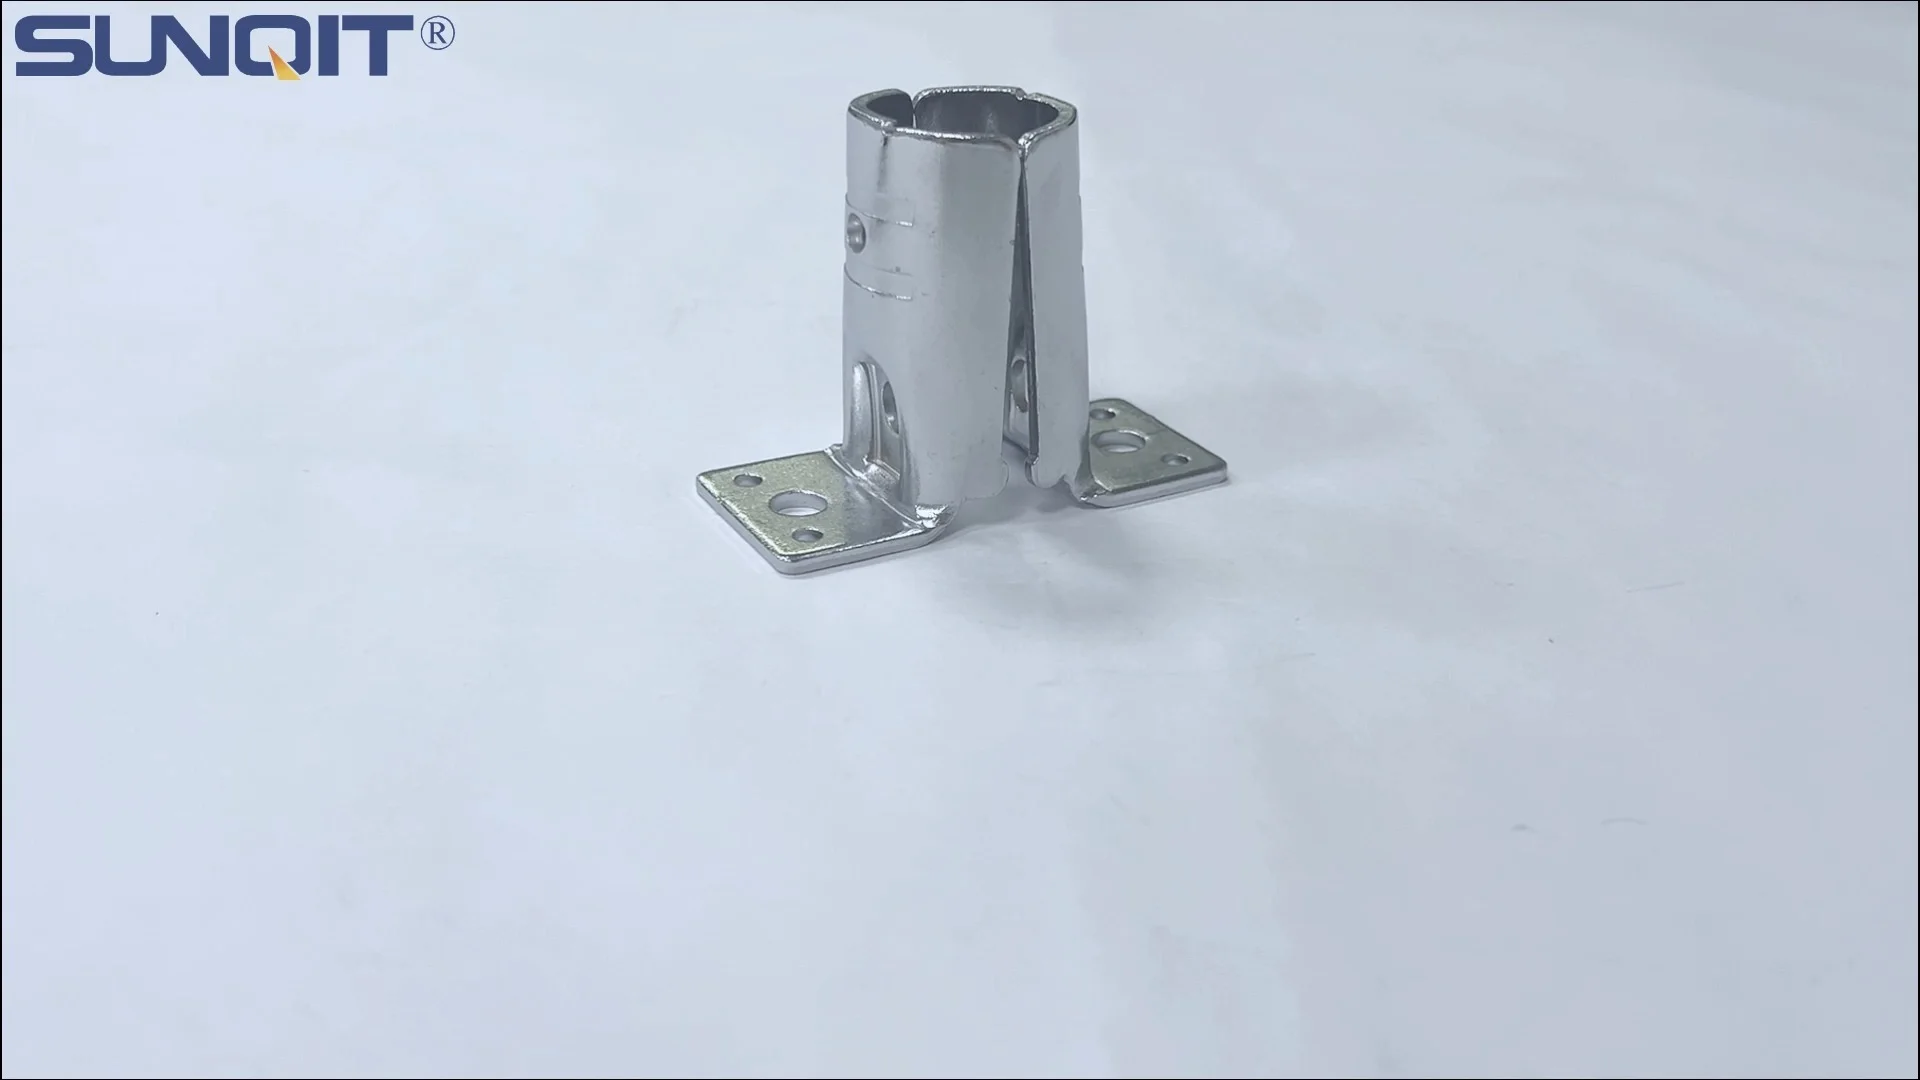
Vertical Lean Pipe Joint
Vertical lean pipe joint is used for 28mm lean pipe fixed on ground and keep it stable.
Let's start with a scenario we've all encountered, or at least can relate to: It's a busy Tuesday afternoon on your production floor. Your team has just finished assembling a brand-new lean pipe workbench, designed to streamline your assembly line and boost efficiency. Everyone's excited to start using it—until someone leans against the side to reach for a tool, and the whole structure shifts. Not a huge movement, but enough to make you pause. "Is this thing safe?" you wonder. "Could it hold up to the daily grind of parts, tools, and workers leaning on it?"
If this sounds familiar, you're not alone. Far too often, teams rush through the assembly of lean pipe structures, eager to get back to production, only to overlook a critical step: testing the strength of the vertical lean pipe joints. These joints are the backbone of any lean pipe workbench, conveyor, or material rack—they hold everything together, ensuring stability, safety, and longevity. Skip testing them, and you're rolling the dice on accidents, downtime, and costly repairs down the line.
In this guide, we'll walk through why testing vertical lean pipe joint strength matters, how to do it properly, and what to watch for. Whether you're a seasoned plant manager or a small business owner setting up your first workshop, this isn't just about "checking a box"—it's about protecting your team, your equipment, and your bottom line. Let's dive in.
Why Vertical Lean Pipe Joint Strength Isn't Just "Another Step"
Before we get into the "how," let's talk about the "why." Why does testing vertical lean pipe joints deserve your time and attention? Let's break it down into three critical areas: safety, efficiency, and cost.
Safety First: Protecting Your Team and Products
Imagine (oops, scratch that— think about ) a workbench collapsing mid-shift because a vertical joint gave way. Tools, parts, maybe even heavy machinery could come crashing down. The risk of injury to your team is real, not to mention the damage to expensive components or raw materials. Even a small wobble can lead to spills, slips, or strained muscles as workers overcompensate for an unstable surface.
Vertical joints bear the brunt of the weight in any lean pipe structure. They connect the vertical pipes (the "legs" of your workbench or rack) to the horizontal supports, transferring load from the top of the structure down to the floor. If they're weak or improperly secured, the entire system becomes a liability. Testing ensures that these joints can handle not just the static weight of tools and materials, but also the dynamic stress of daily use—like someone leaning on the bench, pushing a loaded trolley into it, or even accidental bumps from forklifts.
Efficiency: Avoiding Downtime When You Can't Afford It
Nothing kills productivity faster than unexpected downtime. If a vertical joint fails a week after assembly, you're not just looking at the time to fix it—you're looking at disrupted workflows, delayed orders, and frustrated team members who have to pause their tasks to troubleshoot. In a lean manufacturing environment, where every minute counts, that's a hit you can't afford.
Testing joints before full assembly catches issues early, when they're easy to fix. A loose joint might take 10 minutes to tighten during testing; if it fails later, it could take hours to disassemble part of the structure, replace components, and get back on track. Think of it as an investment in your schedule: a little time now saves a lot of time (and stress) later.
Cost Savings: From "Band-Aids" to Long-Term Reliability
Cheap fixes and quick patches might seem like a good idea in the moment, but they add up. A joint that's not tested might loosen, leading to uneven wear on other components—like caster wheels that start to wobble or roller tracks that misalign. Before you know it, you're replacing parts more frequently than you should, blowing your maintenance budget.
Quality lean pipe components aren't cheap, but they're designed to last—if they're assembled correctly. Testing ensures you're getting the full lifespan out of your investment. It also helps you avoid the hidden costs of rework: the labor hours, the replacement parts, and the opportunity cost of not using the structure while it's being repaired.
Pro Tip: Even if you're using pre-assembled components or working with a trusted lean pipe supplier, always test joints yourself. Manufacturing defects, shipping damage, or even human error during initial assembly can weaken joints—you don't want to find out the hard way.
Understanding Vertical Lean Pipe Joints: What You're Actually Testing
Before we grab the tools, let's make sure we're on the same page about what vertical lean pipe joints are and how they work. Not all joints are created equal, and understanding their design will help you test them more effectively.
The Basics: What Is a Vertical Lean Pipe Joint?
At its core, a vertical lean pipe joint is a connector that joins a vertical pipe (or "leg") to a horizontal pipe, a base plate, or another structural component. It's the "cornerstone" of the structure, responsible for transferring vertical load (weight from above) and lateral load (sideways pressure) to the ground. Without strong, secure joints, even the thickest aluminum lean pipe or stainless steel pipe won't keep your structure stable.
Joints come in different styles, depending on the material of your pipes and the design of your structure. Common types include:
- Fixed joints: These lock pipes at a specific angle (usually 90 degrees for vertical/horizontal connections) and don't allow movement. They're common in workbenches and static racks where stability is key.
- Swivel or rotary joints: These allow limited rotation, which can be useful for adjustable structures (like height-adjustable workbenches). However, they add complexity to testing, as you need to check strength in multiple positions.
- Internal rotation joints: Found in some aluminum lean pipe systems, these joints rotate inside the pipe, offering flexibility without sacrificing strength. They're popular in modular setups but require careful testing to ensure the internal mechanism doesn't slip.
Materials Matter: Steel vs. Aluminum Lean Pipe Joints
The material of your pipes and joints affects how they perform under stress. Steel joints are strong and durable but heavier, while aluminum lean pipe joints are lighter and resistant to corrosion—ideal for cleanrooms or humid environments. However, aluminum has different torque requirements and load capacities than steel, so testing methods can vary slightly.
For example, over-tightening an aluminum joint can strip the threads or warp the pipe, while under-tightening a steel joint might lead to loosening over time. Knowing which material you're working with (check the specs from your lean pipe supplier!) ensures you test with the right tools and force.

Pre-Test Prep: What You'll Need (And Why)
Testing vertical lean pipe joints doesn't require a lab full of equipment, but you will need a few basic tools and a clear plan. Let's gather your "testing kit" first—you'll be glad you did.
Tools for the Job
| Tool | Why You Need It | Pro Tip |
|---|---|---|
| Torque wrench | To measure the force applied when tightening joints (critical for avoiding over/under-tightening). | Use a wrench with a range of 0–50 Nm for most lean pipe joints; check your supplier's specs for exact torque values. |
| Spring scale (50–200 kg capacity) | To test lateral (sideways) load resistance—how much force the joint can handle before shifting. | Look for a scale with a hook attachment to easily pull on the structure. |
| Weight bags or sandbags (20–50 kg each) | To simulate static load (e.g., tools, materials stacked on the workbench). | Start with lighter bags and gradually add weight to avoid sudden stress. |
| Spirit level | To ensure the structure is plumb (vertical) before testing—an uneven base can skew results. | Check both vertical pipes and horizontal supports for levelness. |
| Marker or tape measure | To mark reference points (e.g., how much a joint shifts under load). | Use masking tape to mark the pipe and joint—easy to remove later! |
| Caster wheels (if applicable) | To test stability if your structure will have wheels (common in trolleys or mobile workbenches). | Lock the casters during testing to simulate "in-use" conditions. |
Setting Up for Success
Testing should be done in a controlled area, away from busy walkways or moving machinery. Clear the space around your partially assembled structure so you have room to apply force and observe the joints. If you're testing a workbench, make sure it's on a flat, solid surface—uneven floors can make a stable joint look wobbly, leading to false negatives.
Also, document everything. Take photos of the joint before testing, note the initial torque setting, and record how much weight or force was applied. This paperwork might seem tedious, but it's invaluable if you need to troubleshoot later or replicate the setup for other structures.

Step-by-Step: Testing Vertical Lean Pipe Joint Strength
Now, the moment you've been waiting for: the actual testing process. We'll break this down into five key steps, each designed to simulate real-world stress and uncover hidden weaknesses. Take your time with each step—rushing increases the chance of missing a critical flaw.
Step 1: Visual Inspection—The "First Line of Defense"
You don't need tools for this step—just your eyes and a little curiosity. Before applying any force, closely examine the vertical joint and the pipes connected to it. Look for:
- Visible damage: Cracks, dents, or bent threads on the joint or pipe. Even a small crack can weaken the joint under load.
- Proper alignment: Are the pipes straight, or do they bow where they meet the joint? Misalignment puts extra stress on the joint.
- Secure seating: Does the pipe fit snugly into the joint, or is there a gap? Loose seating means the joint isn't gripping the pipe properly.
- Corrosion or rust: For steel joints, rust can weaken the metal over time. For aluminum, look for white, powdery oxidation (a sign of poor storage or material defects).
If you spot any of these issues, stop here. A damaged joint or pipe should be replaced before testing—there's no point in testing a component that's already compromised.
Step 2: Torque Testing—Ensuring the Joint Is "Just Right"
Torque testing checks whether the joint is tightened to the manufacturer's specifications. Too loose, and it will fail under load; too tight, and you risk damaging the pipe or joint. Here's how to do it:
- Check the specs: Your lean pipe supplier should provide a torque rating for the joint (e.g., "25 Nm for aluminum joints, 35 Nm for steel"). If you don't have this, start with a lower torque and gradually increase.
- Set your torque wrench: Adjust the wrench to the recommended torque. For swivel or internal rotation joints, test in both the "locked" and "rotated" positions (if applicable).
- Apply torque evenly: Fit the wrench onto the joint's nut or bolt and pull slowly, in a straight line. Stop when you hear the wrench "click" (indicating the set torque has been reached).
- Re-test after loosening: Loosen the joint slightly, then re-tighten to the spec. If it takes less torque to reach the "click" the second time, the threads might be stripped or the joint is worn.
Pro tip: For critical joints (like those on heavy-duty workbenches), repeat this test 2–3 times. If the torque required decreases each time, the joint is likely deforming—replace it.
Step 3: Static Load Testing—Simulating "Day-in, Day-out" Weight
Static load testing checks how well the joint handles a steady, downward weight—like the tools, parts, and equipment that will sit on your workbench. Here's how to simulate this:
- Mark your reference point: Use a marker or tape to mark the top of the vertical pipe and the joint. This helps you spot movement later.
- Add weight gradually: Start with a light load (e.g., 20 kg) on the horizontal support connected to the vertical joint. Let it sit for 5 minutes.
- Check for movement: Compare the marked lines—has the vertical pipe shifted relative to the joint? Even 1–2 mm of movement is a red flag.
- Increase the load: Add more weight (e.g., 50 kg, then 100 kg) in 20–30 kg increments, waiting 5 minutes between each. Stop when you reach 120% of the structure's intended load (e.g., if the workbench should hold 150 kg, test up to 180 kg).
- Remove the weight: After the final load, take off all weight and check the joint. Did it return to its original position, or is there permanent deformation (e.g., a bent pipe or loose joint)?
If the joint shifts or deforms during this test, it's not ready for use. Tighten it (if loose) or replace it (if deformed).
Step 4: Lateral Load Testing—Handling the "Sideways Stress"
Most structures face more than just downward weight—they also get pushed, pulled, or leaned on from the side. Lateral load testing simulates this stress:
- Attach the spring scale: Hook the scale to the horizontal support, near the vertical joint (about 1–2 feet from the joint for realistic stress).
- Apply lateral force: Pull the scale slowly, noting the force required to make the joint shift. A stable joint should resist movement up to at least 30–40 kg of lateral force (adjust based on your structure's use case—e.g., a trolley needs more resistance than a static rack).
- Test in multiple directions: Pull from the left, right, and front/back (if applicable) to ensure the joint is strong in all directions.
- Check for loosening: After applying lateral force, re-check the torque on the joint. If it loosened, the joint isn't gripping the pipe well enough.
For structures with caster wheels, lock the wheels first—unlocked casters can roll, making it hard to gauge joint strength. If the structure still shifts, even with locked casters, the vertical joints are the likely culprit.
Step 5: Endurance Testing—Simulating "Weeks of Use in Hours"
Even if a joint passes the static and lateral tests, it might fail over time due to repeated stress. Endurance testing simulates weeks of use in a short period:
- Combine load and movement: Place a moderate static load (e.g., 50 kg) on the structure, then apply gentle, repeated lateral force (pull the spring scale back and forth 10–15 times).
- Check for wear: After 10–15 cycles, inspect the joint for loosening, creaking, or visible wear. Tighten the joint and re-test torque—if it loosens again, the threads or pipe might be worn.
- Repeat with heavier loads: If the joint holds up, add more weight (e.g., 75 kg) and repeat the cycles. This mimics the gradual buildup of load over a busy week.
Endurance testing is especially important for swivel or internal rotation joints, as the moving parts can wear down faster than fixed joints.

Troubleshooting Common Issues (And How to Fix Them)
Even with careful testing, you might run into problems. Here are the most common issues and how to address them:
Issue 1: The Joint Loosens During Load Testing
Why it happens: The joint isn't gripping the pipe properly, often due to a mismatched pipe/joint size (e.g., using a 25mm joint with a 20mm pipe) or worn threads.
Fix: Check that the pipe and joint are the same size (measure with a caliper if unsure). If the threads are worn, replace the joint. For aluminum lean pipe, try using a thread-locking compound (like Loctite) to prevent loosening—just avoid over-applying, as it can make future disassembly hard.
Issue 2: The Pipe Bends at the Joint
Why it happens: The pipe is too thin (e.g., 1.0mm instead of 1.5mm wall thickness) or the load exceeds the pipe's capacity.
Fix: Upgrade to a thicker pipe (check your supplier's load ratings) or add a reinforcement bracket near the joint to distribute weight.
Issue 3: The Joint Breaks or Cracks
Why it happens: Defective material, over-tightening, or using a joint rated for less weight than required.
Fix: replace the joint with a higher-rated model (e.g., steel instead of aluminum for heavy loads) and ensure you're not exceeding the torque spec.
Best Practices for Long-Term Joint Strength
Testing is just the first step—keeping your vertical lean pipe joints strong over time requires ongoing care. Here are a few habits to adopt:
- Schedule regular re-tests: Even the best joints loosen over time. Test critical joints every 3–6 months, or after a major impact (like a forklift bump).
- Train your team: Make sure everyone assembling lean pipe structures knows how to torque joints properly and spot signs of wear.
- Use quality components: It's tempting to cut costs with cheap joints, but they'll cost you more in repairs and downtime. Stick with reputable suppliers who stand behind their products.
- Label torque specs: Tape a cheat sheet with torque ratings to your workbench or toolbox—no one remembers every spec off the top of their head!
Wrapping Up: Testing Isn't a "Hassle"—It's an Investment
Going back to our opening scenario: Maria, the production supervisor, decides to test the vertical joints on her new workbench before letting the team use it. She finds one joint that's slightly loose, tightens it to the correct torque, and re-tests. The workbench holds steady under load, and over the next month, there's not a single wobble or near-miss.
That's the power of testing. It's not about being "overly cautious"—it's about being proactive. A few hours of testing today can save you days of stress, injury, and lost productivity tomorrow.
So, the next time you're assembling a lean pipe workbench, conveyor, or rack, remember: the vertical lean pipe joints are the unsung heroes holding it all together. Treat them with care, test them thoroughly, and your structure will stand strong—shift after shift, week after week.
Your team, your products, and your bottom line will thank you.