- Company Articles
- Products and Technology
- Installation And Maintenance
- How to Tighten a Loose Parallel Rotatory Lean Pipe Joint Chrome

How to Tighten a Loose Parallel Rotatory Lean Pipe Joint Chrome
Related Product
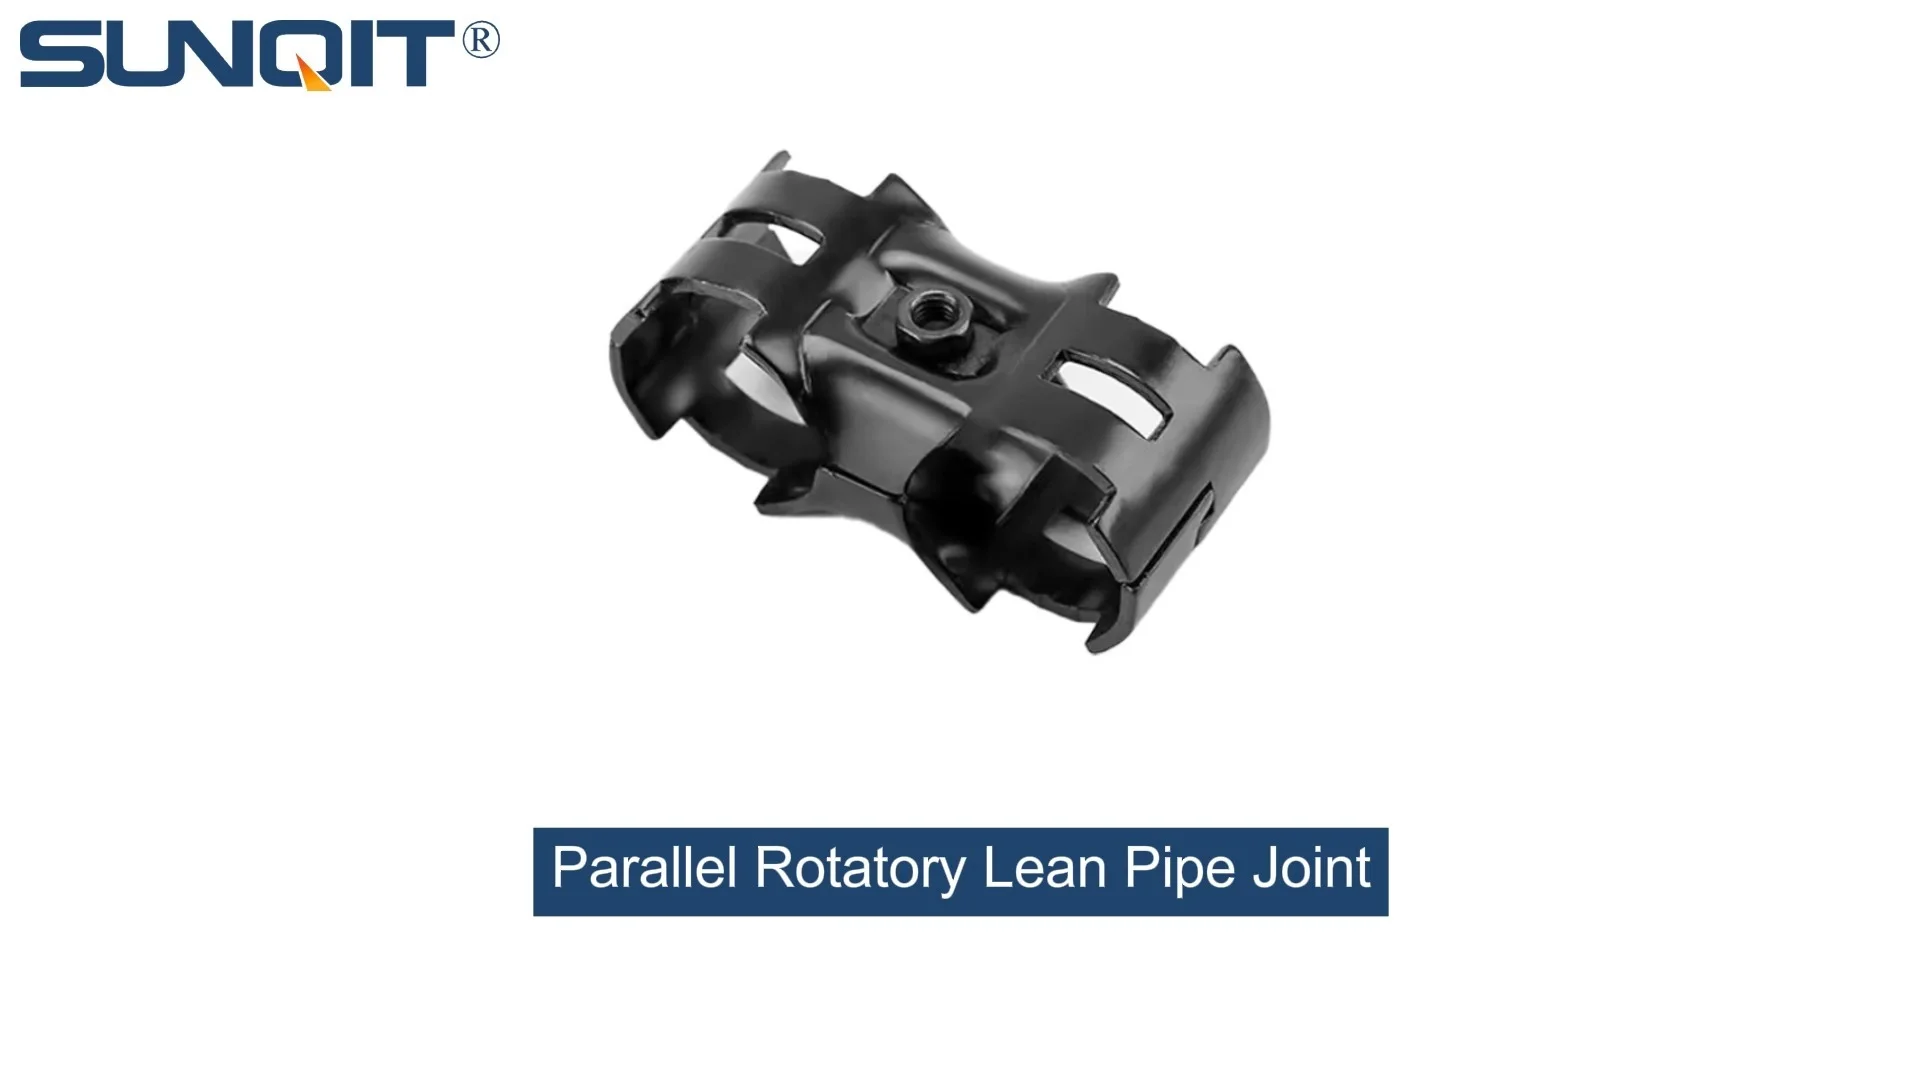
Parallel Rotatory Lean Pipe Joint
Parallel rotatory lean pipe joint, for 2 pcs pipe conenction in parallel direction with rotatory function.
We've all been there: you're in the middle of a busy shift, parts are moving smoothly along your lean pipe workbench, and suddenly—*rattle, clank*—the whole setup shifts. A tool slips, a component misaligns, and your once-efficient workflow grinds to a halt. More often than not, the culprit is a loose joint. And when it comes to lean systems, few joints are as crucial (or as prone to loosening) as the parallel rotatory lean pipe joint chrome. In this guide, we'll walk through why these joints matter, how to spot a loose one, and the step-by-step process to tighten it—so you can get back to what matters: keeping your production line running like a well-oiled machine.
Understanding the Parallel Rotatory Lean Pipe Joint Chrome
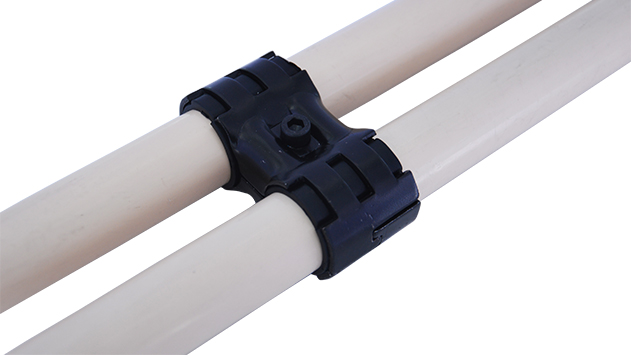
Before we dive into fixing, let's make sure we're all on the same page about what a parallel rotatory lean pipe joint chrome actually is. If you work with lean pipe systems—whether building workbenches, material racks, or conveyor setups—you've probably handled these joints dozens of times. They're the unsung heroes that hold your lean pipe structures together while allowing controlled rotation, making them perfect for adjustable workstations or dynamic material flow setups.
Made from durable chrome-plated steel, these joints are designed to connect two parallel lean pipes (often 28mm in diameter, the standard for most lean systems) while letting them rotate around each other within a specific range. This rotation is key for flexibility: think of a workbench where you need to swivel a tool holder, or a material rack where bins need to tilt for easy access. The chrome plating isn't just for looks, either—it adds corrosion resistance, which is a big deal in factories where spills, humidity, or coolants are part of the daily grind.
But here's the thing: all that movement can take a toll. Over time, vibrations from machinery, the weight of materials, and even the regular wear of rotation can cause the joint's internal components to loosen. And when that happens, the "controlled" rotation becomes "unpredictable wobble"—which is when production headaches start.
Why Tightening a Loose Joint Matters (More Than You Think)
You might be tempted to ignore that small rattle or minor wobble. "It's just a loose joint," you think. "I'll fix it later when things slow down." But in lean manufacturing, "later" can cost you more than just time. Let's break down why addressing a loose parallel rotatory lean pipe joint chrome is non-negotiable:
- Safety First: A wobbly structure is an accident waiting to happen. If the joint connects a section of a conveyor or a workbench with heavy tools, a sudden shift could cause materials to fall, tools to slip, or even the entire structure to tip. No production goal is worth risking an injury.
- Efficiency Kills: Loose joints throw off alignment. Imagine a flow rack where a misaligned roller track (thanks to a loose joint) causes parts to jam. Suddenly, your "lean" process becomes a bottleneck as workers stop to unjam parts, adjust the rack, or rework misaligned components. Over a day, that adds up to hours of lost productivity.
- Secondary Damage: A loose joint doesn't just affect itself. The extra stress and movement can loosen adjacent joints, bend lean pipes, or even damage other components like caster wheels (if the structure is on wheels) or aluminum profile connections. What starts as a 5-minute fix could turn into a full rebuild if left unchecked.
- Quality Control Issues: If the joint is part of an assembly workbench, instability can lead to imprecise work. A slight wobble while tightening a screw or placing a component might not seem like much, but over hundreds of units, it can create quality inconsistencies that cost you with returns or rework.
Pro Tip:
Make it a habit to inspect joints during your regular 5S audits. A quick visual check and gentle wiggle can catch loose joints before they become problems. Add a note to your checklist: "Check parallel rotatory joints for play or unusual movement."
Tools You'll Need (No Fancy Equipment Required)
The good news? Tightening a parallel rotatory lean pipe joint chrome doesn't require a degree in engineering or a garage full of specialized tools. Chances are, you already have most of these items in your maintenance kit. Here's what you'll need:
| Tool Name | Purpose | Pro Tips |
|---|---|---|
| Adjustable Wrench (6-8 inches) | To grip and tighten the joint's locking nut. | Use a wrench with smooth jaws to avoid scratching the chrome plating. |
| Hex Key Set (Allen Wrenches) | Many joints have set screws that secure the rotation mechanism. | Check the joint first—some use metric sizes (common: 5mm, 6mm), others standard. |
| Level (2-foot or Digital) | To ensure the lean pipe structure is straight after tightening. | A digital level is faster, but a bubble level works if that's all you have. |
| Thread Locker (Medium Strength, e.g., Loctite Blue) | Optional, but recommended for high-vibration areas. | Avoid "permanent" thread locker (red) unless you never want to adjust the joint again. |
| Clean Cloth | To wipe away dirt, grease, or debris from the joint before tightening. | Grease or dust can make it hard to get a secure grip on the nut or set screw. |
| Work Gloves | To protect your hands from sharp edges or chrome plating (which can get slippery). | Go for nitrile gloves—they're better than latex at gripping metal. |
That's it! No power tools, no complicated gadgets. Just basic hand tools and a little patience. Now, let's get to the step-by-step process.

Step-by-Step: Tightening a Loose Parallel Rotatory Lean Pipe Joint Chrome
Follow these steps, and you'll have that joint tight and stable in 15 minutes or less. We'll assume the joint is part of a typical lean pipe workbench, but the process works for material racks, conveyor supports, or any structure using these joints.
Step 1: Safety First—Power Down and Clear the Area
Before you touch anything, make sure the area around the joint is safe. If the structure is part of a conveyor system, turn off the power. If it's a workbench with tools or materials, remove everything from the surface to prevent items from falling during adjustment. If the structure is tall (like a material rack), use a ladder or step stool if needed—but never stand on the rack itself. Safety glasses are a good idea too, in case any debris falls when you start working.
Step 2: Identify the Exact Source of the Looseness
Not all "loose joints" are the same. Grab the lean pipe connected to the joint and gently wiggle it up, down, and side to side. Is the movement coming from the joint itself, or is the lean pipe loose inside the joint? Most parallel rotatory joints have two main components: the outer housing (which connects to one pipe) and the inner rotating sleeve (which connects to the other pipe). The looseness could be from the locking nut that holds these two parts together, or from set screws that secure the pipes into the joint.
Here's a quick test: Hold the outer housing steady with one hand, then rotate the inner sleeve with the other. If there's play (wobble) while rotating, the locking nut is likely loose. If the pipe itself slides or twists inside the joint, the set screws (usually on the side of the joint) need tightening.
Step 3: Stabilize the Structure (Yes, Even for a Small Joint)
You don't want the structure shifting while you're tightening the joint. If it's a freestanding workbench, have a coworker hold it steady, or prop it against a stable surface (like a wall) with a piece of scrap wood. If it's a mobile structure (on caster wheels), lock the casters first. The goal is to eliminate any movement in the structure so you can focus on the joint itself.
Step 4: Clean the Joint (Grease and Dust Are Your Enemies)
Take your clean cloth and wipe down the joint, especially around the locking nut and set screws. Factories are dusty places, and a layer of grease or dirt can make it hard to grip the nut with your wrench, or cause the set screws to slip. A quick wipe now will save you frustration later.
Step 5: Tighten the Locking Nut (For Rotational Play)
If the issue is rotational play (the inner sleeve wobbles inside the outer housing), grab your adjustable wrench. Fit the wrench around the locking nut—the large, hexagonal nut at the base of the joint (check your joint; some have a knurled nut for hand-tightening, but most need a wrench). Hold the outer housing with one hand to prevent it from turning, then turn the wrench clockwise to tighten the nut. Start with gentle pressure—you don't want to strip the threads. Tighten until you feel resistance, then give it a quarter-turn more. Test the rotation again: it should move smoothly but without any wobble.
Pro tip: If the nut is stuck (common if it's been loose for a while and collected rust), spray a little penetrating oil (like WD-40) and let it sit for 5 minutes before trying again. Avoid using a pipe wrench unless absolutely necessary—it can damage the chrome plating.
Step 6: Tighten the Set Screws (For Pipe Slippage)
If the pipe is slipping inside the joint, locate the set screws. These are small, usually hexagonal screws that screw into the side of the joint and bite into the lean pipe to hold it in place. Use the correct hex key (you might need to try a few sizes to find the right fit) and turn clockwise to tighten. Go slowly—over-tightening can strip the screw or indent the pipe. Tighten until the pipe no longer moves when you wiggle it. If the set screw is stripped (common if it was loose and vibrating), replace it with a new one—don't try to force it.
Step 7: Realign and Level the Structure
Now that the joint is tight, take a step back and check the structure with your level. Tightening the joint might have pulled the pipes slightly out of alignment, especially if it was very loose. Place the level on the workbench surface or along the lean pipe—adjust as needed by gently bending the pipes (if they're the flexible pe-coated type) or loosening/tightening adjacent joints. A level structure ensures even weight distribution, which will help keep the joint tight longer.
Step 8: Test, Test, Test
Don't just assume it's fixed—put it through its paces. Rotate the joint through its full range of motion. Wiggle the pipes. If you're working on a workbench, place some weight on it (simulating tools or materials) and check for movement. If you're working on a conveyor or flow rack, run a few test parts through to ensure smooth flow. If everything feels solid and movement is controlled, you're good to go. If not, repeat steps 5-7—you might have missed a set screw or under-tightened the locking nut.
Step 9: (Optional) Apply Thread Locker for Longevity
If the joint is in a high-vibration area (near a stamping machine, for example), a drop of medium-strength thread locker on the locking nut's threads can help prevent it from loosening again. Apply a small amount (a drop or two) to the threads before tightening the nut, then let it cure for 24 hours (check the product label for exact curing time). Avoid getting thread locker on the rotating parts of the joint—it can gum up the rotation mechanism.

Troubleshooting: When Tightening Isn't Enough
Sometimes, even after following the steps above, the joint might still be loose or not working right. Don't panic—most issues have simple fixes. Here are the most common problems and how to solve them:
Problem: The Locking Nut Just Spins (No Tightening)
This usually means the threads on the nut or the joint's housing are stripped. If the nut is stripped, replace it with a new one (your lean pipe supplier should carry replacements). If the housing threads are stripped, you have two options: (1) Use a thread repair kit (like a helicoil) to restore the threads, or (2) replace the entire joint. For critical structures, replacement is safer than a repair—stripped threads can fail suddenly under load.
Problem: The Joint Is Tight, But Rotation Is Stiff
Over-tightening the locking nut can cause this. Loosen the nut by a quarter-turn and test rotation again. If it's still stiff, check for debris inside the joint—dust or metal shavings from tightening might be gumming up the works. Spray a little compressed air into the joint to clear it out, then add a drop of light machine oil (like 3-in-1 oil) to the rotating parts. Wipe away excess oil to prevent attracting dust.
Problem: The Pipe Still Slips, Even After Tightening Set Screws
First, check if the set screws are the right length—if they're too short, they won't bite into the pipe. replace with longer screws (matching the thread size). If the pipe has indentations from previous tightening (common with pe-coated lean pipe), rotate the pipe slightly so the set screw bites into a fresh area. If all else fails, wrap a strip of rubber (like an old bike inner tube) around the pipe before inserting it into the joint—the rubber increases friction and holds better.
Problem: Multiple Joints Are Loose (Not Just One)
This is a red flag. If several joints are loose, it might mean the structure is overloaded, or the initial assembly was done incorrectly (e.g., using the wrong joint type for the load). Check the weight capacity of your lean pipe system—most standard systems handle 50-100kg per linear meter, but heavy tools or materials can exceed that. If overloading is the issue, reinforce the structure with additional supports or upgrade to heavier-duty components (like aluminum lean pipe, which is stronger than standard pe-coated pipe).
Preventive Maintenance: Keep Those Joints Tight for Good
Fixing a loose joint is great, but preventing it from loosening in the first place is even better. Here's how to make sure your parallel rotatory lean pipe joint chrome stays tight, saving you time and hassle down the line:
- Regular Inspections: Add joint checks to your weekly maintenance routine. A 5-minute walkaround with a wrench (just to snug up any nuts that feel slightly loose) can prevent major issues. Pay extra attention to joints near vibrating equipment—they loosen faster.
- Lubricate Rotating Parts: Every 3 months, apply a drop of light machine oil to the rotating sleeve of the joint. This reduces friction and wear, which can cause loosening over time. Wipe away excess oil to avoid attracting dust.
- Clean Joints Annually: Once a year, take apart heavily used joints (if possible), clean the internal components with a brush and solvent, then reassemble with fresh thread locker. This removes built-up grime and ensures smooth operation.
- Train Your Team: Make sure everyone who uses the lean pipe structure knows to report loose joints immediately. A line worker who notices a wobble is your first line of defense—empower them to flag issues before they escalate.
- Upgrade When Needed: If a joint keeps loosening despite your best efforts, it might be time to upgrade. For high-vibration areas, consider stainless steel joints (more durable than chrome-plated) or aluminum lean pipe joints, which often have better locking mechanisms. Your lean pipe supplier can help you choose the right upgrade for your needs.
When to Call in the Pros
Most loose joints are DIY fixes, but there are times when you should call your lean pipe supplier or a professional installer. Here's when to step back and get help:
- Structural Damage: If the lean pipe is bent, cracked, or dented, or the joint housing is cracked, don't try to fix it—replace the damaged components. Bending a pipe back into shape weakens it, and cracked joints can fail under load.
- Multiple Stripped Threads: If several joints have stripped threads, it's a sign of poor initial assembly (wrong torque, mismatched parts) or overloading. A professional can assess the structure and recommend a permanent fix, like upgrading to stronger joints or reinforcing the frame.
- System-Wide Instability: If the entire lean pipe system (sways) or shifts when in use, even after tightening all joints, there's a design flaw. A professional can recalculate load distribution, add cross-braces, or redesign the structure to be more stable.
- Safety Concerns: If you're unsure about the fix, or the structure is critical to production safety (e.g., holding heavy machinery), err on the side of caution. A professional can ensure the repair meets safety standards and won't fail.
Wrapping Up: Tight Joints, Smooth Operations
A loose parallel rotatory lean pipe joint chrome might seem like a small problem, but in the world of lean manufacturing, small problems can snowball into big delays, safety risks, and costs. By taking the time to tighten it properly—following the steps above—you're not just fixing a joint; you're protecting your team, your productivity, and your bottom line.
Remember: lean systems thrive on precision and stability. A tight joint is a silent contributor to that stability, ensuring your workbenches, material racks, and conveyors do what they're supposed to do—make your job easier, faster, and safer. So the next time you hear that rattle, don't wait. Grab your wrench, follow this guide, and get back to building something great.
And if you need replacement joints, set screws, or just advice on upgrading your lean system, reach out to your trusted lean pipe supplier—they're there to help you keep things running smoothly.