- Company Articles
- Products and Technology
- Installation And Maintenance
- How to Troubleshoot Loose Connections in Two Way Lean Pipe Joint

How to Troubleshoot Loose Connections in Two Way Lean Pipe Joint
Related Product
Two Way Lean Pipe Joint
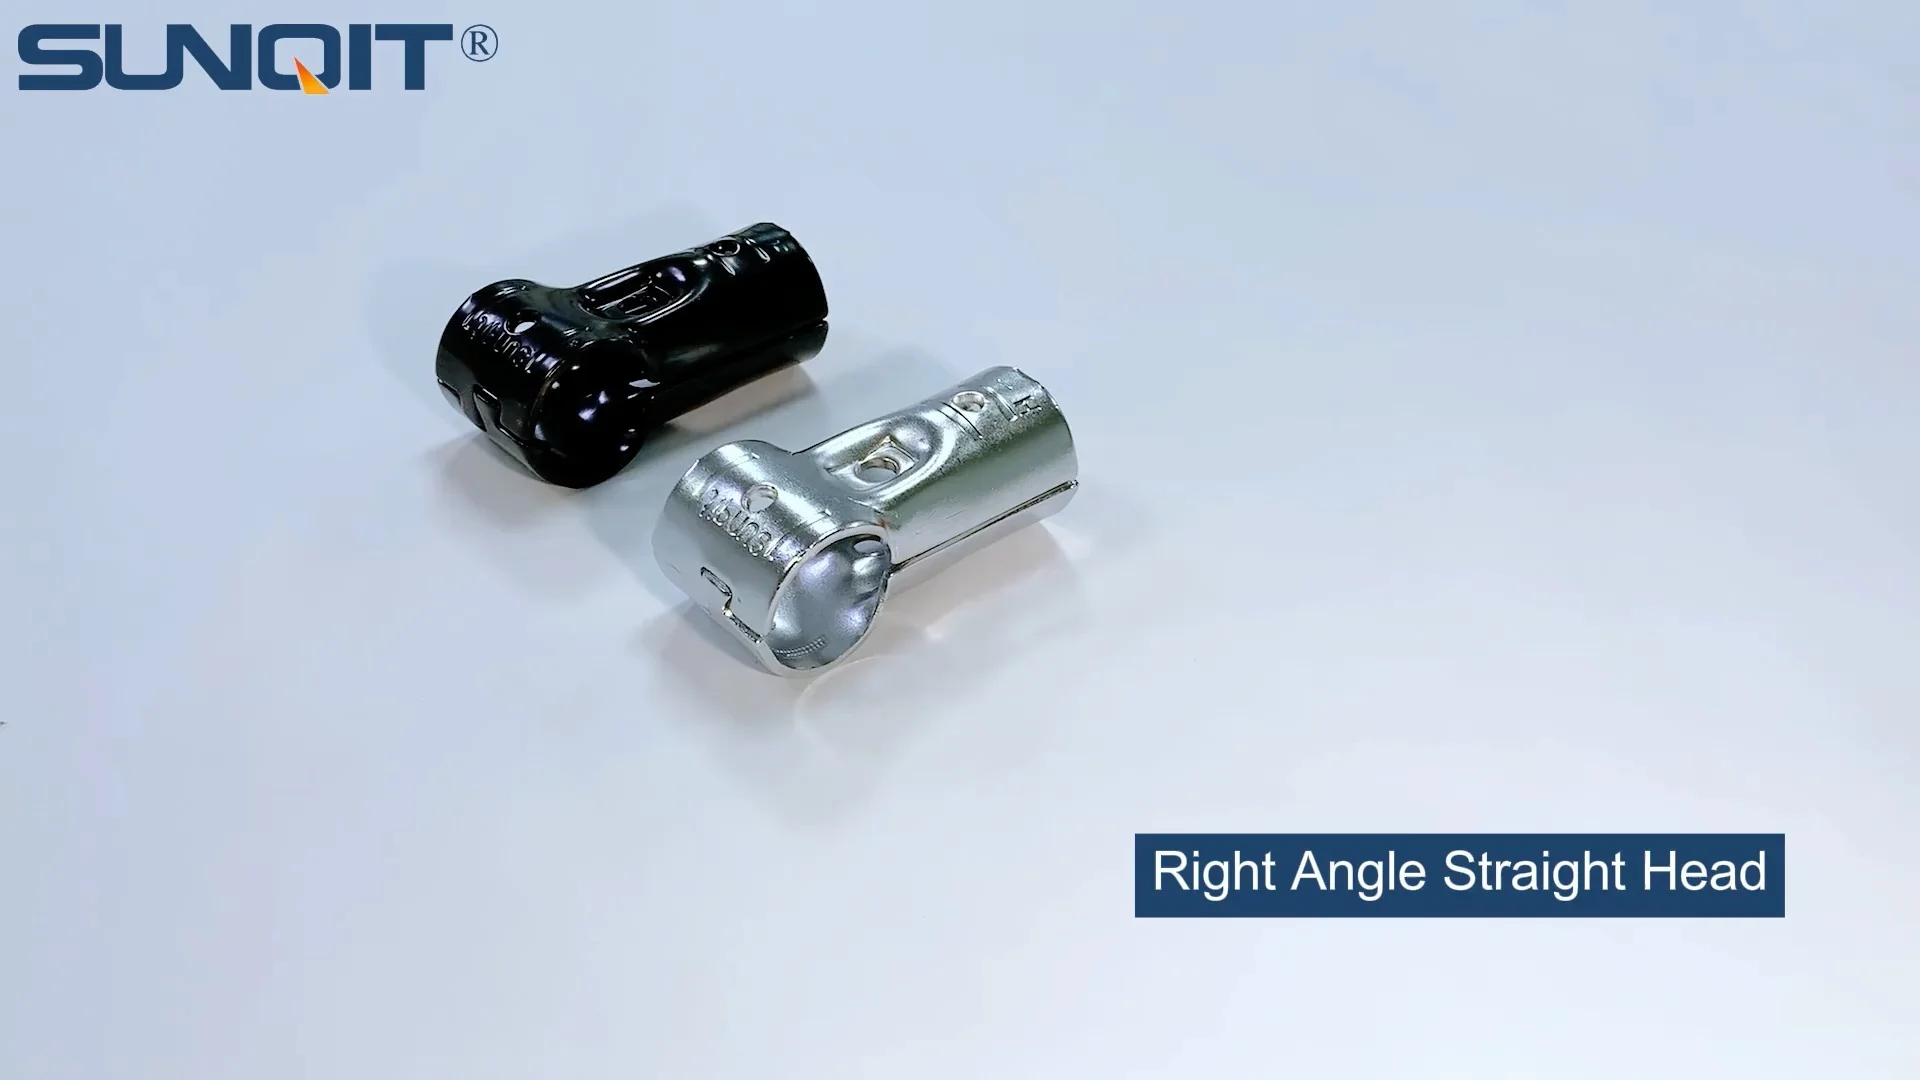
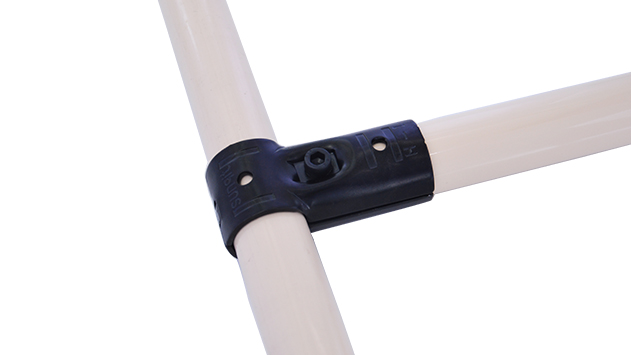
Two way lean pipe joint for 2 pcs 28MM lean pipe connection in straight angle, which used widely in workbench, flow rack, hand trolley frame connection.
Introduction: The Backbone of Lean Systems
Walk into any modern manufacturing facility, warehouse, or assembly line, and you'll likely spot a network of structures that keep operations running smoothly: workbenches, flow racks, conveyors, and turnover trolleys. What holds these structures together? More often than not, it's a humble but critical component: the lean pipe joint. Among the various types of joints, the two way lean pipe joint stands out for its versatility, connecting two pipes at angles to form the framework of everything from simple material racks to complex production cells.
But here's the thing: even the sturdiest structures are only as strong as their weakest link. A loose two way lean pipe joint might start as a minor annoyance—a slight wobble in a workbench or a creak in a flow rack—but left unaddressed, it can snowball into bigger problems. Loose connections lead to unstable structures, which risk damaging materials, slowing down production, or even causing safety hazards for workers. In lean manufacturing, where efficiency and reliability are king, downtime from a faulty joint is the last thing anyone needs.
If you've ever found yourself staring at a wobbly aluminum lean pipe structure, wondering how to fix it, you're in the right place. This guide will walk you through troubleshooting loose connections in two way lean pipe joints, from identifying the root cause to implementing long-term solutions. We'll cover common issues, step-by-step inspection techniques, and preventive maintenance tips to keep your lean systems in top shape. Let's dive in.
Understanding Two Way Lean Pipe Joints: What They Are and How They Work
Before we jump into troubleshooting, let's make sure we're on the same page about what a two way lean pipe joint is and why it matters. At its core, a two way lean pipe joint is a connector designed to join two lean pipes (often aluminum lean pipe or stainless steel pipe) at a fixed or adjustable angle—most commonly 90 degrees, though some designs allow for other angles. Think of it as the "elbow" that gives your lean structure its shape and stability.
These joints are part of a broader ecosystem of lean pipe and accessories, which includes everything from caster wheels to roller tracks. What makes them unique is their simplicity and flexibility. Unlike welded connections, lean pipe joints are modular—you can assemble, disassemble, and reconfigure them without specialized tools, making it easy to adapt structures as production needs change. This modularity is a cornerstone of lean manufacturing, where adaptability and waste reduction are key.
Most two way lean pipe joints are made from durable materials like aluminum or zinc-plated steel, designed to withstand the wear and tear of daily use. They typically feature internal threads or clamping mechanisms that grip the pipes when tightened, creating a secure bond. Some joints even include plastic or rubber components to reduce vibration or prevent slipping. But despite their robust design, these joints can loosen over time—especially in high-traffic areas where structures are frequently bumped, loaded, or adjusted.
Common Causes of Loose Connections: Why Your Joints Might Be Wobbling
Loose two way lean pipe joints don't just happen randomly. More often than not, there's a specific reason behind the wobble. Let's break down the most common culprits, so you can narrow down the cause during your troubleshooting process.
1. Improper Installation: The "Set It and Forget It" Myth
One of the biggest mistakes teams make is rushing through the assembly process. If a two way lean pipe joint isn't tightened properly during setup, it's only a matter of time before it loosens. This is especially true for aluminum lean pipe structures, where the lightweight material can create a false sense of stability—you might think the joint is tight, but a quick tug could prove otherwise. Over-tightening is also a problem: cranking the joint too hard can strip threads or warp the connector, making it impossible to achieve a secure grip later.
2. Wear and Tear: The Toll of Daily Use
Imagine a flow rack in a busy warehouse, where workers load and unload boxes multiple times an hour. Each time a box slides onto the rack, it jostles the structure, sending tiny vibrations through the pipes and joints. Over weeks and months, these vibrations can gradually loosen the threads on a two way lean pipe joint. Add in factors like temperature fluctuations (which cause metal to expand and contract) or exposure to moisture (which can lead to rust on steel joints), and you've got a recipe for loose connections.
3. Overloading: When Structures Bear Too Much Weight
Every lean structure has a weight limit, and that limit applies to the joints as much as the pipes. If you stack more materials on a workbench or flow rack than it's designed to hold, the extra stress can pull the two way lean pipe joints out of alignment. For example, a material rack B (3 row and 3 floor) might be rated for 50kg per shelf, but if you load 80kg on a shelf, the vertical joints holding up the structure will bear the brunt of that excess weight. Over time, this can stretch or bend the joint, creating gaps between the connector and the pipe.
4. Damaged Components: When Joints or Pipes Give Out
Sometimes, the issue isn't with how the joint was installed or used—it's with the joint itself. If a two way lean pipe joint is made from low-quality materials (common with off-brand lean pipe and accessories), its threads might wear down quickly. Similarly, if the pipe connected to the joint is bent, dented, or scored, it won't sit flush in the connector, leaving room for movement. Even small imperfections, like a cracked plastic sleeve on the joint, can compromise the grip.
5. Environmental Factors: The Hidden Saboteurs
Dust, debris, and chemicals can also play a role in loosening joints. In manufacturing environments where oil, coolant, or cleaning agents are present, these substances can seep into the threads of a two way lean pipe joint, acting as a lubricant and causing the connection to slip. Similarly, in warehouses with high humidity, rust can form on steel joints, weakening their hold. Even something as simple as a loose caster wheel on a turnover trolley can create vibrations that travel up the structure and loosen joints over time.

Step-by-Step Troubleshooting: From Inspection to Fix
Now that you know what might be causing the looseness, let's walk through the troubleshooting process. We'll start with simple checks and move to more involved fixes, so you can resolve the issue with minimal downtime.
Step 1: Safety First—Stabilize the Structure
Before you start poking around a wobbly structure, make sure it's safe to work on. If the loose joint is part of a workbench, flow rack, or material rack, remove any materials or tools from the structure to reduce weight. If the structure is leaning dangerously, prop it up with temporary supports (like wooden blocks or spare pipes) to prevent it from collapsing while you work. Safety glasses and gloves are also a good idea—especially if you're dealing with metal components that might have sharp edges.
Step 2: Visual Inspection—Spot the Obvious Signs
Grab a flashlight and take a close look at the two way lean pipe joint. What do you see? Look for:
- Gaps: Is there space between the joint and the pipe? Even a 1mm gap can cause wobbling.
- Damage: Are the threads on the joint stripped or bent? Is the pipe dented where it connects to the joint?
- Debris: Dust, oil, or grime in the threads can prevent a tight grip. Wipe the joint with a clean rag to check.
- Rust or Corrosion: On steel joints, rust can weaken the connection. On aluminum lean pipe joints, look for white, powdery oxidation.
Step 3: Check for Movement—The "Push Test"
Gently push and pull on the pipes connected to the joint. Does the joint move, or does the entire structure shift? If the joint moves independently (e.g., the horizontal pipe wiggles while the vertical pipe stays still), the issue is likely with the joint itself. If the whole structure moves, the problem might be elsewhere—like a loose caster or a damaged base.
Step 4: Tighten the Joint—But Don't Overdo It
If the joint looks intact and there's no obvious damage, the first fix to try is tightening it. Grab the appropriate tool—most two way lean pipe joints use a hex key (Allen wrench) or a socket wrench. insert the tool into the joint's tightening mechanism (usually a bolt or screw on the side) and turn it clockwise. Apply steady pressure, but stop when you feel resistance—over-tightening can strip threads or crack the joint.
Pro tip: For aluminum lean pipe joints, use a torque wrench if you have one. Most manufacturers recommend a torque of 20-25 Nm for aluminum joints—check your supplier's specs to be sure. If you don't have a torque wrench, a good rule of thumb is to tighten until the joint feels snug, then give it a quarter-turn more.
Step 5: Test the Fix—Shake It Like a Polaroid Picture
After tightening, give the pipes a gentle shake again. If the joint stays firm, great—you're done! If it still wobbles, move on to the next step.
Step 6: Inspect for Damage—When Tightening Isn't Enough
If tightening doesn't work, the joint or pipe might be damaged. Remove the joint from the pipe (you'll need to loosen any adjacent joints to free it up) and inspect the threads closely. Run your finger along the threads—if they feel rough, bent, or gapped, they're probably stripped. Check the pipe, too: if it's bent or has a flattened spot where it connects to the joint, it won't seat properly in the connector.
If the joint is damaged, replace it with a new one. This is where having a stock of spare lean pipe and accessories comes in handy—ordering a replacement two way lean pipe joint from your supplier at the last minute can mean hours of downtime. When replacing, make sure the new joint matches the size and material of the old one (e.g., aluminum for aluminum lean pipe, steel for stainless steel pipe series).
Step 7: Check for Misalignment—When Pipes Don't Play Nice
Sometimes, the issue isn't the joint or the pipe—it's how they're aligned. If the two pipes connected by the two way lean pipe joint aren't straight or are at the wrong angle, the joint will never sit properly. For example, if the vertical pipe is slightly bent, the horizontal pipe connected to it will be misaligned, putting stress on the joint and causing it to loosen. Use a level to check if the pipes are straight and at the correct angle (usually 90 degrees for two way joints). If they're not, gently bend the pipes back into alignment (if they're aluminum—steel pipes may need a pipe bender) before reattaching the joint.
Step 8: Add Reinforcements—For Extra Stability
In high-stress areas (like the base of a heavy-duty workbench or a flow rack that's loaded multiple times a day), consider adding reinforcements to prevent future loosening. Thread locker (like Loctite) can be applied to the joint's threads before tightening, creating a bond that resists vibration. Just be sure to use a removable thread locker (blue) so you can disassemble the joint later if needed—permanent (red) thread locker will make adjustments impossible. Alternatively, you can add a second joint or a brace (like a diagonal pipe) to distribute weight and reduce stress on the two way lean pipe joint.

Troubleshooting Table: Quick Reference Guide
| Common Cause | Signs to Look For | Troubleshooting Action |
|---|---|---|
| Improper installation (under-tightened) | No visible damage, joint moves when pushed | Tighten with hex key or torque wrench to manufacturer specs |
| Stripped threads on joint | Threads look gapped or bent; joint spins without tightening | replace with new two way lean pipe joint |
| Bent or dented pipe | Pipe is misaligned; joint sits crookedly | Straighten pipe or replace with new aluminum lean pipe |
| Debris in threads | Dust, oil, or grime in joint; joint feels "slippery" when tightening | Clean threads with rag and degreaser; retighten |
| Overloading | Structure sags under weight; joint loosens after loading | Reduce load to weight limit; add reinforcement braces |
| Vibration from nearby equipment | Joint loosens gradually over time; structure is near conveyors or machinery | Apply removable thread locker; add vibration-dampening pads |
Preventive Maintenance: Keep Joints Tight for the Long Haul
The best way to deal with loose two way lean pipe joints is to prevent them from loosening in the first place. With a little proactive maintenance, you can extend the life of your lean pipe structures and avoid costly downtime. Here's how:
1. Train Your Team on Proper Assembly
Most loose joints start with improper installation. Make sure everyone on your team knows how to assemble lean pipe structures correctly—especially how to tighten two way lean pipe joints. Hold a quick training session where you demonstrate the right torque (using a torque wrench) and show examples of over-tightened vs. under-tightened joints. Post a cheat sheet near assembly areas with torque specs for different joint types (aluminum vs. steel) and pipe sizes.
2. Schedule Regular Inspections
Set up a routine inspection schedule based on how heavily your structures are used. For high-traffic areas (like assembly line workbenches or flow racks near conveyor belts), do a visual check weekly and a torque check monthly. For less-used structures (like storage racks), a monthly visual check and quarterly torque check should suffice. Use a checklist to track which joints have been inspected and tightened—this helps you spot patterns (e.g., joints in a specific area always loosen) and address underlying issues.
3. Clean Joints and Pipes Regularly
Dust, oil, and debris are enemy number one for tight joints. Wipe down lean pipe structures with a damp rag during inspections to remove buildup. For joints that are exposed to coolant or chemicals, use a mild degreaser to clean the threads. This not only prevents slipping but also helps you spot damage (like rust or stripped threads) early.
4. replace Worn Parts Proactively
Don't wait for a joint to fail before replacing it. During inspections, keep an eye out for signs of wear: threads that look dull, plastic components that are cracked, or joints that require frequent retightening. replace these parts with new ones from a reliable lean pipe and accessories supplier. It's a small cost compared to the downtime of a collapsed structure.
5. Upgrade to Heavy-Duty Components When Needed
If you're consistently dealing with loose joints in a high-stress area, it might be time to upgrade. For example, if a standard two way lean pipe joint can't handle the weight of your flow rack, switch to a reinforced joint or an aluminum lean pipe with thicker walls. Some suppliers offer heavy-duty joints with larger threads or metal-to-metal connections that are more resistant to vibration. It's an investment, but it will save you time and frustration in the long run.
Real-World Case Study: Troubleshooting a Loose Joint in a Production Line
Let's put this all into context with a real example. A mid-sized electronics manufacturer was experiencing delays on their assembly line—products were getting stuck on a flow rack, causing backups. The team noticed the flow rack, which used aluminum lean pipe and two way lean pipe joints, was wobbling slightly. They decided to troubleshoot the issue using the steps outlined above.
Step 1: Inspection
The team removed the products from the flow rack and propped it up with temporary supports. A visual inspection revealed a gap between the two way lean pipe joint connecting the vertical pipe to the horizontal roller track. The joint was loose, but the threads looked intact—no signs of stripping or damage.
Step 2: Tightening
Using a hex key, they tightened the joint. At first, it seemed to work—the gap closed, and the rack felt stable. But when they tested it by rolling a product down the roller track, the joint loosened again after a few passes. The team realized the vibrations from the rolling products were causing the joint to slip.
Step 3: Root Cause
Upon closer inspection, they found that the roller track itself was slightly misaligned, putting extra stress on the joint. The misalignment was causing the products to hit the side of the track, creating vibrations that traveled up to the joint. Additionally, the joint's threads had a thin layer of dust and oil from the assembly line, acting as a lubricant.
Step 4: Fix
The team cleaned the joint's threads with degreaser and realigned the roller track using a level. They then retightened the joint and applied a small amount of removable thread locker. To prevent future misalignment, they added a diagonal brace from the flow rack to the adjacent workbench, distributing the weight and reducing vibration.
Result
The flow rack was stable, and products rolled smoothly without getting stuck. The team scheduled weekly inspections of the joint and similar joints on other flow racks, and downtime was reduced by 90% over the next month. By addressing the root cause (misalignment and debris) instead of just tightening the joint, they prevented the issue from recurring.
Conclusion: Tight Joints, Smooth Operations
Loose two way lean pipe joints might seem like a minor issue, but they're a warning sign of bigger problems: unstable structures, production delays, and potential safety risks. By taking the time to troubleshoot properly—starting with a visual inspection, checking for common causes like improper installation or wear, and following through with the right fix—you can keep your lean systems running smoothly.
Remember, the key to success is proactivity. Regular inspections, proper training, and a stock of quality lean pipe and accessories will go a long way in preventing loose joints. And when issues do arise, approach troubleshooting systematically: start simple, rule out obvious causes, and don't hesitate to replace damaged parts. After all, a tight joint isn't just a connection between two pipes—it's a connection between your team, your processes, and the efficiency that makes lean manufacturing work.
So the next time you spot a wobbly workbench or a sagging flow rack, take a deep breath, grab your hex key, and put these steps into action. Your lean system (and your production line) will thank you.