- Company Articles
- Products and Technology
- Product knowledge
- How to Verify Chrome Quality on Vertical Lean Pipe Joints Before Purchase

How to Verify Chrome Quality on Vertical Lean Pipe Joints Before Purchase
Related Product
Vertical Lean Pipe Joint
Vertical lean pipe joint is used for 28mm lean pipe fixed on ground and keep it stable.
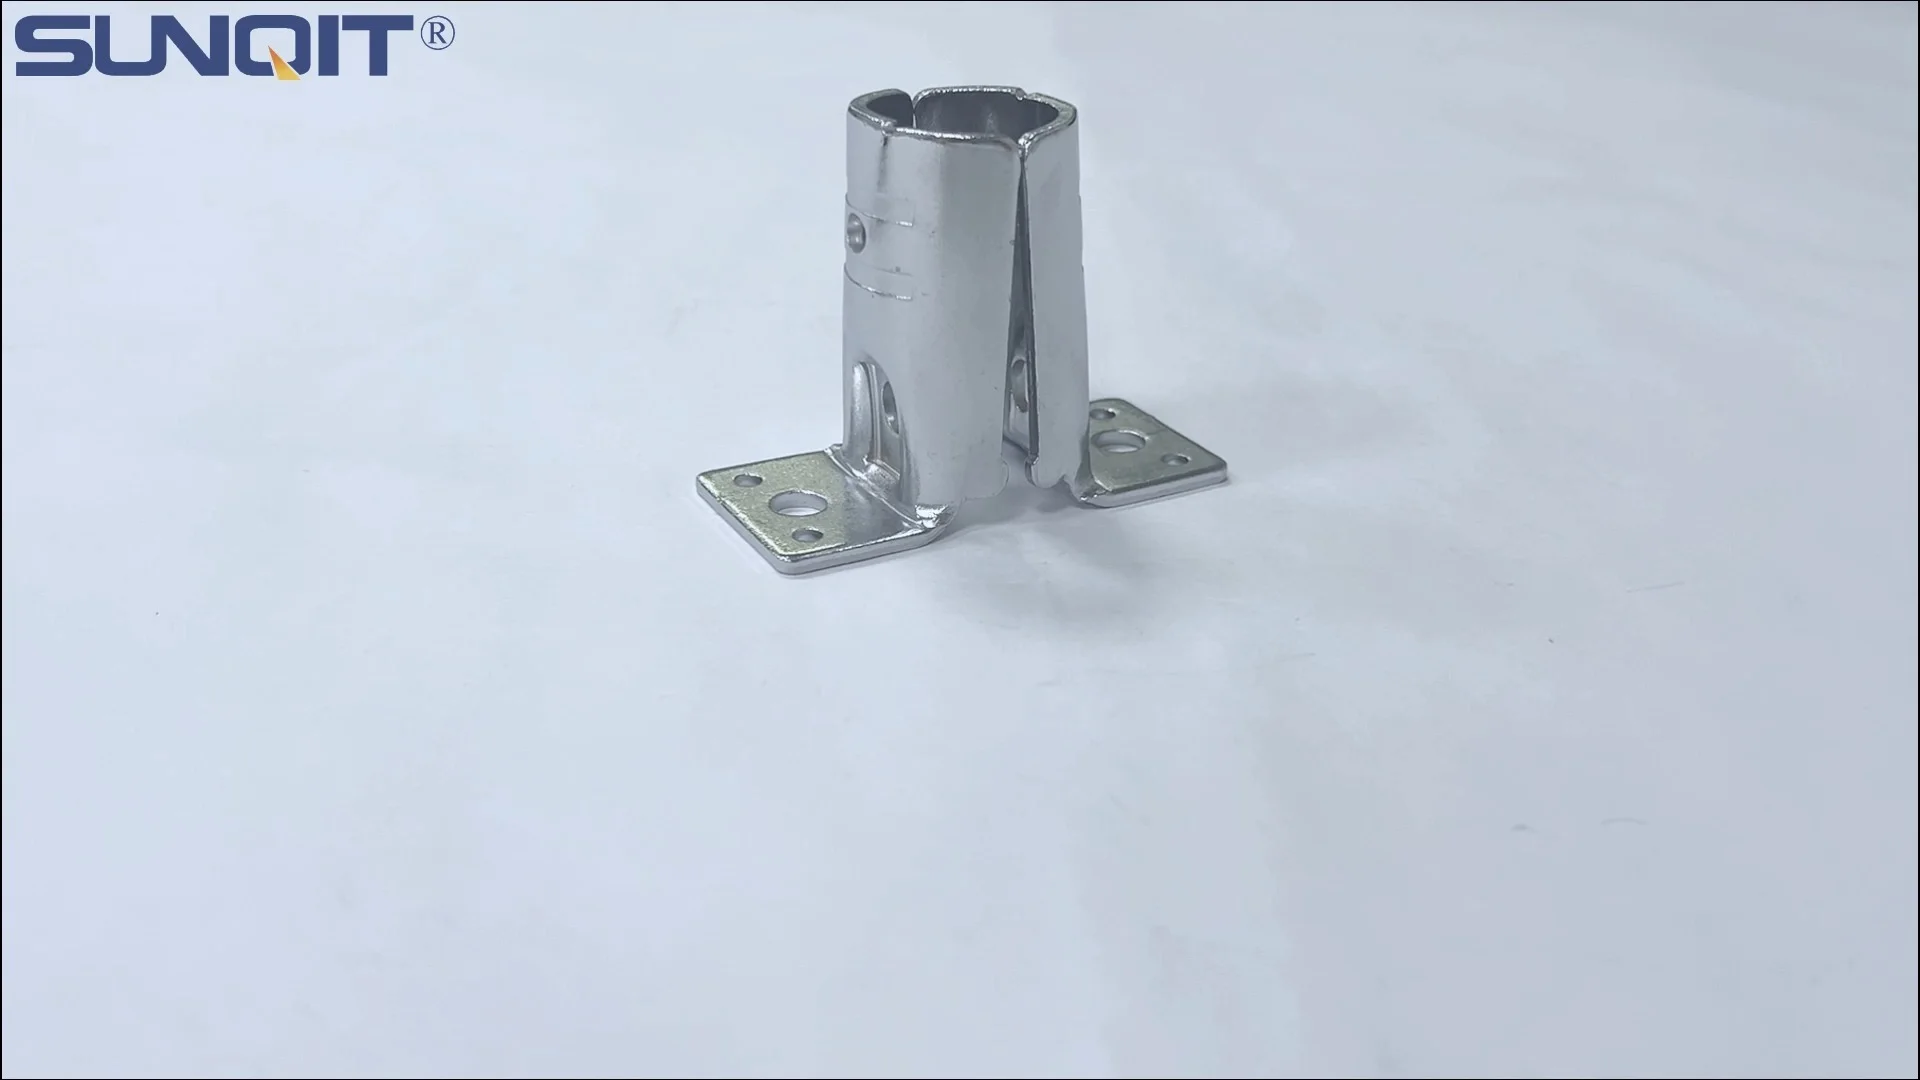
Walk into any busy production facility, and you'll likely spot them: the unsung heroes holding everything together—vertical lean pipe joints. These small but critical components are the backbone of lean systems, supporting workbenches, flow racks, and turnover trolleys that keep assembly lines moving. But not all joints are created equal. The chrome plating on these joints isn't just for shine; it's a protective barrier that determines how well they'll stand up to daily wear, moisture, and the constant stress of heavy loads. A joint with shoddy chrome might start rusting within months, loosen under pressure, or even snap—threatening production delays, safety risks, and costly replacements.
If you're in the market for vertical lean pipe joints, especially the chrome-plated variety, knowing how to spot quality chrome before you buy is non-negotiable. This guide will walk you through practical, hands-on steps to verify chrome quality, so you can partner with a lean pipe supplier you trust and avoid the headaches of subpar components. Let's dive in.
Why Chrome Quality Matters for Vertical Lean Pipe Joints
Before we get into the "how," let's talk about the "why." Chrome plating on vertical lean pipe joints serves three critical roles:
Durability: Factories are tough environments. Joints are bumped by trolleys, exposed to oils and coolants, and subjected to repeated assembly and disassembly. Chrome acts as a hard, wear-resistant layer that prevents the underlying metal (usually steel) from scratching or deforming.
Corrosion Resistance: Even in climate-controlled facilities, moisture and humidity can creep in. Without proper chrome plating, steel joints rust—a death sentence for structural integrity. Chrome repels water and resists oxidation, keeping joints strong and functional for years.
Load Bearing: A vertical lean pipe joint might look simple, but it's often supporting hundreds of pounds of materials or equipment. Chrome plating, when applied correctly, bonds tightly to the metal, ensuring the joint maintains its strength under pressure. Poor adhesion between chrome and the base metal can create weak spots that fail under stress.
In short, skimping on chrome quality isn't just a cosmetic issue—it's a gamble with your facility's efficiency and safety. Now, let's break down how to check that quality before you place an order.
Step 1: Start with a Thorough Visual Inspection
You don't need fancy tools for the first test—just your eyes. A quick visual check can reveal more about chrome quality than you might think. Here's what to look for:
Surface Smoothness and Uniformity
Run your fingers gently over the chrome surface. High-quality chrome should feel smooth and consistent , with no rough patches, bumps, or "orange peel" texture (a bumpy, uneven finish caused by poor plating techniques). Even minor irregularities can trap moisture or dirt, corrosion over time.
Hold the joint under good lighting—natural light or a bright LED flashlight works best. Tilt it at different angles to catch reflections. The chrome should shine evenly, with no dull spots or areas where the plating looks thin. If you notice streaks, blotches, or areas where the base metal is visible (even faintly), that's a red flag.
Pits, Cracks, and Bubbles
Pits are tiny holes in the chrome, often caused by contaminants (like dirt or oil) on the metal before plating. Cracks or bubbles (small raised bumps that look like air pockets) mean the chrome didn't bond properly to the base metal. Both issues are deal-breakers: pits let moisture seep in, while cracks and bubbles will only grow larger as the joint is used, leading to flaking chrome.
Pro tip: Use a magnifying glass to inspect hard-to-see areas, like the crevices where the joint connects to the pipe. These tight spots are where plating defects often hide.
Tip: Compare samples from different suppliers side by side. It's easier to spot differences in smoothness and uniformity when you have a known good (or bad) example for reference.

Step 2: Test Chrome Adhesion—Will It Stick When It Counts?
A pretty chrome finish means nothing if it peels off after a few months. Adhesion—the bond between the chrome layer and the base metal—is critical. Here are two simple ways to test it:
The Tape Test
This is a classic method used in manufacturing to check coating adhesion. Here's how to do it:
1. Clean the chrome surface with a dry cloth to remove dust or oil.
2. Take a strip of high-tack masking tape (like painter's tape, but stickier—3M 600 or equivalent works well) and press it firmly onto the chrome, making sure there are no air bubbles.
3. Hold the joint steady and peel the tape off quickly at a 90-degree angle. Inspect the tape: if any chrome flakes or particles stick to it, the adhesion is poor.
The Scratch Test (Gently Done)
You don't need to damage the joint to test its strength. Use a fingernail or a coin (a penny works) to lightly scratch the chrome surface. Apply the same pressure you might use to scratch a piece of plastic. High-quality chrome will resist the scratch, leaving little to no mark. If the chrome scratches easily, or if you can peel up a corner of the plating with your nail, it's weak and will fail under use.
Warning: Don't use sharp tools like screwdrivers for this—you're testing the chrome, not the base metal. A sharp tool can cut through even good chrome, giving a false negative.

Step 3: Check Corrosion Resistance—Simulate Real-World Conditions
Chrome's main job is to fight rust, so testing its corrosion resistance is a must. While professional labs use salt spray chambers for this, you can do a simple at-home version with supplies you likely already have:
DIY Salt Water Test:
1. Mix 1 tablespoon of salt into 1 cup of warm water to create a saline solution (this mimics the moisture and chemicals joints might face in a factory).
2. Dip a clean cloth into the solution and wipe it onto the chrome surface of the joint. Let it air dry completely.
3. Leave the joint in a warm, humid place (like a bathroom) for 48 hours. After two days, inspect for rust spots, discoloration, or pitting.
Quality chrome should look unchanged—no rust, no dulling. If you see even tiny rust specks, the plating is too thin or porous to hold up in real-world conditions.
For extra rigor, repeat the test with a second joint sample, but this time, scratch the chrome lightly with a nail before applying the salt water. This simulates a small nick in the plating (a common scenario in busy facilities). Good chrome will still resist rust around the scratch, thanks to a process called "cathodic protection," where the chrome sacrifices itself to protect the steel. Poor chrome will let rust spread from the scratch like a stain.

Step 4: Measure Chrome Thickness—Thicker Isn't Always Better (But Too Thin Is Worse)
Chrome plating thickness is measured in microns (1 micron = 0.001 mm). For vertical lean pipe joints, a good target is 8-15 microns. Thinner than 8 microns, and the chrome won't offer enough protection; thicker than 15 microns, and it might become brittle, cracking under stress.
To measure thickness, you'll need a magnetic thickness gauge —a small, handheld tool available online for $50-$100 (worth the investment if you buy joints regularly). Here's how to use it:
1. Calibrate the gauge according to the manufacturer's instructions (most come with a calibration block).
2. Place the gauge's probe flat against the chrome surface, making sure it's perpendicular to the joint. Avoid curved or angled areas, as they can skew results.
3. Take readings at 3-5 different spots on the joint (top, bottom, sides) and average them. If the average is below 8 microns, ask the supplier why. They should be able to provide a plating certificate showing thickness specs—if they can't, walk away.
Tip: Some suppliers cut corners by "flash plating"—applying a super-thin chrome layer just for appearance. A thickness gauge is the only way to catch this.
Step 5: Vet the Supplier—Quality Chrome Starts with Quality Processes
Even the best inspection methods can't make up for a supplier with shoddy plating processes. Before you commit, dig into your lean pipe supplier's background. Here's what to ask:
Do They Have Plating Certifications?
Reputable suppliers will have certifications like ISO 9001 (quality management) or compliance with ASTM B480 (the standard for decorative chrome plating). These certifications show they follow strict processes for cleaning, plating, and testing.
Can They Share Plating Process Details?
A trustworthy supplier won't hesitate to explain their plating steps. Look for key steps like: electrolytic cleaning (removing oil and dirt before plating), acid etching (roughening the steel surface to help chrome bond), and post-plate sealing (a final treatment to close pores in the chrome). If they say, "We just dip it in chrome," that's a red flag.
What Do Their Customers Say?
Ask for references or check online reviews. Talk to other manufacturers who've bought vertical lean pipe joints from them. Did the chrome hold up? Were there issues with rust or flaking? A supplier with happy customers is far less likely to cut corners on plating.
Common Chrome Defects and How to Spot Them (A Quick Reference Table)
| Defect | What It Looks Like | Cause | Is It Acceptable? |
|---|---|---|---|
| Pitting | Tiny, pinhole-sized holes in the chrome surface | Contaminants (dirt, oil) on the metal before plating | No—lets moisture in, leading to rust |
| Bubbles | Raised, air-filled bumps under the chrome | Poor adhesion due to improper cleaning or plating current | No—will flake off under stress |
| Orange Peel | Bumpy, uneven texture resembling orange skin | Plating bath temperature too high or current too strong | Minor cases (very slight texture) are okay; severe cases are not |
| Streaks/Dull Spots | Uneven color or shine, often vertical or horizontal lines | Uneven current distribution in the plating bath | No—indicates inconsistent thickness and protection |
| Scratches (Pre-Purchase) | Visible lines or marks in the chrome | Rough handling during packaging/shipping | Minor surface scratches are okay; deep scratches exposing steel are not |
Final Thoughts: Invest Time Now to Save Headaches Later
Verifying chrome quality on vertical lean pipe joints might take a little extra time upfront, but it's nothing compared to the cost of replacing rusted, broken joints six months down the line. By combining visual checks, adhesion tests, corrosion simulations, thickness measurements, and supplier vetting, you'll be equipped to spot quality chrome—and avoid the duds.
Remember, a reliable lean pipe supplier will welcome your questions and even provide samples for testing. If a supplier hesitates to let you inspect their joints or can't explain their plating process, that's your cue to move on. Your production line deserves components you can trust, and with these steps, you'll find them.
So, the next time you're evaluating vertical lean pipe joint chrome, roll up your sleeves, grab that magnifying glass, and test away. Your team, your budget, and your peace of mind will thank you.