- Company Articles
- Products and Technology
- Installation And Maintenance
- How to replace Worn Aluminum Profile Rubber Strips on Flexible Production Lines

How to replace Worn Aluminum Profile Rubber Strips on Flexible Production Lines
Related Product
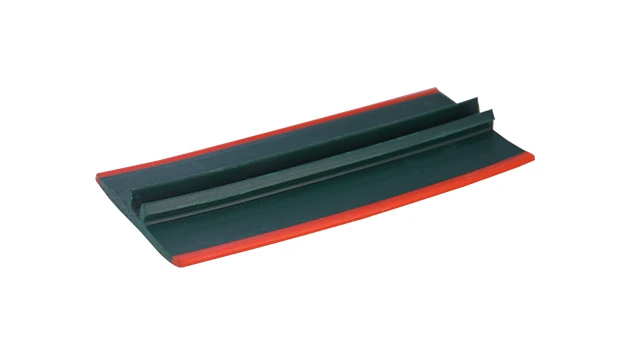
Aluminum Profile Rubber Strip
The tread strip fits into a T-slot channel and provides an anti-slip ribbed surface. It has a key pad that presses into a T-slot and is commonly used for adding traction on steps or as padding for doors. Tread strip can be ordered by rolls. The high quali
Walk into any modern manufacturing facility, and you'll likely see the backbone of their operations: flexible production lines. These dynamic setups rely on sturdy, adaptable components to keep things moving—aluminum profiles being one of the most critical. Lightweight yet durable, aluminum profiles form the frames of workbenches, material racks, and conveyor systems, making them indispensable for lean system efficiency. But there's a small, often overlooked part that keeps these profiles performing at their best: the rubber strips that line their edges. Over time, these strips wear down, and ignoring them can lead to everything from scratched parts to production delays. Today, we're diving into how to spot worn rubber strips, why they matter, and a step-by-step guide to replacing them—because even the smallest components deserve attention in a well-run operation.
Why Aluminum Profile Rubber Strips Deserve Your Attention
Before we jump into the "how," let's talk about the "why." Aluminum profile rubber strips might seem like an afterthought, but they play four key roles in keeping your production line running smoothly:
Protection First: Aluminum profiles are tough, but the parts sliding across them—whether on a workbench or a conveyor—often aren't. Rubber strips act as a buffer, preventing scratches, dents, or chips on delicate components. I once visited a electronics plant where a worn strip on their assembly line caused small circuit boards to scrape against the aluminum edge, leading to micro-cracks in the wiring. It took weeks to trace the issue back to that tiny, frayed strip.
Safety Isn't Optional: Production floors are busy places, and even a small slip can lead to big problems. Rubber strips add friction, reducing the chance of tools, parts, or even hands sliding off surfaces. In high-traffic areas like packing stations or material loading zones, this anti-slip feature isn't just convenient—it's a safety net.
Noise Reduction: Manufacturing is rarely quiet, but unnecessary clatter only adds stress. When metal or plastic parts hit bare aluminum, they create a sharp, repetitive noise. Rubber strips muffle these impacts, turning a (cì'ěr—shrill) "clink-clink" into a softer thud. Over a full shift, that difference in sound levels can make a huge impact on team morale.
Aesthetics and Longevity: Let's face it—scuffed, dirty profile edges make even the most advanced production line look unkempt. Rubber strips cover minor dings and keep debris from lodging in profile grooves, extending the life of your aluminum components. They're like the trim on a car: small, but they keep everything looking polished.
Signs Your Rubber Strips Need Replacing
Rubber strips don't fail overnight—they degrade slowly, giving you plenty of warning if you know what to look for. Here are the red flags to watch for during your next line inspection:
Cracks and Brittleness: Run your finger along the strip. If it feels hard, rigid, or has visible cracks (even tiny ones), it's time to replace it. Rubber dries out over time, especially in environments with high heat or UV exposure, losing its flexibility and ability to absorb impacts.
Discoloration or Fading: Fresh rubber strips have a consistent, vibrant color (often black, gray, or yellow, depending on the type). If yours are turning white, brown, or patchy, it's a sign of chemical breakdown—exposure to oils, solvents, or even harsh cleaning agents can cause this.
Peeling or Loosening: A properly installed rubber strip should sit flush in the aluminum profile's groove, with no gaps. If you notice edges lifting, or sections that pull away with a gentle tug, the adhesive (or the strip itself) has weakened. This isn't just unsightly—loose strips can catch on parts, causing jams.
Reduced Grip: Test the anti-slip properties by placing a smooth object (like a plastic part) on the strip and gently tilting the surface. If it slides easily, the strip's texture has worn down. This is a big safety risk, especially on workbenches where tools or finished products might rest.
Missing Sections: In busy areas, strips can get torn or completely pulled off by heavy objects. Even a small missing chunk leaves the aluminum edge exposed, defeating the purpose of the strip entirely.
Pro Tip: Make rubber strip inspection part of your weekly "5S" routine. Grab a flashlight and check high-wear areas—like the edges of workbenches, the sides of conveyor tracks, or the front of material racks—first. These spots take the most abuse and will show wear earliest.

Gathering Your Tools and Materials
Replacing rubber strips isn't a complex job, but having the right tools on hand will make it quick and frustration-free. Here's what you'll need:
Basic Hand Tools: A flat-head screwdriver (for prying up old strips), needle-nose pliers (to grip and pull stubborn sections), and a utility knife (with fresh blades) for cutting through stuck adhesive or trimming new strips.
Cleaning Supplies: Rubbing alcohol or a mild degreaser, lint-free cloths, and a small brush (like an old toothbrush) to scrub out debris from the profile groove. Grease, dust, or old adhesive residue will prevent the new strip from sticking, so thorough cleaning is key.
Measuring and Cutting Tools: A measuring tape or ruler (to get the exact length of the strip you need) and a pair of sharp scissors or a rubber cutter. For longer strips, a straightedge (like a metal ruler) will help you make clean, straight cuts.
New Rubber Strips: This is the star of the show—you'll need replacement aluminum profile rubber strips. When ordering, note the profile's groove size (common widths are 5mm, 8mm, or 10mm) and the material. For most general use, EPDM rubber works well (it's resistant to heat and chemicals). If your line handles sensitive electronics, look for ESD (electrostatic discharge) rubber strips to prevent static damage.
Optional Extras: If the original strip was glued in (not just pressed into a groove), you might need a small tube of rubber-compatible adhesive. Avoid super glue or harsh solvents—they can damage both the new strip and the aluminum profile.

Step-by-Step: Replacing Your Rubber Strips
Now that you've identified the problem and gathered your tools, let's walk through the replacement process. Take your time—rushing can lead to mistakes, like cutting the strip too short or leaving adhesive residue behind.
Step 1: Prep the Work Area
Safety first! If the aluminum profile is part of a machine (like a conveyor or automated workbench), power down the equipment and lock it out with a tag. You don't want it accidentally turning on while you're working. Next, clear the area around the profile—remove any parts, tools, or debris that might get in your way. Lay down a clean cloth or cardboard if you're working on a surface that could get scratched (like a finished workbench top).
Step 2: Remove the Old Strip
Start by gently prying up one end of the strip with your flat-head screwdriver. Be careful not to scratch the aluminum profile—wrap the screwdriver tip in tape if you're worried about marks. Once you have a small section lifted, use your fingers (or pliers, if it's stuck) to pull the strip away from the groove. If it's glued down, you might need to use the utility knife to score along the edge of the strip, breaking the adhesive bond.
Pro tip: If the strip is brittle, it might crumble as you pull. Go slow, and pick up any small pieces—you don't want them falling into machinery later. For really stubborn strips, heating the rubber with a hair dryer (on low heat!) can soften it, making removal easier. Just don't overheat—you don't want to damage the aluminum.
Step 3: Clean the Groove Thoroughly
With the old strip removed, the aluminum groove will likely be full of dust, dirt, or leftover adhesive. Grab your brush and scrub out loose debris, then wipe the groove with a cloth dampened with rubbing alcohol. For sticky adhesive residue, let the alcohol sit for 30 seconds, then scrape gently with the utility knife (held at a 45-degree angle to avoid scratching). Repeat until the groove is smooth and clean—this ensures the new strip will adhere properly.
Step 4: Measure and Cut the New Strip
Lay the new aluminum profile rubber strip flat on a clean surface. Measure the length of the groove you're covering, then add 1-2mm to that measurement—this extra length ensures a snug fit (rubber can shrink slightly over time). Use your straightedge to mark the cut line, then snip the strip with scissors or a rubber cutter. For corners or angles (like on a workbench frame), cut the ends at 45-degree angles so they meet cleanly, with no gaps.
If you're replacing strips on a long section (like a conveyor track), cut multiple strips to fit instead of one super-long piece. This makes installation easier and allows for expansion/contraction with temperature changes.
Step 5: Install the New Strip
Start by aligning one end of the new strip with the end of the groove. Press it firmly into place with your thumb—you should feel it "click" into the groove. Then, work your way along the length, pressing down with your fingers to ensure the strip seats evenly. For glued strips, apply a thin, even layer of adhesive to the groove first (follow the manufacturer's instructions for drying time), then press the strip into place.
Pay extra attention to corners or curves—stretch the strip slightly (but don't overdo it!) to avoid bunching. If you notice a bubble or gap, peel back the strip a few inches, re-align, and press again. The goal is a smooth, continuous seal with no air pockets.
Step 6: Test and Adjust
Once the strip is installed, give it a final check. Run your hand along the length—no edges should lift, and the strip should feel firmly attached. Place a few parts or tools on the strip to test grip—they should stay in place when the surface is tilted slightly. If you're working on a conveyor, run a test batch of products through to ensure the strip doesn't catch or slow things down.
If something feels off—like the strip is too loose or too tight—don't hesitate to remove it and try again. It's better to spend an extra 10 minutes now than to have to redo the job next month.
Troubleshooting Common Issues
Even with careful work, you might run into hiccups. Here's how to solve the most common problems:
| Issue | Cause | Solution |
|---|---|---|
| New strip won't stay in the groove | Groove is dirty, or strip is the wrong size | Re-clean the groove with alcohol; measure the groove width and order a strip with a matching diameter |
| Strip cracks when installing | Strip is too cold (rubber becomes brittle) or old stock | Warm the strip with a hair dryer (low heat) before installing; check expiration dates on rubber products |
| Gaps at corners | Poorly cut angles or misalignment | Trim ends at precise 45-degree angles; use a miter box for clean cuts |
| Adhesive won't bond | Groove not clean, or adhesive incompatible with rubber | Re-clean with a stronger degreaser; use adhesive labeled for "rubber to metal" applications |
Maintaining Your Rubber Strips for Longevity
Replacing rubber strips is a hassle—so let's make them last as long as possible. With a little maintenance, you can extend their lifespan by 2-3 years:
Clean Regularly: Wipe strips down weekly with a damp cloth to remove dust and oils. Avoid harsh cleaners like bleach or acetone—they break down rubber. Mild soap and water work best.
Inspect Quarterly: Add rubber strips to your preventive maintenance checklist. Look for early signs of wear (cracks, fading) and address them before they get worse.
Protect from Extremes: If your production line is near heaters, air conditioners, or windows, consider adding heat shields or UV covers to protect strips from temperature swings and sunlight.
Choose the Right Material: Not all rubber strips are created equal. For high-heat areas (like near ovens), use silicone rubber. For chemical exposure, EPDM is better. Talk to your aluminum profile accessories supplier about which material fits your environment.
Final Thoughts: Small Strips, Big Impact
Replacing worn aluminum profile rubber strips might not be the most glamorous task on your to-do list, but it's a perfect example of how "lean system" thinking applies to even the smallest details. By taking care of these tiny components, you're protecting your equipment, improving safety, and keeping your production line running smoothly—all while avoiding costly downtime. The next time you walk past your workbenches or conveyors, take a second look at those rubber strips. They might be quiet, but they're working hard to keep your operation at its best.
And remember: when it's time to order new strips, don't skimp on quality. A cheap, low-grade strip will wear out quickly, costing you more in the long run. Invest in high-quality aluminum profile rubber strips from a reputable supplier—your production line (and your team) will thank you.