- Company Articles
- Products and Technology
- Installation And Maintenance
- How to replace Worn Internal Straight Aluminum Joints: Maintenance Insights

How to replace Worn Internal Straight Aluminum Joints: Maintenance Insights
Related Product
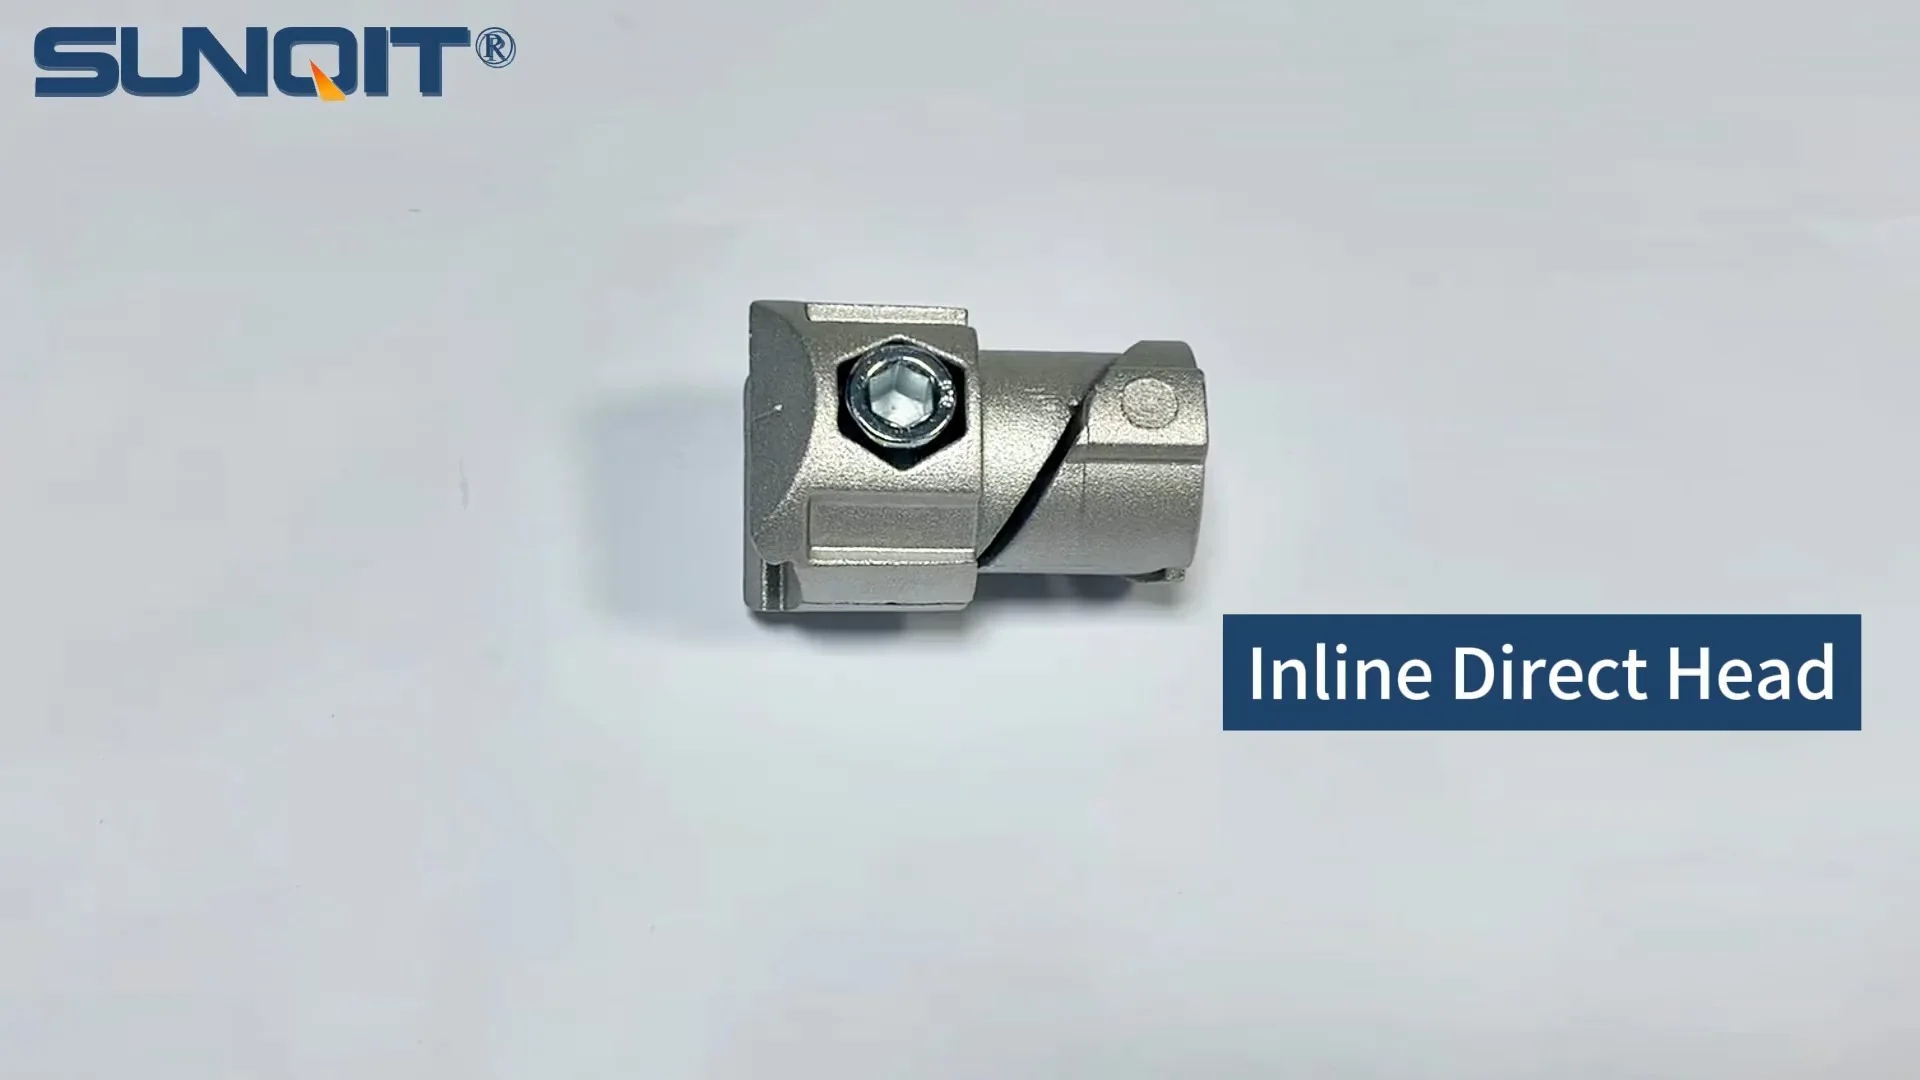
Internal straight aluminum joint
Aluminum pipe joint inside connection used for two pcs 28pcs aluminum pipe connection in straight angle,it connects two pcs pipe from inside.
The Morning the Line Almost Stopped: A Wake-Up Call
It's 7:15 AM on the production floor, and Raj, the maintenance lead, is doing his pre-shift walkthrough. The air smells of machine oil and fresh coffee, and the hum of idle conveyors fills the space. He pauses at Workbench E—single deck, no casters—a workhorse that's been holding up the electronics assembly line for over two years. Something feels off. As he leans against the edge to check the bin of capacitors, the bench shifts with a creak that makes his jaw tighten.
"Not again," he mutters, crouching down. There, where the left aluminum profile meets the crossbeam, the internal straight aluminum joint is visibly cracked. A hairline fracture snakes across its surface, and when he wiggles the leg, the joint moves—just enough to explain the wobble. Last week, a similar joint failure on Material Rack B (3 row, 3 floor) caused a carton of circuit boards to topple, costing the team 45 minutes of cleanup and rework. Raj knows if he doesn't fix this now, by mid-morning, Workbench E could be the next disaster.
*"We run a lean system here—downtime is the enemy," Raj thinks. "A single worn joint shouldn't derail our flow. But when you ignore the small stuff, the small stuff becomes big."*
Internal straight aluminum joints might not be the flashiest parts of your production setup, but they're the unsung heroes holding everything together. From workbenches to material racks, these unassuming components connect aluminum profiles, distribute weight, and keep your lean system running like a well-oiled machine. But like any hero, they wear out—slowly, silently, until one day, they can't hold on anymore.
In this guide, we're diving deep into replacing worn internal straight aluminum joints. We'll cover why these joints matter, the tools you'll need, a step-by-step replacement process, and how to prevent future failures. Whether you're a maintenance pro like Raj or a small business owner trying to keep your workshop functional, this isn't just about fixing a part—it's about protecting your team's efficiency, safety, and sanity.
Why Internal Straight Aluminum Joints Are the Backbone of Your Lean System
Let's start with the basics: What *is* an internal straight aluminum joint, and why does it matter more than you might think? In short, it's the glue that turns aluminum profiles into functional structures. Imagine building a bookshelf with just planks—without screws or brackets, it's just a pile of wood. Similarly, aluminum profiles (those sleek, T-slotted rails you see in workbenches and racks) need joints to connect. The internal straight aluminum joint is designed for straight-line connections: think the vertical legs of a workbench meeting the horizontal frame, or the side rails of a material rack.
Unlike external joints, which clamp around the outside of profiles, internal joints fit *inside* the T-slot, creating a flush, streamlined connection. This design isn't just for looks—it reduces snags (critical in high-traffic areas), distributes weight evenly, and minimizes the risk of damage from passing carts or tools. For lean systems, where every inch of space and second of time counts, this matters. A protruding external joint might catch a worker's sleeve; a wobbly internal joint can throw off assembly precision, leading to defective products.
Pro Tip:
Internal straight aluminum joints are rated for specific load capacities. A standard 20×20mm joint, for example, can typically handle 150–200 lbs of static weight when paired with 20-series aluminum profiles. But wear and tear chip away at that strength. A joint with even a small crack might lose 50% of its load capacity overnight.
And let's talk about aluminum itself. Aluminum profiles are popular in lean systems because they're lightweight, corrosion-resistant, and infinitely customizable—you can cut them to length, add accessories, and reconfigure structures as needs change. But aluminum is also softer than steel, which means the joints holding it together take on extra stress. The internal straight aluminum joint acts as a buffer, absorbing vibrations from tools, impacts from dropped parts, and the constant weight of materials. Over time, that stress adds up. Threads strip, metal fatigues, and cracks form.
So, when Raj saw that cracked joint on Workbench E, he wasn't just looking at a broken part—he was looking at a potential breach in the lean system's armor. A breach that could turn a productive day into a cascade of delays.

Tools of the Trade: What You'll Need (and Why Skipping the Right Tools Costs You)
Raj keeps a dedicated "joint replacement kit" in his maintenance cart—a lesson learned after scrambling for tools during the Material Rack B incident. Let's break down what's in that kit and why each item matters. Think of this as your pre-flight checklist: skip a tool, and you'll either botch the job or waste time running back to the shop.
| Tool/Item | Why You Need It | Pro Tip |
|---|---|---|
| Replacement Internal Straight Aluminum Joint | Obvious, right? But not just any joint—match the size (e.g., 20mm, 30mm) to your aluminum profile. Using a 30mm joint on a 20mm profile is like putting a square peg in a round hole. | Buy extras. Raj keeps 5 spares in his kit—you don't want to pause mid-job to order a replacement. |
| Hex Key Set (Metric) | Internal joints are secured with hex screws (usually M5 or M6). A 4mm or 5mm hex key is standard, but check your joint—some use specialized sizes. | Invest in ball-end hex keys. They let you angle the key 30°+, crucial for tight spaces (like under a workbench). |
| Rubber Mallet | For gently tapping the joint into place or loosening stuck profiles. Aluminum dents easily—never use a steel hammer! | Wrap the mallet head in electrical tape for extra cushioning on delicate profiles. |
| Wire Brush or Compressed Air | To clean debris, dust, and rust from the T-slot before installing the new joint. Grit in the slot prevents proper seating. | A can of compressed air with a straw nozzle gets into tight T-slot corners—worth the $5 investment. |
| Level (2-foot or Digital) | To ensure the profile is straight after replacement. A crooked joint leads to uneven weight distribution. | Digital levels with a "beep" function are game-changers—no squinting at bubble lines. |
| Anti-Seize Compound | Prevents screws from seizing (rusting) in the joint. Aluminum + moisture = corrosion, and stuck screws are a nightmare to remove later. | A tiny dab on the screw threads is enough—too much attracts dirt. |
*Raj once watched a new tech try to replace a joint with a Phillips-head screwdriver (wrong tool) and a steel hammer (disaster waiting). The result? Stripped screw threads, a dented profile, and a 2-hour delay. "Tools matter," he likes to say. "Use the right ones, and the job takes 15 minutes. Use the wrong ones, and you're rebuilding the whole bench."*

Step-by-Step: Replacing the Internal Straight Aluminum Joint (Without Losing Your Mind)
Now, let's walk through the replacement process. We'll use Raj's Workbench E scenario as a guide, but the steps apply to any structure using internal straight aluminum joints—material racks, assembly stations, even custom shelving. Take your time, follow the steps, and remember: patience beats rushing (and breaking something).
Step 1: Safety First—Clear the Area and Secure the Structure
Before you touch a single screw, make sure the area is safe. If the joint is on a workbench, empty it completely—no tools, parts, or coffee mugs left behind. If it's a material rack, remove any loaded bins (even lightweight ones—you don't want them shifting during replacement). For workbenches or racks with casters, lock the wheels; for stationary setups like Workbench E, place a sturdy block under the loose section to support it while you work.
*"I once had a tech skip this step," Raj recalls. "He was replacing a joint on a turnover trolley, and when he loosened the screws, the whole side collapsed—onto his foot. He was fine, but the trolley? Totaled. Secure the structure. Always."*
Step 2: Assess the Damage (and Check for Hidden Issues)
Now, take a close look at the worn joint. Is it cracked, stripped, or just loose? A loose joint might just need tightening (but if it's loose *again* after tightening, the threads are probably stripped—replace it). A cracked joint is non-negotiable: even small cracks grow under stress. While you're at it, inspect the connected aluminum profile. Is the T-slot bent, dented, or corroded? If the profile is damaged, you'll need to replace that too—otherwise, the new joint won't seat properly. Raj's Workbench E joint has a crack, but the aluminum profile looks clean—no dents, no rust. Good. He marks the position of the old joint with a pencil on the profile—this will help align the new one later.Step 3: Remove the Worn Joint (The Tricky Part)
Grab your hex key and locate the retaining screws. Most internal straight aluminum joints have 2–3 screws that thread into the joint from the side of the profile. insert the hex key and turn counterclockwise to loosen. If the screws are stuck (common with rust or over-tightening), apply a drop of penetrating oil (like WD-40) and let it sit for 5–10 minutes. Avoid brute force—stripping the screw head means you'll need to drill it out (a last-resort nightmare). Once the screws are out, the joint should slide out of the T-slot. If it's stuck (thanks to years of friction), gently tap the end of the profile with your rubber mallet—this usually breaks the seal. Raj taps Workbench E's leg once, and the old joint slides out with a satisfying "pop." He inspects it: the crack runs from one screw hole to the other. "Yep, that's why it was moving," he nods.Step 4: Prep the T-Slot (Cleanliness = Longevity)
Now, clean the T-slot where the joint sat. Use your wire brush to scrub away dirt and rust, then blast out the dust with compressed air. Run your finger along the slot—if it feels gritty, repeat. Even a tiny pebble in the slot can prevent the new joint from seating flush, leading to wobble later. Raj notices a few bits of dried glue (leftover from a label) in the slot. He picks at it with a flathead screwdriver (gently!) and blasts again. "Clean slot, happy joint," he mutters.Step 5: Install the New Joint (Alignment Is Everything)
Take your new internal straight aluminum joint and apply a tiny dab of anti-seize compound to the screw threads (this prevents future rust). Slide it into the T-slot, aligning it with the pencil mark you made earlier. The joint should fit snugly—no gaps between the joint and the slot walls. If it's loose, check that you have the right size joint for your profile (e.g., 30mm joint for 30mm profile). Once aligned, insert the screws and tighten them by hand until they're snug. Then, using the hex key, tighten them 1/4 turn more—*but stop if you feel resistance*. Over-tightening strips aluminum threads faster than you can say "downtime."
Pro Tip:
Tighten screws in a "star" pattern (like changing a car tire). For a 2-screw joint, tighten one halfway, then the other, then finish both. This ensures even pressure and prevents the joint from skewing.
Step 6: Test, Test, and Test Again
Now, the moment of truth. Remove the support block, give the joint a firm shake—no movement, no creaks. Place your level on the profile: it should read perfectly horizontal (or vertical, for legs). Raj places a 40-pound sandbag on Workbench E and lets it sit for 10 minutes. When he checks, the joint is solid, the bench is level, and his pulse has finally slowed. *"Last test: the 'worker lean,'" Raj grins. He leans his full weight (about 180 lbs) against the bench. No wobble. No creak. Just the solid thud of a job done right.*Step 7: Document the Repair (Lean Systems Love Data)
Finally, write down the repair: date, joint type, location (Workbench E, left leg), and who did the work. This helps track joint lifespan (most last 18–24 months in high-use areas) and spot patterns (e.g., if joints on the third shift workbench fail faster, maybe the team is overloading it). In a lean system, data drives improvement—even for small repairs.Troubleshooting: When Things Go Wrong (And They Will)
Even with the best prep, replacement can hit snags. Here's how to handle the most common issues:
Fix: Re-clean the slot with compressed air. If the profile is bent, gently tap it straight with your rubber mallet (aluminum bends easily—go slow!). If it's the wrong size, check the joint packaging—20mm vs. 30mm joints look similar but are not interchangeable.
Fix: If the screw strips, use a screw extractor tool (they're cheap and save headaches). If the T-slot threads are damaged, you can try a thread repair kit (helicoil) or replace the profile. Pro tip: Always start screws by hand—if they cross-thread, you'll feel it immediately.
Fix: Use your level to check alignment—maybe the joint is straight, but the opposite leg is shorter. Shims under the leg can help. If the floor is uneven, adjust the leveling feet (if your structure has them). And always check adjacent joints—one bad joint often leads to others overcompensating.
Problem: The New Joint Won't Slide Into the T-Slot
Cause: Debris in the slot, a bent profile, or the wrong joint size.Fix: Re-clean the slot with compressed air. If the profile is bent, gently tap it straight with your rubber mallet (aluminum bends easily—go slow!). If it's the wrong size, check the joint packaging—20mm vs. 30mm joints look similar but are not interchangeable.
Problem: Screws Strip When Tightening
Cause: Over-tightening, using the wrong size hex key, or damaged T-slot threads.Fix: If the screw strips, use a screw extractor tool (they're cheap and save headaches). If the T-slot threads are damaged, you can try a thread repair kit (helicoil) or replace the profile. Pro tip: Always start screws by hand—if they cross-thread, you'll feel it immediately.
Problem: The Joint Is Tight, But the Structure Still Wobbles
Cause: Misaligned joint, uneven floor, or a second worn joint nearby.Fix: Use your level to check alignment—maybe the joint is straight, but the opposite leg is shorter. Shims under the leg can help. If the floor is uneven, adjust the leveling feet (if your structure has them). And always check adjacent joints—one bad joint often leads to others overcompensating.
*Maya, a new maintenance tech, once replaced a joint on a material rack only to find it still wobbled. Frustrated, she called Raj, who pointed out the rack's other leg joint was also cracked—she'd missed it in her initial check. "We call that 'joint dominoes,'" Raj. "Fix one, and the stress shifts to the next weak link. Always check the whole structure."*
Preventing Joint Failure: The Lean Way to Extend Lifespan
Replacing a joint is reactive. Preventing failure is proactive—and that's where lean principles shine. Here's how to keep your internal straight aluminum joints (and aluminum pipe accessories) in top shape:
Schedule Regular Inspections (Don't Wait for a Wobble)
Add joint checks to your preventive maintenance calendar. For high-use areas (like assembly workbenches), check monthly; for low-use racks, quarterly. Look for cracks, looseness, or rust. Train your team to report wobbles immediately—they're the first to notice when a bench feels "off."Clean Joints and Profiles (Dirt Is the Enemy)
Dust, oil, and debris build up in T-slots, causing friction that wears down joints. A quick wipe with a rag and a blast of compressed air during weekly cleaning goes a long way. For humid environments, consider a light coating of silicone spray on the T-slot (avoid oil-based sprays—they attract dirt).Don't Overload Structures (Respect the Load Rating)
That "just one more bin" might seem harmless, but exceeding a joint's load capacity is a death sentence. Post load limits on workbenches and racks (e.g., "Max 200 lbs") and train teams to stick to them. Remember: lean systems thrive on discipline—cutting corners here costs more later.Use Quality Parts (Cheap Joints = Expensive Downtime)
It's tempting to buy generic internal straight aluminum joints online for $2 instead of $5 from a reputable supplier. But generic joints often use lower-grade aluminum and imprecise machining—they fit poorly, wear faster, and fail unexpectedly. Raj learned this the hard way when a batch of cheap joints failed within 3 months. Now, he buys from the same supplier who provides their aluminum profiles—compatibility guaranteed.Train Your Team (Empowerment = Fewer Failures)
Teach operators basic joint care: how to spot a loose joint, when to report damage, and how to avoid overloading. A line worker who knows to tighten a loose screw (with a hex key kept at the bench) can prevent a failure before it starts. In lean terms, this is "respect for people"—giving your team the tools and knowledge to own their workspace.From Wobble to Wow: The Ripple Effect of a Simple Repair
By 8:00 AM, Raj has Workbench E back in action. The line starts on time, and by lunch, the electronics team has already hit their morning quota. No delays, no drama—just the quiet satisfaction of a problem solved before it became a crisis.
That's the thing about internal straight aluminum joints: they're small, but their impact is huge. A well-maintained joint keeps your lean system flowing, your team safe, and your bottom line healthy. It's not glamorous work, but it's the kind of work that builds a culture of reliability—one joint at a time.
So, the next time you walk past a workbench or material rack, take a second to look down. That unassuming joint holding it all together? It deserves your attention. Because in lean manufacturing, the difference between a good day and a bad day often comes down to the parts no one notices—until they fail.
*Raj smiles as he passes Workbench E later that afternoon. Maria, the line supervisor, gives him a thumbs-up. "No wobble today," she says. "Thanks." He nods. "Just keeping the joints tight," he replies. And in that moment, that's more than enough.*