- Company Articles
- Products and Technology
- Installation And Maintenance
- Installation Guide: Flat Adjustable Swivel Castor Wheels on Lean Tube Workstations

Installation Guide: Flat Adjustable Swivel Castor Wheels on Lean Tube Workstations
Related Product
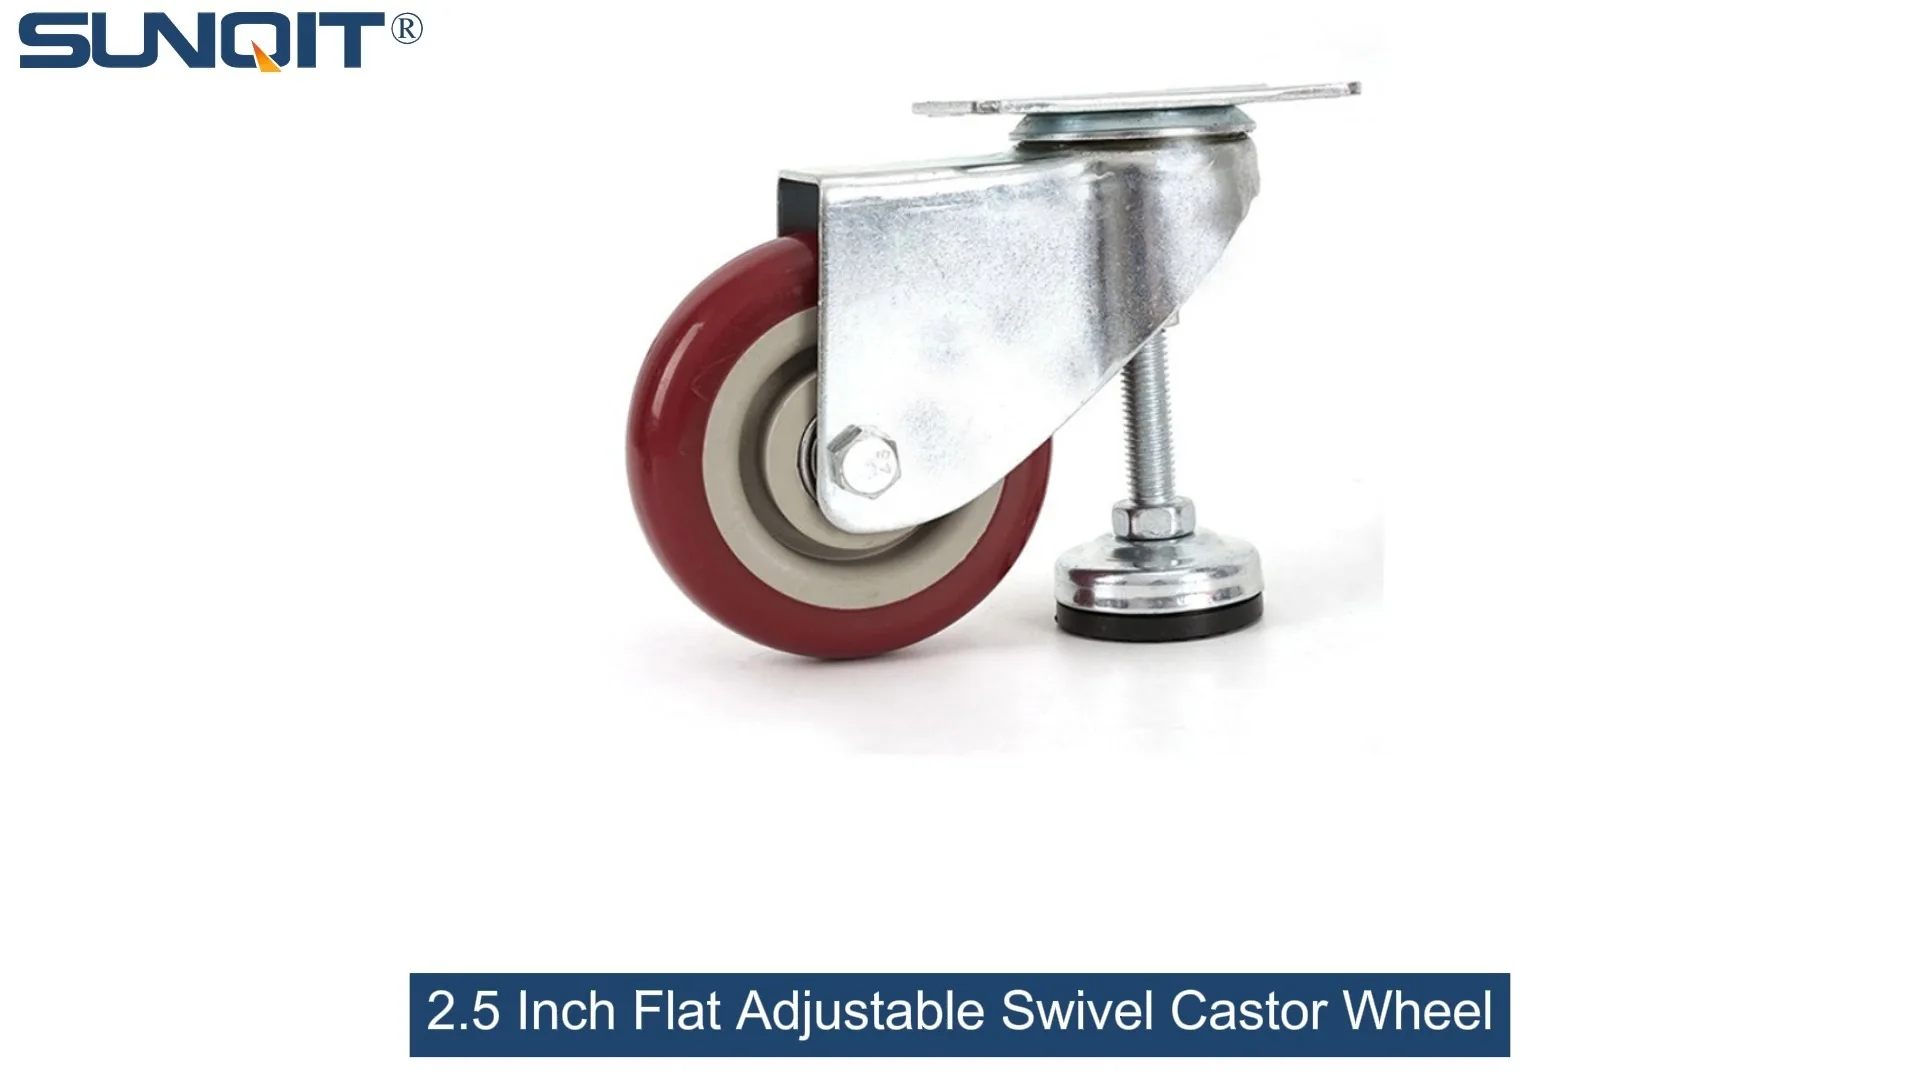
Flat Adjustable Swivel Castor Wheel
Swivel Chair Casters Ball Bearing Wheels Rubber Base with adjustable height function. Resistant to abrasion, impact and corrosion. Heavy payload can hold 80Kgs per pcs,which can make it works at a stable and smooth status.
If you've ever found yourself struggling to reposition a heavy workbench across a busy shop floor, or wished your workstation could glide smoothly to where you need it most, you're not alone. In manufacturing, assembly, or even garage workshops, mobility and adaptability aren't just nice-to-haves—they're essential for keeping workflows lean, efficient, and ergonomic. That's where flat adjustable swivel castor wheels come in. Designed to attach seamlessly to lean tube workbenches, these castors transform static work surfaces into dynamic tools that move with your needs. But installing them properly? That's the key to unlocking their full potential. In this guide, we'll walk through every step of installing flat adjustable swivel castor wheels on a lean tube workbench, from unboxing the parts to testing the finished setup. Whether you're a seasoned facility manager or a DIY enthusiast setting up your first workshop, this step-by-step breakdown will ensure your workbench rolls smoothly, stays stable, and stands the test of time.
Why Flat Adjustable Swivel Castors Matter for Lean Tube Workbenches
Before we dive into the installation, let's take a moment to appreciate why these castors are such a game-changer for lean tube workbenches. Lean manufacturing principles emphasize minimizing waste—whether that's time, effort, or space. A stationary workbench can create unnecessary waste: if you need to access materials from across the room, or reconfigure your workspace for a new project, moving a heavy bench by hand wastes time and risks injury. Flat adjustable swivel castors solve this by adding mobility without sacrificing stability. The "flat adjustable" feature means you can tweak the height of each castor to level the workbench on uneven floors, while the "swivel" design lets you maneuver tight corners with ease. And because they're built to attach to lean tube workbenches—those versatile, modular workstations made from lightweight pipes and joints—they integrate seamlessly with the existing structure, no major overhauls required.
But it's not just about movement. These castors also enhance ergonomics. By adjusting the height, you can customize the workbench to fit different operators, reducing strain on backs and shoulders. They often come with locking mechanisms, so once you've positioned the bench, you can lock the wheels in place to prevent unwanted movement during tasks. For anyone running a lean operation, where every second and every square foot counts, this combination of mobility, adjustability, and stability is invaluable.
Pro Tip: Not all castors are created equal. When shopping for your lean tube workbench, look for "flat adjustable swivel castor wheels" specifically designed for industrial use—they'll have higher weight capacities, durable wheels (often rubber or polyurethane to protect floors), and corrosion-resistant finishes to stand up to shop environments.
Tools and Materials You'll Need
Before you start tightening bolts, gather these tools and materials. Having everything on hand will save you trips to the toolbox mid-installation and ensure the process goes smoothly. Here's what you'll need:
| Tool/Material | Purpose | Pro Tips |
|---|---|---|
| Flat adjustable swivel castor wheels (set of 4) | The main component—ensure they're compatible with your lean tube workbench's frame. | Check the weight capacity! A typical workbench with tools can weigh 200-300 lbs; choose castors rated for at least 100 lbs each (400 lbs total). |
| Mounting plates (included with castors) | Attach the castors to the workbench's legs or frame. | Some lean tube workbenches have pre-drilled holes; if not, you may need to drill your own (see Step 3). |
| Socket wrench or adjustable spanner | Tightening bolts that secure the castors to the mounting plates. | Use a socket that fits the bolt heads exactly to avoid stripping them. |
| Phillips-head or flat-head screwdriver | For smaller screws, like those securing the brake mechanism (if included). | Magnetic-tip screwdrivers help keep tiny screws from rolling away. |
| Level tool (bubble or digital) | Ensuring the workbench is level after installation. | Check both side-to-side and front-to-back for evenness. |
| Tape measure | Measuring distances between mounting points to align castors evenly. | Measure twice, drill once! Uneven spacing can cause wobbling. |
| Drill and drill bits (if no pre-drilled holes) | Creating holes in the workbench frame for mounting plates. | Use a bit slightly smaller than the bolts to ensure a tight fit. |
| Lock washers and nuts (included with castors or sold separately) | Preventing bolts from loosening over time due to vibration. | Always use lock washers—they're cheap insurance against wobbly castors. |
| Rubber mallet (optional) | Gently tapping mounting plates into alignment if they're snug. | Avoid metal hammers—they can damage the castor's finish or the workbench frame. |

Step 1: Unbox and Inspect the Castors and Accessories
First things first: unbox your flat adjustable swivel castor wheels and lay out all the parts. This might seem obvious, but skipping this step can lead to frustration later when you realize a bolt or washer is missing. Most castor sets come with the castors themselves, mounting plates, bolts, lock washers, nuts, and sometimes additional caster accessories like brake levers or height-adjustment tools. Take a minute to cross-check the parts list (usually included in the packaging) to ensure nothing is missing or damaged.
Pay special attention to the wheels: are they free of cracks or chips? Spin them gently—they should rotate smoothly without sticking. Check the swivel mechanism too: the castor's top plate should swivel 360 degrees easily, with no grinding or resistance. If you notice any defects—a bent mounting plate, a seized wheel, or missing caster accessories—contact the supplier immediately. It's better to delay installation than to install faulty parts that could fail later.
Inspection Hack: If the castors have been in storage, wipe the wheels and swivel joints with a dry cloth to remove dust or rust. A quick spray of lubricant (like WD-40) on the swivel bearing can help if there's minor stiffness—just wipe off excess to avoid attracting dirt.

Step 2: Prepare the Lean Tube Workbench
Now, let's prep the workbench. Start by clearing off any tools, materials, or equipment from the surface—you don't want anything falling off during installation. If the workbench is already assembled, you may need to flip it upside down to access the bottom of the legs or frame. Important: Lean tube workbenches are sturdy, but flipping a heavy one alone can be risky. Enlist a helper if the bench weighs more than 50 lbs—safety first!
Once the bench is flipped (or positioned so you can easily reach the mounting points), inspect the frame where you'll attach the castors. Most lean tube workbenches have a frame made of metal pipes connected by lean pipe joints—the connectors that hold the structure together. The legs are typically the sturdiest part, so that's where the castors should go. Look for flat, horizontal surfaces on the legs (often near the bottom) where the mounting plates can sit flush. If the legs are round or angled, you may need a special adapter (check if your castor set includes one, or purchase separately).
Next, clean the mounting area with a damp cloth to remove grease, dirt, or debris. A clean surface ensures the mounting plate adheres tightly and prevents slipping. If there's rust or paint chipping, gently sand the area with fine-grit sandpaper—this helps the bolts grip better and prevents corrosion from spreading.

Step 3: Mark and Align the Mounting Plates
Alignment is everything here. If the castors are mounted unevenly, the workbench will wobble, making it hard to push and potentially damaging the wheels over time. To get it right, follow these steps:
Measure and Mark
Using your tape measure, find the center of each leg (or mounting surface). For a standard four-legged workbench, you'll have four castors—one per leg. Measure the distance from the edge of the leg to the center point, and mark it with a pencil. Do this for all legs to ensure symmetry. For example, if each leg is 2 inches wide, the center will be 1 inch from each edge.
Next, place a mounting plate on top of the marked center point. The plate should sit flat—no rocking or tilting. Use a pencil to trace the holes in the mounting plate onto the leg; these are where you'll drill (if there are no pre-drilled holes) or insert the bolts. Pro tip: If your workbench has pre-drilled holes, align the mounting plate's holes with these—this saves time and ensures compatibility.
Check for Square
Even if each mounting plate is centered on its leg, the castors might still be misaligned if the legs themselves aren't square. To fix this, measure the diagonal distance between opposite castors (e.g., from the front-left castor to the back-right). The measurements should be equal—if not, adjust the mounting plates slightly until they are. This ensures the workbench rolls straight, not diagonally.
Alignment Trick: Use a string stretched between opposite legs to visualize straight lines. If the mounting plates lie along these lines, you're good to go!
Step 4: Drill Holes (If Needed)
If your lean tube workbench doesn't have pre-drilled holes for castor mounting, you'll need to drill them yourself. Don't worry—it's simpler than it sounds, as long as you use the right drill bit. Start by selecting a bit that's slightly smaller than the diameter of the bolts (e.g., for 1/4-inch bolts, use a 3/16-inch bit). This creates a tight fit, which is crucial for stability.
Place the tip of the drill bit on one of the pencil marks you made earlier. Hold the drill perpendicular to the leg (use a level if you're unsure) and apply steady, gentle pressure as you drill. Let the drill do the work—pushing too hard can cause the bit to slip or the leg to warp. Drill all the marked holes, then deburr the edges with a file or sandpaper to remove sharp metal shavings (these can cut hands later!).
If the workbench's frame is made of thick metal, you may need a pilot hole first—drill a smaller hole (e.g., 1/8-inch) to guide the larger bit. For aluminum or thin steel, this might not be necessary, but it's always safer to start small.
Step 5: Attach the Castors to the Mounting Plates
Now it's time to connect the castors to the mounting plates. Lay out each castor, mounting plate, bolts, lock washers, and nuts. For each castor:
- Place the mounting plate on a flat surface, with the holes facing up.
- Set the castor on top of the mounting plate, aligning the castor's bolt holes with the plate's holes.
- insert a bolt through each hole, from the bottom of the plate up through the castor.
- Slide a lock washer onto each bolt, followed by a nut.
- Hand-tighten the nuts until they're snug—you'll fully tighten them later, once the plate is attached to the workbench.
Why hand-tighten first? This allows you to adjust the castor's position slightly when mounting it to the workbench. If you fully tighten now, you might struggle to align the plate with the drilled holes.
Step 6: Mount the Castors to the Workbench
With the castors attached to the mounting plates (loosely), it's time to secure everything to the workbench. Have your helper hold the workbench steady (or prop it up on blocks if you're working alone) as you align each mounting plate with the drilled holes (or pre-drilled holes) on the legs.
insert bolts through the workbench leg's holes and into the mounting plate's holes. If the bolts are too short, or the holes don't line up, double-check your measurements—this is a common issue if the mounting plate was misaligned. Once the bolts are through, add lock washers and nuts to the bottom of the mounting plate (the side opposite the castor) and hand-tighten.
Now, it's time to fully tighten the bolts. Using your socket wrench or adjustable spanner, tighten each nut in a crisscross pattern (like tightening lug nuts on a car). This ensures even pressure, preventing the mounting plate from warping. Tighten until the nut is snug—over-tightening can strip the threads or crack the mounting plate. A good rule of thumb: once the nut stops turning easily, give it a 1/4-turn more.
Repeat this process for all four castors. Take your time—rushing here can lead to uneven mounting, which causes wobbles later.
Step 7: Adjust Height and Test Stability
With all castors mounted, carefully flip the workbench back over (again, use a helper!) and set it on the floor. Now, let's check the height and stability. Most flat adjustable castors have a height-adjustment feature—usually a screw or lever on the side of the castor. Use this to tweak each castor's height until the workbench is level.
Place your level tool on the workbench's surface. If the bubble is off-center, adjust the corresponding castor: turn the adjustment screw clockwise to raise the leg, counterclockwise to lower it. Check both side-to-side and front-to-back until the bubble is centered. This step is critical for preventing strain on the castors and ensuring the workbench doesn't rock during use.
Once level, test the stability by pushing gently on each corner of the workbench. It should feel solid—no wobbling or shifting. If it does wobble, check for loose bolts (tighten them) or uneven height adjustment (re-level). If the problem persists, inspect the mounting plates to ensure they're flush against the workbench leg—gaps here can cause instability.
Step 8: Test the Swivel and Brake Mechanisms
Now for the fun part: testing the mobility! Push the workbench forward, backward, and side to side. The swivel castors should rotate smoothly, allowing you to maneuver in tight spaces. If a castor sticks or doesn't swivel, check for debris in the swivel joint (clean it out) or loose bolts (tighten them). A little lubricant on the swivel bearing can also help if there's resistance.
Next, test the brakes (if your castors have them). Engage the brake lever on each castor and try to push the workbench—it shouldn't move. If it does, the brake isn't engaging properly. Check if the brake pad is worn (replace it if needed) or if the lever is bent (gently straighten with pliers). Some brakes adjust with a small screw—tighten it to increase pressure on the wheel.
Safety Check: Always engage the brakes when the workbench is in use. This prevents accidental movement, especially when leaning on the bench or using power tools.
Troubleshooting Common Issues
Even with careful installation, you might run into a few hiccups. Here's how to fix the most common problems:
Wobbly Workbench
Cause: Uneven castor height, loose bolts, or misaligned mounting plates.
Solution: Re-level the castors with the height-adjustment screws. Tighten all bolts (both on the castor-plate connection and the plate-workbench connection). If the mounting plates are misaligned, loosen the bolts, realign, and retighten.
Sticky Swivel Action
Cause: Dirt in the swivel joint, dry bearings, or bent mounting plate.
Solution: Clean the swivel joint with a brush and compressed air. Apply a few drops of lubricant (silicone-based or lithium grease works best). If the plate is bent, gently straighten it with a hammer (place a block of wood between the hammer and plate to avoid dents).
Brake Not Locking
Cause: Worn brake pad, loose brake lever, or misaligned brake mechanism.
Solution: replace the brake pad (check caster accessories for replacements). Tighten the lever's mounting screw. If misaligned, loosen the castor's bolts, adjust the position, and retighten.
Maintaining Your Castors for Longevity
Your castors are installed and working perfectly—but they'll need a little TLC to stay that way. With regular maintenance, they can last 5-10 years (or more!) even in busy workshops. Here's what to do:
Clean Regularly
At least once a month, wipe the wheels and swivel joints with a damp cloth to remove dirt, sawdust, or oil. For stubborn debris, use a toothbrush to scrub the wheel treads and bearing areas. This prevents buildup that can cause sticking or premature wear.
Lubricate Annually
Lubricate the swivel bearings and wheel axles once a year (more often if used in dusty or wet environments). Use a high-quality lubricant like lithium grease or silicone spray—avoid WD-40 for long-term lubrication (it's a cleaner, not a lubricant). Apply a small amount to the bearings, then spin the wheel and swivel the castor to distribute the lubricant evenly.
Inspect for Wear
Every 3 months, check the wheels for cracks, flat spots, or worn treads. If the tread is smooth (no grip), or the wheel is cracked, replace it immediately—worn wheels can damage floors and make the workbench hard to control. Also, check bolts and nuts for tightness—vibration from movement can loosen them over time.
replace Caster Accessories as Needed
Lock washers, brake pads, and nuts wear out eventually. Keep spare caster accessories on hand so you can replace them quickly. Most suppliers sell replacement parts individually, so you don't have to buy a whole new castor set.
Conclusion: Your Workbench, Reimagined
Installing flat adjustable swivel castor wheels on a lean tube workbench isn't just about adding wheels—it's about reimagining how your workspace functions. With these castors, your workbench becomes more than a static surface; it's a flexible tool that adapts to your workflow, saves you time, and reduces strain. By following the steps in this guide—from inspecting parts to testing the brakes—you've ensured a safe, stable, and smooth-rolling setup that will serve you for years.
Remember, the key to success is patience and attention to detail: measure twice, align carefully, and test thoroughly. And don't forget regular maintenance—those small checks will keep your castors rolling smoothly when you need them most. Whether you're assembling electronics, woodworking, or managing a production line, a mobile lean tube workbench is a game-changer. Now go forth, and let your workspace move with you!